
3 Easiest Ways to Make AI Videos
60sDirectly addresses a common pain point for beginners with a clear, actionable list, making it highly shareable.
▶ Play Clip"Delivers real, beginner-friendly methods, but the 'Best' claim is really a soft ad for one platform — mostly it delivers."
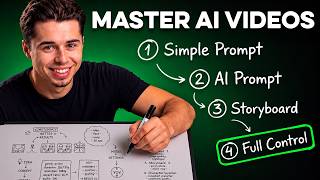
This video walks complete beginners through three progressively powerful methods for creating cinematic AI videos, all built on the OpenArt platform. It demonstrates a simple text-to-video prompt with C Dance 2.0, an image-to-video workflow using GPT Image 2 as the starting frame, and the newest Smart Shot feature, which converts a single prompt into a fully detailed five-section shot plan before rendering.
The creator, with 3 years of AI content experience, explains that struggling with AI video generation is usually a tool problem, not a skill problem.
The three easiest ways to create high-quality videos: a simple three-line prompt, image-to-video, and the Smart Shot feature.
C Dance 2.0 is called the most powerful AI video model, accessed through OpenArt's all-in-one platform under the video section, text-to-video tab.
A simple prompt describes a street food chef tossing noodles. Settings: audio on, mode normal, aspect ratio 16:9, 1080p resolution, 15-second duration.
The generated clip is cinematic: smooth movements, flames rising when noodles are tossed in the air, and moving background people add realism.
This method alone gives limited control over the outcome, which motivates moving to the image-to-video approach.
The idea is to first create an image you control, then feed it to the AI as the starting frame, so you know exactly what details go into the video.
In OpenArt's image section, the creator selects GPT Image 2 with aspect ratio 16:9, 4K resolution, and quality on high, then describes the same street-food scene.
The image looks like a premium Asian food ad with a natural-looking subject — no 'AI glow' or imperfections in hair and beard, a common past problem.
Rewriting the prompt and generating again swaps the character or background language entirely while keeping the concept, thanks to GPT Image 2's natural-language understanding.
The chosen reference image is taken to the video section with SeaArt 2.0, mode changed to 'start and end frame,' and the image uploaded as the starting frame.
The video keeps the character and details consistent start to finish; fire flares even change the lighting on the character's face for extra realism.
A character sheet built from a selfie using GPT Image 2 is uploaded so the AI sees the face from several angles, preventing consistency problems in longer videos.
Smart Shot returns a five-section plan: character (name, physical details, photos, color palette), environment, cuts and shots (lens, duration), mood and cinematography notes, and overall color palette.
Manual planning would take at least 30 minutes; Smart Shot does it in seconds, though it can miss small details that you can edit and regenerate before creation.
The final video is polished, realistic, with clear motion and emotional tension — produced in less than 3 minutes from a single prompt.
The key takeaway is that any beginner can produce high-quality, controllable AI videos today with the right platform and workflow — from a simple three-line prompt to a fully planned multi-shot cinematic scene.
Text-to-video is the fastest on-ramp
A three-line prompt with C Dance 2.0 yields cinematic results instantly, but with limited control.
00:28Image-to-video restores control
Generating a reference image first lets you lock in details like character, lighting, and composition before any motion is created.
01:59Multiple angles prevent consistency issues
Feeding an AI several views of a character dramatically improves consistency — a core principle for any longer AI video.
05:51Smart Shot compresses pre-production
A task that would take 30+ minutes of manual planning is done automatically, with lens, duration, and mood details included.
07:39Under 3 minutes to a finished video
Demonstrates how far tooling has come — a full, realistic multi-shot scene from one prompt in minutes.
08:35[00:01] video yourself, you know it's not as easy as it seems. But that's because you are using the wrong tools. You see, most AI generators out there are extremely that because I've been creating AI content [music] for the last 3 years. So
[00:14] three easiest ways you can actually create high-quality videos as a complete beginner. The first one is also the simplest, and all you really need for it is to write a simple three-line prompt. So let's actually go ahead and test it
[00:28] the most powerful AI video model out there called C Dance 2.0. And to access is an all-in-one platform. So, if you want to use it, I'll leave a link in the sign up. All right, so once you're inside, this is the home page you'll
[00:44] see. There are a lot of AI features here, but what we really want right now is to go to the video section and press on text-to-video. Here, we can choose from all the popular AI models, but for this example, I'm going with C Dance
[00:56] 2.0. Now, all I need to do is write a simple prompt inside the box. So, here's what I'll say. Next, I'll make sure the audio is turned on and select normal for the mode. As for the other settings, I'll set the aspect ratio to 16 by 9,
[01:09] 1080p for the resolution, and 15 seconds for the duration. Then, I'll just hit result. Now, let's take a look at what we got.
[01:34] I like how smooth every movement feels and the way he stirs those noodles. But what's actually impressive is when he throws them in the air and all of those flames come out in a cinematic way. And one more detail that I like is the
[01:46] people moving. This gives it an added note [music] of realism. But even though the results are solid, this method alone won't give you much control over the outcome. So, let's take a look at the second way to create AI videos. Now,
[01:59] this is built on a method called image-to-video, but the concept behind create an image that we'll give to the AI, which it then uses as the starting frame for the video we want. This way, we know exactly what details we'll have
[02:12] inside the video before we actually generate it. Which means, if there's before generating. So, let's head over to the image section [music] inside OpenArt. And for the model, I'm going with GPT Image 2. Next, before I write
[02:26] the prompt, I'll change the settings to have the aspect ratio at 16 by 9, the resolution at 4K, and quality on high. Then, I describe the same Here's what we get back. I think it
[02:38] notice is how high quality this image is. It looks like one of those premium ads for Asian food, and the guy looks really natural, too. There's no AI glow imperfections in his hair and beard. That used to be a big problem with AI
[02:52] people, but GPT Image 2 handled it perfectly here. I could use this as my starting frame, but I want to show you how easy it is to actually change it. Let's remove the previous prompt and add this one. I'll keep all the settings the
[03:04] same and press generate. As you can see, we completely changed the character. completely different language in the background. I don't know how to read it, looks super clean. Now, let me show you how I can simply create another
[03:18] working in the daytime cooking the same noodles. Here's the prompt I'll use, and here's the result we get back. Again, the concept is the same, but we changed character. And you can do this for literally any detail you want. You just
[03:32] need to rewrite the prompt in simple terms and regenerate. Plus, you don't have to worry about writing complex and extremely long prompts, because GPT Image 2 is really good at understanding natural language. Now, what I'll do is
[03:45] and I think I like the first one the most. So, I'll take that and and to the video section one more time. I'll select SeaArt's 2.0 as the model and change the mode from text with reference to start and end frame. Like I said, we're going
[03:58] starting frame, so let's upload it. I'll what I want to happen. So, here's what I'll say. Again, for the settings, I'll go with 16 by 9 for the ratio, 1080p for the resolution, and I want it to be a
[04:11] 15-second video. Now, let's take a look at the result.
[04:30] our image, and it kept the character and all the details around it consistent from start to finish. Now, again, this looks extremely realistic, but one thing that's really impressing me is how those fire flares change the lighting on our
[04:42] character's face. So, this shows one more time how good SeaArt is at image-to-video method gives you a lot of control over the final result. But, if creating all the reference images yourself, you'd want to use the third
[04:56] be using one of the newest AI features inside OpenArt called Smart Shot. And what this does is turn one single prompt into a full shot plan, which can then be inside OpenArt, I'll go back to the homepage and look for the Smart Shot
[05:11] feature. I'll press on it, and this is the interface we'll get. As you can see, we have a few more settings. The first one is the usual prompt box. Then, we optional. Here, you can add your environment or your characters and
[05:24] use inside your video. So, to make this example as realistic as possible, I'm And for this, I'll press on characters and objects and go with image, where I'll upload this character sheet I built using GPT image 2. And the way I did it
[05:39] was pretty easy. I just took a quick selfie of myself. Then, I asked the AI to turn it into a panel showing my face from a few different angles, even zooming in on parts like my mouth and ears. And the reason I did that instead
[05:51] of just uploading the selfie is that the more angles the AI sees of me, the better it understands the character, so I get no consistency problems later. And honestly, that's what I do every single time I make a longer AI video. So let's
[06:04] that's left is to add a prompt. And this is what I'll say. Next, for the settings, I'll go with the sheet quality at high for the best results. And for the output, I'll leave it on 16 by 9 for the aspect ratio, go with 1080p for the
[06:18] resolution, and 15 seconds. Now I can create the final video with just one click. But what I usually do to get the most control out of it is to press on preview shot plan. This will give me the exact strategy for it, so let's do that.
[06:31] Here's what we get. As you can see, we get this insanely detailed plan with five different sections. The first one is all about my character. We get the name, the physical details, the photos of me from different angles, and even a
[06:43] color palette that's used to match my character to the mood the whole video. Next, for the second section, we get the environment. On the left side, there's a real image of how it would look, but what's more interesting is the picture
[06:55] plan for how the action is going to happen, starting at number one, then moving to two, three, and so on. And honestly, that's a level of detail I wouldn't even think to plan myself. Then, for the third section, we get all
[07:08] the different cuts and shots from the scene. And if we zoom in a little bit on get a photo of how it would look. We also get details like the lens being used, in this case a 32 mm anamorphic, the duration, which here is 4 seconds,
[07:23] that shot. And the same goes for all five shots. Then, for the fourth section the mood, which are really important for making the scene feel cinematic. And on cinematography notes, plus the color palette for the whole video. And
[07:39] together myself, it would probably take me at least 30 minutes, even though I've point. So, a feature like this saves you few small things it can sometimes miss. For example, here we've got two
[07:53] we only get a reference for my character at the top. The good thing is, Smart Shot lets us fix this before we create the video, which is really useful credits regenerating until I get what I want. So, let's press the edit button
[08:07] take a look to see if it added There's the second character reference on the palette, a few pictures of him, and the details. So, now I'll press create video, and let's take a look at the final result.
[08:35] quality of this, especially when I think it took me less than 3 minutes to make. throughout the entire video. The motion is really clear, and I really like the emotional tension inside the scene, especially when I finally catch the guy.
[08:49] So, this Smart Shot feature isn't just saving you hours of prompting, but it just one simple prompt. So, if you want to test it yourself, as well as the sign up to OpenArt using the link in the description below. And if you want
[09:03] access to some of the best AI image and video models in one place, now's a great time to upgrade. If you upgrade to advanced or above before July 31st, you'll get up to 40% off participating models for the rest of 2026. So, sign up
[09:16] for watching, and I'll see you in the next one.

⚡ Saved you 0h 09m reading this? Transcribe any YouTube video for free — no signup needed.