Why Your Recordings Suck (Fix Now)
45sGrabs attention by addressing common frustration with confusing OBS settings.
▶ Play ClipThis tutorial provides a clear, step-by-step walkthrough of the optimal OBS Studio settings for high-quality game recording. The creator, Cody, explains the configuration of the output, video, and audio tabs, breaking down complex encoder options and recommending a safe MKV recording format with automatic remuxing to MP4.
Open Settings → Output tab, change output mode from Simple to Advanced to unlock recording-specific options.
Set the recording path to an SSD to avoid stuttering. Recording directly to a slow hard drive can corrupt or stutter footage.
MKV format preserves footage even if the recording stops unexpectedly (power loss or crash). Enable automatic remuxing to MP4 in Advanced tab so you get both formats.
NVIDIA users choose 'NVIDIA NVENC H.264', AMD users pick the AMD equivalent. The x264 encoder (CPU-based) is slow and should be avoided unless you lack a proper GPU.
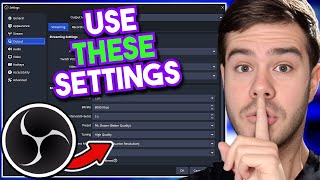
For recording, use Rate Control = CQP (not CBR). CQ Level 16–20 (recommended 17) balances quality and file size. Keyframe Interval: 0 or 2. Preset: P5–P7 (P7 for powerful PCs, P5 for weaker ones). Multi-pass: 'Two Passes (Full Res)' with 'High Psychological Visual Tuning'.
In Audio tab (top), set all tracks to 320 kbps for best quality. Select correct Desktop Audio (headphones/speakers) and Microphone from dropdowns.
Base canvas = monitor resolution (e.g., 1080p). Output (Scaled) resolution = desired recording resolution (e.g., 1080p). If base ≠ output, choose 'Lanczos' downscale filter. FPS = 60 for smooth recording.
By following this OBS configuration—especially using Advanced mode, MKV recording with auto-remux, CQP rate control, and correct audio/video settings—you can achieve crisp, compatible game recordings easily.
"The title perfectly matches the content: it delivers a beginner-friendly, step-by-step OBS setup specifically for recording, exactly as promised."
What output mode should you use in OBS for recording to access more settings?
Advanced (not Simple).
0:23
Why should you record to an SSD instead of a hard drive?
Recording to hard drive can cause stuttering and corruption; SSDs provide stable performance.
0:49
What recording format is recommended to prevent data loss on unexpected interruptions?
MKV (Matroska Video) — it preserves footage even if the recording crashes.
1:02
How can you get both MKV safety and MP4 compatibility in OBS?
Enable 'Automatically remux to MP4' in Advanced → Recording tab.
1:27
Which video encoder should an NVIDIA GPU user choose for recording in OBS?
NVIDIA NVENC H.264 (or the AMD equivalent for AMD users).
2:00
What rate control mode is best for recording (not streaming) in OBS?
CQP (Constant Quantization Parameter) — offers better quality for recordings.
2:53
What is the recommended CQ Level range for recording?
Between 16 and 20, with 17 being a good middle ground.
2:57
What audio bitrate should you set for all tracks in OBS for best quality?
320 kbps.
3:43
Advanced Output Mode unlocks recording settings
Essential first step — without this, you can't fine-tune encoders for recordings.
0:23MKV format prevents data loss
Practical safety measure that many beginners overlook; also includes auto-remux to MP4.
1:02GPU encoder preferred over CPU
Clearly explains hardware encoder options (NVENC vs AMD) and warns against using x264 on weak machines.
2:00CQP rate control for recording quality
Switching from CBR (streaming) to CQP (recording) is a key quality tweak that many miss.
2:53Downscale filter choice matters
Recommends Lanczos filter for best quality when base and output resolutions differ.
4:17[00:00] every gamer wants their recordings to
[00:01] look perfect and clear problem is the
[00:03] settings are confusing as heck so let me
[00:05] show you the exact OBS Studio settings
[00:07] to make your recordings look perfect
[00:09] first we'll go into OBS studio and then
[00:11] we'll go to the bottom right corner
[00:12] where it says settings and then we're
[00:14] going to skip over the general and skip
[00:16] over appearance and skip over stream cuz
[00:18] we don't need that we're going to go
[00:19] directly to the output tab once you're
[00:21] on the output tab we're going to change
[00:23] the output mode from simple to Advanced
[00:25] and that's going to give us more
[00:27] settings to access then we're going to
[00:29] change the Stream tab right here to the
[00:31] recording Tab and this is where the meat
[00:33] and potatoes really are going to hide
[00:34] now I know this looks a little
[00:35] intimidating but I'm going to explain it
[00:36] that anyone can understand even your mom
[00:38] first thing we got to worry about is the
[00:40] recording path this is where all of your
[00:42] recordings are going to save on your
[00:44] computer so you can hit the browse
[00:45] button and choose a location that you
[00:46] want all of your recordings to go to I
[00:48] will say you're going to want to pick an
[00:50] SSD or some kind of good solid state
[00:52] drive because I tried recording directly
[00:54] on a crappy hard drive before and it
[00:56] basically stuttered the recordings and
[00:57] it was bad so pick a nice solid state
[00:59] drive to record this to and then if you
[01:01] want you can transfer it over later and
[01:02] then for the recording format we're
[01:03] actually going to pick MKV and you might
[01:05] be thinking why the heck are we not
[01:06] using something like MP4 well MKV
[01:09] actually has a really useful feature
[01:10] whereas if your recording gets stuttered
[01:12] or your power goes out or for whatever
[01:14] reason it just like loses the progress
[01:16] then your recording file won't actually
[01:18] be corrupted you're actually going to
[01:19] keep all of the recording that you had
[01:21] before that incident happened unlike if
[01:23] you're using like MP4 because that whole
[01:25] file is going to be Mia and the neat
[01:26] thing is is if we actually go directly
[01:28] to the advanced tab here we can scroll
[01:31] down to where it says recording and then
[01:32] we're going to choose automatically
[01:34] remux to MP4 so what this will do after
[01:36] you enable it is when you end your
[01:38] recording it's automatically going to
[01:39] give you the MKV file which you can
[01:41] delete and then it's going to
[01:42] automatically give you the mp4 file as
[01:45] well so that way you can safely record
[01:47] an mp4 without possibly losing your
[01:49] footage if the power goes out or some
[01:50] stupid thing happens so this actually
[01:52] really helpful so highly recommend that
[01:54] well let's go back to the output Tab and
[01:55] we're going to move on to the video
[01:56] encoder a lot of people get confused on
[01:58] this but really there's only two options
[02:01] you have Nvidia enve which is people
[02:03] that have Nvidia cards like myself so
[02:05] you'll be using the Nvidia enve h264 but
[02:07] if you're an AMD user you're just going
[02:08] to pick the AMD equivalent in your video
[02:10] encoder it's that simple and then if you
[02:12] don't have either of those options then
[02:13] chances are your recordings are going to
[02:15] look pretty bad because you don't have a
[02:16] proper graphics card and then you'll
[02:18] have to use x264 which is going to eat
[02:20] up a lot of your CPU and your recordings
[02:22] are going to look really rough so it
[02:23] would highly recommend against using
[02:25] x264 unless you absolutely have to just
[02:27] know you're probably going to run into
[02:28] issues the audio encoder we're going to
[02:29] use FFM Peg fun to say the audio track
[02:32] this is actually really important and
[02:34] very helpful but it is a little complex
[02:36] so I'm going to save this for the very
[02:38] end of the video so stick around to make
[02:39] sure that you use this cuz it's actually
[02:41] a super helpful feature in recordings
[02:43] but there's some other stuff we got to
[02:44] tackle before we do that so we're
[02:45] actually going to scroll down to where
[02:46] it says encoder settings and if you
[02:48] remember the streaming tab we use CBR on
[02:50] here we're actually going to use cqp for
[02:53] the encoder rate control because it's
[02:54] going to be better for our recordings
[02:56] and then for the CQ level you can pick
[02:58] anything between 16 to 20 I prefer 17
[03:01] it's right in the middle but if you're
[03:02] experiencing issues you can lower it to
[03:04] 16 or if you want to go higher then you
[03:06] can go all the way up to 20 but that
[03:07] might be a little Overkill then the key
[03:09] frame interval I have it at two you
[03:11] could also have it at zero you might see
[03:12] both in other videos but either is
[03:14] really fine the preset can be anywhere
[03:16] between P5 and p7 if you got a really
[03:18] good computer I'd use p7 you got a
[03:20] really crap computer I'd pick P5 you got
[03:22] somewhere between P6 you can also switch
[03:25] this up as you go in case you running
[03:26] any issues just like the CQ level and
[03:28] the key for Interval if you need to then
[03:30] for the tuning multipass profile all the
[03:32] rest of the stuff you can just copy high
[03:33] quality two passes High pycho visual
[03:36] tuning zero and two it's really that
[03:37] simple and then you can hit apply and
[03:39] we'll move on to the audio tab at the
[03:41] very top not the one on the left but at
[03:42] the top change all these bad boys to 320
[03:44] to give you the best audio quality for
[03:46] all of them and then we're going to move
[03:48] to the actual audio quality but before
[03:49] we do that quickly hit okay if you're
[03:51] wondering why I got the starting soon
[03:52] screen it's actually my streamer starter
[03:54] pack which is linked in the description
[03:55] down below so you feel free to check
[03:56] that out we'll actually go back to the
[03:58] settings in the bottom right corner then
[03:59] we'll go to the audio tab on the left
[04:01] make sure that you have your desktop
[04:02] audio selected so that's going to be
[04:04] your headphones or your speakers that
[04:06] your audio is coming out of for
[04:07] everything and then pick your microphone
[04:08] from the first list here I'm using the
[04:10] road pod mic USB right there love this
[04:12] mic also linked in the description below
[04:14] simply hit apply make sure that goes in
[04:16] there then we'll go to the video Tab and
[04:18] you're going to change your base canvas
[04:19] resolution to whatever game you're
[04:22] playing I game at 1080P and my monitor
[04:24] is 1080p so my base canvas resolution is
[04:27] 1080 and then for the output you're
[04:28] going to want to change it to whatever
[04:29] you're going to record at I want to
[04:30] record at 1080p 60 frames per second and
[04:33] since these two numbers match here we
[04:35] don't need a downscale filter but if
[04:37] yours do not match you're going to
[04:39] change this downscale filter to lands
[04:41] Coast because it's going to give you the
[04:42] best quality and then the common FPS
[04:43] value we're going to pick 60 cuz I'm
[04:45] recording in 1080P 60 FPS moving on to
[04:48] the next app we got hot keys in case you
[04:49] want to use any of these like start stop
[04:51] recording with if you have an extra key
[04:53] on your keyboard or you got a stream
[04:54] deck or something like that but you can
[04:56] feel free to explore these on your own
[04:57] and also make sure to drop a like on
[04:58] this video if it's been helpful so far
[05:00] so other streamers can find this video
[05:02] so we can now hit okay and these will
[05:04] give you beautiful settings for your
[05:06] recordings but the last thing I wanted
[05:07] to touch on if we go to the settings in
[05:09] the bottom right corner click that go
[05:10] back to Output recording and then the
[05:12] audio tracks you can actually split your
[05:14] audio tracks so you can split your game
[05:16] audio and your mic audio so when you
[05:18] bring it into your video editor after
[05:20] you can actually have more control over
[05:21] both but I have an entire video covering
[05:23] that entire process which is right here
[05:25] to the side of me so give that one a
[05:26] watch my name is Cody and I will see you
[05:28] in the next one
⚡ Saved you time reading this? Transcribe any YouTube video for free — no signup needed.