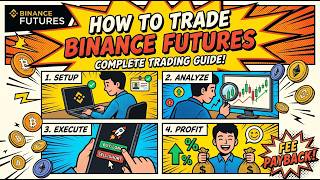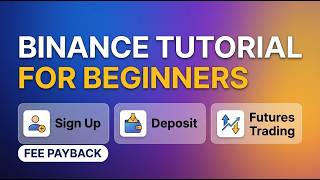

Get $600 in Free Rewards on Binance!
45sThe promise of free money and a 50% fee discount is a high-engagement hook that drives clicks and sign-ups.
▶ Play Clip"Title says 'easiest way' and it delivers a practical beginner guide, though the promise of 'easiest' is subjective."
This video is a comprehensive tutorial for beginners on how to use Binance, covering the entire process from account registration and KYC verification to two-factor authentication, P2P trading, and futures trading. The creator provides step-by-step instructions and safety tips for each stage of the user journey.
Signing up through the link in the description grants a 50% fee payback and $600 in rewards.
Use email or phone number; after entering and agreeing to terms, a six-digit code is sent for verification.
Password must be at least 8 characters, include at least one number and one uppercase letter.
Identity verification involves facial scan, best done via mobile app; choose ID type and take pictures of front and back.
Set up Google Authenticator for enhanced security; link the app by scanning the QR code provided.
Access P2P trading from Spot wallet; select 'Buy' tab and choose USDT for stability and beginner-friendliness.
Prioritize sellers with high transaction counts and good ratings; after payment, click 'notify seller' and upload proof.
Transfer USDT from Spot wallet to USDT-M futures wallet via the Transfer function.
Choose between cross and isolated margin; beginners should use isolated. Leverage up to 150x, but recommended 3-5x for risk management.
Select direction (long/short), monitor position in 'Positions' tab, and set take profit/stop loss; close with market or limit order.
Sign-up Bonus
Offers a tangible incentive for using the provided link, driving user action early.
Password Security Baseline
Provides a clear example of minimum security standards for crypto accounts.
00:59P2P Seller Safety Tips
Teaches essential risk-reduction practices for peer-to-peer trading.
04:53Leverage Risk Warning
Explains the trade-off between leverage and liquidation risk, a crucial principle.
07:52Order Types Explanation
Clarifies the difference between limit and market orders, foundational to trading.
08:19[00:00] Hello everyone, today I am going to show you the easiest way to use Binance. First, let's look at exactly how to sign up for your Binance account. Before we start, look at the description box. If you access the sign up screen through that link,
[00:15] you will receive a 50% fee payback and $600 in rewards all at the same time. Alright, once you've clicked the link, it will take you to the official Binance sign up page.
[00:28] You can choose to proceed with your email address or your mobile phone number, whichever is more convenient for you. Go ahead and enter the email you want to use right now and make sure to check the box for the terms and conditions agreement at the bottom.
[00:45] Once that's done, click the big continue button. A six-digit verification code will be sent to the email or phone number you just provided. Simply find that code and type it into the boxes on your screen and hit that continue button.
[00:59] Next, you need to create your password. To keep your account safe, the password must be at least eight characters long and include at least one number and one uppercase letter.
[01:12] If an inviter code entry screen pops up, just double check that the code is there to ensure your bonuses are active and finish the sign up. Next, let's move on KYC Identity Verification.
[01:25] Since this process includes a facial scan for security, we are going to continue the process on a mobile phone. Go ahead and install the Binance app on your phone and launch it. If you log in with the account you just created, the app will immediately guide you to the
[01:40] verification screen. Confirm your nationality and then choose an ID card to proceed. Whether you choose a national ID, a driver's license, or a passport, select Take Pictures as the method and click Continue.
[01:56] You'll need to take a clear picture of the front and back of your ID, making sure it fits perfectly into the camera frame on your screen. After that, it's time for a facial scan.
[02:08] Then just quickly confirm your additional personal information like your name, date of birth, and address and hit that continue button. And select your occupation and hit that continue button And industry and hit that continue button The review will only take about five minutes and you can verify that your KYC is complete
[02:31] by checking for the verified status on your profile screen. Finally, let's set up two-factor authentication. For this part, let's return to your PC screen. Click on Security under the Account tab in the left-hand menu.
[02:46] Look for the Authenticator App option and click Manage right next to it. When you click Enable Authenticator App, a security verification code will be sent to your email or mobile phone.
[02:59] Enter that code and a QR code window will appear on your screen. Now let's download the Google Authenticator App on your phone. Click Open to run the app and tap Get Started at the bottom.
[03:12] For maximum privacy, I recommend clicking Use without signing in, and then click the Add a Code button in the middle. Select Scan a QR Code.
[03:24] Now, simply point your phone's camera at the QR code on your PC screen. A six-digit OTP code for Binance will instantly be generated on your phone. Go back to your computer, click Next, enter that six-digit numeric code from the app, and click Submit.
[03:41] You can now see that your Google OTP is officially activated and your account is fully secured. Next, let's take a much closer look at exactly how P2P trading works on the Binance platform.
[03:54] To get started, go ahead and hover over that wallet-shaped icon in the top right corner of your screen and click on Spot. From the wallet dashboard, you'll see several options. Go ahead and click Deposit.
[04:07] Now, look for and select P2P Trading. Take just a quick moment here to review the transaction process overview that pops up on your screen. To start your actual purchase, make sure you switch over to the Buy tab at the top.
[04:22] From there, select USDT as the specific cryptocurrency you want to trade today. I recommend USDT because it is generally more stable in price and honestly much easier for beginners to use than trying to buy Bitcoin directly.
[04:37] Now select the current coin and enter the specific trade amount you have in mind Once you select your preferred payment method a full list of currently available sellers will be displayed Now here is a pro tip for safety I always recommend
[04:53] prioritizing sellers who have a high number of completed transactions. You should also take a second to check their ratings and their overall completion rates. Once you have found and selected a reliable seller, go ahead and click buy USDT. Before you proceed any further, please carefully
[05:11] read the seller's specific payment guidelines. Enter the coin amount again. Confirm that all the details are correct and click buy USDT. At this point, the seller's name and payment
[05:23] information will be displayed. Before making the actual transfer, check the chat box to see if the seller has sent you a quick message and then use your selected payment method to complete the payment. After you've completed the bank transfer, return to the Binance page immediately and click
[05:40] that big transferred notify seller button. This is crucial to let them know the payment is done. You'll want to upload one to three images of your receipt as proof of payment, check the agreement
[05:52] box, and then click confirm. If you go back and click the wallet icon on the website's main screen again and head into your spot wallet, you can verify that the USDT has been successfully
[06:04] deposited. It's that simple. This time, let's shift gears and learn exactly how to trade futures on Binance. First, we need to start by transferring the Tether or USDT that you will use as margin
[06:18] for your futures account. Start by clicking the wallet icon in the top right corner of the Binance home screen to enter your spot wallet again. This time, click on Transfer. A pop-up window will appear. Select Spot for the From section and make sure to select USDT-M
[06:36] for the Q section. Select USDT as the coin and enter the transfer amount you want to use for trading below. Click confirm. Just like that the transfer from your spot wallet to your futures
[06:50] wallet is complete and you're ready to trade. Now let's start futures trading in earnest. Go to the top menu and click futures Specifically you want to click on USDS futures which are the dollar margin futures this will take you directly to the main futures trading interface To choose your market click this part right
[07:14] here in the top left corner to select the specific coin you want to trade futures for. You can set up your entire futures trade using the menu on the right hand side. First let's check the margin mode. You'll see two options cross
[07:28] and isolated. Cross is a method that uses your entire asset balance in the futures wallet as margin, while isolated restricts the margin to a specific amount you set when
[07:40] entering the position. For most beginners, I highly recommend using the relatively safer isolated mode to manage your risk. Next, let's set your leverage. You can actually set leverage
[07:52] all the way up to 150 times. Now keep in mind that the higher the multiplier, the larger the position you can open with the same amount of capital, but your liquidation risk also increases
[08:05] proportionally. Because of that, it is much easier for beginners or intermediate traders to manage risk by sticking to a more conservative three times to five times leverage. Next is the order type.
[08:19] If you use a limit order, you can specify your desired entry price and a market order is executed immediately at the current market price. Below that, check your available margin and set the
[08:32] price and quantity you want to trade in this section. Now select the direction of the trade. If you expect the price to rise, click long, and if you expect it to fall, click short to open a
[08:44] position. Once the position is open, you can check its current status in real time in the positions tab below. Entry price, your starting price. Mark price, the current market price, liquidation price.
[08:57] If the price reaches this level, your position will be automatically liquidated. PNL shows your current return rate. If you click the pencil icon next to TP slash SL, you can set your take profit
[09:13] and stop loss prices. Finally, to close your position, select your preferred method between market or limit under the close all section. The position is now closed. And that's it for the
[09:26] guide on how to trade Binance futures. Please leave a like if this video was helpful.
⚡ Saved you 0h 09m reading this? Transcribe any YouTube video for free — no signup needed.