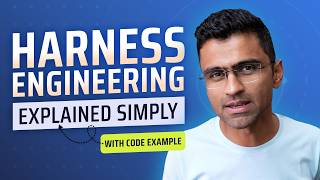

LLMs are useless without harnesses
44sThe windmill analogy makes a technical concept instantly intuitive, giving viewers a quick win to share.
▶ Play Clip"Delivers a clear, practical explanation with a live demo; the 'easy explanation' promise mostly holds, though the sponsor segment pads it."
Harness engineering is the practice of building reliable scaffolding—tools, memory, guardrails, context management, and verification—around a large language model to turn it into a dependable agent. This video explains the concept with a horse-and-wind analogy, then demonstrates it live by building a GitHub-starring agent that fails without a harness and succeeds with one.
A standalone LLM is like wind—it can't do useful work until you harness it with tools, memory, context management, guardrails, observability, and feedback loops.
An agent is an LLM combined with a harness. Anything that is not the LLM itself (tools, memory, etc.) belongs to the harness, enabling the agent to book flights, write code, or order samosas.
Harness engineering is the craft of building reliable scaffolding around an AI model—tools, memory, context management, observability—to turn a clever but flaky model into a production-trustworthy agent.
The demo builds an agent that stars any GitHub repository, using LangChain, the Llama 3 open-source model, and Playwright for browser automation.
The naive agent opens the repo, clicks the star button, and reports 'task complete'—but the star count remains unchanged because it hit a login wall and didn't know how to proceed.
The login guard checks before each model call whether the agent is on a login page; if so, it logs in automatically using credentials from the environment file.
The iteration guard caps the agentic loop at 8 iterations, preventing infinite loops and runaway token usage that could result in huge bills.
This middleware injects current page state (logged in? repo starred? star count?) into the model's context before every call, improving the loop's situational awareness.
Every tool call is wrapped; when the model calls 'finish', the harness reads the actual DOM via agent.verify. If verification fails, the grounded failure is fed back—the model's word is never the source of truth.
After adding the harness, the agent logs in, stars the repo, and the counter goes from 12 to 13. Same model, same prompt—only the harness changed.
Databricks' internal evaluations, shared by the CEO on LinkedIn, show that improving the harness with the same model can reduce costs by half.
Context engineering decides what the model sees at each step; harness engineering is the full execution environment—tools, allowed actions, failure handling, and the verification that must happen before anything is called done.
Harness engineering transforms a flaky LLM into a dependable agent by adding guardrails, context, and verification without changing the underlying model. As an emerging discipline, it can slash costs and boost reliability—making it a critical skill for AI engineers in 2026.
What is an agent in the context of LLMs?
An agent is an LLM plus a harness (tools, memory, guardrails, context management, etc.).
00:41
What is harness engineering?
The craft of building reliable scaffolding around an AI model to turn a flaky model into a production-trustworthy agent.
02:00
What was the main failure of the naive agent in the demo?
It hit a login wall, didn't know how to log in, yet claimed the task was complete.
09:10
What are the four middleware components added in the harnessed branch?
Login guard, iteration guard, contextual prompt, and verify middleware.
11:08
What does the iteration guard do?
It limits the agentic loop to a maximum of 8 iterations to control token cost and prevent infinite loops.
14:19
What does the verify middleware do before letting the 'finish' tool return?
It reads the actual DOM via agent.verify to confirm the action (e.g., repo starred) succeeded; if verification fails, it feeds the grounded failure back to the model.
17:10
What is the difference between context engineering and harness engineering?
Context engineering shapes what the model knows; harness engineering shapes how the agent operates and is the broader term.
22:53
In the Databricks example, what were the costs of Opus 4.8 with Pi vs Claude Code harness?
Pi cost less than $1, while Claude Code cost around $2.
21:56
What tool is used for browser automation in the demo?
Playwright.
04:01
What does the login guard middleware do?
Before calling the model, it checks if the agent is on a login page and logs in using credentials from the environment file.
12:54
Agent = LLM + Harness
This concise formula is the foundation of the entire video—clarifying that agents are not just models but model-plus-scaffolding.
00:41The Login Wall Failure
A concrete example of an LLM hallucinating success—saying 'task complete' while doing nothing—which exposes why harnesses are essential.
09:10Verification: The Model's Word Is Never the Source of Truth
This principle—grounding agent success in real-world state rather than model claims—is the core of building trustworthy AI agents.
17:10Harness Engineering Cuts Costs by Half
Databricks' internal data proves that harness improvements alone can halve costs, making a strong business case for the practice.
20:39Context Engineering vs. Harness Engineering
Distinguishes the two terms, positioning harness engineering as the broader discipline that encompasses context management.
22:53[00:09] for you. If you want a wind to do any real work such as powering your home, you need to harness its energy using windmills in such a way that you can convert that kinetic energy into electricity that can power the bulb and
[00:26] the other devices in your home. Large language models are like the wind. Stand-alone they are of no use. You need to harness its power using things like tools, memory, context management, guardrails, observability, feedback
[00:41] loops, and so on. And when you combine LLM with all of this, what you get is an agent. An agent can book a flight ticket for you. It can write code, and it can
[00:53] even order 500 samosas for your upcoming birthday party. Agent is equal to LLM [music] plus harness, which means in an [music] plus harness, which means in an agent, anything except LLM is harness.
[01:06] Let's take another example. Say you have a strong horse and you want it to pull a heavy load. Stand-alone it cannot do it. You need a device that connects horse with a cart which is carrying that load. And that connecting device is called
[01:21] harness. Harness consists of various parts, straps, collar, blinders, etc. And these parts have different roles. For example, blinders are used to limit
[01:33] the field of view for a horse so that it doesn't get distracted and it will do doesn't get distracted and it will do the intended work. Similarly, in any agentic system, you set up guardrails so that LLM doesn't respond to out-of-scope
[01:48] questions, adversarial inputs, and so on. To summarize, large language model needs harness to build an agent. Harness engineering on the other hand is the
[02:00] craft of building [music] reliable scaffolding around an AI model. And when I say scaffolding, it means tools, memory, context management, observability, and so on, which will turn a clever but flaky model into an
[02:17] agent that you can trust in production. Let me now show you Harness engineering through live code demo. We are going to build an agent that can go to any GitHub repository that you provide it, and it will click on this
[02:32] star button. So, it will add a star to a GitHub repository, okay? You can provide any GitHub repository. And we will see that what kind of problem the agent runs into without Harness engineering, and with Harness engineering, how you can
[02:46] fix all those problems, okay? So, first let us build a simple agent without Harness engineering. We are going to use LangChain for this, okay? And as a repository, we will use our own Nano agent repository. This is Code
[03:02] Basics contribution to the community. The repository is available on PyPI. You can create lightweight React agents through this, okay? So, this is the repository we'll use in our code. And if you look
[03:17] at the code base here, I have this particular branch. So, if you do get status, I am on naive branch, which doesn't have any Harness engineering implemented. And in the environment file, you need to copy this
[03:32] file to dot env, provide your GitHub username password. Also, provide your Grok API key. We are using it to make LLM calls. And as an using it to make LLM calls. And as an LLM, we are using Llama open-source
[03:47] model. We are not using Opus 4.8 or any of those heavy models. Very simple open source model and here you can provide your target repo. This can be provide your target repo. This can be any GitHub repository. Let me run the
[04:01] agent now. I will I will show you the code later on, but let me show you what it will do. When I run this, it will use Playwright. So, Playwright is this Python package or a tool that gets used to
[04:17] do the browser automation. So, you want to open things in browser, run run run it, you know, sort of like RPA. So, that kind of work is done by this agent. So, it's going to You will see, okay? Just notice what happens. When I
[04:31] run it, it's going to open a browser. See, it opened it using Playwright. Then it clicked on star. It clicked on star, okay? And it says that agent finished, okay? Model is claiming task is complete, okay? And here you see
[04:47] some message. Now, this is what I had previously. So, I had 12 stars. So, when right? So, let me refresh this. I still have 12 stars. It did not do the work that I expected it to do.
[05:04] It says agent finished, task is complete, and I'm under impression that agent has worked, okay? But it did not do the intended work. Let me show you the whole code flow quickly. We start in
[05:19] main file, and here we are getting the repo URL from your environment, okay? So, this is my repo URL. So, that's what you will get here. And then you create this harness browser. So, this is a Playwright
[05:34] Chromium See, Chromium base browser instance that it will create. If you have done web scraping, you will know about this. So, you get the browser about this. So, you get the browser instance, and that you get here in page
[05:48] and then you pass the browser instance to your agent. And you also pass your GitHub repository, okay? So, you are creating this Chromium instance of a browser and you're passing this particular
[06:01] repository, which is your Nano agent repository, and you are saying that, "Hey browser, give a star to this particular repository." Now, in the run particular repository." Now, in the run agent, you have execute agent function.
[06:14] Here, you are building the agent. See, where is my build agent function? This. You're building the agent by using LangChain API, create {underscore} agent. That's a function you use in LangChain, and it will use your model,
[06:28] LangChain, and it will use your model, so your model is Llama 3, then your API key, and you have a bunch of tools, okay? So, if you have done coding in LangChain, you probably know how this create agent function works. So, in the
[06:41] tools, you have navigate, click star, and finish, okay? So, see, navigate, what it will do is you provide any URL, and in that browser, see, you have
[06:53] browser instance, it will open that URL. So, you give the URL, it already has browser instance, which is this page, okay? And it will open that URL. What will click star button do? Well, as the name suggests, it will go to that
[07:09] particular web page, which it opened here, and then it will try to locate the element, HTML element, using this page locator, where it says, "Star this
[07:21] star button. And when button is found, you will call button {dot} click programmatically. All right, so these are the tools that this agent has. Here are the tools.
[07:35] agent has. Here are the tools. And then, you get this agent, and you And then, you get this agent, and you will just say agent {dot} a invoke, and you will say star this particular repository, which is your target
[07:47] repository that you have passed. And you're also passing this context called harness context, where it's just a data class where you have page and repo URL. Folks, don't worry if this sounds overwhelming, try to understand the
[08:01] concept of what happens without harness engineering and what happens after harness engineering. If you want to know specific details of this code, you can give it to chat GPT and it will explain you. And once it has starred that
[08:14] you. And once it has starred that repository, it will report this results back. So, see here, after you finish executing the agent, you're reporting the results. And you're saying agent finished, model claimed, whatever,
[08:28] Now, one thing you have to remember is create agent has internal agentic loop. So, it will know what kind of tools it has and it will call the right tool at the right time and it will do the verification on
[08:43] its own and it will finish that whole task, okay? So, that agentic loop is part of this create agent function. So, we're not writing that loop manually here. It is part of LangChain's implementation. All right. So, as you
[08:58] saw, the plain naive agent, what it will do is it will go to the repository. See, in the Chromium, it will successfully go to the repository, but when it clicks on star, it is asking you to log in and it
[09:10] doesn't know how to log in. So, it will just exit. And when it exits, it says agent finished, okay, task completed. But in reality, the repository was never uh starred because it got this login page and it does not know how to handle
[09:27] this situation. So, this is what happens without harness engineering. I have implemented harness engineering in a different branch, so let me just check that out. Git checkout harnessed. And this one now has the harnessed code.
[09:44] And as you can see, I have added bunch of things in the middleware. Before we move ahead, let me take a moment to thank today's sponsor, Arcade. We just saw that our naive agent got stuck in a login wall. It did not know how to
[09:58] proceed further. And honestly speaking, these kind of problems cannot be solved with better prompting. Here, [music] agent doesn't have a genuine way to authenticate. This is exactly the kind of problem that Arcade solves. It is an
[10:12] MCP runtime that handles user authentication for your agents. Each user authorizes the access through OAuth workflow that they trust. And then Arcade will store, refresh, and scope those tokens per call, giving your agent
[10:28] the least privilege it needs for that user for that specific action. And the secret never touches LLM. The LLM will never see the API key or a token. Arcade
[10:40] injects them at execution time on a server side, which means the system you server side, which means the system you will build with it will verify real authorized actions, not the hallucinated ones against a login wall. If you want
[10:54] agents your security team will actually approve, then check out Arcade at arcade.dev. Link in the description. All right, let's get back to our video. The first thing I want to explain is login guard
[11:08] middleware. We'll look into iteration later on. But we have this login issue. So, the agent is trying to click on start button, and it is hitting the login page. It does not know how to handle that. Now, in
[11:23] LangChain, when you are creating agent using this function, you get bunch of middleware. Now, what exactly is middleware? Let me show you the internal agentic loop that it executes, okay? So, this is the agentic
[11:38] loop. Whenever you are creating create underscore agent, and when you give it some task, internally it will run the agentic loop. And this is Look at this arrow. This is a loop, okay? So, this is this whole thing
[11:54] is a loop. So, it will call bunch of functions before agent, before model, call the tools. Then after model, it will again call the tool. It will keep on running. And then, when it accomplishes a goal, it will finish it,
[12:11] accomplishes a goal, it will finish it, okay? So, what if we add login handling in this before model function? So, here, at this location, we will check if not logged in, okay? If not logged
[12:26] then then login, basically, okay? So, that's what uh is implemented by middleware. Middleware allows you to interject your code in that internal agentic loop,
[12:41] okay? So, I have created this uh login guard I have created this uh login guard middleware, and that is part of this middleware.py function. So, let's go there, okay? So,
[12:54] here, control click, and middleware.py, you see? This is what we have implemented. And agent middleware is the class from LangChain middleware is the class from LangChain standard library. So, it knows when to
[13:07] call it, okay? So, here, what happens is there is this function before model. Before model is this. So, before calling the model in the agentic loop, it will first check is on login
[13:23] page, and it Are you logged in? If you're not logged in, see if you're not logged in, then it will log you in via this function. So, let's look at this function. So, in this function, it will
[13:36] pull GitHub username and password from your environment file, okay? So, here I going to show you because I have my secret keys, but here you will have username and password. So, it will get
[13:51] that and then it will fill, see, login fill password input using the Playwright fill password input using the Playwright API. It will fill all that information and then it will login, see, it will login. Okay, so that is the purpose of
[14:06] login middle guard. That is the purpose of login guard middleware. The purpose of iteration guard middleware is to restrict the iterations because in the
[14:19] agentic loop, if you keep on running, then you will keep on calling your model and your token usage may go above your you might get $50,000 token bill, okay? You want some control over your agent. You don't want agent to
[14:34] break your wallet, okay? It can make you bankrupt. So, to prevent that, you're saying max iterations. See, max iteration is eight. You see, eight? And you're saying that I want some kind of cost control on my
[14:49] agent, okay? So, the first thing we did is if you're not logged in, it will log is if you're not logged in, it will log you in. Second thing is it will do some kind of cost control so that if there is an error, it shouldn't get stuck into
[15:02] an error, it shouldn't get stuck into infinite loop and burn millions of token for you, okay? So, let's look at this code. So, here it is before model, see, before model. It gets executed here. And then it will do the iteration count and
[15:17] then if the iteration count is greater than max iterations, which is which is eight, it will jump to end node. So, if you have studied lang graph, in lang graph, you have a graph, and there is this end
[15:31] node. End node means you're completing the execution. So, it will just go to the end node and finish the execution. Then you have contextual prompt middleware. So, this one gets called in this A wrap model call. You see A wrap
[15:46] model call? Before calling the actual model, uh you know when it is calling that particular model, it will pass context. So, context has things like, are you logged in? Is repo starred?
[16:02] What is the star count? You know, all of that information it will get through this utility functions, and it will create this kind of object, which has all the information. URL, are you logged in? Yes, 0 1.
[16:16] URL, are you logged in? Yes, 0 1. Starred, uh star count, and so on. And it will pass that information in the context. So, what happens is uh when the flow comes through here, that object will contain the current
[16:29] information of that page. I'm on a GitHub page. It will tell me, are you logged in? Uh is the repository starred? If it is starred, how many stars are there? The star count. It will give me all that information. And then I will
[16:45] come here in the wrap tool call. So, that's where the fourth middleware comes in the picture, which is verify, okay? Verification and feedback loop, okay, is
[16:57] uh the essential component of harness engineering. So, here, verify on finish uh middleware, you see? A wrap tool call, okay? Wrap tool call.
[17:10] So, before calling the tool, it will uh pass the context, uh the page context, okay? So, when uh when it is done calling the tool, so when the tool is called, okay? So, it will be saying tool name is equal to
[17:24] finish. So, when it is done calling the tool, it will retrieve the page and it will verify, okay? So, what it will verify? Let's look at this function. It will verify is repo starred. And it will pass this this uh,
[17:39] particular uh, state here, okay? Repo is starred, the star count, a reason, and so on. It will verify that particular thing here. Now, look at this comment.
[17:51] thing here. Now, look at this comment. Uh, this wraps every tool call, every tool call it will wrap it, okay? And when the model calls finish, the harness reads the actual DOM via agent.verify, which is this. See, it will call this
[18:06] function before letting the tool return. If verification fails, we short-circuit, And feed the grounded failure to this. The model's word is never the source of
[18:18] truth. So, folks, this verification step is this particular part, feedback loop. In the harness, there are a couple of components, right? All of this. And this components, right? All of this. And this verification that we saw is basically
[18:31] this particular feedback loop part of harness. The iteration guard and login harness. The iteration guard and login guard, you can consider it as guardrails and tool, and then contextual prompt middleware is part of this context
[18:45] management, okay? So, in this harness that we created, we have uh, touched based on all these components. Let me now go ahead and run this, okay? So, now it will try to log in. Watch it, see? You see this? It
[18:59] tried to log in using that login guard, and it is sending this uh, verification code, which I'm going to give it here. And then it will go, see? Now, look at this star, right? Star is 12. Ah, you see star is 13 now.
[19:15] So let me show you. So star initially were 12. Let me refresh it. Now see star is 13. So my agent is doing the intended work. I did not update my
[19:28] model. I did not change my prompt, nothing. I just added the harness. And using the harness now agent is not failing, you know, when it was failing on login initially. Now we have login guard middleware through which it is
[19:44] making sure it is logging into the page. Then it is passing the necessary context so that agentic loop has better awareness on what's going on. And then it is also doing the verification, okay? Whenever the repo is starred, this
[19:58] verify middleware is making sure that the model has done the intended work. And then to control the cost of tokens, etc., you have iteration guard as well. To
[20:11] summarize, we just added the harness on top of an LLM. Okay, we added all of these things. And that has improved the behavior of our agent. If you are an AI
[20:23] engineer, you can make a huge impact by doing proper harness engineering. And doing proper harness engineering. And this LinkedIn post by Databricks CEO is the proof of that. They ran internal evaluations on different models and
[20:39] different harnesses. And what they found was even with the same model, when the harness is improved, it can improve the cost saving, you know, it can reduce your cost by half. So if you go to this
[20:55] article, and if you look at this particular image, what you will notice look at this. You have Opus 4.8. You see like you have You have Opus 4.8. You see like you have Opus 4.8 in a high effort mode and Pi.
[21:09] So, Pi is this harness, you know, coding harness. This is a by the way coding benchmark, okay? And then, you look at Opus 4.8, same model, high effort, but the harness is Claude code.
[21:24] So, Claude code is an agent, but agent is nothing but LLM and harness. So, Claude code, the team at Anthropic, when they build Claude code, they took the model, which is Opus 4.8 or whatever, and they have written all the code
[21:40] around it. The code for tool calling, context management, observability, memory, guardrails, and all of that. And that is your Claude code, essentially. So, Claude code, you can also call it harness, okay? And the similar harness
[21:56] is Pi. You see Pi, there is another one, which is Codex. And the cost, if you look at it, see, the cost of this one is around $2. And when you have same model, Opus 4.8, same effort, which is high, but when
[22:12] your harness is different, which is Pi, see, here the cost is less than $1, folks. See, this is a humongous cost saving you can get by doing a
[22:24] proper engineering, and that is where you all, as an AI engineer, will shine, where you will write all those middlewares that we just wrote in any code. You know, any AI projects that you're working on, when you write proper
[22:39] harness, it will save cost, it will improve the accuracy, it will reduce hallucination, it will have tons of benefits. Now, what's the difference between context engineering and harness engineering? Well, it is obvious from
[22:53] engineering? Well, it is obvious from this chart. Context engineering is part this chart. Context engineering is part of harness engineering. Year 2025 of harness engineering. Year 2025 was all about context engineering. In
[23:05] year 2026, I think around February, harness engineering started getting popular. Now people are talking about it, and it is much broader term. So context engineering is the design of what the model sees at each step, okay?
[23:21] Deciding what information should be in the window, what gets retrieved, what gets summarized, and what gets evicted. It answers one question. Does the model have the right information to make this next decision well? It provides the
[23:38] correct relevant information to model. That is context engineering. Harness engineering is broader. It is full execution environment. Which tools are available? Which actions are allowed? How failures gets handled? What has to
[23:54] happen before anything is called done? So this is that verification step, okay? Context engineering shapes what the model knows, whereas harness engineering shapes how the agent operates. That's it, folks. I hope you like this video.
[24:08] If you have any questions, please post in the comment box below. Thank you very in the comment box below. Thank you very much for watching.

⚡ Saved you 0h 24m reading this? Transcribe any YouTube video for free — no signup needed.