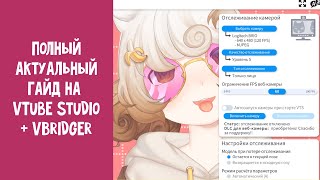
VTube Studio: Paid vs Free Version
40sDirectly addresses the cost barrier and value proposition, sparking debate on whether the free version is usable.
▶ Play ClipThis guide provides a comprehensive, up-to-date walkthrough for setting up and using VTube Studio in 2025, covering avatar import, tracking options, asset management, effects, and OBS integration. It also compares different tracking methods and recommends paid add-ons for enhanced functionality.
Download VTube Studio (free version shows a GIF watermark). Recommended paid add-ons: Ethermark removal (360 rubles) and collaboration room add-on (710 rubles).
For webcam: Nvidia Broadcast (free crack). For iPhone: VTube Studio Pro (2000 rubles) or Vbridger (259 rubles) with free iFacialMocap. Apple Pay works in Russia.
Avatars must be Live2D models (folder with JSON files and textures). Import via top menu item 'Select your avatar' -> 'Add model' -> open folder.
Left mouse button to move, mouse wheel to resize, Ctrl + mouse wheel to rotate.
Enable camera tracking in settings, select camera, choose tracking quality (top four are best), select tracking option (recommend 'Face'), set FPS to 60.
For iPhone: same connection type (wired/Wi-Fi), enter IP and port. For Vbridger: select capture type and connect. Enable plugins in VTube Studio and accept request.
Vbridger + iPhone: best quality, supports cheek inflation, anger, surprise. Nvidia and MediaPipe: good, support lateral mouth movement. Google MediaPipe: good but CPU heavy. Nvidia: first version works better, winking issues.
Calibrate with calm expression. Supports Tobii and Lip Motion (additional equipment). Voice tracking via microphone in advanced lip sync mode.
Copy avatar folder before adjustments. Use auto setup if broken. Adjust sensitivity for lateral movement (X, Y, Z). Recommend regular physics, 60 FPS.
Search for animation parameters (e.g., 'mo' for mouth). Input/Output values: bottom = start, top = end. Adjust for sensitivity or semi-active state.
Configure idle animation (e.g., tail wagging). Record custom animation via second tab: set duration, record movements, disable unwanted parameters.
Go to model settings, select object, click eye to highlight, then recolor in palette.
Four types: PNG/GIF, frame-by-frame animation, Live2D assets, web elements. Live2D assets react to avatar movement and have physics.
Place asset folder in 'ETMS' folder (via main settings). Then add via settings menu. Adjust element order (positive = front, negative = back).
Set FPS for frame animation. 'Remove when hovered' for eating simulation. Attach to avatar parts by dragging and releasing on desired part.
Combine assets into scenes via three stars menu. Bug: if folder with random images added, remove all elements from scene to fix.
Add background to 'Backgrounds' folder. Enable WiFiX for effects (more CPU load). Adjust effects and save presets. Download presets from link.
Screen lighting changes avatar lighting based on screen content. Can select separate window.
Enable hotkeys. Create new expression: select parameters, name, create hotkey. Assign to Twitch rewards via Twitch sync.
Add block with expression, assign scene, effects preset, background change, avatar position, avatar change, or random Steam Workshop item.
Create folders for expressions. Plugins page link in description. Disable proxy if errors occur.
Reactiv site for collaboration with PNGtubers. Paid add-on for collaboration rooms in VTube Studio.
Requires avatar with mouse visual. Alternative: Bongo Cat. Set X input for mouse direction.
Place PNG in avatar folder, go to avatar settings, click 'No icons', select PNG.
VTube Studio has built-in avatar constructors (chibi) with customizable hair, ears, tail, clothes. Some used as assets (e.g., bat pack, Christmas tree).
Go to color changer, set ear elements to full transparency, record trigger with color preset. Toggle ears on/off.
1) Chrome key with green background. 2) Game capture with transparency (allow transparency). 3) NDI (plugin, often broken). 4) Virtual camera (works for some). 5) Spout (recommended: no interface, transparent background, good quality).
VTube Studio offers extensive customization for VTubing, from tracking to assets and effects. The Spout method is recommended for OBS integration due to its reliability and quality.
"Title accurately promises a complete 2025 guide with Vbridger and tracking comparison, and the video delivers exactly that."
What are the two recommended paid add-ons for VTube Studio?
Ethermark removal (360 rubles) and collaboration room add-on (710 rubles).
00:18
What format must avatars be in for VTube Studio?
Live2D format, consisting of a folder with JSON files and textures.
01:41
How do you rotate an avatar in VTube Studio?
Hold left Ctrl and use the mouse wheel.
02:48
What is the recommended FPS for tracking in VTube Studio?
60 FPS.
04:18
What are the four types of assets (Osetians) in VTube Studio?
PNG/GIF, frame-by-frame animation, Live2D assets, and web elements.
12:11
How do you attach an asset to a specific part of the avatar?
Drag the asset and release it on the desired part (e.g., hair, eye).
14:12
What is the purpose of the 'Remove when hovered' setting for assets?
To simulate eating by removing the asset when hovering over a specific part (e.g., mouth).
14:52
What is the best method for transferring VTube Studio to OBS according to the video?
Spout, because it shows only the image on a transparent background without the interface and works well.
25:14
How can you remove cat ears from an avatar to attach king ears?
Go to color changer, set ear elements to full transparency, record a trigger with color preset, then toggle ears on/off.
23:40
What is the difference between the first and second versions of Nvidia tracking in VTube Studio?
The first version works better for the speaker; the second allows face capture settings but has winking issues.
06:17
Paid Add-ons for VTube Studio
Highlights the cost and necessity of add-ons for watermark removal and collaboration.
00:18Tracking Options Comparison
Provides a detailed comparison of tracking methods, crucial for choosing the best setup.
05:23Spout as Best OBS Integration
Recommends Spout over other methods for its reliability and quality, a key practical tip.
25:14Removing Avatar Parts via Transparency
Shows a clever workaround for attaching new parts by making existing ones transparent.
23:40[00:04] Welcome to the channel dedicated to YouTube. This is an updated guide for know my old guides on this topic have gotten a lot of views, but it's and the quality of these guides leaves much to be desired . So here's a new, concise and
[00:18] up-to-date guide. Let's go. First, you need to download YouTube Studio itself. I'd like to free version, but it will only show you a GIF like this in the corner of the program, which you can trim in OBS. But I would still recommend purchasing the Ethermark removal add-on
[00:31] for 360 rubles. It might not seem like it cost that much money, telling you honestly. You can also purchase an add-on that allows you to collaborate with other YouTubers within YouTube Studio. Costs 710 rubles.
[00:44] I also highly recommend it, because the quality of your joint broadcasts will significantly improve there. Plus, if you have a webcam and graphics card from Nvidia, install the Nvidia Broadcast Cracker update for free. Well, and the last one. If you have
[00:57] camera, you will also need to purchase YouTube Studio Pro. Apple Pay still works in Russia, by the way. I can pay from my phone number without any problems . The cost of the Pro version on the phone is 2,000 rubles. If your avatar
[01:11] get by with less expense. You just need to buy the Vibridger itself for 259 rubles. and connect it to your iPhone via the free ial mup. Then the tracking quality will be high and you will spend less money. I do the same myself. But,
[01:26] of course, this option does not take into account the costs of setting up the Vibrider itself, because riggers usually do this for an additional fee. All of this may sound confusing to a go over the format that YouTube Studio supports. All
[01:41] avatars accepted by the program are made in Live 2D and look like folders containing JSON files and textures. Such avatars can be downloaded or ordered for money.
[01:54] folder, you need to transfer it to YouTube Studio. But everything is in order. YouTube Studio menu. It appears when you double-click on an empty space inside the program. Let me list the menu items from top to bottom. Select your avatar and
[02:08] screenshot, add a background and items to the price, block mouse movement of the avatar and items. This way they will stand in one place and cannot be moved. Clicking again will unlock it.
[02:20] Program settings and Steam cloud, program log. And the last thing. Connect your set up collaboration. And first, let's throw our avatar into the program. Select the top menu item. After that, you will see a list of your
[02:35] . Click add model and open folder. We transfer our folder with the avatar here. We return to YouTube not on the list, try re-saddening it in YouTube Studio. You
[02:48] can move your avatar around the screen with the left mouse button, change its size with the mouse wheel, and also rotate it with the mouse wheel while holding down the left Ctrl key. And advertisement. I recently made a reaction to a popular video on my boost.
[03:01] Russian YouTubers deserve to be cancelled. Reaction without water in video form. It lasts an hour and a half, and access costs only 111 rubles. For that price, you also get access to a whole bunch of podcasts and guides on YouTube topics. There is no monetization on
[03:13] grateful for your support. Now let's get back to the video. Let's take a closer look at the program settings. First of all, pay attention to the three upper right buttons. Using them, you can open the program
[03:25] if you haven't done so yet, and also close the menu. I would like to draw your attention to this once again. You can change the language here. This is misunderstandings later about why everything is in a different language. Otherwise, questions often
[03:38] arise. Now let's move to the left side. Here, by clicking on the lock, you model's movement, and above there are between different sections of the program settings. By hovering your mouse
[03:51] over these sections you can see what can be configured . From left to right, these are the main avatar settings, and hotkey settings . We'll go over them all one way or another . First, let's enable camera tracking to get the
[04:04] appropriate section and select your camera from the list. Below we need to select the tracking quality. Regarding tracking options, I can say this. The highest quality ones are the top four options. But whether your PC can handle it is a
[04:18] big question. In the last step you will need to select a tracking option. And if you don’t have something non-standard, then choose a face. I recommend setting FPS to 60. This is enough. Now I'll tell you about alternative
[04:31] face capture connections. If you have a direct connection to your iPhone, then in the main settings on both devices, select the same connection type: wired or Wi-Fi. In the second case, you will need to enter the IP address on the iPhone. You can
[04:45] view it on your computer in the same settings block. You must also specify the same port on both devices. After which you need to switch the toggle switch and you're done. When connecting to Webridger, simply select the capture type and click
[04:57] connect to YouTube Studio. In YouTube Studio itself, you need to enable plugins and accept the incoming request. Tracking options like Nvidia and Media Pip will be available with a webcam, while YouTube Studio and Face Motion are available
[05:10] with an iPhone. The second option, by the way, is free, I recommend it. Both only work when they are on the same Wi-Fi network. Well, and the last thing about VBRER. By clicking the download button, you can select a preset option.
[05:23] I recommend Vbridger Advanced Arcid version 3.0. Now a little about the differences between quality is a vibridger paired with an iPhone. It allows you to inflate shocks, to the sides.
[05:36] to demonstrate anger and surprise without setting up hotkeys. But for all this, you need to separately configure the Vibridge Editor avatar. Or you can simply order such a setup from creators. Nvidia and Media PP VR are the
[05:50] tracking option. It also allows the mouth to move side to side and has good reading of the teeth of the captures from Nvidi. Personally, on my avatar, this is the best noticed that the head turns to the sides with Nvidia more than with the iPhone, which is also a
[06:05] plus. They are followed by Google Media Pip and Nvidia's version within YouTube Studio itself. They also support lateral movement of the mouth. The best of these options is Google, but it eats up a lot of CPU for me. If we talk about
[06:17] Nvido, then surprisingly, its first version works better for me. But in the second one you can make settings for face capture, which we won’t get into today. The downside of the Nvido capture, for me personally, was the winking. It is not
[06:29] responsive enough, and one of the eyes refuses to close completely, which can also be corrected or simply turned off. Well, the worst possible tracking level is level five or lower. You can read the difference between them
[06:41] additional facial expressions available for the avatar. In any case, I recommend that test all the monitoring options available to you, keeping an eye on the best option for you, and with any of the options you choose, don't forget to
[06:55] works correctly. To do this, look at the screen with a calm expression on your face and click calibrate. Please also note that YouTube Studio supports advanced tracking technologies such as Tobi and Lip
[07:08] Motion. Both require additional equipment. You can read more about the first one by camera and effect settings section in the corresponding block. The second one allows you to customized expressions with them, which we will talk about later. You
[07:23] can also set up voice tracking from the microphone. In the advanced lip sync mode, the program identifies sounds such as a, i, y, e, o, and can transfer them to the avatar animation. You can find out how to set up this type of tracking by
[07:35] below the block. But also note that the avatar may simply not have the parameters configured for sounds, then this will not work. And often you have to To do this, you need to go to the avatar settings section and manually find all the
[07:49] mouth parameters and change their input to sound. But I will talk about these settings later. camera settings and effects section, you can adjust the sensitivity of tracking blinks, smiles, and the like, as well as other settings
[08:02] that are self-explanatory. Done with tracking. Now let's customize strongly recommend that you copy the folder with your avatar somewhere before making any further adjustments, and always have the original, unmodified avatar somewhere
[08:16] in the archive, because there are times when you've messed things up so much that there's nothing left to do roll it back. Now, if your avatar isn't working properly and fix it automatically, you can go to the Avatar settings and select automatic
[08:30] setup. If this doesn't help, you can copy the settings from any by default. There you can also correct the white outline and send the avatar to your phone if necessary. Below you can choose a sensitive
[08:42] lateral movement. X is horizontal, Y is vertical and Z is zoom. Do this experimentally, so that your avatar does not run off the screen, but also so that it is not completely motionless. Below I recommend choosing regular physics, not the
[08:55] old one. Select 60 fps because that's what V Studio itself recommends. This is the best option. And again, choose the settings below to suit yourself. Here we have the the avatar moves and how dynamically the movement of
[09:09] all body parts will occur depending on the settings. Next, the force of the wind. I think everything is clear. Avatar elements fluttering in the wind. Drag physics come into play when you manually move your avatar with your cursor. Next we have some
[09:21] briefly. If you have something wrong with a particular animation and it doesn't each one individually here. For example, you are not satisfied with the movement of your mouth. You can type mo in the search to find its settings, or if you're lucky,
[09:34] go to the corresponding folder. Or you can find it manually. When determining what kind of animation it is, I recommend looking under the entrance caption. It describes letters. As a reminder, X means that this animation is related to
[09:46] horizontal movement, Y to vertical movement, and Z to depth movement. If you are still unsure whether you tracking and turning on breathing on the parameter. This way you will see its animation not happy with something, you can change the anti-aliasing, as well as change the value of the
[10:01] input and output parameters. What do they mean? In short, the bottom number is the start, and the top number is the end of the animation. That is, if you take animation, opening eyes, beginning of animation, closed eye, end open. Next, if
[10:13] you adjust the value between, you can achieve a more sensitive animation trigger or make the animation always be in a semi-active state. smiley parameter and made the avatar always smile a little. You can also adjust the
[10:27] top value to make the avatar reach the end of the animation faster and easier. If it's still not clear, then watch my other video, otherwise it will take a long time. Well, let's go back upstairs. Here you can customize the wait animation. It is needed if you
[10:39] loop while the avatar is in use. For example, wagging the tail. In general, there is no need to turn this animation on and off separately. It's just configured by default. But if suddenly, then you know where to turn it on. Below is
[10:53] is, in case the camera can’t see you, for example, if you go out to get some ourselves by going to the second tab and scrolling down. Here we select the animation duration and click "Start recording". You must then make a series of
[11:07] movements or expressions that are maintained. Finally, we can change the parameters used in it. For example, if you want your mouth movements to be recorded while the animation is playing
[11:20] , you can disable the mouth-related option so that they are not the default as in the recording or rotate parts of the animation that you don't like. Well, the last thing about setting up an avatar. You can recolor individual
[11:33] model settings and select the appropriate line. Here you can find the object you need by searching or by clicking on the avatar itself. To check for sure that this is the object you need, click on the eye and you will see a highlight on the avatar. Then you
[11:46] can go to the palette and recolor it. So, we are done with the Avatar settings section. Now let's talk about the Ossetians, effects and other beauty. Let's start with the Ossetians. So, from now on I will call the pictures bend other elements
[11:58] model itself. You can download the assets themselves from the Steam library. By the way, there are also avatars from the corresponding VK groups. They can also be downloaded from individual websites and a bunch of other places. Links will also be in the description. There are
[12:11] only four species of Ossetians. The first classic PNG, that is, gif images. The second one is Ossetians animated frame by frame . They look like folders with many PNs, which are animation frames. In fact, such Ossetians are a
[12:24] higher-quality analogue of GIFs. Third Live 2D ossets are objects registered they are basically the same as avatars, both in terms of files and structure, but they are not. Used as additional objects.
[12:38] This is the highest quality version of Oset, as it reacts to the Avatar's movement and has its own physics, but it is also less common on the Internet and sometimes costs money. And the fourth is web elements, which is the same as the
[12:50] source in OBS. This is how you can display your chat in YouTube Studio, VDO Ninja, or any other website. The first type of ossets can be dropped with the mouse, but the last three can only be used directly through YouTube Studio.
[13:03] In order for your frame-animated AST or Live 2D Asset to appear in YouTube Studio folder. You can do this by clicking the corresponding button in the main settings, going to ETMS and transferring the folder with your Oset there. Then it
[13:16] can be added by clicking on the corresponding item in the settings menu. After which a extremely clear, because each item is signed. You may have noticed window like this appears. Let me explain what this is. If you want your object to
[13:32] be in front of the avatar, choose a positive number in the element order. If you need to place an object behind the avatar, for example, a chair, then a negative number. So in this case, this slider is something like a layer in Photoshop,
[13:44] so that the elements are displayed in the correct order. Especially if you have a lot of them, you need to choose the right value. I'll leave you with an example of a box to make it I'll leave you with an example of a box to make it clearer.
[13:59] Pay attention to FPS. It is important for frame-by-frame animation. At times it can be too fast or too slow. Then try changing the value. Remove the don't want the object to be attached to the avatar and it should be separate from
[14:12] it. For example, if it is a chair. If you want to attach a regular PN set to draw your attention to the fact that it will follow the physics of the element it is attached to. Therefore, it is very important where you attach it. This very element is removed
[14:26] at the moment when you release the mouse with the dragged axis. That is, you drag the mouse, release it on a hair, and it will attach itself to the hair. If you release a mouse on the eye, it will attach itself to the eye, and so
[14:39] on. If you want the osset to not cling to certain parts of your avatar, then go to the first item in the model settings and select these parts there. Oset will be removed when hovered over
[14:52] . For example, if you want to simulate eating oseto. Also, after the complex avatar, then it will be very difficult for you to achieve any choice, and these mishaps, as they are correctly called, these
[15:06] will remove your oset. No matter how much I tried to fool around with my avatar, nothing worked for me lot of such microelements, and it seems like I reassigned them all so that this oset would be removed, but it still won’t go away. I don't know what this is connected with.
[15:21] simple avatar, like, for example, the hamster that I showed in the example, you select the eleventh element, namely the back wall of the mouth, and when you point at the mouth, which is open accordingly in this hobby, the element is removed. So I decided
[15:35] to get it just in case. Also, please note once again that you can lock all sets on stage using the lock button in the menu and unlock them by pressing it again. If you need to fix a
[15:48] double-click on it. You can also combine ossets into scenes. To do this, click on the three stars in the menu, click create a new scene, select which Ossetians will be included, give it a name and save. This knowledge will be useful to you in
[16:02] the future. I also wanted to point out this bug. If you accidentally add a folder to animation, just random images, then it might happen that bugged and you won't be able to delete it normally. In this case,
[16:17] go to the list of elements and click to remove all elements from the scene. And thus the program. All you have to do is this. the program, then go back to the program files folder, to the Backgrounds folder and
[16:31] add your background there. Now I will show you how to set up effects and lighting. To do this, go to the camera and effects settings and activate WiFiX. Please note that this will put more strain on your computer. Click the button
[16:43] YouTube Studio. It seems to me that the names here make everything perfectly clear. All you have to do is just adjust the effect after you've selected it, and that's it. effects and save them as presets at the same time for faster loading later.
[16:57] Also, if you click on the gear, you can turn on experimental effects for those interested. But anyway, if you are really lazy, then I will leave a link to download the presets and effects that I use most often.
[17:12] Simply upload them to the effects folder and they will appear in the list. You can adjust the lighting under the effects. And the coolest and most frequently used is screen lighting. It changes the lighting of your avatar depending on what's
[17:25] happening on the screen. Most often, this type of lighting is used in games for atmosphere. You can also select a separate window if you Studio is setting up hotkeys and expressions. Here you can enable or
[17:38] disable the use of hotkeys, enable or disable hotkeys on the screen. Here they are on the right. You can also create a new expression for your avatar by going to the appropriate menu. Here we select the parameters that will be
[17:50] included upon activation. We give the expression a name and create a hotkey for it . Please note that we are not assigning anything yet, but rather creating a trigger based on the expression. After that, a new block with our expression will appear in the list,
[18:04] and we can assign hotkeys or hot buttons or activation of the Twitch ignition to it. To do this, first we need to go to the general settings and enable synchronization with Twitch. Here you can also enable
[18:17] emoji dropping on your head and chat on the Vtubestudio screen in the form of a scrolling line. Then simply click on the Twitch button in the expression block and select what will be the trigger for activation. If we need activation to be done with
[18:31] points, then we select the reward activation trigger . Select a reward from the list and don't click test to check if everything works. Also check the activity of the expression itself to make sure everything works. Below you can customize
[18:45] how long it takes to stop displaying expressions, if you need to. If you scroll down to the very bottom of this section, you can add a new block with an expression. There you can place your scene with sosets, and your preset with
[18:58] the effects that we configured earlier, and assign triggers for their appearance. In the same way, you can set up a background change, move your avatar to the desired position, change your avatar, and even add a
[19:10] random item from the Steam Workshop, among other things. A little about the systematization of everything created. You can create folders and sort the created expressions into them. You can also hide and reveal information for a
[19:23] . For convenience, you can rename expressions and, last block of this video, I want to tell you about a couple more things I missed . The first is plugins. I already showed you today how to turn them on, but I
[19:38] didn’t show you where to get them. There is a separate page, the link to which I will leave in the description. There you can find most of the plugins for this program. They are used more or less the same way. I'll just point out one thing: if you're experiencing
[19:51] any errors when disabling plugins, what helped me was disabling the proxy server on my PC and disabling various third-party proxy servers that were messing with your IP. You can also see a number of plugins and programs useful for YouTube, both in general and for people using
[20:06] YouTube Studio, in my other video about features for YouTubers. And there are already two of them released on the channel. and also one more part on boost. There was also a guide published on throwing objects at your YouTube avatar.
[20:20] I also recommend that you have probably ever used something called Reaktiv. This is a special site for collaboration between YouTubers and PNGvatars. If you're not familiar with the topic, I recommend my video on how to collaborate on YouTube.
[20:32] web elements feature appeared was to insert a reagent link there and conduct collaborations. But in this case, you'll get an error, because on YouTube, to collaborate with a reactive agent, you have to pay the other one money in order to
[20:45] enjoy this privilege. As I mentioned, purchasing a paid add-on to YouTube Studio allows you to create collaboration rooms within it. conducting collaborations. I highly recommend it, but separately. I
[20:58] won't spend time on this in this video, because I understand that not everyone will buy this topic in the description. You can also set up a trigger for your mouse movement in YouTube Studio itself. But for this to work, the avatar must initially have a
[21:11] computer mouse visual with configured animation. Therefore, we will also skip this point. As an alternative, I recommend Bongo Cat. It's easier to do it there. And another important note, because Ulyana constantly forgets to add something to
[21:24] her videos. So, yes, despite the fact that you need a mouse visual to simulate its movement with this trigger, you can make your PTA, that is, like in my case, for example, my ghost on the screen , move in the direction of the
[21:38] mouse right, left, up, down, if you make certain settings. But in order not to extend my already long video too much, I’ll just show on the screen what exactly needs to be reconfigured. In this
[21:50] case, it is important to simply put X into the input . That's all. I also want to tell you how to set a picture to choose as your avatar. That is, when you go to the list of all your avatars present on YouTube, you see
[22:04] that some of them have pictures, and some do not, because they are not pre-installed by default. To avoid constantly searching by poke or by name, and to make everything more visually clear, you need to go to the
[22:16] folder with the avatar, upload the desired PNG file there, then go to the avatar settings, click the upper right corner where it says "No icons," same PNG file you just uploaded from the list. Ready. And one last thing I
[22:31] are four types of ossets, as I mentioned for YouTube Studio, there are also something like small avatars that can be customized directly in YouTube Studio itself using the sliders. That is, you are given a
[22:45] chibi, whose hair color can be changed , as well as the type of ears, the type of ponytail, and different clothes can be used. Well, that is, in fact, it is a constructor inside VTube in fact, it is a constructor inside VTube Studio. But some of these avatars
[23:00] are used as additional assets. For example, recently a pack with bats and ghosts was released, as well as a Christmas tree from Laterika, to whom I say hello, because she recreated my avatar. I will leave links to all three of these options
[23:14] in the description. And there are full-fledged avatars that can be designed in a YouTube studio. So , to avoid being verbose, I’ll just leave a link to a separate video where I explain how it’s all
[23:26] done. Also, thank you for understanding the description, otherwise I completely forgot to finally, I want to talk about removing parts of the avatar for better attachment of king ears to your model, but you already have cat ears. What to do? Go
[23:40] to the avatar color changer, select each ear element in turn, and set the slider to full transparency. Then we add a trigger with a color preset input and click on the button to finish recording. Your avatar with transparent
[23:52] ears will be recorded. You can also do this by recoloring your avatar. Now let's go back to finishing the flowers and press the switches on the ears so that they return to their place. should disappear and appear when activated again. It's that
[24:06] simple. Finally, we've covered all the features of YouTube Studio, except for transferring images to OBS. There are only a few options. The first and most antediluvian one with the removal of Chrome. It's simple. Select the background called Color Picker and set the
[24:20] background to green in OBS. Add window capture to YouTube Studio and set the Chrome filter. Ook. Second option. In OBS, we add game capture with transparency resolution. In YouTube Studio, when selecting Color Pecker, click Allow Transparency. Ready.
[24:35] In both cases, we open all the icons on the screen and cut the source by holding down Alt. The third option is NDI. To do this, you need to download the appropriate YouTube Studio plugin and add a source with the same name. Well, this
[24:48] method hasn’t worked for me or many of my friends for a long time, so I don’t virtual camera. Actually, we're launching. If it doesn't work, click "Help with installation" inside VTube Studio. Go to OBS and add it as a regular
[25:01] camera. This method is not bad, but it doesn’t work for everyone. The advantage of the India and virtual camera is that they don't display the YouTube Studio interface in OBS, allowing you to make adjustments within the program directly during the stream. And the
[25:14] best way at the moment is Spo. You also need to download and install the plugin in OBS and it has all the advantages of the previous methods. The interface is not visible, only the image itself on a transparent background. At the same time, Spot
[25:27] majority of provocations for whitubbing. It works well and gives a good picture, so I recommend it. The only thing that is very important when using any of the listed methods, except for capturing a window, is that I recommend
[25:41] setting a black background, because with chroma keying a green frame remains. And yes, if anyone didn't understand, there's me. Right now on the screen you see people who support me on
[25:57] Thank them very much. You can also get on this list for as little as 50 rubles. per month. and thus track my activities. From 70 rubles. Get access to more than 10 guides from me, starting
[26:10] from 111 rubles. and also to podcasts. I also have all the available options for supporting VK, Dono Boost, and even a paid TG channel, so choose what's most or other YouTube event, you can advertise yourself in my
[26:24] VKontakte group for just 100 rubles. There are already 1,500 people there, link in the description. Thank you all for watching and good luck in the world of whitubbing. Bye bye. world of whitubbing. Bye bye. [music]
⚡ Saved you 0h 26m reading this? Transcribe any YouTube video for free — no signup needed.