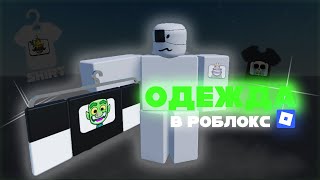
How to Make Roblox Clothes & Earn Robux
45sTeaches a valuable skill (earning Robux) with a clear step-by-step guide, appealing to Roblox players seeking monetization.
▶ Play ClipThis video provides a step-by-step guide on creating custom clothing in Roblox, specifically T-shirts. It covers downloading templates, editing them in an image editor, uploading to Roblox, and selling items in the marketplace.
The video explains that high-quality prints can earn money, and it will show how to create, test, and upload custom T-shirts.
Go to Creator Hub, click Creations, select Avatar Items, Classics, Upload Asset, and Learn More. Download the zip file containing T-shirt and pants templates.
Two versions of the T-shirt template are provided: one with full labels and one with abbreviations. Both help identify which parts correspond to which areas of the shirt.
The template has specific pixel coordinates for front and back. The image must be saved with the same dimensions and alignment to avoid shifting.
To make parts transparent (e.g., sleeves), select the area and delete it. The game will match the player's skin color in those areas.
Example: To make a black T-shirt, place a large black rectangle over the template. The game will cut out the shape for the character.
Save in PNG format, especially if there are transparent parts. PNG is recommended even without transparency.
Open Roblox Studio, create a character, and add the T-shirt using the Shirt Template. Click Add Image and select the file. Click Create to apply.
If only using in-game (e.g., for NPCs), you don't need to upload to Roblox. Uploading costs 10 Robux and is required for inventory or selling.
Go to Creator Hub, Creations, Avatar Items, Upload Asset. Select the file, name it, add a description (optional), and pay 10 Robux. Wait for moderation.
After moderation, go to Avatar, find the T-shirt, check the sell box, set a price (minimum 5 Robux), and publish. It will appear in the marketplace.
The creator shows a second account viewing the T-shirt in the marketplace, demonstrating the purchase option.
Creating and selling custom Roblox clothing is straightforward: design using templates, upload with a 10 Robux fee, and set a price to sell. The video provides clear steps for beginners.
"Title accurately promises a guide on creating Roblox clothes, and the video delivers exactly that."
Where do you download the T-shirt template from?
From the Creator Hub: Creations > Avatar Items > Classics > Upload Asset > Learn More.
00:16
What file format should you save the T-shirt design in?
PNG format.
02:43
How much does it cost to upload a T-shirt to Roblox?
10 Robux.
03:33
What is the minimum price you can set for a T-shirt in the marketplace?
5 Robux.
04:32
Why must the image dimensions and alignment match the original template?
Because the template has specific pixel coordinates for front and back; shifting the image will cause misalignment on the character.
01:36
How do you make parts of the T-shirt transparent (e.g., sleeves)?
Select the area and delete it; the game will match the player's skin color in those areas.
02:02
What is the purpose of testing the T-shirt in Roblox Studio before uploading?
To ensure the design looks correct on the character without spending Robux.
02:55
What happens after you upload a T-shirt and pay 10 Robux?
It goes through moderation, and once approved, it appears in your Avatar items and can be equipped or sold.
04:17
Earning Money from Custom Clothes
Highlights the potential profitability of creating high-quality Roblox clothing.
00:02Importance of Image Alignment
Explains a key technical detail: pixel coordinates must match the template to avoid shifting.
01:36Creating Transparency for Skin Color
Demonstrates how to make parts of clothing transparent to match the player's skin.
02:02Cost Saving Tip for In-Game Use
Advises not to upload to Roblox if only using in-game, saving 10 Robux.
03:33[00:02] if you create a really high-quality print, you can earn good money. In this video, I'll show you how to create your own clothes, test them, and need to download the layout on which we will actually draw our T-shirt. To do this,
[00:16] go to the Creator Hub, click Creations, select Avatar Items, click Classics, Upload Asset, and click Learn More. Scroll down here. We will have two images and two links here. It doesn't matter which link you
[00:28] click, because you'll only download one zip file. There will be two assets here: a pants asset and a T-shirt asset. But if you have problems with English and, for example, you don’t understand what is written here, I created two versions of this same T-shirt, only they are
[00:40] written here in full words what is responsible for what , and there is a version where just letters are written. And you can also understand what they are responsible for. But if you still here, and you can use it if necessary . Now we need to take
[00:54] add it to the program in which we will be editing this very image. I will I will explain why it is necessary to move the picture. And I'll explain how images on a T-shirt works. Imagine there is some kind of program, and it has a
[01:09] part of the torso, it has some coordinates. This will be the first pixel, and the some coordinates. And everything that fits into these front of the torso. Then, for example, the back is taken. She also has
[01:23] specific coordinates. They stand out. Everything that is taken under these coordinates, all these pixels, they will be put on the player’s back. And here it is important that save must be the same as the original. If, for example, your
[01:36] picture moves somewhere to the right, the pixels will not change, as it had some specific pixel coordinates. They will simply get out, picture will simply shift. Therefore, you need to make sure that the dimensions of the image are the same as the
[01:49] original. and so that the picture doesn't move to the side. parts. For example, you have a certain T -shirt and you want the tassels to be transparent. That is, their color was the same as the player's skin color. In
[02:02] select the part that should be transparent. Select and use now there shouldn't be any layer here. Basically, we can say that there is now a hole in the picture. And when we load the image into the game, this
[02:17] part will adjust to the player's skin color. Now you can start creating the T-shirt itself. So, I created the T-shirt . It's not clear at all what's when our T-shirt is equipped for the character, the most important parts are all these
[02:31] multi-colored ones. All these white parts, everything that is nearby, they are make a black T-shirt, I would take and put a huge rectangle like this here. And on the T-shirt it will be cut out specifically for the character, and the
[02:43] T-shirt will be black. Now we need to save the file. Be sure to save it in PNG format. If you have some transparent parts in your file, or if you don't, it's still better to use PNG. But if you don't have transparent parts, in
[02:55] some other file type. Now we need to process that everything is fine with Footblock . We need to go to Roblox Studio, save the game, create a character, and add what we created to him. If a T-shirt, then a T-shirt, if pants, then
[03:08] click Short Template. Click Add Image Choice File and select the file After we have added the file, we need to click create, and the T-shirt will be put on. As you can see, everything is fine with the T-shirt, just as I
[03:21] wanted. Although the file initially looked very strange and it was not clear that it was a T-shirt, but, as you can see, everything was put on correctly. Here's a tip: if you're only going to use the shirt in- game, for example, for an NPC, then you
[03:33] because uploading a shirt to Roblox costs 10 Robux. If you want to necessary to download it. But if you still want to add this T-shirt to your inventory or make it salable, you will still have to upload it to
[03:47] Roblox, we need to go to the Creator Hub again, click Creations, Avatar Items here Upload, Asset and upload our T-shirt. We have uploaded the T-shirt. Now we need to give it some name. I wrote, for example, K Rocket. Now you
[04:02] description to it, but this, in principle, is no longer necessary. For example, I'll write press the blue button and pay 10 Roblox if we have them. Press the blue button again. That's it, 10 Roblox coins are written off and the T-shirt is added to the
[04:17] Roblox rules, it will pass verification and be usable. has been uploaded and has passed moderation. Now I can go into Avatar, and my T-shirt will appear here, and I can put it on right away. If we want to sell this
[04:32] T-shirt, we have to click on it, click on the sell checkbox here and enter a price for it. The minimum price is five Robux. I indicated five Robux. And click on the pubish item. That's it, the T-shirt has appeared in the marketplace. And now I will show from the second
[04:44] appear. So I logged in from my second account, clicked on my profile, and . Here I clicked on the T -shirt, and it shows me how if I had five robux in this account , I could buy it. In
[04:58] liked the video, it was useful for you, you will like it Also, if you have any questions, you can leave them in I will be happy to answer them. And Pfizer was with you . Bye everyone.
[05:12] . Bye everyone. [music]
⚡ Saved you 0h 05m reading this? Transcribe any YouTube video for free — no signup needed.