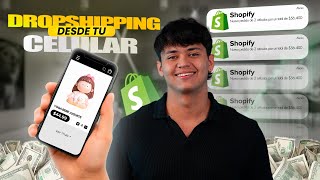

Dropship with Only Your Phone?
45sDirectly challenges common excuses and promises a mobile-only solution, sparking curiosity and engagement from aspiring entrepreneurs.
▶ Play Clip"The title accurately promises a mobile-only dropshipping setup, and the video delivers exactly that with a step-by-step guide."
This video demonstrates how to create a complete dropshipping store using only a smartphone, leveraging a custom AI-powered software called Killer Store. The process eliminates the need for design or programming skills, enabling users to set up a store in minutes.
The creator addresses common excuses like lack of design or programming skills and introduces a solution to build a dropshipping store using just a cell phone.
An AI developed over months enables store creation in minutes, directly from a mobile device, without prior experience.
Open Chrome, go to killerstore.co, and click 'create my store now' to start building a store with AI.
Fill in registration details, choose a store name, select target country (e.g., Colombia), and pick up to six product categories (e.g., bathroom, home, babies, pets, vehicles).
Choose a color theme for the store (e.g., blue, pink, red) and click next.
Click 'create Shopify store', enter email, name, password, and start a free trial. Skip card details and custom settings.
Copy the Shopify admin URL and paste it into Killer Store. Then follow steps to allow development, create an app, and configure API permissions.
Create an app in Shopify, copy permissions from Killer Store, and paste them into Shopify's admin API permissions section. Repeat for each permission.
After saving permissions, install the app, reveal the token, copy it, and paste into Killer Store to validate the connection.
Select a Shopify plan (3-day free trial, then $18.99/month). Enter card details and address to subscribe.
Start the test, verify human, and wait for premium membership validation. Then finish setup to begin product import.
Products are automatically created and uploaded to the store. Reload the page to see new products appearing.
Remove the password from the store to view the live site. The store is fully designed with product pages optimized for conversion.
The video shows that anyone can create a professional dropshipping store using only a smartphone and the Killer Store AI tool, with products and design handled automatically. The process takes about 5-10 minutes, and the store is ready to sell.
What is the name of the AI-powered software used to create a dropshipping store?
Killer Store
01:24
How many product categories can you select when setting up the store?
Up to six categories.
02:05
What is the first step after registering on Killer Store?
Choose a store name and select the target country.
01:51
What must you do after creating a Shopify account to connect it to Killer Store?
Copy the Shopify admin URL and paste it into Killer Store.
04:07
How do you obtain the API token from Shopify?
Install the app, then click 'reveal token once' and copy it.
07:04
What is the cost of the Shopify plan after the 3-day free trial?
$18.99 per month.
08:34
How long does the entire store creation process take according to the video?
Between 5 and 10 minutes.
09:16
AI Eliminates Design and Programming Barriers
Highlights the core value proposition: no skills needed, just a phone.
00:42Automatic Product Upload
Demonstrates the AI's capability to populate the store with products automatically.
09:31Store Optimized for Conversion
Emphasizes that the store is designed to maximize sales, not just look good.
10:09[00:01] even thousands of dollars doing dropshipping. And you still haven't done it, probably don't have a computer to do it. Well, today I'm going to get rid of all knowing how to design, not knowing how to program, all those kinds of
[00:16] excuses you make because I've just found the solution for how to create a completely dropshipping store, simply using this thing here, which is a cell phone. So this is literally going to be the
[00:30] shortest, easiest, and fastest video you'll ever see to get started, or just with your cell phone, you'll be able to do it after watching this video.
[00:42] last few months developing an artificial intelligence that will make this possible. Being able to create stores literally in minutes and extremely easy. And the best part is that you can do this directly with your
[00:56] program, without even having prior experience in the do it after watching this video, simply by using this cell phone. But today, to make it much more convenient for you to watch, I'm going to
[01:10] do it directly from this iPad, which is literally the same as a cell phone. So let's go. All we literally need is this Chrome, which everyone has. So let's open it and what we're going
[01:24] to copy here is Killer Store. Once we copy Killer Store, we're going to go killerstore.co. Let's click there and click on "create my store now," which is the software we've built
[01:38] to create online stores in 5 minutes using artificial intelligence. Then, we click on create. All we do here is fill in this information that I this information, we will simply click on register. We no longer
[01:51] register here. All we have to do is simply come here, enter case I will call Killers Shop, and we will select the country where For example, if I want to sell in Colombia, I select the country of
[02:05] Colombia, and so on with all the countries we have. Let's click six categories that we want. In this case, I want my bathroom, home, babies, pets, and vehicles. So, once
[02:19] click next. Here we select the store or theme of our store that we want. If we want a blue store, a store, pink store with red. So, we simply select one.
[02:33] In this case, I'm going to select the blue store. I'm going to click next. And as I know anything about programming or editing, or have any prior experience. Because we do everything ourselves directly with the software, using
[02:46] is select a banner. In this case, we'll place the first banner that appears and click next. The next step is simply to create our Shopify account. So, we're going to click on the little
[02:59] Shopify store" and once it loads here, we're going to put our email address, which in this case will be this one here. And once we have this, we're just going to click where it says free trial. Let's click on free trial. We're getting
[03:13] screwed here. Let's click on continue with email and here we'll fill out this form with name, surname and password and click on create a Shopify account. So, once we're here, it tells us to
[03:28] please start filling in the card details, but we're not going to click where it says skip. And we're going to do the same with this, because the software will do all the configuration for us.
[03:42] anything at all, so we click on skip custom settings. Once our Shopify store is created, what happens next? We don't even have any products, as you can see here. There
[03:55] are no products here, and if we don't go to the online store section , absolutely nothing from our store appears either. show you that nothing appears in our store. Look,
[04:07] absolutely nothing appears. So we're going back to the beginning, and it's very important that you pay attention here. We're going to go to the URL of this page, We're going to go to the URL of this page, which is admin.com/store/,
[04:19] and it's different for everyone. So we're going to click, copy it, and go back to the Killer Store software. Once we're on this page, this will have already changed, so we're going to paste the URL we just
[04:31] copied and click where it says save URL. The URL in the store click next. And here we have to do a few steps, about five super short steps, but I'm going to help you. We simply need to
[04:45] click on the blue button which is to go to the allow development, allow development and we will click on create create application. What we're going to
[05:00] That name doesn't matter, you can literally give it any name you want and click on create app. So, once we're already completed the first step. Okay, let's move on to the next one. We have already
[05:13] completed the second step, which was to create the application. And the third step is these permits. So, how can we select these permissions? Simply by clicking the little blue button there, we copy them. He's already gone
[05:25] . It's already been copied. Let's go back to this part of our Shopify and click on "config" in " config admin API permissions". We click there and here where it says filter access scopes, we are going to
[05:40] select or paste the permissions that we are going to copy. So, we already click to increase those permissions. Let's go back to Killer Store. We copy the second permission, select the previous permission,
[05:53] delete it, and click paste. And that's where the new permit is copied for us. We select the new permissions, we go back again, and so on with each of the permissions it asks for. We hit paste. We select the
[06:05] permissions. Let's go to the third one, I mean, the fourth one. We're going to paste it and here we select these four permissions that they ask for. Next we go to the publication one, I think. Oh no, the inventory one, which is the fourth one or I don't know, I don't even
[06:18] know where I am anymore. And we're simply going to follow the step-by- well, that's the one we had. The last one is missing, which is the one about publications. And we're going to click on paste. And we would already have them done in those publications
[06:34] . So, once we're here, we're going to click on "understood," and we'll move on to install the application and generate a token. So, that's what we're going to once we save this part here that appears in bold, which is the
[06:49] enabled we have to click on API credentials. We have already been enabled here. We're simply going to select the option to work the first time, so we have to click several times or click down here and
[07:04] then the application installation will open. We simply click on install and once it is installed, this on reveal token once and copy it by clicking on this
[07:17] little hand here. We go back to Killer Store, go to step five and paste our key there. Yes, we click on test connection and it says that the connection was successfully validated. So, we've literally got
[07:30] most of the steps for our store done. Let's click next. And what we literally need to do here is add a Shopify plan to our store. So, let's do it right now . Simply click
[07:42] on view plans and you will be taken to this section where you have to enter but it's a free trial, first 3 days. So what
[07:54] card details. I'll put them away and we'll be back. Once we have the data there, we'll click on subscribe and wait for the subscription to be we'll have to fill out a small address form, but it's
[08:08] literally very, very easy to skip. Ready? So the put an address, an address here. We're going to put Cali here. We're going to put Cali back in. We'll put the postal code here. Here's
[08:21] phone number 17. And we're going to click on confirm business address. And that's it, we literally have everything ready to create our store. So, the validate it. It says the plan was validated successfully and we click
[08:34] next. What we need to do here is start our completely after those 3 days it would cost you 18.99, but you can cancel that plan whenever you want. So we're going to re-enter the
[08:48] once we have this, we'll simply click on start our test. It's being processed here. Let's select that I am a human. It's being Let's wait a moment for this to start. And that's it. Once initiated, it will
[09:02] begin validating our premium membership, literally in order to this may take a few seconds. The premium account has already been created here. Let's move on to the next step. And here it gives us a detailed list of absolutely
[09:16] our store. So, we'll just click on finish setup and that's it. We would literally already have our store completely and this process may take between 5 and 10 minutes. So, if we
[09:31] current store and go to products, you'll see that products are literally being created automatically, which in this case didn't appear, but that's because I haven't reloaded the page.
[09:43] So, if I reload the page right now , you can already see that , you can already see that products are being uploaded automatically. No matter how many times I recharge,
[09:56] new and new and new products keep appearing. So they literally give us the products, they give us the designs, they give us absolutely everything so that we can literally just start selling in this dropshipping business model.
[10:09] So let's wait a second for everything to be set up. online store, and while all this is being uploaded, I'm going to remove the password from our store so I can show you how it looks or how it would look. Then I'll wait
[10:23] a moment, it's 1:20, 1:21. I'm going to wait and see how long it takes to load absolutely all of this. Literally one minute later, it's 1:22, going to show it to you automatically. Let's click on view
[10:37] automatically. Let's click on view and here's the store literally made into a product, we'll be able to see that it has its entire product page completely done, literally. The only thing left to do is literally create the form so
[10:53] on delivery. If you want to create the form, or the best how to set up the form in less than 4 minutes in the video that's appearing, or here, or in one of these two parts of the video, so
[11:07] lots and lots of sales because it's literally optimized for the conversion rate. So this is how our page would literally look: knowing how to design, without knowing how to program, without having literally any
[11:23] really hope you enjoyed this video. I hope you have truly learned something today. If so, like this video and share it start a dropshipping business, but says they don't have a
[11:36] computer or can't because they do n't know how to program or something similar. And do subscribe to this channel, follow me on Instagram, and I'll see you follow me on Instagram, and I'll see you next time. Ciao. Ciao.
⚡ Saved you 0h 11m reading this? Transcribe any YouTube video for free — no signup needed.