
Why Performance Testing Matters
45sExplains the critical difference between functional and non-functional testing in a clear, relatable way that resonates with developers.
▶ Play Clip"Delivers a solid, practical guide to k6 performance testing with clear examples, though it includes a sponsor plug and some filler."
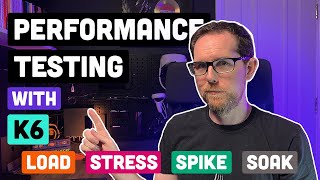
This video provides a comprehensive introduction to performance testing using the open-source tool k6. It covers the importance of non-functional testing, how to install k6, and demonstrates four key test types: load, stress, spike, and soak testing, using a simple API deployed on a Raspberry Pi as a practical example.
k6 is a simple, free tool for performance testing. Performance testing is a non-functional test that evaluates security, efficiency, reliability, and performance under real-world conditions.
The video covers load, stress, spike, and soak testing, explaining the purpose of each and why they are used.
Installation methods: on Mac via Homebrew (`brew install k6`), on Windows via Chocolatey (`choco install k6`), and on Linux via packages or Docker image.
k6 tests are written in JavaScript. A basic test imports the HTTP package and uses an export default block to make requests. Running it calls the API once and stops.
k6 uses virtual users to simulate parallel requests. Adding options like `vus` and `duration` allows controlling the load. Example: one user for 10 seconds made 525 requests.
A simple age calculator API is used for testing. It doesn't use a database, so it's CPU and memory bound. Code is available to Patreon subscribers.
Performance testing should be done against an environment close to production, but not production itself. The video uses an old Raspberry Pi 2 (900 MHz CPU, 1 GB RAM) to push limits.
Load tests simulate average load. For example, if typical traffic is 200 requests per second, set the test to that. Use stages to ramp up, sustain, and ramp down. Add a 1-second sleep to simulate one request per user per second.
To make tests realistic, vary test data. Use a shared array to store generated data (e.g., 100 random dates) and select random values for parameters.
Add thresholds to verify performance requirements, e.g., 99% of requests should complete within 100ms. Also check response status codes. Tests can be integrated into CI/CD pipelines.
Monitor application and server metrics (e.g., CPU, memory) using tools like htop, Grafana, or Datadog. In the load test, the Raspberry Pi averaged below 20% CPU.
Stress tests increase load beyond normal (e.g., 50-100% increase) to find breaking points. In the example, load increased from 200 to 1000 requests per second over 23 minutes. At 1000 rps, CPU was above 50%.
Spike tests simulate sudden traffic surges. Example: quickly ramp to 2000 requests per second, hold for 2 minutes, then drop. The Raspberry Pi struggled with high CPU and memory usage; 95th percentile response time exceeded 100ms.
Soak tests run for extended periods (typically 8 hours) to detect gradual issues like memory leaks or disk space exhaustion. Set virtual users to average load, but may increase to shorten test duration.
The video concludes by recommending the k6 documentation for more options and suggests a video on idempotency for building resilient software.
Performance testing with k6 is essential for ensuring applications meet performance requirements under various conditions. The video effectively demonstrates load, stress, spike, and soak tests, emphasizing the importance of realistic environments and monitoring.
What is k6?
k6 is a simple, free tool for performance testing.
00:01
What are the four types of performance tests covered?
Load, stress, spike, and soak tests.
00:41
How do you install k6 on a Mac?
Using Homebrew: brew install k6
00:55
What language are k6 tests written in?
JavaScript
01:22
What is the purpose of virtual users in k6?
Virtual users simulate the number of parallel requests sent to the API.
02:04
Why is it important to test against an environment close to production?
To get realistic performance results, as the application will run on production-like hardware and conditions.
03:12
What is the purpose of a load test?
To determine how the application responds under average expected load.
03:53
How do you simulate one request per user per second in k6?
Add a 1-second sleep (sleep(1)) in the test script.
04:06
What is the purpose of a stress test?
To find the breaking point of the application by increasing load beyond normal levels.
06:35
What is a spike test?
A test that simulates a sudden surge of traffic that quickly dies off.
07:42
What is the typical duration of a soak test?
Around 8 hours, but can be longer.
08:51
What is the purpose of a soak test?
To detect gradual issues like memory leaks or disk space exhaustion over extended periods.
08:36
Non-functional testing importance
Explains the difference between functional and non-functional tests, setting the stage for why performance testing matters.
00:41Realistic environment for testing
Emphasizes that performance tests should be run on production-like environments, not production itself, to avoid impacting users.
03:12Thresholds for performance requirements
Shows how to define measurable performance criteria (e.g., 99% under 100ms) and integrate them into CI/CD.
05:12Stress test reveals breaking point
Demonstrates how stress testing can reveal the maximum capacity of a system (Raspberry Pi handled 1000 rps with >50% CPU).
06:35Soak tests catch gradual issues
Highlights that short tests miss memory leaks and disk space issues that only appear over hours.
08:36[00:01] so in today's video we're going to have a look at performance testing using k6 testing before then k6 is a really simple free tool that you can use to do it now you might be wondering what is the point of performance testing and why
[00:14] do I need to bother with it you might already be writing unit and integration is working as designed these are both forms of functional tests as you are testing the functionality of your application however we also need to
[00:27] consider nonfunctional tests as well non-functional tests are for testing things like security efficiency reliability and performance so we're testing which will give us an idea of how application is likely to perform
[00:41] under various real world conditions in particular we're going to have a look at low testing stress testing spike testing and soak testing I'll cover what each of those are for and why we might want to do them as we go through the examples
[00:55] on our machines there are a number of ways to do this depending on what platform you're using if you're on a Mac like myself then you can use home brew and just do Brew install k6 or if you're on Windows and you have chocy installed
[01:09] you can also do choco install k6 and there are also packages available for Linux as well as the option of running it as a Docker image now for the example that you have k6 installed directly on your machine so k6 tests are all written
[01:22] in JavaScript and you don't need many lines of code at all to get started so let's start a new test first we need to import the HTTP package from k6 and then add in an export default block and inside we can basically add any
[01:36] JavaScript code we want here I'm doing a get call to an API running locally on my machine if I run this then it will call the API once and then stop which is itself but we can see here the details that we're going to get back when we run
[01:49] our tests in particular we can see how long the request took with HTTP request duration and how many requests per second it managed under HTTP requests to make this more useful we're going to add in some options k6 has the concept
[02:04] of virtual users this is the number of parallel requests that we're going to send to our API if we just add in one user with a duration of 10 seconds then this is going to call our API as many times as it can one call after another
[02:17] until the time runs out if I run this against the API running on my machine you can see here that in 10 seconds it managed 52523368 managed 52523368 [Music]
[02:32] demonstrate all of these different test types I've put together a very simple of birth and it'll calculate how old you are in years months days hours minutes and seconds this application doesn't read or write from a database so it
[02:46] should only be bound by CPU and memory limits as always all the code shown in this video is available to my patreon subscribers subscribers also get access as discounts to my courses when I
[02:59] support this channel then please check out my patreon page now the whole point of performance testing is to determine how your application is going to respond application isn't going to be running on
[03:12] so you really need to do your performance testing against an environment that's as close to production as possible now I wouldn't against production itself as you will see some of these tests will really push
[03:25] would likely cause problems for your users for this tutorial I'm not going to run my API on a production like system machine so we can see how it performs under load I have this old Raspberry Pi
[03:39] 2 that I have sitting around which has a 900 MHz CPU and 1 GB of RAM given this to really push it to its limits with these tests so the first test we're going to look at is a standard low test the purpose of a low test is really to
[03:53] determine how your application will respond under an average load if on a typical day your application gets let say 200 requests per second then that is what we're going to set your load test to at the moment our script is set up to
[04:06] run as one user with one call after another for this test we need multiple users with one call per user per second to do that we need to add in a 1 second sleep which is also included in the k6 package with load tests we want to
[04:19] slowly ramp up the number of requests to a target of 200 requests per second then we keep the test running for a decent amount of time say 20 minutes and then ramp it back down again we can do this by setting up stages in our options
[04:32] have currently and replace it with the stages that we want this is good but it's going to call our API with the same parameters over and over again I haven't got any caching set up in this API but generally it's a good practice to vary
[04:46] the test data so it's more realistic to a real life load with k6 you can set up a shared array that gives you a place to store all the data for your tests as my tests need dates as an input I can write a quick function that will generate me
[04:59] 100 dates within the last 100 years and add that to the shared array I then just need to select a random date from my array and pass that in as a parameter application is actually responding correctly there are various ways to do
[05:12] checking the status code of your responses which is what I'm doing here load tests are usually used to make sure that our application is meeting specific performance requirements you might have a requirement that says requests need to
[05:25] come back within say 100 milliseconds with k6 you can add in expected performance thresholds as part of the setup and it will test those for you for example here I'm adding in a requirement that 99% of requests should come back
[05:39] within 100 milliseconds you can then add this test as part of your cicd pipeline haven't affected the performance of your application so this test would normally take around 30 minutes to run however so I can actually show you the results I'm
[05:54] going to set the ramp up and down to 30 seconds and the main run to just 5 it's important to make sure you're monitoring your application and server to see how it's responding you don't want your server running out of memory
[06:07] or staying at 100% CPU for the entire time in my case I'm just using htop to see how my Raspberry Pi responds at different levels ideally you would have something like either grafana or data dog so we can see that my rasbery Pi is
[06:22] handling the load quite nicely with an average CPU usage below 20% once it's complete you will get an output that look something like this you can see here there is a tick next to 200 showing all of the requests were successful
[06:35] there's also another tick next to http request duration which is showing that it has passed the threshold that we set with a stress test we want to see how the application will handle an increased load you can pick a realistic number for
[06:47] this which might be a 50 to 100% increase in the number of requests number of request until your application breaks so you know what your system is capable of in this test I'm slowly
[06:59] the space of a minute keeping it stable for 5 minutes before ramping up the number of requests again this test will run for 23 minutes and the number of requests will increase from 200 up to 1,000 requests per second so you can see
[07:13] at 200 requests per second things are pretty stable with an average CPU under 20% at 800 requests per second the Raspberry Pi is starting to show a bit of strain with CPU staying around 45% and finally at 1,000 requests per
[07:28] second surprising the rasby p is still holding up with an average load just above 50% we would probably have to push this even further if we want to get it load of that amount might not be realistic for your application now we
[07:42] response times are a lot higher compared to what it was with the low test but it was still fairly respectable there may be occasions though where you get a sudden Spike of traffic that quickly dies off maybe your application gets on
[07:55] suddenly it has to deal with a very high load in a short space of time this is where spikee tests come in we have a very quick ramp up of traffic that lasts a short amount of time before quickly dying down in this example we're quickly
[08:09] increasing traffic to 2,000 requests per second holding it for 2 minutes and then quickly dropping back down again again you can see at 2,000 requests per second my poor old Raspberry Pi is struggling a bit with very high CPU usage the memory
[08:22] usage was also a lot higher than it was in any of the other tests that we looked at I didn't include the 100 millisecond threshold in this test but you can see failed as the 95th percentile reached 101 milliseconds in some cases running a
[08:36] low test for half an hour isn't going to be enough to gauge the stability of your excessive disc space usage happened gradually and you aren't likely to application for an extended period of time the soak test is similar to the low
[08:51] running it for a very long time typically around 8 hours but you can run it for a lot longer if you need to generally we set the number of virtual users to match the average load on your system but if you're trying to test for
[09:04] space then you may want to increase that amount so you don't have to run the test for so long you can also use soak tests to make sure that you don't lose any requests for example if your application has to restart or to check that there
[09:17] aren't any rate limits on third party apis that you're using the stages for a ramp up a traffic followed by the sustained load and then a very short ramp down don't worry I'm not going to make you watch an hourong soap test I
[09:30] testing has been useful make sure you check out the k6 documentation which is additional options on there that might be useful for you if you're looking to build resilient software then you might want to check out this video on item
[09:44] potency thank you for watching and I will hopefully see you in the next




⚡ Saved you 0h 09m reading this? Transcribe any YouTube video for free — no signup needed.