3 Tire Checks to Make Your Car Last
58sTire wear and pressure tips are highly shareable because most drivers ignore them and face costly repairs.
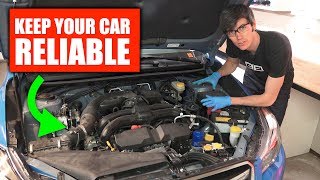
▶ Play ClipThis video, created in partnership with Progressive, provides a step-by-step guide to simple car checks that owners can perform at home every six months. It covers exterior inspections (tires, brakes, suspension) and under-the-hood checks (fluids, filters, wiper blades, lights) to maintain vehicle reliability and safety.
Check tread depth using wear bar indicators; if smooth across, replace tires. Maintain proper pressure (found on door jamb or manual) to avoid uneven wear and hydroplaning. Inspect wear patterns: center wear = overinflation, edge wear = underinflation, one-sided wear = alignment needed.
New pads have ~12mm material; replace at 3mm; urgent at 1-2mm. A screeching sound indicates the wear indicator is active.
Look for fluid leaks or physical damage on shock absorbers and springs. Turn steering wheel fully to each side for visibility without removing wheels.
Wipe dipstick, reinsert, then read level between two marks. Milky oil indicates coolant contamination. Check brake fluid, coolant, and windshield washer fluid levels against min/max lines.
Engine air filter usually accessible with clips; cabin air filter behind glove box. Inspect for debris and replace if dirty.
Ensure wiper blades have smooth, crack-free rubber. Check all lights (headlights, indicators, brake lights) using a friend, mirror, or phone recording.
"The title promises longevity tips, and the video delivers practical maintenance checks that directly contribute to a car's lifespan."
How do you know when tires need replacing using the wear bar indicators?
When the tread wear indicator is flush with the surrounding tread blocks, meaning the surface is smooth across.
00:44
Where can you find the recommended tire pressure for your car?
On the inside of the driver's door jamb or in the owner's manual.
01:11
What do different tire wear patterns indicate?
Center wear = overinflation; edge wear = underinflation; one-sided wear = misalignment.
01:26
What are the thickness thresholds for brake pad replacement?
About 12 mm for new pads; replace at 3 mm; urgent replacement at 1–2 mm.
01:58
What sound indicates brake pads have reached about 3 mm and need replacement?
A screeching sound from the brakes.
02:14
What should you look for when inspecting shock absorbers?
Fluid leaks, visual damage to the shock or springs.
02:27
How do you correctly check engine oil level?
Wipe the dipstick clean, reinsert it, pull it out again, and read the level between the two marks.
02:55
What does milky oil color indicate?
Milky or frothy appearance indicates coolant mixing with oil, which is a serious problem.
03:59
Where should brake fluid and coolant levels be?
Between the min and max lines on the reservoir.
04:30
Which two air filters should be inspected regularly?
Engine air filter and cabin air filter.
04:44
Where is the cabin air filter typically located?
Behind the glove box, usually without tools.
05:17
What condition should wiper blades be in?
Smooth, continuous rubber without cracks, still flexible.
05:49
How can you check brake lights without help?
Use a friend, a mirror, or record with a phone while pressing the brake pedal.
06:03
Tread wear indicator check
Simple tactile method to determine tire replacement need without tools.
00:44Brake pad thickness thresholds
Provides clear numerical guidelines (12mm new, 3mm replace) for a critical safety component.
01:58Correct oil dipstick procedure
Emphasizes wiping and reinserting for accurate reading, a common mistake to avoid.
02:55Milky oil indicates coolant leak
Early detection of a serious engine problem that can prevent catastrophic failure.
03:59Catch problems early to save money
Reinforces the value of proactive maintenance over reactive repairs.
06:18[00:00] Hello everyone and welcome. In this video I have teamed up with Progressive and we're going to be talking about simple checks that you can make on your car at home and I would recommend doing this at least every six months, if not more often than that. Certainly some of these items you will want to check
[00:15] more often than once every six months, but these are simple checks that you can do at home to make sure your car is in good running condition. So we're going to start with the exterior of the vehicle, looking at the tires, the brakes, the suspension, and then we will dive under the hood and start looking
[00:28] at filters as well as fluid checks. Now starting with the tires there's three things we want to be looking at, the tread depth, the tire pressure, and how the tire is wearing. Now starting with the tread depth on all tires you'll have these wear bar indicators. So you'll notice them within the grooves.
[00:44] And so what these indicators tell you, if you roll your finger across from one tread block over the next, over top of one of these tread wear indicators and it runs perfectly smooth across rather
[00:56] than falling down into the groove and then back up, if it runs perfectly smooth across then that means you need to replace your tires. Next it's important to make sure your tires are properly inflated. You'll find the tire pressure information on the inside of your door jam or within your owner's manual
[01:11] and you want to make sure that this tire pressure doesn't get too low because this can result in uneven wear, wear fuel economy, and increase your chances for hydroplaning. And finally we get to tread wear. So if you look at your tire and you notice that the center of the tire is wearing down more than
[01:26] the outside of the tire, then that probably indicates your tire pressure is too high. If the outsides are worn down but the center isn't as much, then your tire pressure is likely too low. And if you notice that one side of a tire is wearing far more than the other side, then it likely means you need
[01:42] your alignment re-adjusted. Next we're going to inspect the brakes. Now I've removed the wheel using the spare tire kit from the back of the vehicle, but oftentimes you won't actually have to remove the wheel. You can simply look through the holes in the wheel and look at your brake pads. So looking at a
[01:58] brake pad, a new brake pad will typically have around 12 millimeters of pad material remaining. And you want to start thinking about replacing it once that pad material gets down to about 3 millimeters. If you've only got one or two millimeters left of pad material, you want to replace those brake pads.
[02:14] Oftentimes when these brake pads get down to about 3 millimeters, they'll have a metal indicator in there and you'll start hearing a screeching sound from your brakes, letting you know that it's time to replace them. Moving on to the shock absorber. You want to make sure you don't see any fluids leaking
[02:27] out of the damper. You also want to look for any visual damage on the shock or on the springs and make sure everything looks like it's in good working condition. And again, you don't have to remove the wheels to do this. You can simply rotate your steering wheel all the way to one side, look in from that angle,
[02:42] rotate the steering wheel all the way to the other side and then look in from the other angle. Okay, now let's take a look underneath the hood. Now the first thing we're going to look at is the engine oil. So you're going to want to find the dipstick
[02:55] and pull it out. And as you pull it out, we're going to wipe down the entire thing using a towel. So we're going to clean it off that way. We can get a good reading once we insert it back in. So once we know that it's clean, stick it right back in and then we're going to pull that out and read it.
[03:13] And so looking at the dipstick, once it's pulled out after you've cleaned it off and then stuck it back in and then pulled it out once more, you will see that there are two little indicators. So there's a hole right there and there's another hole right here. And so you want your oil level to be somewhere
[03:27] between these two. And you can see that here it's right at the end, right at the high fill line. Now if it's right towards the bottom or if you don't see any oil, you might want to add about half a quart to the engine and then recheck the engine oil level using the dipstick and add as needed. You
[03:44] want to make sure though that it lies between these two indicators. Now as far as how frequent you should be changing the oil, refer to your owner's manual. And one thing you also may want to look for is if you see a milkiness in the oil's color, that can indicate that coolant is getting in within your
[03:59] engine oil. And so that's a big problem. You don't want to have that happening. So just make sure that it's either clear or starting to get darkish. That darkish color comes from the oil holding contaminants before you change it out. Now depending on your vehicle, you're going to have different fluids that
[04:15] you need to check. So for example, this vehicle has electronic power steering. So there's no power steering fluid to check. You do want to check the brake fluid. So you'll see a max and a minimum indicator line on the brake fluid reservoir. And so you want to make sure that the brake fluid is between those two lines.
[04:30] You'll see the same thing on your coolant reservoir. So somewhere near your radiator or coming from your radiator, you'll have an expansion tank for the radiator. And you'll see a min and a max line. You want to make sure that the coolant falls between the min and the max line. And of course top off your
[04:44] windshield washer fluid as needed. Next we move on to filters. And there are two filters which we're going to want to inspect, the first of which being the engine air filter. And oftentimes these actually don't require tools to gain access to. You can simply pull these out and inspect with just some clips
[05:03] which are used on this. And you can see there is a little bit of debris in there but overall it looks pretty good still very clean. You can shake out some of that debris and then put that back in or replace it with a new filter. The second filter we want to check is the cabin air filter. So you'll
[05:17] generally find this behind the glove box. And it usually won't require any tools to remove. Simply pop that out and inspect. So this one's looking okay. It's definitely got some debris in there. So I'll tap some of this out and perhaps consider replacing this fairly soon. There is a good amount of
[05:34] kind of dirt and debris stuck in there. And go ahead and slide that back in and then we'll place the glove box back in. It's also a good idea to check out your wiper blades. You want to make sure that it's a nice smooth continuous surface that doesn't have any cracks in it and that the rubber isn't starting
[05:49] to deteriorate you know it's still flexible so that it maintains good contact with your windshield. And finally you want to make sure that all of your lights are working properly. So your headlights, your indicators and then for your brake lights you can either have a friend check the brake lights
[06:03] for you while you press on the brake pedal or you can set up a mirror or perhaps use your phone and record them and make sure that all of your brake lights are working. So hopefully this has provided you with some useful information. Easy stuff to check over on your car but it can save you a headache
[06:18] in the long run and it could save you some money as well if you catch a problem early. So thank you all for watching and of course thank you to Progressive for partnering on this video.
⚡ Saved you 0h 06m reading this? Transcribe any YouTube video for free — no signup needed.