How Auto-Tune Saves Your Vocal in Seconds
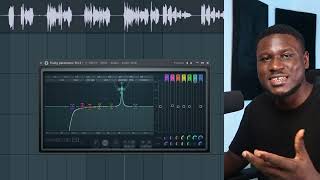
53sDramatic before/after comparison of pitch correction makes this a must-watch for beginner singers.
▶ Play Clip[00:00] hey there I want to show you how to
[00:01] quickly get a decent vocal mix for your
[00:03] song covers and your demo tracks even if
[00:05] you've never missed a song before this
[00:06] process is almost foolproof I will be
[00:08] using the stock plugins that comes with
[00:10] your Daw that is music making software
[00:12] in this case I'll be using FL Studio now
[00:15] it's important to follow this process
[00:16] I'll be showing you step by step so you
[00:18] can arrive at similar results okay so
[00:20] right here we have Beats and Vocal Track
[00:23] and first thing we'll do is we'll link
[00:26] both to the mixer so I can have
[00:28] individual control
[00:30] so in FL Studio just double click it and
[00:34] then come here Ctrl l or command LF is
[00:36] the mic in fuel studio just make sure
[00:38] it's linked to the mixer all right
[00:39] another link to the mix we're going to
[00:41] apply some effects and process into the
[00:43] lead vocal now the way you apply this
[00:45] effects is called a vocal chain okay
[00:47] that is where you add the different
[00:49] processing so the first thing we need is
[00:51] pitch correction most times for popular
[00:53] song genres you typically want a little
[00:55] bit of pitch correction in the artist
[00:57] vocal custom artists may not hit the
[01:00] notes perfectly all the time okay so we
[01:03] use auto tune to come to low mail and we
[01:05] will look for the key of the song now if
[01:08] you do not have auto key from Antares
[01:10] it's an easy way to find the key of any
[01:12] song We'll be using a website called
[01:14] tune bats so what this does is simply
[01:17] drag the song in here when you drag this
[01:20] one in here it tells you the tempo and
[01:22] the key but while interested in the key
[01:24] for now okay so I'll simply be dragging
[01:26] the beats
[01:28] and it analyzes it
[01:30] so C major okay
[01:33] and 102 BPM which is also shown in
[01:35] example because C major and a minor
[01:37] relative scales okay so we'll go with C
[01:40] major here C it's already in Key C okay
[01:44] now the return speed is how much of the
[01:47] tuning effect you want all right now the
[01:49] highest is the more of the auto tuned
[01:51] classic effects you hear okay and if you
[01:54] don't want to hear too much of the
[01:55] effect you can reduce it so that it's
[01:56] just snap the note correctly okay if you
[01:58] want to hear much of it but I think I'm
[02:00] going to have this at nine okay because
[02:01] the lower the number the more of the
[02:03] effects you hear and you had the number
[02:05] the less of the effects you hear all
[02:07] right so let's say I have this here for
[02:09] now I'll adjust this later if need be
[02:11] all right next thing I need to adjust
[02:13] the flex tune this Flex tune allows for
[02:16] more pitch deviation makes it sound a
[02:18] little bit more realistic okay less
[02:19] robotic as well I'm going to enhance
[02:21] this let's just increase it a little bit
[02:23] okay and most importantly the human eyes
[02:25] if you are singing or you're wrapping
[02:27] and you notice you hold notes like the
[02:29] notes things a lot of the time you want
[02:32] to adjust the human eyes as well so this
[02:34] will help prevent you from sounding like
[02:37] a robot when you're holding notes or
[02:39] trying to pitch high notes okay
[02:41] so I'm going to have this here so our
[02:43] listing and I'll make adjustments so I'm
[02:45] going to turn off the auto tune and see
[02:47] how it sounds without the auto tune
[02:50] [Music]
[02:52] for your signs and tricks so baby I mean
[02:55] it
[02:57] I'm scared to be left alone again baby I
[02:59] mean
[03:01] falling for your signs and tricks so
[03:03] baby I mean it yeah now I'm going to
[03:07] listen to you with auto tune
[03:09] turned on
[03:11] it
[03:13] [Music]
[03:17] I'm scared to be left alone again baby I
[03:21] mean
[03:22] [Music]
[03:25] it yeah you can see it sounds almost
[03:28] natural right but while I have a little
[03:30] bit of that auto-tune effect okay also
[03:33] we need to set our Tempo because we're
[03:34] going to be applying some effects later
[03:36] that require is to sync with the project
[03:39] sample okay so we're going to come down
[03:41] to 102 BPM which is the tempo of the
[03:44] track is written here and it's also
[03:46] shown on tunebat earlier so now I don't
[03:49] tune in to workout the next thing I'm
[03:50] going to do is use a compressor oil
[03:52] compressor does that keeps the vocal
[03:54] balanced it fix any inconsistency in
[03:56] your loudness level so like when it
[03:58] sounds more balanced and predictable on
[04:00] the beat you don't have a part where the
[04:02] vest or a part of the verse is so quiet
[04:04] then the next part is very loud you want
[04:06] it to sound a lot more consistent all
[04:08] right so
[04:10] going to and if you even look at let me
[04:12] make this bigger If You observe the
[04:14] audio file you can see some notes look
[04:15] small while some look big you can see
[04:17] this region right here
[04:18] you can see some notes right here looks
[04:20] more white some look big
[04:22] this looks small
[04:26] this looks this nose looks small white
[04:27] this look big so I want to fix that okay
[04:29] so that it sounds more consistent the
[04:32] loudness level so I'm going to come
[04:33] right here add a FL Studio stock
[04:35] compressor okay so now there are so many
[04:38] ways you can use the compressor to
[04:39] achieve this result I'm going to be
[04:41] sharing with you a typical preset I use
[04:44] for compressing vocals all right so the
[04:46] first thing I'd like to adjust my
[04:48] threshold to around -20 DB okay then I
[04:52] like to adjust my ratio to around 4.1
[04:57] somewhere around there 4.0 4.1 okay then
[05:00] I like to leave my attack at 10
[05:01] milliseconds so that attacks pretty fast
[05:04] it's not working pretty fast then I like
[05:06] to leave my release here so I quickly
[05:08] release the vocal as well okay so also
[05:12] if you notice that it's squashing your
[05:14] vocals too much you may need to relax
[05:17] the threshold okay but if you notice
[05:19] that there's still some inconsistency in
[05:20] the vocal then you need to
[05:23] um raise up the thresholders you need to
[05:25] bring it down to about minus 30 DB also
[05:28] okay so just basically adjust this if
[05:30] you notice that your vocal still has
[05:31] inconsistency issue okay what if it's
[05:34] something squashed relax it okay so now
[05:36] I'm going to listen to see how it sounds
[05:40] [Music]
[05:45] so I think I over squashed it so I'm
[05:48] going to maybe have it around minus 20.
[05:51] oh baby
[05:54] [Music]
[05:57] it sounds more consistent but if You
[05:59] observe there's a new problem now the
[06:01] vocal sounds like has been reducing the
[06:04] volume and this happened a lot of the
[06:05] times when you compress any element at
[06:07] all okay so that's why most compressors
[06:09] do have again compensation that you can
[06:12] use to adjust for changes in volume so I
[06:15] can simply increase it right here
[06:17] [Music]
[06:22] so baby I mean it
[06:26] was scared to be left alone again the
[06:28] behind me
[06:30] falling for your signs and tricks so
[06:33] baby I mean it yeah
[06:35] [Music]
[06:39] if I turn off the compressor here it
[06:41] sounds
[06:47] [Music]
[06:49] I see how inconsistent it sounds without
[06:51] the compressor when I turn it back on
[06:58] foreign
[06:59] [Music]
[07:09] so we're trying to fix that
[07:11] inconsistency and this is what a
[07:13] compressor does fix that problem easily
[07:16] okay so now that I don't compress we're
[07:18] going to use an equalizer to remove
[07:19] unwanted frequency from the vocal so the
[07:22] vocal sits better into the mix all right
[07:24] The Wanted frequency can be the modular
[07:26] end of the vocal nasal frequencies right
[07:29] and if your vocal does have harsh high
[07:32] end also need to take that out as well
[07:34] right and this is pretty easy to do so
[07:37] I'm going to come right here this low
[07:39] end Rumble right click come to type High
[07:42] Pass right click again order step eight
[07:45] and this will help sweep the
[07:48] um low end frequency okay now for most
[07:50] vocals depending on the mic you use and
[07:53] the style of or the type of artists work
[07:55] I recommend you stick within about 100
[07:57] to 150 heads when sweeping you don't
[08:00] want to take out too much body and
[08:02] information on the low end of the vocal
[08:04] okay so let's say I sweep this like um
[08:07] about 120 for now
[08:10] let's see about 120 somewhere around
[08:12] there okay I'll listen
[08:17] [Music]
[08:19] I think it's only a bit too tiny so I'll
[08:20] bring it back
[08:27] [Music]
[08:38] so just around 110 or 111 heads sounds
[08:42] great okay so you you typically adjust
[08:45] this depending on the style of workout
[08:46] you get custom artists do have more
[08:48] busier voice some have tiny voices right
[08:51] while some record too close to the mic
[08:54] some record with mics that have more
[08:55] presence so there's so many reasons why
[08:57] you want to you know adjust this to fit
[08:59] your own project so remember typically
[09:01] multiple cars within 100s 150 heads is
[09:03] where the cutoff should be when it has
[09:05] sound a little thin simply back off a
[09:08] little bit all right
[09:10] so next we'll do is take out nasal
[09:12] frequencies okay these are resonance
[09:13] frequencies around the mid range that's
[09:15] from the low mid to the high means okay
[09:17] so the easiest to hear it is typically
[09:20] starting from the high mids which is
[09:21] around this region right here so I'm
[09:23] going to do it so here on how to do that
[09:25] we simply use our Mouse wheel to pinch
[09:28] it up
[09:29] okay if maybe you don't have a mouse
[09:31] wheel on your mouse you can just come to
[09:32] the corresponding knob right here you
[09:35] see you can adjust
[09:37] so you simply reduce it okay so you can
[09:40] have this then we sweep across the we
[09:42] hear a sort of ring like it's talking
[09:45] through in snow something like something
[09:46] like that it's like it's still keep
[09:48] throwing nose Okay so take that out yeah
[09:54] [Music]
[10:02] [Music]
[10:04] figure out a place that sounds the most
[10:06] consistent okay so it may sound a little
[10:08] bit more in in particular frequency than
[10:10] in some okay so don't just test it for
[10:12] the first one here so sweep across and
[10:14] listing which frequency does it exactly
[10:16] sound the most consistent
[10:21] so we just take this down a little bit
[10:24] not too much please just a little bit
[10:26] okay
[10:27] maybe like um one to two or tops three
[10:30] DB down okay just a little bit
[10:34] so baby I mean it yeah I'll also do that
[10:38] right here
[10:41] [Music]
[10:53] let me try another frequency range
[10:55] so baby I mean
[10:58] [Music]
[11:04] you baby
[11:07] that's the point so take it down there
[11:09] as well
[11:12] come to this other one yeah
[11:20] [Music]
[11:26] [Music]
[11:28] so baby I mean it yeah
[11:31] yeah do that as well okay
[11:34] let's see this region
[11:37] so baby I mean
[11:42] it yeah
[11:45] yeah
[11:47] do that as well
[11:50] [Music]
[11:54] foreign
[11:55] all right so it sounds a lot cleaner now
[11:58] so energy worker is quite sharp so I'm
[12:00] going to take out a little bit of high
[12:02] end from the vocal okay because the mic
[12:04] I think the mic drops used to record
[12:05] this vocal was a bit too bright so I'm
[12:07] going to just dampen it a little bit
[12:11] now because when damping frequencies
[12:13] okay don't just do a huge cut like this
[12:15] okay it's usually just soft to cut about
[12:17] plus or minus one to three DB okay
[12:23] [Music]
[12:24] stuff like this please okay we don't
[12:27] want that kind of massive change just a
[12:29] little bit
[12:31] so baby
[12:36] baby
[12:38] [Music]
[12:49] so when I turn up the EQ the size sounds
[12:58] [Music]
[13:05] [Music]
[13:11] trust me may not sound like there's a
[13:13] lot going on right now but you've saved
[13:15] yourself a lot of problems further down
[13:17] the mixing chain okay by taking out
[13:19] unwanted frequencies that may build up
[13:21] later into causing problems so now it's
[13:24] time for us to use Reverb And Delay okay
[13:26] so when is the rear band delay we're
[13:28] going to create sense okay I'm saying
[13:30] this is really easy to do all right
[13:32] depending on yourself it may be
[13:33] different to your software but NFL is
[13:35] pretty easy and straightforward all you
[13:36] have to do is just come to your audio
[13:37] track that's your vocal your lead
[13:39] workout track okay then just simply send
[13:42] it so if you want to send it maybe to an
[13:44] empty insert 4 okay just click the
[13:46] button okay then you can rename it right
[13:49] click rename
[13:51] to give you a little bit more control
[13:54] than applying the Reverb directly on
[13:56] your lead vocal okay so I'm going to
[13:58] come here using FL Studio stock Reverb
[14:00] plugin and now please don't just start
[14:03] going crazy by adjusting the knobs
[14:05] that's an easy way for it to use by
[14:07] using a free Reverb calculator you can
[14:10] get online you can simply just search on
[14:11] Google
[14:12] um Reverb calculator
[14:16] and typically the first website to see
[14:18] is a free web calculator okay then you
[14:21] click that and then you simply insert
[14:23] your project Tempo which is 102 in our
[14:26] case and I recommend most times you
[14:28] stick to the large room and presets okay
[14:31] for most Parts all right so I'm going to
[14:33] use for the pre-delay 36.7 so if I press
[14:36] make it to the nearest um 10 to the
[14:38] nearest number which is 37 and then this
[14:41] is um
[14:44] 2316.18 milliseconds so most Decay times
[14:47] for some plugins is in seconds so
[14:49] dividing this by 1000 is about 2.3
[14:52] seconds okay so 37 milliseconds and 2.3
[14:57] seconds so simply come right here this
[14:59] is our pre-delay and we'll just adjust
[15:01] this if you look at the top left corner
[15:04] of FL Studio you see the number
[15:05] adjusting so making this 37
[15:09] so now if you can get the exact number
[15:11] you can pick the nearest number you can
[15:13] get your hands to okay and then we can
[15:15] then adjust the Decay to
[15:18] to I think was 2.3 so now we're going to
[15:20] increase the size once the reverbs are
[15:22] spread out
[15:23] okay further okay and then we're also
[15:26] going to reduce the dryer take out the
[15:27] dryer completely then increase the
[15:29] weight a little bit maybe it's like 60
[15:31] percent just a little bit all right and
[15:34] then take out the base we don't want
[15:36] bass we want to Bright Reverb so now
[15:38] when we play this High sounds
[15:42] in it yeah
[15:45] well it sounds too much how do you fix
[15:47] this pretty easy just come right here
[15:49] and adjust the amount you want if you
[15:51] want a lot to increase it if you want
[15:52] Little you reduce it so I'm going to
[15:54] reduce this accordingly so it sounds
[15:56] good to us
[15:59] [Music]
[16:04] [Music]
[16:18] so if I turn on the reverbs
[16:21] [Music]
[16:31] [Music]
[16:37] so next is the delay so we're going to
[16:40] also come right here don't understand
[16:42] again all right and then we're going to
[16:45] rename this to delay so when we do this
[16:49] we're going to add a delay plugin
[16:54] this is the stock delay plugin FL Studio
[16:56] all right so most times I recommend you
[16:59] stick to when you come to the time
[17:01] adjust it to four okay if you look at
[17:03] the top left corner of your screen you
[17:04] see it's at 4.0 okay but if your Tempo
[17:07] is like let's say 130 BPM and higher
[17:09] that's your tempo right here maybe you
[17:11] can consider eight or two you can try
[17:14] the other options out or try to avoid um
[17:17] thirds and sixth for the most times
[17:19] because the bounce will sound weird
[17:21] unless if it's a creative decision
[17:22] you're trying to make all right but if
[17:24] you're trying to just get a good mix
[17:25] typically two four and eight are good
[17:28] options to stick to all right so I'm
[17:31] going to stick to four in this case and
[17:33] then I'm going this is where if you want
[17:36] a lot of Bounce in the river for example
[17:37] if I
[17:39] um leave this
[17:44] you can hear a lot of bounds where if I
[17:46] reduce it
[17:50] is a lot less right so this is if you
[17:52] want a lot less Bounce from the delay
[17:54] this is what you use and if you want the
[17:57] loudness of the um delay to be quiet you
[18:01] can reduce it from the input volume
[18:06] [Music]
[18:08] you can see it's a lot more quiet now
[18:11] and if I increase it probably foreign
[18:24] but there's an issue it keeps running
[18:26] into the lead vocals okay so we're going
[18:30] to use a side chain
[18:31] which is easy trust me it's easy to do
[18:33] so we're going to just use the fruity
[18:35] limits are still a stock plug in FL
[18:37] Studio come to comp come to side chain
[18:40] you right click it and then you come to
[18:43] this right and just a few steps left
[18:46] just reduce this to the lowest you can
[18:48] adjust just a little bit just a little
[18:50] bit okay and then only place it sounds
[18:53] like this yeah
[18:57] [Music]
[19:00] oh
[19:02] so let me show you so you can really
[19:04] hear what's going on
[19:06] telephone tricks so baby I mean it
[19:14] was if I turn off this foreign
[19:23] okay this is running to each other boy
[19:26] is turned on falling for your signs and
[19:28] cheeks so baby I mean it yeah
[19:34] this is a lot more controlled okay so if
[19:38] I just turn everything back on
[19:40] cheeks so baby I mean it yeah
[19:46] [Music]
[20:06] so you can see now it's sounding good
[20:08] all across all right so now I'm going to
[20:10] show you how to Just Master Your Song
[20:11] okay so when we export it as wave we're
[20:14] going to just name the track um call it
[20:16] this
[20:23] so you want to export your track as wave
[20:25] okay please exports your mixes as wave
[20:28] all right wave 32-bit float all right
[20:30] make sure the master effect inside
[20:32] effects and this is also turned on all
[20:35] right animation is in Stereo a measure
[20:38] is in full song all right then click
[20:40] Start so we drag it back into the
[20:42] project all right we can turn this ones
[20:44] off now we can Master our track
[20:49] so simply link it to the mixer an empty
[20:52] insert okay and then you can rename it
[20:55] so you can easily know dizzy
[20:58] um
[20:59] mastering
[21:01] session okay
[21:03] then you can
[21:05] first of all have your lufs meter so you
[21:08] can know the current loudness level
[21:10] because the thing will match things that
[21:11] simple thing is all about making it
[21:12] louder but that's always the case Okay
[21:14] so listening to see who wants to be
[21:17] within about minus eight to minus 10 or
[21:19] ufs all right
[21:22] [Music]
[21:27] all right so it's around minus 11 at the
[21:30] moment all right so just simply bring
[21:31] this down bring the lfs method to the
[21:33] bottom of your slot by using your mouse
[21:35] wheel to drag it down all right or when
[21:38] you click the drop down you can simply
[21:40] um I think you're able to move it down
[21:41] yeah you can move it down like that if
[21:45] you have a
[21:46] um Mouse wheel so now use a fruity limb
[21:48] with fruity limiter to make it a bit
[21:51] louder okay increase the ceiling a
[21:52] little bit then increase the gain
[21:58] [Music]
[22:01] now if you can hear there's a little bit
[22:03] of distortion going on
[22:09] foreign
[22:13] [Music]
[22:21] and then come right here the presets
[22:24] right click it
[22:25] and then we'll come to 20 heads and 18
[22:28] heads cuts and then we'll sweep across
[22:30] about 20 25 30 35 heads okay just take
[22:34] out some and sometimes you can even go
[22:35] as high as 40 heads okay
[22:41] [Music]
[22:49] right so now what we should do is
[22:51] increase the ceiling some more
[22:55] then reduce the game
[23:00] [Music]
[23:02] so baby I mean it yeah
[23:07] [Music]
[23:22] so it's when you listen across you can
[23:24] surround minus eight to about minus ten
[23:26] earlier first at the moment which is
[23:28] fine okay well if you notice you know
[23:30] clipping or distortion on your track you
[23:32] simply need to take out maybe more bass
[23:34] or you simply reduce the gain on the
[23:37] limiter okay so now this is by no means
[23:39] a professional Master this is just a
[23:41] quick way to mix and Master Your Song
[23:44] your covers your demo tracks and get it
[23:46] out there okay you know you're making
[23:48] content on YouTube and tick tock on IG
[23:51] you want to high quality Productions
[23:53] without always needing to pay a producer
[23:56] and a mixing engineer this will surely
[23:58] help you in getting good results so we
[24:01] can now export our Master also because I
[24:04] assume you're going to use this as
[24:05] either for streaming or to edit with
[24:07] your videos so please also export as
[24:10] wave okay avoid MP3 when you're trying
[24:12] to put it on streaming platforms or
[24:14] exporting to edit your videos okay so
[24:17] also going to export this as wave make
[24:19] sure it's still in wave then we simply
[24:21] click Mass um start and it exports
[24:25] voila here we have it it fully mixed and
[24:28] master track easy to do so if you find
[24:30] this helpful please hit the like button
[24:32] so other people can find it and learn
[24:33] more I mean so classy this is essi Suits
[24:36] cheers
⚡ Saved you 0h 24m reading this? Transcribe any YouTube video for free — no signup needed.