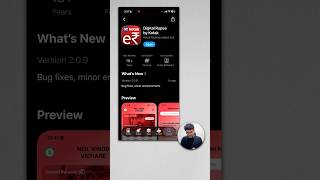

How to Find Your Bank's eRupee App
60sStep-by-step tutorial with clear visual instructions that viewers can follow along.
▶ Play ClipThis video provides a step-by-step tutorial on setting up the Digital eRupee app, a central bank digital currency (CBDC) wallet in India, and linking it to a bank account. The process involves downloading the app, verifying the SIM, setting up PINs, and linking a debit card. The tutorial is practical and aimed at users who want to use eRupee for transactions, including P2P crypto trading.
Open the App Store (iOS) or Google Play Store (Android), search for your bank's name (e.g., Kotak), then search for 'e-rupee' and tap Open.
After opening the app, tap 'Enter', then 'Accept' to acknowledge that digital e-rupee is legal tender. You can skip or start registration.
Select the SIM card (SIM 1 or SIM 2) that has the phone number linked to your bank account. Tap 'Verify SIM' and wait for the verification process to complete.
After verification, tap 'Continue'. Set up an app PIN for security (mobile PIN, pattern, fingerprint, or face lock). Enter and confirm the PIN.
Type your name and tap 'Continue'. Then set up a wallet PIN specifically for the digital e-rupee wallet. Enter and confirm the PIN.
Select your bank account (e.g., Kotak Mahindra) and tap 'Continue'. Enter the last six digits of your debit card and its expiry date to complete the linking.
After submitting the debit card details, tap 'Understand Security' and your digital e-rupee wallet is successfully created and linked to your bank account.
The video successfully demonstrates how to set up a Digital eRupee wallet and link it to a bank account, enabling users to use the CBDC for transactions. The process is straightforward and requires only a smartphone, a linked SIM, and debit card details.
[00:07] Store and if you have an iPhone then you have to open the App Store. After that go to search and type the name of the bank in which you have an account. For example, if my bank account is in Kotak, then I will type Kotak here. After that you have to
[00:21] type e-rupee here. E Rupi [sound of clearing throat] and search here. You simply have to click on Open on it. After opening the app, you will see an interface like this. You have to click on enter. Here you have to
[00:34] click on Accept. Digital e-rupee is legal tender. Ok? You have to click on Skip here or click on Start Registration and now you are being asked for this SIM card. The bank in which your account is maintained.
[00:48] One of your numbers must be linked to it, your phone number. So, you have to select which SIM card that phone number is in and which SIM card is inserted in your phone, SIM One or SIM Two. inserted in your phone, SIM One or SIM Two.
[01:03] click on Verify SIM. There is a procedure to send a message here. You already know it. Your loading takes some time and your verification process gets completed here. your verification process gets completed here.
[01:17] You have to click on Continue. Here you will be asked for your mobile PIN or pattern lock, fingerprint, face lock etc. Basically for the security of the app. You have to click on Setup App PIN and enter your PIN here.
[01:31] Now you have to enter your name here. After typing your name, you have to click on Continue here. Then click on Continue again. Now you will be asked for your wallet PIN here, which will be your PIN specifically for your digital e-
[01:45] I have to click on Continue. After that I have to create my PIN here. Safely. After entering the PIN, click on submit. You will have to enter the confirmation PIN again. Bean pin. Now click on submit here. There will be some loading. Your PIN has been created.
[01:59] You have to click on Continue. Here your Kotak Mahindra account is like my account is in Kotak Mahindra Bank. It will be
[02:11] I have to click on Continue and my bank account has come here. You have to select it and by clicking on Select this bank account here, you have to type the last six digits of your debit card here.
[02:26] So that your linking process gets completed. So let me type those six digits here. After typing, click on submit. You have to enter the expiry date of your debit card here.
[02:38] I have typed mine. After that you have to click on submit. There will be some loading and here you have to click on Understand Security. you have to click on Understand Security.
[02:50] your wallet has been successfully created here in digital e-rupee. It is created here in digital e-rupee. It is also linked to your bank account.




⚡ Saved you 0h 02m reading this? Transcribe any YouTube video for free — no signup needed.