

How I Made $10K in a Day Trading
30sHigh-earning claim and personal story create curiosity and aspiration, common triggers for engagement.
▶ Play Clip"Title accurately promises a complete learning path, and the video delivers with detailed steps, tools, and a live example."
This video provides a comprehensive, step-by-step guide to starting a day trading career, based on the creator's seven years of full-time experience. It covers core trading fundamentals, necessary tools, trading psychology, technical analysis, and a systematic approach to building and testing strategies.
The creator outlines a consolidated learning path covering core fundamentals, tools, psychology, technical analysis, and a live trade example.
Trading is simplified as understanding charts as visual representations of supply and demand imbalances, seeking equilibrium.
The goal is to enter positions with high probability of price moving in a favorable direction, risking a small amount to gain multiple times that risk.
Using the S&P 500 as an example, investing $100 yields $26 in a year, while day trading can yield $527 in a day by zooming into 1-minute charts.
Essential tools include TradingView for charting, a broker/exchange (e.g., Blofin, Bybit), and a trade journal for tracking performance.
Navigate to products > super chart, switch from line to candlestick chart, and select any trading pair (e.g., Solana/USD).
Red candles show price decrease (open > close), green candles show increase (open < close). Wicks indicate high and low.
Using multiple timeframes (e.g., 15-minute and 1-minute) provides double layers of confidence for entries.
Humans view being wrong as bad, but in trading, losses are part of the plan. A calculated loss is acceptable if the strategy is profitable.
Each trade has a fixed risk (1R) and target reward (e.g., 4R). Losses are expected and accounted for in a profitable system.
To risk $100, divide the risk amount by the difference between entry and stop-loss price to get the number of units.
You don't need a high win rate to be profitable. Example: 30% win rate with 4:1 risk-reward yields profit.
Don't tell non-traders about losses; they may discourage you. Trust the process and strategy.
Identify trend by drawing trendlines connecting lows (uptrend) or highs (downtrend). Trade in direction of trend.
An uptrend requires higher highs and higher lows. A break of structure (BOS) confirms the trend.
When price breaks a key low in an uptrend, it signals a potential reversal (change of character).
The 61.8% level (golden ratio) is a key area where price often retraces before continuing the trend.
An RSI-based indicator that highlights oversold (red) and overbought (green) areas to confirm trade entries.
A three-candle pattern where the middle candle's wick leaves a gap; price often returns to fill it before continuing.
Steps: 1) Observe chart for patterns, 2) Define exact rules, 3) Backtest using bar replay, 4) Evaluate results in a journal.
Steps: 1) Observe and ideate, 2) Paper trade with simulated capital, 3) Trade with small real capital, 4) Scale up.
Using Solana on Blofin: set entry, stop-loss, take profit, calculate position size with leverage to risk $100.
Day trading success comes from mastering psychology, technical analysis, and a systematic strategy. Start with backtesting and paper trading before risking real money.
What does a red candlestick indicate?
Price decreased: open price is higher than close price.
07:10
What is the golden ratio in Fibonacci retracement?
61.8% level.
23:11
What is a fair value gap (FVG)?
A three-candle sequence where the middle candle's wick leaves a gap between the first and third candle's wicks.
26:47
What is a change of character (CHoCH) in market structure?
When price breaks a key swing low in an uptrend or swing high in a downtrend, signaling a potential trend reversal.
20:35
How do you calculate position size to risk $100 if entry is $85 and stop-loss is $84?
Divide $100 by $1 (difference) = 100 units.
12:02
What is the purpose of using multiple timeframes in trading?
To get double layers of confidence: a zoomed-out perspective for the bigger picture and a zoomed-in view for precise entries.
08:26
What is the key psychological shift needed for trading success?
Viewing losses as part of the plan, not as failures; being wrong is acceptable if the strategy is profitable.
09:47
What is the formula for expected profit given a 30% win rate and 4:1 risk-reward?
Profit = (0.3 * 4R) - (0.7 * 1R) = 1.2R - 0.7R = 0.5R per trade.
13:11
What is a break of structure (BOS) in an uptrend?
Price makes a higher low and then breaks above the previous high, confirming the uptrend.
19:55
What is the first step in building a trading strategy?
Observe the chart for patterns and potential setups.
28:46
Mental Rewire for Losses
Explains the critical psychological shift needed: accepting losses as part of a profitable system.
09:47Win Rate vs Profitability
Demonstrates with math that a 30% win rate can be profitable with proper risk-reward, countering common misconceptions.
13:11Fibonacci Golden Ratio
Introduces the 61.8% retracement level as a key area for trade entries, based on natural patterns.
22:33Fair Value Gap Concept
Provides a specific candlestick pattern that often leads to price continuation, useful for entry precision.
26:47Systematic Strategy Building
Outlines a repeatable process: observe, define rules, backtest, evaluate – turning trading into a business.
28:46[00:01] exact learning path that I would follow to start my day trading career from the what I know now. Okay, I've been day trading full-time for about 7 years now. my foundations that give me opportunities to make three, five,
[00:16] sometimes $10,000 in single sessions, I wasted years of my 20s [music] and to spend. Had I have just had the information that I'm going to share with with core trading fundamentals to clear out any confusion and show you how to
[00:31] simplicity. Then I'm going to show you the tools you're going to need to get started. We're going to get into trading psychology, which requires pretty much an entire brain rewire that most people never realize. I'm going to go into
[00:43] [music] analysis crash course, and show you exactly how I analyze the markets, how to build and test your own systems to the foundational models that I use every day to place my trades. Then at the end,
[00:56] showed you. I'm going to show you me applying it in real [music] time. So, you can basically follow along and have a consolidated learning path to starting this video, I'm going to sort of just talk as if you're my friend and I'm
[01:09] about trading from my 9 years of doing this and 6 years of doing it full-time. zooming out and looking at trading in its simplest form. It's really easy to overload. There's a million different things online. Starting by understanding
[01:25] it in its simplest form is going to allow you to add when necessary but not what happens to most people who are starting out and most people in general. simplest form, we have to understand what we're looking at with the chart.
[01:38] When we're looking at a chart, what we're seeing is a visual representation there's periods where the chart is moving down and there's periods where looking at is basically a battle between buyers and sellers to determine what a
[01:51] fair price is. And all that we're seeing with these moves are supply and demand imbalances. So, in this example where price is moving down, that means that there was more supply than demand until this level was hit where the buyers
[02:04] stepped in and the demand started to outweigh the supply to drive the price up until a major period where the supply started to outweigh the demand again and allowing the price to fall back down to those levels. All we're doing is
[02:17] basically seeking equilibrium and this is a representation of what people are willing to buy and sell for in real time. Okay, what we're trying to achieve positions on this chart where we can enter in with say, for this example, one
[02:30] unit of something that costs $100. So, we're purchasing something that's $100, allowing that to increase over time, and then later sell it for a higher investing, in this example, that one unit $100, selling it for 110, and
[02:44] collecting 110 in profit. And the way we're going to do this is by figuring patterns, areas where we have a high probability of being able to enter in, keep our risk contained, and then later sell that where we're able to make five,
[02:58] six X what we're risking if we're wrong. So, in order to explain exactly how day trading works, I want to use a chart here of the S&P 500. Now, this is the overall stock market and what we're looking at is a full year's worth of its
[03:10] data. Okay, so say we took $100 and we wanted to buy in at this price and we allow one year to pass. Now, you can see this year was really good. Sometimes it's 10%, sometimes it's 30%, sometimes it's negative. But, this past year,
[03:22] that's 26%, meaning that our $100 that we invested after waiting one year is now going to be worth $126. That's great if we're dealing with a large amount of capital and it's great for investing. But, as far as daily opportunities, it's
[03:35] not going to give us that much upside. And technically, on this position, our implied risk is the S&P 500 going all risk is called risking off of liquidation and our risk is our entire
[03:48] position of $100 here. So, we're risking $100 for upside of $126. So, our risk is at $100. Now, like I said, that's great, but to make $26 in that's going to give us opportunities for daily income. Now, if we're looking
[04:03] at this same chart, but we zoom in instead of being on a weekly chart to a 1-minute chart, you'll see on an individual daily basis when the market be able to position ourselves. But now, instead of waiting an entire year to
[04:17] instead of waiting an entire year to make $26, we can put $100 worth of risk on to be able to have the potential, in this case, to make $527 of profit if we're able to pick areas where price is more likely to move up to
[04:30] level. But now, obviously, the question becomes figuring out these areas of opportunity. Okay, and as we zoom in on this process, the math becomes more and more important to be able to nail this properly. And obviously, we need to be
[04:43] place to be able to position ourselves to predict where the market is going to of these opportunities. Okay, but our jobs as traders is to be able to figure out these specific areas. And you can see, as an example, this is exactly what
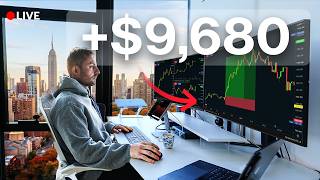
[04:57] see, I enter a position here. I position myself so that I have more upside and my risk is contained. You can see I'm up 5,000, nearly 6,000, and then price figure out these very specific areas.
[05:11] to you. I'm showing you that these are the opportunities at hand if we're able to master the skill and figure out how to execute this on a daily basis. And but it's about putting ourselves in the right positions to allow this to play
[05:24] out. But before we get into that, first we need to go over all of the tools and softwares that you're going to need to start this process. So, first thing that which is where we're going to be doing all of our charting and analysis. Okay,
[05:37] a broker or an exchange to actually be able to execute [music] these trades. either BlowFin here or Bybit. Okay, and for traders on the team that are trading Tradeify or Topstep to be able to get access to capital and be able to execute
[05:53] that we're going to need is a trade journal to be able to document and record all of our trading information to be able to see our results over time. you guys so you can follow along, but more on that later. Okay, so let's start
[06:05] the homepage here, you're going to want to go to products and then you're going to want to click here on super chart. What this is going to do is pull up a basic chart. Okay, before we're looking at this chart in a line graph, we click
[06:17] on candles and that's going to show us the same data, but just in candlestick helpful for us to be able to look at charts simply. Okay, when we're on TradingView, what this is allowing us to do is see this visual representation on
[06:31] any pair that we're looking to trade. Now, you can see if I click up into this basically anything that I want to look at. Okay, so say I want to look at Solana. What this is going to show me is basically the price of Solana compared
[06:44] to the US dollar. So, as Solana's value increases compared to the dollar, we'll increasing and when it decreases, we're also going to be able to see that visual representation of all of these instruments compared to the dollar or
[06:57] Okay, when we're looking at this chart, there's a lot of important information first, it's important to understand what we're actually looking at when we're Okay, so here's how we look at this data. Whenever we see a red candle,
[07:10] okay, this is showing us a few things. It's showing us the open price, the close price, and then the low and the high. Because price opened at this level and closed lower, this candle is going to be red. So, that's showing us a net
[07:22] decrease in movement with our highs and lows over that time frame. If we're looking at a green candle or a bullish candle, price opened here and closed higher, leaving us with a green candle and we still have our highs and lows
[07:35] being showed by these wicks right here. So, that's going to show us how price has moved over that period and we can study how this responds in order to dictate how we're going to place our trade. So, if you go up to TradingView,
[07:47] here where you can basically select any sort of time frame that you want to look at. So, on my chart right here, I have it so that each one of these candles is showing me 1 minute worth of price move. Okay, so if we look, this candle showed
[07:59] me the open and the close, considering it's a black candle, I have mine in candle, and then it's showing me the low and the high over that period. In the opposite direction, we see our open, our close, our high, and our low right here.
[08:13] Okay, so we can see, if we take 1 hour worth of data, right, I'll have 60 candles at a 1 minute time frame right here. Again, if we look at the 15-minute chart, you can see we have 1 2 3 4 candles at 15 is 60 total minutes, but
[08:26] now we're looking at 15-minute candles as opposed to 60 1-minute candles. Okay, can look at these simultaneously to be able to give us an advantage in the and the reason that this is important, and I'm going to go back to my live
[08:40] trade example here, is because we can find areas on a 15-minute chart that agree with our 1-minute chart to be able to give us double layers of confidence. really zoomed-out perspective and a really zoomed-in perspective to allow us
[08:54] to play into the bigger picture, but be very, very accurate on our entry, which profit. Okay, I was targeting this area on my 15 and this on my 1, which both use that to make 5 6x what I was risking. Okay, so basically, we can take
[09:09] all of these pairs and all of these time frames. Okay, and say I want to build a and trade all the time. We're going to go ahead and click on this button here plus button here, and we can add basically anything that we want to trade
[09:22] on a continued basis into a watch list by clicking on this plus button. And now we can organize this so we can always have access to be able to quickly go and look at what we want to trade for the day. Okay, but before we can get into
[09:34] actually taking trades and looking at analysis, we need to fully understand one of the most important parts that is usually glazed over by traders in the beginning, but without this, I promise you, it's going to be nearly impossible
[09:47] able to master this mental rewire that I'm going to explain to you right now, immediately better than like 90% of retail traders. Okay, so as human that is actually the exact opposite way that we need to act while we're trading
[10:02] in order to be successful. Okay, and this explains why 90% of people struggle to become traders. As humans, we're predisposed to thinking that being wrong correctional changes. Means that something is wrong. Okay, and typically,
[10:15] making us money, we view this as good. opposite way [music] that you need to think about it. Whenever we're entering a trade, say we're entering a trade right here, only one of two things is
[10:27] going to happen. Either price is going to continue to move through our unit of risk, giving us -1 unit of risk, or price is going to move in our direction, giving us +4 units of R. Okay, the reason that we put this automatic line
[10:41] right here to be able to exit a position if we are wrong is already coming to comfortable and confident to be able to take a calculated loss. The reason we're taking calculated losses as traders is because the market is somewhat random.
[10:55] that the market is going to move in our direction, it is pre-built into any successful trading plan to account for those losses. long as we're following a simple strategy that we know it works
[11:08] and we're executing on that strategy, we're accounting for those losses to be able to give us the opportunity to have these wins. So, any loss should be the reason this is so important is because all we're trying to do is boil
[11:21] trading down into basically two simple data points. Say for entering a trade here, we have one unit of risk at our stop loss, and what we're trying to do is make, in this case, 1 2 3 4 units of gain for one unit of risk. Assuming we
[11:37] likely to move in this direction before we're doing that is by positioning ourselves so we can calculate exactly how much we want to risk every single time we take a trade so that our risk is
[11:50] then going to allow everything to be very calculatable. So, if we're risking -1R, we can ensure this is going to be +4R. And say we want to risk $100. All
[12:02] entering at or the price that we want to buy at, say it's 85, subtract it by the stop-loss value, which say is 84. Okay, in this case, it's going to give us one. So, if we literally want to risk $100, we're taking the dollar amount we want
[12:16] to risk divided by $1, and that's going to give us the amount of units that we need to enter with in order to risk the same exact dollar amount. Okay, so let's Okay, so if we go back over to TradingView, say I wanted to buy in here
[12:29] at exactly 85. I want to set my risk. So, if price goes down to 84, I'm getting out. I can click and drag my take profit to be exactly four times double-click into this, I can literally input 100, and that's going to show me I
[12:42] need exact quantity of 100 units at this price to be able to buy in in at this price because if this moves down by $1 in price times 100 units, that's going to equal $100 worth of risk. So, this is extremely important because all we're
[12:57] trying to do in trading is figure out basically two key metrics. One, what versus losing? So, your winning percentage or your losing percentage, you're right versus when you're wrong. So, let's take this as an example. This
[13:11] where people constantly think that they need to be right in order to be good being right or wrong. In trading, you get paid to be profitable. You don't get paid to be right. And this is going to explain that exact scenario. So, let's
[13:25] take a scenario where we lose 70% of the trades that we take. Okay, so every time that we're entering in the market expecting for price to come up to this level before coming down to our stop-loss, 70% of the time we're wrong.
[13:38] "Oh, you're wrong, so that's inherently bad. That strategy doesn't work." Now, opposite way that you need to think. Okay, so let's take all of our losses and all of our wins. Okay, so over here we have 1 2 3 4 5 6 7 losses for a sum
[13:53] of -7R and an average loss of -1R. Once again, that's why it's so important to be able to calculate our position sizing that, all of these metrics that we're going over in order to make it
[14:07] calculatable based off of the winning percentage in the average risk-reward is start changing the amount that we're entering on trades with arbitrarily. So, this is going to give us a loss rate of 70%. Now, let's go over to our winners
[14:20] here. You can see, we have 1 2 3 winners. Say we have 5.2R on one winner, winners. Say we have 5.2R on one winner, 2.5R and 3.1 on the other. So, that's going to give us a sum total of 10.8R. Once again, when I'm talking about R,
[14:33] I'm talking about the risk we're putting on the table in the multiples of how much we're able to make in reward if we're right about the directional bias units, these are my negative risk units. This is going to give us a sum total of
[14:46] 10.8 positive risk factors. Our average amount of R on our winners in the winning percentage of 30. Okay, so if we take our 10.8 over 10 trades, subtract it by 7R, that's going to leave us with positive 3.8R.
[15:01] So, if we're risking $100 on the trade, that means that that's going to be 100 * that means that that's going to be 100 * our 3.8R and it's going to leave us up $380 in profit being wrong 70% of the time.
[15:13] One piece of advice that I will give to you is don't tell people when you start trading. Don't talk about it with people who don't understand trading cuz if you know, I lost money today. I lost few trades and I lost $200." They're going
[15:26] do differently? How can you improve for next time?" And the truth of the matter is, sometimes there is zero things to improve. Sometimes you just need to understand to trust that process. You need to trust that your strategy
[15:38] actually works, which makes it so that having a good, simple, profitable system is super important. We're going to get into that in a second. But, to also understand that losing money is not inherently bad. Being wrong is not bad.
[15:50] And if you make money on a trade by doing something really stupid, they can compromise you losing a bunch of money, but it ends up making you money. All habits. But, people in the outside world are going to tell you everything's
[16:02] money on a trade. Keep doing that. So, it's a literally the game I just showed you. It has nothing to do with how you feel about winning trades or anything to how you rewire your mind for trading. Okay, so now let's get into actually
[16:16] analyzing charts. And I'm going to show you exactly, very simply, how I start to find patterns and start to put ourselves in high-probability situations by to start really simple, and then I'm going to continue to go advanced. So,
[16:29] sense to you even if you're a beginner, but we are going to go into some more advanced topics. And I'm going to show you how I'm actually able to pick these can set my risk at a fixed amount, but
[16:42] Say I'm starting on a 5-minute chart. And all we're looking at is our want to do is understand something called market structure. And the first element of understanding market structure is simply to look at trend
[16:55] levels. Okay, so what a trend is is basically when price is generally moving that's up or down. Okay, and there's a few unique identifying factors that we can use to determine whether the price is generally moving up or down. And if
[17:08] moving up, we tend to want to take trades in that direction. And if price is generally moving down, we don't want to fight that trend, and we want to go can do is click on this tool right here. Immediately, I can start identifying
[17:22] high points and low points of price that is generally moving in an up direction. You'll see price is generally moving down here and up over here. Okay, and I line tool here. And all I'm doing is clicking off of this lowest point here
[17:35] up direction. Okay, and all I want to do is draw a line here that comes in contact with as many of these low levels as I possibly can get. can right click on this and click on clone and then move this one up to that high period and see
[17:49] where the top part of my range is. Okay, this is basically showing me now the And it's going to give me a lot of information the further that we analyze to understand about these trend levels is it basically what it's showing us is
[18:03] these visual levels of where these supply and demand levels are. Price is pushing down to this area, pushing up, coming down to this area where the demand continues to outweigh the supply. Where the buyers continually start to
[18:16] outweigh the sellers. Okay, so here buyers win, here sellers start to win, here the buyers are holding this key level. Okay, supply starts to outweigh demand here. Price comes back down to test this level again, attempts to push
[18:30] comes back down to test it again, and that value. These trend areas are going to show us a few things. First off, if we can figure out where price has responded off of before, we can start to
[18:43] anticipate and build positions off of these low levels. Okay, so that even if lower through that level, we're still putting ourselves in a position where if we are right and demand continues to outweigh supply where it has before, we
[18:57] the way up to the top of the range and potentially make eight times what we're additionally, if price is generally trending up right here, and then all of a sudden price drops below these levels, whenever price comes up to contact that
[19:12] on the opposite side is usually a high impact area for a high probability of price to come up contact that level and then continue moving down in an opposite again if we could position ourselves up here, this is the last point that price
[19:27] went before making a continuation all the way in the opposite direction. So get in mid-trend and start to position ourselves in higher conviction areas to go in our direction. Okay, so I'm going to go a step deeper now into analyzing
[19:41] the way price moves in trend. So in order to establish an uptrend, we need downtrend was. Okay, so whenever we're looking at trends, here is really what we want to focus on. If price is generally moving say in a direction like
[19:55] that uptrend. We have a few unique identifiers which is going to show us how this market is structured. Okay, in order for us to technically have an uptrend, we need to have a push up, a low, a higher high, and a higher low,
[20:08] and then we need something called of structure. Now whenever I say break of structure, that means that price has made a secondary low and pushed up over that secondary high and that's confirming that we have a higher high,
[20:20] higher low, higher high, higher low. That's confirming an uptrend. Now say price now makes a move down to this low level again, but instead of continuing pushes through this level. I'm going to take the last confirmed higher low with
[20:35] is going to be something called a change of character. Now the change of character is showing us that we're no longer holding this level and no longer breaking to fresh highs with new breaks of structure and this is our first sign
[20:49] of weakness saying that we could potentially be at the very beginning of a new trend that is now broken below these levels, can come up and then continue to do the same thing in the opposite direction. Now creating bearish
[21:01] Okay, and this becomes very important because this is going to allow us to look at charts relatively quickly and understand whether we're in an uptrend us to time entries a lot better. So, let's take an example here. If I'm
[21:14] looking at this chart, I'm seeing that price is generally moving down. You can see before price was moving up here, but instead of breaking over that new high, new high and started to close, but then broke below this level. That's
[21:26] confirming a change of character. We get a push down, push up. That's a break of break of structure to the downside. Now, we get a push down, a push up, a final low here. So, that's my bearish break of structure until we get this move right
[21:40] here, which you can see closed above this previous swing point before our low. And what this is telling me, if we get a candle close here, is this is the exact point where we're getting our change of character. Okay, so like I
[21:52] potential area where the trend could be showing indications of reversals, which tells us this level could be the last push if we are going to make a move in the opposite direction or have a bullish uptrend that this low level is important
[22:07] beginning of a new uptrend. Now, as price starts to trade back into this area, it becomes very obvious to us that it's either price is going to break below this level or we're going to establish a brand new uptrend. Okay, in
[22:21] which case we can start to set ourselves up to be able to risk underneath that in the new direction, we can make four times what we're risking. I'm going to go a little bit deeper now. That's generally how I'm reading the visuals in
[22:33] want to talk about is something called the Fibonacci sequence. Okay, and the Fibonacci sequence is a ratio that is naturally occurring. We can see it in seashells, trees, nature, facial symmetry. This is basically how the
[22:46] universe is coded and we can actually see this showing up in tendencies in mass human psychology. People tend to do it, institutions, the way price tends to move tends to follow this key ratio. So, this is exactly how it works. So, say we
[22:59] have a point where price is moving up like this. What we want to do is we want to go over to this tool right here and click on Fibonacci retracement and then we're going to click on the beginning of our trend and put this up to the highest
[23:11] entire range. Now, you're going to see these numerical values here. We're going these numerical values here. We're going to see 78.6, 61.8, 50 level, 38.2, 23.6. attention on is this green level right here. That's going to be the 61.8. This
[23:27] is considered the golden ratio. Now, typically what will happen is if price is going to continue to move in a direction, if it pulls down and comes in probability, if there's going to be a continuation, the price is going to come
[23:40] back down to this area, complete a full retracement and then continue moving in that direction. So, let's go back over to our chart here and take an example change of character over this level. So, let's take our Fibonacci tool, go from
[23:54] this low to the high that is produced and you'll see that's exactly where price pulls at its lowest level, also coming in line with this area that wasn't broken before. So, the demand was outweighing the supply here. So, if we
[24:07] wanted to say we want to position right here, now this can allow us to be even more precise on how we're positioning ourselves because we're seeing the price is coming in contact with this low level. Let's take a look at this working
[24:19] again. So, let's say we wanted to trade in the opposite direction, okay? So, we break of structures up here and then a push and then we notice price fails to break over this level. Okay, as price trades back down to this level that was
[24:33] previously contacted, you see this is where we get an aggressive push below and a push down. So, if we take our fib from this swing point down to this exact point over here, you'll see this is the exact point that price came back up to
[24:47] into that golden ratio again from this entire range, also into the opposite side of where the buyers used to be beating the sellers or the demand was outweighing the supply broke below it and now the supply here outweigh the
[25:01] demand right at that 61.8 area again allowing us to more precisely be able to enter and play to the downside. Okay, so this fib you can see examples of this literally happening everywhere. What I like to keep in mind while I'm using my
[25:14] fib and to find areas where it's going to be very impactful to use them. What I want to see is if the price leading into that direction on that range is responding off of these key levels. If price is responding on its way up,
[25:27] is going to respond on the way down and If we're disrespecting it on the front end, I don't really expect it to be able to respond to it on the opposite side. But if it's working in harmony with
[25:40] areas that we can match up with other pieces of analysis to be able to assist us in finding good areas to trade. Okay, the next piece of technical analysis using something called the Inevitable Pro Plus. Now this is an indicator that
[25:54] we built uses something called a cloud highlight RSI. Now an RSI stands for relative strength index and you can see on this indicator when price is in these big drawdowns, we start to see red highlights. Okay, when price is
[26:08] territories, this is where we're going to start to see these green highlights. So you can see we had a green highlight at the very peak of this price action. magical indicator, but what it does do is allows me to check to see where we
[26:21] generally are with price and if we are, like we can see right here, in a generally oversold area to get a little bit of a boost in the opposite direction. You can see as price is at its low here, we're highlighting it red
[26:33] and anytime it's relatively overvalued, it's going to be highlighted in green. evidence to be able to put me in generally good areas. If you want access that I use, okay, that and a bunch of other resources are in the description.
[26:47] look at with my chart is something called a fair value gap. What a fair value gap is is a sequence of three candles where the high wick of the first wick of the third candle. And what it does is leaves behind an area here,
[27:01] which we're going to call a fair value gap. All right, in this case, this is a three bullish candles here and we'll notice this is typically where price will pull back into before continuing to make an expansive move the upside. Same
[27:14] have one, two, three candles moving generally down, if we take the first wick and the third wick, this is where price tends to move up into into the midpoint or the 50% of this move before continuing to move in the opposite
[27:27] direction. Okay, so if we go back to our example from before, there's lots of gaps in this price action, but we're not exactly sure which gaps we need to be can see there's a gap here if it aligns with my other general analysis. So, take
[27:41] this as an example, we have our change of character level here, we have our trend break here, we have a change of character where we're closing lower than this previous level. We also notice that price significantly pushes through this
[27:54] area and leaves behind a gap right here. Okay, we have a smaller gap, which if we zoom in right here, was produced and you'll see that was the last area before price took a massive sell-off. We take this gap from this three candle sequence
[28:07] through that level, price came up to this midpoint, aligned perfectly with the 61.8 level and on the opposite side of this trend level, and this was the last area that it pushed before making a substantial move to the downside. Okay,
[28:21] I'm using to be able to put into data-tested strategies to be able to take what seems to be completely random data and random information and we can start to very quickly filter out all of
[28:33] the noise and put ourselves into high-probability situations to be able contained and allow our wins to be open-ended. Okay, but in order to do this, we need to build an exact strategy and then and able to test it to
[28:46] effectively build a trading strategy and build trading into a trading model. into now. Here's exactly how I've been able to build my trading into a business model and exactly how you can start and build an actual game plan for yourself
[28:59] to test it to have proof of concept instead of just jumping into the markets what most people make a mistake on. Okay, so the first thing that we're concept and how we're going to do this
[29:11] is by literally just looking at the chart and looking for observations of we go back to our example over here, we can basically conclude that if we get a change of character, a push down, price coming back into a trend level, into our
[29:25] 61.8 level, and into a fair value gap, this has a high probability for us to be able to set our risk up and get five times what we're risking. Okay, and I'm technical analysis. I have an amazing video going over not only TradingView,
[29:39] but also how to do a bunch of different technical analysis. I'm going to link dive in a little bit deeper. So, the first step is literally just to observe the second thing that we're going to do is actually define exact rules that
[29:53] we're going to follow. So, observation is the creativity phase. The second thing is defining rules, 1 2 3 4 etc. rules that we're actually only going to enter the market if these things line up. Now, it's very important to start
[30:06] that you add into this, the more difficult it's going to be to collect the data and observe it and then to be able to determine what is actually trades. Okay, and what this is going to allow us to do is basically pull up our
[30:20] trade journal on the right side, and go through scenarios in the market that fit our criteria. Okay, so on TradingView, you can go to this top part right here, click on this bar replay button, click on this menu and select bar, and you can
[30:33] literally click and drag and rewind the price and then use this play button to play the bars forward to be able to make decisions of what you would do in real time. Okay, so as the market is developing. So in our situation, if
[30:45] character, waiting for a fib level in our fair value gap. Okay, here we're immediately set up my Fibonacci level, add in my fair value gap level, and then set up my take profit value, play it forward to see how the trade plays out,
[30:59] and then basically I can input the exact date. Okay, so this was the 14th day of strategy that I'm testing, you can add your own, the time frame that you're trading on, whether it was a long or a short position, whether it was a win or
[31:12] a loss. In this case was a win, and the P&L that you would have made on this our risk at a 100. So, if I set up my position so that I'm risking a $100, this trade would be $500 in profit. Okay, so say we play this forward. Okay,
[31:26] I wait for my next change of character level. I have my fair value gap here and my 61.8 and my golden ratio level. So, I set up my position, can put in my next trade here. Okay, and say we have a loss in here as well. So, say we lose $125.
[31:39] percentage here, as well as all the money we've made over a certain amount of testing. We can click into this sum value here, click on more options in average profit. If I can click on this
[31:52] And so, that way when we go into averages, it's going to show me how much money I'm making on my average winning trades. If I want to uncheck this, it's going to show me my total average of all of my trades, whether it's a win or a
[32:04] loss. And this is going to allow you to get your winning percentage and your average risk reward. Okay, so we've identified a strategy with observation, we've set up rules and defined them, and then we've evaluated the outcome and
[32:16] our average win and loss size. Okay, and is basically make it so that we're on the green side of this table. So, in that case [music] of our strategy, our
[32:28] average position size was 5 to 1. Technically, we had a 100% win rate, but all we would have to do is be able to find situations where two out of 10 times we're able to find that exact scenario and that's going to put us into
[32:42] a profitable state. If we can get even better at it and we can do it 30% of the time by improving our analysis, that is going to put us at a highly profitable state and that's going to allow us to move to the next stage. But anyone
[32:54] starting off with trading who's not doing this process first and is jumping their time. You want to have the proof of concept first. Trading is the only and be able to have full proof of concept without putting any money into
[33:08] the process. Here is the next steps to the point of trading with a live account. So first thing that you want to do is observe on chart to find the idea. Okay, we replayed it and put all of the
[33:20] you're ideating, you don't need to replay, you just want to look for stuff, indicators and processes that you're adding to your chart and see if that's going to give you a positive outcome over time. I would say 30 to 40 trades
[33:34] over a few months is going to give you a pretty good idea of how you can expect long term. Next thing that you're going to do is go in and actually paper trade this strategy by executing it with simulated capital on a real exchange.
[33:48] Okay, so keep in mind this process is going to be diminishing over time. Meaning that each time you go through one of these stages, the profitability is going to continue to drop, but the goal is to be able to start with such a
[34:00] through actually executing it and then bringing it to a live account, you're still well in the profitable stage to be able to trade and deploy this with real trade that we would be taking as an example. So we have a break, a change of
[34:14] character, our fair value gap, we set up our Fibonacci level. Okay, price is actually execute this trade. Okay, so if this is on Solana, I'm going to click into my pair here on BlowFin, click on Solana USDT, right? So that's Solana
[34:28] We're to click on this button right here, click on where we want our entry, want our take profit. Okay, I'm going to double click into this and click on $100 worth of risk. That's going to give me 344 units that I need to enter it. So,
[34:44] I'm going to go in, add the entry price, which you can see is 9158, and I'm going to type in 344 units. And you're going to see underneath here, we have a cost. Technically, this position is going to cost $31,500.
[34:56] Now, unless you have $31,000 in your account to risk $100 on a trade, this if we go up to this button right here, you'll see we can actually adjust the amount of leverage. Now, if I go up to 100, click on that 100, that is dividing
[35:10] the actual capital requirement of the position by 10, which is now requiring only 3150. If I go up to say something like 50, now the cost of this position is only $630. So, I can go in, click on my take
[35:23] So, I can go in, click on my take profit, 9031, 9187, and you'll see I'm inputting these exact values, and that's going to give me $100 almost exactly of risk and the probable [music] outcome of this trade being that $500
[35:35] amount. Then, considering we want price to go down, I would click on the short be able to capitalize on this trade, play it to the downside, and then all trade journal. Okay, and I'm only scratching the surface of what we can do
[35:49] with trading strategies and common TA. While keeping it fair to the private into every single thing that I'm doing day-to-day while I'm trading, but I and show you things that you can start using to get a base level of
[36:03] and start off your trading. But, you can see as an example of a trade that I was taking, I'm finding the trend that we're currently playing into. I'm looking at that I started sharing with you guys. I added this proprietary indicator here on
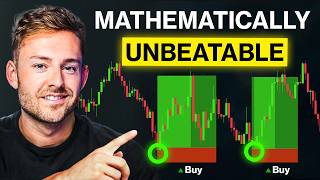
[36:17] my chart, which is indicating a buy level, so that's exactly where I bought here, and then I was able to trail this up for for much the entire session. here. I've already locked in 3,000, and then I close out my entire position.
[36:31] able to find multiple opportunities to do this during the day. Follow the and then be able to add capital to it make this video to show you exactly how I wish I started to hopefully be able to
[36:45] an opportunity to join a team if you want to take it to the next level. You right here. Make sure you hit the like button and subscribe to the channel if Resources are all in the description, but until next time, guys, I will see
[36:58] but until next time, guys, I will see you all in the next video.
![How To Start Day Trading As A Beginner In 2025 [Full Tutorial]](https://img.youtube.com/vi/xHU5MHuUSKI/mqdefault.jpg)

⚡ Saved you 0h 37m reading this? Transcribe any YouTube video for free — no signup needed.