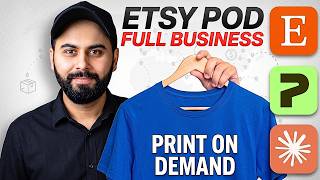

Launch an Etsy Print-on-Demand Business in 1 Hour
60sThe promise of launching a full side business in just one hour is an irresistible hook for aspiring entrepreneurs.
▶ Play Clip"Delivers exactly what the title promises—a real AI-driven POD setup—but padding with subscription plugs keeps it from being exceptional."
The presenter demonstrates a one-hour workflow for launching a print-on-demand T-shirt business on Etsy using Claude AI, a custom 'POD Collection Launcher' skill, and Higgsfield's image-generation MCP. The video walks through connecting MCP, generating designs and model mockups, cleaning up images in Canva, and publishing products via Printify.
You can launch a print-on-demand business on Etsy in literally 1 hour, with no machinery or inventory required.
Platforms like Printify print your design on a T-shirt and send it to the customer automatically when an order comes in from Etsy or Shopify.
What used to take 2–3 months to set up can now be done in about 1 hour by using AI tools and a custom skill.
A one-day unlimited free trial for the Higgsfield MCP is available from a link in the description; a Meezan Bank card worked for registration.
Click the plus icon in Claude, choose Add Custom Connector, then for remote MCP select MCP & CLI and paste the Higgsfield MCP link.
Go to Skills > Manage Skills > Upload Skill and upload the custom 'POD Collection Launcher' skill so it appears in the Claude interface.
Type backslash (/) in Claude, select the POD Collection Launcher skill, and press enter to start the automated design workflow.
The skill researches profitable ideas, generates props and designs, selects color palettes, and creates 8 product images by default (can be changed to 16 or 20).
Images are generated on white backgrounds so they can be easily background-removed in Canva and uploaded to a print-on-demand platform.
Upload the design in Canva, use the background remover, stretch the design, then download with a transparent background for print-on-demand.
Upload the transparent PNG to Printify, select product variants and colors, preview mockups, and save the product.
Publishing from Printify gives the option to connect the listing to Etsy and Shopify; after connecting, all products sync automatically.
Create a store on Etsy, create products on Printify, connect them, and your whole collection goes live; AI-generated model images can be used in listings.
With no inventory or machinery, AI tools like Claude and Higgsfield, plus Printify's fulfillment, let a single person launch a complete Etsy POD collection in about an hour—the key is automating design and listing generation and letting the platform handle production.
What is the main promise of the video's POD business workflow?
You can launch a complete print-on-demand Etsy business in about 1 hour using AI tools.
00:01
What does Printify do in the POD business?
It prints your design on a T-shirt and sends it to the customer automatically when an order comes in.
00:28
How do you connect the Higgsfield AI MCP in Claude?
Click the plus icon, choose Add Custom Connector, select MCP & CLI, paste the Higgsfield MCP link, and click Add.
03:51
What is the name of the custom skill used to generate a POD collection?
POD Collection Launcher.
05:12
How many product images does the skill generate by default, and how can you change it?
8 images by default; you can request 16 or 20 products in the prompt.
05:54
Why are designs generated on a white background?
So the background can be easily removed when uploading to a print-on-demand platform.
08:09
What tool is used to remove the background and make the PNG transparent?
Canva — upload the image, use the background remover, and download with transparent background.
10:13
What two store platforms can you connect Printify products to?
Etsy and Shopify.
12:27
AI compresses setup from months to one hour
Demonstrates a drastic time reduction: a POD store that used to take 2–3 months can now be launched in about an hour.
01:19One prompt launches a full design pipeline
A slash command triggers an entire workflow—research, design, and mockup generation—which is the core value of the video.
05:26White backgrounds are a deliberate design choice
Generating on white background simplifies the removal step, making the design directly usable on print-on-demand platforms.
08:09Complete business model: Etsy + Printify + AI
Combining an Etsy store, Printify auto-fulfillment, and AI-generated listings creates a low-effort e-commerce business anyone can replicate.
13:19[00:01] that I couldn't believe it until I tried it myself. As of today, you can launch your print on demand business on Etsy in literally 1 hour. you can launch your print on demand business on Etsy in literally 1 hour.
[00:16] and you can also launch it. I am going to tell you the whole procedure. I will explain it to you in a very short way so that you do not face any problem. Let's say you want to do this T-shirt business. But you don't have any machinery.
[00:28] n't have inventory. So that's why there are so many print on demand platforms. For example, Printify gives you the option to use their T-shirt and just paste your design on it and Printify, which is a print on demand platform, will
[00:41] print your design on your shirt and send it to your customer automatically. You can also connect these platforms with Etsy and your Shopify store. Today I will tell you how you can launch your entire collection on Etsy
[00:53] tell you how you can launch your entire collection on Etsy also give you a cloud skill using which you will create your designs while being in just one chat on the cloud and will also get them modelled and then
[01:05] you will upload it on the print on demand platform and from there it will order comes on Etsy, it will automatically come on the print on demand platform and they will print, pack and ship your order and you will get your commission.
[01:19] Earlier it used to take around 2 to 3 months to set up this business. Today I tested it in just 1 hour. I have set up everything and I have shown you everything in this video. So
[01:32] you should not miss even a single step of the video. Staying ahead in the AI race is very important in today's date. If you don't use AI, you will inevitably be left behind. So subscribe to Let's Cover tell you about every new AI tool. Let me
[01:49] End Cover. Let's go to the computer screen and learn Let's See Print on Demand Business. So today I am going to give you a complete setup of print on demand through which you can launch your collection of print on demand t-shirts.
[02:04] use on this, I will give it to you in the description. I have already developed that skill. It has been tested. So now if you want to launch any of your collections and run your business through print on demand
[02:17] or want to sell print on demand products on FC and want to launch your collection there, then you can do those things also. In today's skill, we will give only one prompt through which our skill will do the
[02:30] research itself and then create designs for us and then after that it will also create modeling designs for us so that we can put those modeling pictures on our product listings or if we are selling on Shopify,
[02:43] I will tell you the entire procedure in this video. I have given a link in the description in which you are currently getting a one day unlimited free trial to use MCP. For the things we're going to do today in the cloud, we're going to
[02:57] need Hicks Field's MCP, which you can try anyway, but you can use its free trial today. I have given its link inside the description. You can check here One Day Unlimited Free Trial on All Top
[03:09] Models in Cloud & Chat GBT MCB. Ok? [MUSIC] So we're going to use Cloud's MCB. So first of all you have to click on the plus icon here. Now here you can see that there is an option to add.
[03:22] You have to click on the ad. You have to click on Add Custom Connector. So we have to add the connector of the hugs field here. Because we can generate our videos and audios from the Hicks field. Ok? Otherwise, Klud has no power to
[03:35] generate videos for you. And here for the remote MCP you have to go above Hugs Field. You have to you must have some credits. Only then will you be able to use this thing. you have to click on MCP & CLI. You can select the cloud code here
[03:51] So simply you have to click on this link here. After clicking, you have to add this link here and simply click on Add here. And it will ask you for this connection. You have connected your Hicks shield. I have
[04:05] can see it here. I am also showing you on my screen how to connect the MCB. At this time you can connect your MCP. And the trial to be taken is very simple. We had also
[04:18] unlimited video gen models and image end models were available and we had paid $ for it and we had used it unlimited for one day. So you guys can take the trial of Hak Field
[04:31] MCP in the same way and previously we used our card which was of Meezan Bank of Pakistan whose card worked perfectly and immediately we got a can use it in the same way. But even after this trial is over, you
[04:45] can still run this setup which I am going to show you here. Ok ? So with the free trial, you can try it right away. If you guys are watching after the free trial then you can still use it. So I have already given the skill
[04:57] click on the plus icon and go to skills here. You have to go inside Manage Skills and from here you have to click on Upload Skill and the skill you have to upload that skill here. After uploading, this skill will appear in
[05:12] front of you with the name of POD Collection Launcher. Ok? So the name of this skill is POD Collection Launcher. And what will I do now? Now I will launch an entire collection and show you and also create modeling images or the product images you
[05:26] need within just a few minutes. So first of all To launch the skill, you simply type backslash here and from here you will select your skill and simply press enter.
[05:40] Ok? This is the only thing you have to do. Further, I will also tell you the procedure on how you can use the print on demand platform and get your entire system ready One thing I want to tell you here is that in this collection that we are creating, there will be a
[05:54] collection of 8 images. Meaning that your eight products will be made here. If you want to create more products then you can tell it here itself whether I want a collection of 16 products or a collection of 20 products.
[06:07] So we have selected at here. So the benefit of 8 will be that I can show you everything clearly. Now you see here our skill has been launched. He has also used the product launcher here. Now here it will also do its
[06:19] own research as to what kind of ideas should be there. This will also give us some ideas. We can select from them also. Or if we have any idea in our mind then we will give that idea also to it. So using that on top of that, it will create some really nice
[06:31] for our products [music]. So now you can see here that it has given us some ideas which are ideas that it has already searched which will perform well. So give that also. I select an idea here and this skill is
[06:46] simple. After you have selected the idea, it will now generate props and then generate its images. I will definitely share with you the important things in it now. Now you can see here that
[06:59] it has locked this design and after that it has also selected the colours, colour palettes. And right now it's telling us that I've selected all these things for at designs. Now here it's telling us to
[07:12] start creating these images. So I would say yes to this. Well, if we have written yes here, along with this we could have told it something else also like whether our product should be contain only images. If there should be some style for some thing, then
[07:28] we could have told it that thing here and it would have adjusted accordingly in the future. So now you can see that it will use the image generation model of Hugs Field and I have use GPT image to [music]. So this gpt will use image two only and will
[07:42] create art images for us. Then after that we'll also create images of the models that we'll use on our product listings [music]. So now you can see here that the Hugs Field image generation model has fired up
[07:57] and it's starting to generate our images [music]. So, our images have started to generate. You can see that this image is on a white background. The reason for this is that when we take it to the print on demand platform,
[08:09] we can easily remove its background. Ok? We will use only this text and this image by removing the background and we will list it on the print on demand platform. Now let me tell you that procedure also. So
[08:22] here you can see that we can simply download these images from here and other images have also become ours. He has created all the images related to the niche we selected. So now if you want to change your niche
[08:37] or want to change something in these designs, you can do that too. Ok? So all these designs have been made. I'll give you an example later on how to upload it to a print on demand platform and from there how you can connect it to an ad. So here it is
[08:50] images are created, product images are created, then after that it will also create the model listing. As I told you and in this we have given examples of HNM Zara that the way its models show their T-shirts should be like that.
[09:04] So here we will say yes. I told him that yes brother, now create images and I have also given him another option that your dimensions should be one by one. The name of the T-shirt given is the same as the name of the
[09:18] T-shirt available on print on demand. A mockup of the T-shirt is available. So we will use the same T-shirt design so that our design also does not change. And here this thing can also happen that we can do print on demand as I show you
[09:31] that this is our T-shirt. We can give all the details of this T-shirt here. And then it will use the same T-shirts on the modeling pictures it generates and make the models wear them and then also apply designs on them so that our product
[09:45] images can be created. But for now, I've just named it T-shirt here and we'll click enter. While it's creating designs, we download a design and I'll show you how we upload it to
[09:59] our print on demand platform. Here we have this design in high quality. You have to click on save image. So I've come in here inside Cwa. Inside Cwa, we have
[10:13] upload your image inside the upload. So this is our image we have uploaded. You can see that our image is in very high quality. But the We will use the background remover here and stretch our design like this.
[10:27] stretched out here. And we'll click on Share. Click on download. we have to select the transparent background. This page has to be selected. And from here we will download it. I will download it. Once we download it, our
[10:41] next step is to upload it on our print on demand platform. platforms before, you can use printfi.com. you can use printfi.com.
[10:55] you can add your print on demand designs and then you can connect it with Adc can also connect it with Shopifi. Ok? You have both options. For now, we'll Our design is being
[11:08] uploaded here. So you can see that our design has been added here. when you are making your product, you also have the option of selecting variants. you also have the option of selecting variants.
[11:22] n't look good on grey. You can remove it. You can see on different designs how your design will look. So it looks much better on these designs. So we will select this design and we will also select white at the end and we will
[11:37] back the selected base here. Now here's another thing you can do. If you go to the preview, you will see mockups of all your products here. As you can see, if someone is wearing a T-shirt, he will
[11:49] feel this way. Ok? [Music] So this is So now you can see the product in front of you. Now one thing that
[12:01] arises here is that when we create designs in this way, then it not going to upload these designs here. We will upload our designs here. Now
[12:14] here there is a front side as well as a back side. If you want to make something on the back side, you can make that too. Otherwise you will save the product. After saving the product, you can connect your listing with your store's [Music] here.
[12:27] So as soon as you publish this product from here, it will give you two options that you can connect it on Shopify here and you can also connect it on AdC. you simply have to click on Connect and approve it from there.
[12:40] Your print store will be connected to your ad and will also be connected to Shoppi. Now what will happen is that if you want to edit your listing here, you can do it edit it by going above the ad, you can do it there also. We're back here on our
[12:54] design, so you can see that it has created all those model images for us. it has created all those model images for us. changed the colour of the shirt also. We did not give white colour there. So
[13:07] if we had given it white color, it would have looked better on white color. So despite that, these have also become images of our models which we can also put on our Etsy product listings. So [music] this is a complete procedure through
[13:19] [music] this is a complete procedure through which you can launch your entire collection with just one plan and generate a good income from it. Create a store on top of the ac. Create a store on Printify. Upload the products and
[13:31] after connecting to Etsy, all your products will be All these products will automatically go to your ads store. Ok? So you can start a full fledged business. And
[13:45] you can sell it by running your ads on it. And the more creativity you add to it, the more benefit you will get for yourself here. I have explained the entire business model to you and how you utilize this business model
[13:58] and how you utilize this business model if you want to change the images of the models or change the designs, then everything is in your hands. Today all these things are possible through AI. You
[14:13] can launch your entire store in just one hour. Ok? So, I have made these eight products live on Etsy. Simply in this way, I will make all my eight products live and after making them live, they will also go live on Adc and our Etsy store will be ready within just one hour. The
[14:27] and they will be such products which are going to be sold in the market. So I don't think you have any better option than this to do business in today's times. Now you know how to make your print on demand business live on et.
[14:42] Now if you want to do the business of coloring books and want to sell coloring books as a digital product on HC, then click on it and go and watch the complete video. So it is
[14:57] definitely subscribe to Lets & Go because this is the only platform which tells you instantly about every AI tool and See you in the next video. Till then take care of yourself. Allah Hafiz.
⚡ Saved you 0h 15m reading this? Transcribe any YouTube video for free — no signup needed.