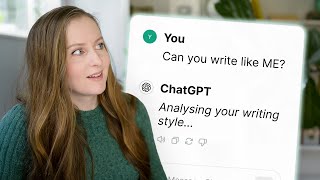

This AI Does 90% of My Blog Writing
45sThe opening hook promises an insane time-saving hack that instantly grabs a creator's attention.
▶ Play Clip"Delivers exactly what it promises: a practical walkthrough for building a custom AI video-to-blog generator."
The video demonstrates how to build a custom AI assistant using ChatGPT's custom GPT feature to automatically turn YouTube video transcripts into blog posts that mimic the creator's writing style. The process requires no coding and can be completed in minutes, with the AI handling 90% of the work.
The custom AI does 90% of the work that used to take hours, producing blog posts in just a few minutes.
The blog posts sound like they were written by the creator themselves, not like generic AI output.
Building the AI requires no programming or advanced technical skills, making it accessible to any content creator.
Go to ChatGPT and click to create a GPT, then name it (e.g., 'Your Name Video to Blog Generator').
Be explicit about what the AI should do, what to avoid, how to structure the post, and the tone and style to use. Reference the knowledge files.
Instruct the GPT to suggest titles, keywords, meta descriptions, or even an email to promote the blog post.
Upload several of your best past blog posts (e.g., 5 in a Word document) so the AI can emulate your writing style.
After creating the GPT, paste a video transcript into the chat; the AI writes the blog post within minutes.
For already published YouTube videos, use a free browser extension. Alternatives include Otter.ai, Sonix, Rev.com, and Temi.
The AI handles 90% of the work; the remaining 10% involves you editing facts or rephrasing sections, either manually or using ChatGPT's canvas mode.
Download the generic prompt from the description and customize it for your own style, preferred length, and output preferences.
Create many blog posts to see consistent mistakes, then edit the instructions or duplicate the GPT to create better versions.
By following the steps, anyone can create a custom AI that transforms video transcripts into blog posts that sound like their own writing, saving significant time while maintaining a personal voice.
What percentage of the work does the custom AI do for the video-to-blog process?
90%
00:02
What should you upload as knowledge files to teach the AI your writing style?
Five of your best previous blog posts in a Word document.
03:06
How should you structure the instructions for your custom GPT?
Be explicit about what to do, what not to do, the structure of the post, and the tone and style.
01:28
What is the easiest way to get a transcript for an already published YouTube video?
Use a free browser extension.
04:23
What extra outputs can you ask the GPT to generate beyond the blog post itself?
Suggested titles, keywords, a meta description, and a promotional email.
02:26
What is canvas mode in ChatGPT used for in the editing process?
To highlight specific sections of the blog post and ask the AI to rewrite or change them.
06:26
Should you use a human-generated transcript or an AI-generated one for this process?
AI-generated transcripts work fine and are cheaper and faster.
05:01
How many favorite blog posts did the creator upload to their custom GPT?
About five.
03:43
AI handles 90% of the workload
Quantifies the time-saving potential of using custom AI for content creation.
00:02Instructions determine output quality
Highlights the importance of clear, explicit prompts in custom GPTs to achieve desired results.
01:28Knowledge files train the AI's style
Demonstrates a practical technique for teaching AI to mimic a specific writing voice.
03:06Editing is still essential
Clarifies that AI automation doesn't eliminate the need for human review and refinement.
06:26Iteration improves the AI
Encourages continuous testing and adjustment to optimize the custom GPT's performance.
07:35[00:02] expert to build a custom AI that would turn my videos into blog posts. And it has completely changed the way that I create content. Seriously, this thing does 90% of the work that used to take me hours in just a couple of minutes.
[00:17] probably doesn't get as good of results though, right? It probably turns out like crappy AI sounding blog posts. But that's the thing. It actually writes like me. these blog posts, they sound like I wrote them, like I said, while
[00:32] saving me a ton of time. Now, what makes this even better is that it didn't require any coding or advanced tech skills at all. And in this video, I'm going to show you how you can create a custom AI assistant that can turn your
[00:47] videos into blog posts. And I'm even going to hand you the prompt so that you can get this done in just a matter of minutes. Okay, so now let's actually build this AI assistant that's going to write your blog post for you. So you are
[01:00] going to go into chat GPT or whatever system you want to use and click to create a GPT. And first thing is you're going to name your GPT. So something like your name and then video to blog generator. And then you can add an
[01:15] image. And you can just use dolly here to autogenerate some sort of image if you want. Or you could upload a photo of your face or whatever you want it to be. because that's just for your purposes if you want to remember exactly what you
[01:28] built this GPT to do. And then instructions. So this is really the meat of building this custom AI. And when it comes to the instructions, you want to be very explicit with the AI. You want to tell it exactly what you want it to
[01:41] do, what you don't want it to do, how you want it to structure this blog post, You want to give it specific instructions on the style and the tone of the writing. Definitely tell it to reference the knowledge files that have
[01:57] been uploaded to this custom GPT. I'll get more into that in a few minutes, but that is key for this process. So, how you structure these instructions is pretty important because it is going to determine the quality of the blog post
[02:11] that the AI generates and also how much it does or does not sound like you. And this is one of the main things that I worked with that AI expert on. By the way, if you want to work one-on-one with an AI expert, because that's not me. Um,
[02:26] check the description below because I will include his contact information if you finish up these instructions, something you might want to consider doing is telling the GPT to generate a few more things beyond just the blog
[02:38] post itself. So, for example, you could tell it to draft some potential titles so that you could choose the one that you like the best. You could tell it to you like the best. You could tell it to suggest keywords or you could tell it to
[02:51] write a meta description for your blog post or even to write an email promoting your blog post if you want to then send off an email sharing it with your email written all these instructions, then you can just close out that window. And then
[03:06] section. So, this is where you're going to upload those examples of blog posts or articles that you have written in the past so that it has a reference for what your writing style is like and how you
[03:19] what I've done for mine is I've just taken several blog posts that I've written in the past that I like. Now, keep in mind that the AI is going to emulate the style of whatever you give it. And so you definitely want to give
[03:31] it. And so you definitely want to give it some of your best work so that it is copying that because if you just take for example like the most recent things good as some things you've written in the past, well it's just going to create
[03:43] more of that. So keep that in mind. Anyway, I took about five of my favorite blog posts that I've written and I just put them into a Word document. Now, I normally use Google Docs, but I put them in Google Docs and then I export it as a
[03:57] Word document because that's easier to upload here to the AI. And that's actually all there is to it. Now, all you have to do is click create in the upper rightand corner here and your custom AI is going to be created and you
[04:09] can start using it. Now, how do you use this thing, though? Okay, all you have of your videos. Now, there are a few different ways you can do this. The very easiest way is with this browser extension right here. And this is the
[04:23] best option I would say because it is free and it works really well. If you've already published your video on YouTube, so if you are creating this blog post after publishing your video on YouTube, then use this option. Now, on the other
[04:36] post before publishing the video on use some other sort of tool. Now, personally, I like using the script because I already use it for some other things in my content creation process.
[04:49] So, it's just easy because I've already got it ready to go. But if you don't want to use the script for any reason, there are tons of other options like there are tons of other options like otter.ai, sonics, rev.com, and tami. And
[05:01] most of these provide both an automated like AI generated transcript option as well as a human generated transcript. Now, for the purpose of generating a transcript to feed into the AI for it to create a blog post for you, you do not
[05:17] need the fancy more expensive human generated transcript. The AI generated transcript with its little flaws and quirks is going to work just fine. So, just go for whatever option is cheapest and easiest for you to use. Copy that
[05:31] transcript and then paste it into the chat interface for this custom GPT you created. Now, as you can see here, in a matter of just moments, the AI starts writing for you, and in just a few minutes, the entire blog post is
[05:45] written. Now, I am blown away by the results this thing can create right off the bat. But that's not to say that it's perfect. Like I said at the beginning of this video, the AI can do 90% of the work. Well, the other 10% of the work is
[05:59] you plugging your transcript into the chat and you doing a little bit of editing at the end. Now, the editing that you need to do will depend based on how well you structured those instructions that you gave it when you
[06:13] were programming the custom AI. So, you might find that you just need to do a tiny little bit of cleanup, just change maybe a few facts or details, or you might want to rephrase a few things. Now, there's two different ways you can
[06:26] do this. either manually, you can do it yourself, or you can open up the blog post that the AI wrote for you in what's called canvas mode in chat GPT, and you can highlight specific sections of it and ask it to rewrite it or give it
[06:41] specific instructions on how you want it to change it. For example, maybe you want it to expand a certain section or make a certain section more condensed. And that is almost all there is to it. Two more things I think you should know
[06:55] before we wrap this up. One is that you will definitely want to go into those instructions that you are giving to the AI when you are programming this custom AI when you are programming this custom GPT and customize them for you. So, in
[07:08] the description below, you will find the link where you can grab a copy of some They're not the exact instructions that I used for mine since mine is very much customized for me and my writing style, but it's just a slightly more generic
[07:23] version of that that I think will actually be easier for you to customize than if I were to hand you the one that I use for my own blog posts. Anyway, so that's in the description below. So, take that, but do customize it for you.
[07:35] Customize it for your writing style, for the length of blog post that you want output, etc. Second thing to know is that after you create this, you should test it. you should actually put it to work and create blog post after blog
[07:47] post. Now, you could do this all kind of in a big batch to work on improving the AI or you can just do it as you are creating content over the next weeks or months, but just don't settle for
[08:00] you notice that it is consistently making a certain kind of mistake or just consistent way that you don't like, well, go in there and make some edits to
[08:12] the instructions for that custom GPT you created or click the duplicate button and create a new version of it if you're worried about maybe messing up the version that you already have that's working pretty well. But it's especially
[08:24] making the same sort of mistake or consistently doing something you don't instructions because you don't need to settle for that. Okay. Well, there you have it. That is how you can create a custom AI for yourself that will turn
[08:37] custom AI for yourself that will turn your videos into blog posts that sound like you actually wrote them and have your unique ideas and perspective. Your next step obviously here is to put this into practice and build one of these
[08:51] custom AIs for yourself. It is so surprisingly easy and really fun to do. I find you'll definitely want to save yourself some time by grabbing that script down below that you can use for programming it. But then have at
[09:05] customize as much as you want. I hope you found this video helpful. If you want to see more videos about using AI for content creation, be sure to let me know down in the comments below. And if you haven't subscribed to my channel, I
[09:17] would love to have you do so. I make videos here every single month all about online businesses. So, if that is something you are working on, then click that subscribe button down below and ring the bell as well. Now, since you
[09:30] clicked on this video, I'm guessing that you are a content creator, somebody who makes videos and maybe makes blog posts as well. And so, next up, I'd recommend that you watch this video right here all about how to get people to obsessively
[09:44] want to get the comments, if you want to get the likes, watch this one right now.



⚡ Saved you 0h 09m reading this? Transcribe any YouTube video for free — no signup needed.