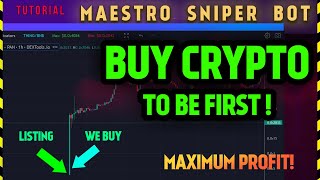

I Made 50x on Crypto Tokens
45sHigh-profit claims and a direct call-to-action hook viewers in.
▶ Play Clip"The title promises a secret method for buying tokens at the lowest price, and the video delivers a detailed tutorial on using Maestro Sniper Bot, though it includes promotional content and some fluff."
This video provides a step-by-step guide on using Maestro Sniper Bot to buy tokens at their lowest price on DEXs, aiming for high returns. The creator shares personal results, setup instructions, and advanced strategies like God Mode, along with recommendations for practice and risk management.
The creator shows examples of 50x gains and earning $8000 from $2030, emphasizing the importance of being first to buy tokens.
Maestro Sniper Bot is a Telegram bot for trading on BSC, Ethereum, and Arbitrum, with free and premium versions.
Users can create or import wallets, but should avoid using their main wallet due to access risks.
Key settings include enabling Smart Slippage, setting slippage to at least 75% for liquidity floods, and enabling anti-rug protection.
Auto-buy and uproof features speed up purchases and prepare for quick sells.
Multi-wallet allows adding up to two extra wallets in the free version for larger purchases.
God Mode enables automatic buying when liquidity is added or a contract method is called, with options like Turbo mode for faster execution.
The creator recommends practicing on BSC with small amounts, testing all features, and only then moving to larger trades.
Buying tokens at the lowest price
Explains the core strategy of using a bot to buy tokens at launch for maximum gains.
00:29Maestro Sniper Bot overview
Introduces the main tool and its supported blockchains.
01:37Configuring anti-rug and slippage
Details essential settings to protect against rug pulls and optimize trades.
04:44God Mode for advanced sniping
Describes a powerful feature for automating purchases on liquidity events.
09:28Practice recommendations
Advises starting small and practicing on BSC to master the bot before large trades.
13:14[00:00] Friends, I spent a lot of time making this video, so please put a like before you continue watching. You all know that most tokens are first listed on DEX exchanges and then only on large centralized exchanges,
[00:17] and the biggest tokens are made during initial purchases, even before the listing. In this video I decided to share the information that until today could be found only in private or on training.
[00:29] This is an instruction on how to buy tokens by bot at the very beginning of their life at the lowest price to make such results. Here I had about 50 XS in the peak, and here in general with $2030 I managed to earn more than $8000.
[00:45] All this included two things. One, it is the possession of some information about the token listing, and two, buying by bot. Because it was thanks to this that my transactions were the first and from the get-go it gave tens of X's and if the prompt X develops and gives other buyers two three X's, then multiply tens of X's in these two three times, I get already hundreds of X's.
[01:08] By the way, you can also use this and earn money. Here is an example. I gave the address of the token contract I bought in my insights group and one of my subscribers bought it with a bot and made about 10 X's in a day or two.
[01:22] Good results. I think it's great. By the way, everyone who is my referral today on the Bybit exchange, in addition to regular promos for me personally and free trading education, I add to my group with insights. Let's get to the instructions.
[01:37] Today the most popular and reliable bot in the network finance ether and arbitrum is Maestro Sniper Bot. How is Maestro Sniper Bot? Maestro Sniper Bot is a telegram bot that has many mechanics for working with tokens in the three blockchains available today, VSC, FR.
[01:56] In Maestro Sniper Bot you can create a wallet or integrate your wallet previously created for example in Metamask. It is very important to understand that adding a wallet implies transferring access to your wallet to Maestro Sniper Bot.
[02:11] Or creating a new wallet in Maestro Sniper Bot similarly gives full access to the wallet. But there have been no scam precedents over the years. You just need to understand this and do not add your main wallet there.
[02:23] It is better to create a new one inside and save just the pass rates for the possibility of unfolding it in the same metamask if needed. By default Maestro Sniper Bot free. There is a premium version that costs $200 a month.
[02:38] We will talk about it closer to the end. But I will say right away, in 95% of situations it is enough to use the free version. Maestro Sniper Bot instructions let's start with the installation and configuration of Maestro Sniper Bot.
[02:52] By the link from the description of this video you go to the account of this bot in Telegram. To start using it, you need to subscribe to their informational groups in Telegram. Confirm that you are a human and it's done.
[03:05] By the way, for your convenience, I made a separate Telegram channel with instructions on the bot in text format, where you can ask questions in the comments and you will definitely be answered. After that we see the menu button at the bottom left, you can click on it and click on slash sniper.
[03:22] It will open the main menu of the bot. The wallet section is the section with our wallets. Click See Free Blockchains. Select the necessary one, for example Binance Smart Chain. Get to the section with the main wallet.
[03:35] We see that by default no wallet is connected We can either click Connect Wallet to connect by SID fairies or private key previously created or generate wallet to generate a new wallet We will do so
[03:48] Click and see the public address of the wallet, the private key of the wallet and SID phrase of 12 words. Then it needs to be configured. Go to config. I will go through all the points and those that I will customize and the rest I will comment on but customize enough only what I will customize
[04:04] in the process. And to rug this is protection from ragpull. When, for example, admins take liquidity out of the token or turn off the ability to sell the token or send your wallet to the blacklist, a bot with increased gas to get ahead of the
[04:19] transaction rank will try to sell your tokens automatically. Smart slippage is slippage. You can see what it is in another video on my channel. Smart slippage is the selection of automatic slippage, taking into account commissions
[04:32] in the token and volatility. We must turn it on. In case we buy on liquidity flood, I recommend to set slippage not less than 75%. But we will talk about it when we get to it.
[04:44] The Genmo do not turn it on. It is not our story. Semi-private TX it makes sense to enable only if the token without commissions to buy sell. Bypassing the so-called sandwich box to exclude the situation.
[04:57] If you buy, there are box sandwich box that make a purchase before you and sell after your purchase. thus cutting off part of the potential profit. The option is not mandatory. Similarly for max gas price, slippage, and max gas limit,
[05:12] they are not necessary. If we put up a Samet slippage, we leave them as they are. Three settings buy, sell, and uproof. Start with uproof. There should be a check mark. If it is checked, immediately after the purchase will be uproof for sale,
[05:26] but not the sale itself. It is necessary so that at the moment when you need to sell, there was no loss of time for Upro. If you buy a token not for the purpose of selling it in the bot, but for example to transfer it to another wallet, you can turn off the Upro. Gas price for
[05:43] Upro can also be set manually if necessary. The UI section checks the auto buy checkbox. This is an automatic purchase. If you check auto buy, it is the fastest way to buy a token without any pauses.
[05:56] Confirm Trade Buy is an additional buy confirmation to avoid wasting time on it is disabled by default. Do Buy allows you to buy back token drawdowns. I personally have never used it, only buying from the start or according to exact parameters.
[06:11] Below are the parameters for a more accurate purchase on the parameters of interest. If our task is to buy the token first, we do not put anything additional. Gas price can be changed at will, but there are no problems with the default one.
[06:26] We go back a step and go to sell. There is similarly a confirmation of sale, which is turned off auto sell on reaching the parameters below and trailing sell, which is an additional setting for auto sell and allows you to move stop loss parameters higher in case of a positive price change.
[06:43] For the basic setting, we leave everything off the BNB edge is responsible for withdrawing BNB tokens from the wallet, and the tokens button is responsible for withdrawing other tokens. Balance is a separate tool in Maestro that allows you to monitor the balance of all tokens on your wallet.
[07:00] But I personally use EtherScanBot, which allows you to keep track of your wallets, what comes to them, what goes to them, and so on, and allows you to track changes in the value of tokens according to specified parameters.
[07:13] I highly recommend it we will add a link to it in text instructions in the group The multi wallet section allows you to add more wallets in the free version you can add two more wallets to buy three wallets at once This is necessary when there is a limit on the
[07:29] number of tokens per wallet and you are competent in the token and realize that the more you buy it the more you will earn. Other wallets will perform similar actions. By default multi token is disabled.
[07:41] To quickly go to the main menu again press menu sniper and the second section for the mandatory configuration of call chanel's go to the desired blockchain delay section me this is an app on that
[07:53] has a higher priority than the basic settings and a greater choice of functionality we also configure it necessarily and select tracker multi-buy is off if we buy only from one wallet here we see the
[08:05] wallet from which we buy by the way with multi-buy is switched off but we have more wallets we can specify it here by clicking and changing it to another one. We do not touch it now. Auto buy is switched on. Smart flip heads too. Necessarily in buy amount we write the purchase
[08:22] amount in BNB on which the purchase will be made. At will it is possible to set other parameters. All. Now if you send the contact address of the token and it can be bought, the bot will automatically buy the specified amount of token to the selected wallet or wallets and then you
[08:38] see live the execution of these transactions first purchase then approve if it is auto approve and a new window will fall out monitors here you can track the change in the price of tokens you can
[08:50] also sell tokens fully or partially or set parameters when reaching which the cell will be made or buy more tokens you can also enable or disable anti-rac and in general this monitor
[09:02] unites all previously made purchases and you can call it at any time by pressing menu monitor Let's move on to two more sections. Copitrate allows you to make similar sales purchases by following one,
[09:15] your own or someone else's, for example, in whom you are confident. For example, your friend plans to buy a token at the start, and you cannot set it all up and at the time of purchase to slow the address of the token
[09:28] the bot will automatically buy and sell that will buy and sell the wallet following. The God Mod section is the most interesting, because it allows you to make the biggest exits. My subscriber made 1011x on the token think by the way her interview about this transaction can be seen in this video on the channel.
[09:47] So here we click. Also choose the network. There are two buttons, config and edgyrmod. In the section config we see already familiar to us settings, it is not necessary to fill it out, because we can do it later in each new year mod.
[10:02] But if you often use YearMod, it makes sense to prescribe the basic settings to manually each time a new one is not to enter them. Now we will leave them unchanged. Go back and click Add New YearMod.
[10:15] Insert the address of the contract, which we plan to buy on the listing. Again, we're to take the address of the contract. Most often it is private or thematic groups. I discounted the address of the contract token thing token, which first conducts IDO presale on PingCell accordingly.
[10:32] The address of the contract can be taken therein. And how to participate in IDO on PingCell you can also see in my past video on the token thing. By the way, everyone who participated in IDO made 12x's.
[10:46] In general, insert the contract address and see the following set of settings. Wallet from which the purchase will be made, next to multi from several. Gas price. There is a default value but you can try to beat the competition by setting the gas higher Turbo mode is only available in the paid version We will talk about it later Next is the most interesting part Liquidity is the
[11:10] parameter that made it possible to make 11 tokens in the above example. When liquidity was poured into the contract, the yearmon automatically bought tokens. Here we select the liquidity method,
[11:22] check the snip liquidity checkbox, and specify the purchase amount. Next method is the contract is closed for buying even if the liquidity is filled. We can be the first if we find out which
[11:34] method will open the purchase, for example. By pressing SNP method, the bot will analyze the token contract and will give all the methods found. As a rule, developers sign the methods to avoid confusion and if we see something like start sale, there is a high probability that
[11:50] exactly when this method is called by the developer, sales will be opened and our bot will make a purchase when the developer does it. Similarly, here you can specify the amount that will be purchased. You can specify both a buy-by method and a buy-by liquidity snap.
[12:06] Auto is a way for a bot to buy when it sees that a contract can be sold. That is, liquidity is filled, purchases are open, and sales are available. It is important that it will not work if the
[12:18] commission in the token is more than 25%. Turbo mode, I position it as a kind of assistant that will think through everything for you, find the necessary method, and start your transaction with
[12:30] the fastest possible set of parameters. Some of these parameters can also be understood in the primitive mode by pressing the simulate button for further manual customization. In general, that's all. A little later I will give recommendations. Earlier the cost of Privaka
[12:46] was $200 and in the first week when I was actively running it, people had the ability to recoup the costs and come out in the plus with the combination of knowledge on the use of Maestro Sniper
[12:58] Bot and information on leaping tokens. My recommendations. One, I still recommend practicing in the BSC network because it is an inexpensive gas network and try to buy for example the contract address of some stable token, maybe even us, although
[13:14] it is better to still change the value and better understand the work of the monitor. For example, to buy a token bone, it is by the way an analog of the token BNB but for the blockchain from the team Shiba Inu, on it by the way in price.
[13:29] I did the same instruction and we participated in the purchase by bot one of the very first tokens in the whole blockchain at its launch, you can see the results there. 2. Recommendation is to go through and practice on all the mandatory points that were voiced in this video.
[13:45] Namely, buy any token, sell it partially, understand the result, transfer it to another wallet, try to customize the sale by price change, buy again, and see how the bot works.
[13:57] Find a token in the motor if it is closed, try to change the gap and buy with custom settings, draw conclusions. Then on pink sell find a token that will be leasing, try to buy it for $1 or an insignificant amount of money by sniper, make at least 3-4 attempts such.
[14:14] Find out all the problems that can happen to you, and only when you understand exactly what you are doing and what should be a successful result think about playing a big game. That's it for sure. And if the video was useful put a like and thank you all for your attention and good luck on this path.
[14:44] you
⚡ Saved you 0h 14m reading this? Transcribe any YouTube video for free — no signup needed.