
AI Art Prints Making $43K on Etsy
52sShows real revenue numbers from simple AI-generated art, sparking curiosity and FOMO about passive income.
▶ Play Clip"The title promises a method to make thousands of dollars, and the video delivers a detailed, actionable guide with real examples, though it includes some promotional content for the creator's own tool."
This video demonstrates how to create and scale a fully automated online business selling digital wall art prints using AI tools like Midjourney and Claude. The creator walks through the entire process from product research and artwork generation to listing creation and automation, highlighting real examples of shops earning thousands of dollars monthly.
The video introduces a method to start and scale an automated online business using Cloud Co-Work and Midjourney version 8, potentially earning thousands of dollars a month.
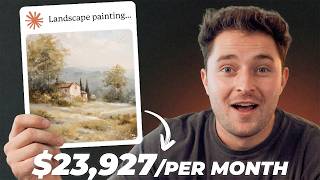
Examples of digital prints on Etsy: a bunny print earning $1,760/month, a tiger pizza painting earning $43,000 over a year, and a vintage gallery pack earning $50,000 over a year.
Even newer shops can scale to thousands of dollars a month within a few months by staying consistent and building a catalog of prints, as shown by a shop making $22,000/month after five months.
Etsy provides free organic reach, off-site ads on Google, and only charges a 12-15% fee on sales from ads, making it low-risk with a 95% profit margin on digital products.
The creator offers a free quick start guide to open an Etsy shop in about nine minutes, including a link for 40 free listings (worth $8).
Research what prints sell best to target the same customer with original AI-generated artwork, using examples like French countryside prints selling $7,000/month.
Use screenshots of successful designs in Midjourney's describe feature to generate four prompts for similar original artwork, ensuring high quality and originality.
Set version to 8 and HD mode for highest resolution. Explore tab allows searching images and styles to inject into prompts for consistent aesthetics.
Download images, then use Claude to build a custom app for bulk cropping into multiple aspect ratios, saving time and avoiding manual work.
Use Midjourney to generate blank frame mock-ups, then ListingView (creator's tool) to overlay artwork onto frames, producing professional product images.
Use ListingView's listing optimizer to create listings, with AI generating SEO titles, descriptions, and tags. Files are bundled into a branded PDF for easy download.
Four Claude skills handle research, artwork creation, cropping, and listing creation, combined into a master skill. The process took 55 minutes for two listings with three interventions.
Using skills individually for specific tasks may be more efficient than full automation, and caution is advised when downloading skills from unknown creators due to security risks.
The video provides a comprehensive, step-by-step guide to creating and automating a digital wall art business on Etsy, emphasizing consistency and leveraging AI tools to scale. It offers practical insights and free resources, making it a valuable resource for aspiring online entrepreneurs.
Real Earnings Examples
Provides concrete evidence of the potential income from digital prints, motivating viewers.
00:26Reverse Prompting Technique
A practical method to create original artwork based on proven designs, saving time and effort.
06:22Automated Cropping with Claude
Shows how to build a custom tool to automate repetitive tasks, increasing efficiency.
10:38Full Automation with Claude Skills
Demonstrates the current limits and possibilities of AI automation in e-commerce.
19:40Efficiency Over Full Automation
Advises using skills individually for better control, a practical tip for business owners.
21:10[00:00] Alright, so the last few weeks have been insane with the updates that we've gotten to Cloud Co-Work along with the brand new release of Mid-Journey version 8. But with these updates, there's a new way to start and scale up a fully automated online
[00:12] business using these two tools that can potentially make thousands of dollars a month. So in this video, I'm going to show you exactly what the product is, how to make it, how to sell it, and then we're going to look at how to automate the entire process using Cloud.
[00:26] And of course, we'll also look at how much money people are already making doing this so you can decide if it's worth your time. So take a look at this digital print that's selling on Etsy. It's listed for $2.55,
[00:38] and it's just a moody digital download print of a bunny. It's selling a little better right now because it's Easter weekend, but what's cool is that although it isn't even a super crazy design, it's still making an estimated $1,760 a month.
[00:52] It's really nothing crazy, but by the end of this video, you'll see how we can use AI to create a listing just like this from scratch, and then automate the entire process using quad. And plus, some of these listings make an insane amount of money.
[01:05] This one is another example in a different style. It's a painting of some tigers eating pizza. You can see two people have bought it in the last 24 hours, but over the last year, it's made an estimated $43,000.
[01:18] And it's still making an estimated $2,000 a month. And that's all just from one individual listing. But take a look at this gallery pack. It's an assortment of these vintage artwork prints that all share a similar style.
[01:31] And right now, it's only making approximately $2,000 per month. But over the last year, this listing has made around $50,000. But what's really cool is that the shop that's selling this artwork has only been selling it for around a year and a half.
[01:46] And in that time, they've been able to make over 21,000 sales and hundreds of thousands of dollars. And they're making mostly profit since they're selling a digital product. But just in case you don't believe me, here's another example of a similar shop that's selling more niche-down artwork for a nursery or a child's room.
[02:04] All of their artwork is sort of consistent with this vibe, but they're making an estimated $22,000 a month doing this, and they've only been selling for the last five months. So although a lot of people think that there's a lot of competition around selling artwork like this, it proves that if you stay consistent for a few months and you build up a good catalog of prints like what these shops have done, even newer, less experienced shops can still scale to the point in just a few months where they're making thousands of dollars.
[02:32] And I'm not even referencing the huge shops that have been doing this for years that consistently make tens of thousands of dollars a month. Now, luckily with the power of AI, there's only a few steps that you need to take to get this working and then automate the entire process.
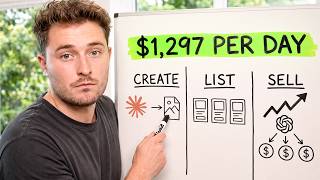
[02:46] First, we need to open up a shop that we'll sell our artwork in. Then we'll need to do a little bit of research and figure out exactly what type of artwork to create and sell. We'll use AI to create the artwork. We'll use AI to build out the product listing and get it posted for sale in our Etsy shop.
[03:01] And we can also automate the marketing so that all we have to do is tell the AI what to do. All of these vintage style digital artwork prints sell the best on marketplace platforms like Etsy. It's kind of like a social media platform for selling products because when you post something,
[03:17] you get free organic reach on these products that you post. And then you can decide later, once you're already making some sales, if you want to turn on paid advertising to these product listings. It's also cool because Etsy will run what they call off-site ads,
[03:32] which basically means when you list your products for sale on Etsy, they're going to advertise your product listings on other websites such as Google. So when a customer searches for vintage art prints and you see an Etsy listing showing up,
[03:46] that's Etsy paying for the ad in Google. But the best part is that you don't have to do anything to qualify or opt into this program. Etsy's already going to do it for any listings that you post on their site. And on top of all that, even if a customer comes through and they click on that advertisement,
[04:02] Etsy's not going to charge you anything unless that customer ends up buying the listing. If a customer does buy your listing after clicking on the ad, they'll charge you between a 12% to 15% fee. But since we already have around a 95% profit margin on our digital products,
[04:17] the fee really isn't an issue and it ends up being free money whenever it works. So that's why whenever I sell a digital product like this, I always choose to open up an Etsy shop first. It's the lowest risk way to get started and start making sales before you turn on the heavy paid advertising and scale to other platforms like Shopify later on.
[04:36] Now, if you've never opened up a shop before, you can grab my free quick start guide right below the subscribe button. It helps you open up a shop in around nine minutes. And there's some links in here that get you free stuff, like the Etsy link.
[04:48] Since they charge you 20 cents per listing that you post for sale, this link gets you 40 free listings or around $8. But with the shop setup, the second step is to figure out what's selling best right now. Now, whenever I go to create and sell digital products like this,
[05:03] my strategy is to figure out what type of prints customers are buying most often so that I can use AI to create an original product that still targets the same customer and niche. For example, these packs of French countryside style prints are selling super well.
[05:18] This one has sold six times in the last 24 hours, making approximately $7,000 per month. and although this pack has over 650 of these vintage style prints keep in mind that we be able to fully automate the process of creating prints just like this and on top of that we could list each one of those prints for sale individually as well
[05:39] It's not always the case, but sometimes these individual prints can pop off and make a few hundred dollars per month on their own, even outside of a pack. So they're essentially making passive income on the individual listings as well as the bundles of all of their paintings together.
[05:54] It's kind of double dipping, if you will. The most important thing to remember when doing product research is to look for products that are selling super well right now. Because when we go to create our own artwork, we're going to make it original, but we want to target the same buyer who's buying a product like this.
[06:09] We already know that this style and this vibe of artwork sells, and so that's what we're going to be going for. And once we've identified the listing, we can move on to actually creating our own artwork. And to do this, I use a process called reverse prompting.
[06:22] Since we know that this style of artwork sells really well, what we can do is come in and grab a screenshot of a reference design, and then we're going to take that screenshot over into Midjourney. Now, I'm on the alpha.midjourney.com subdomain, and this website lets me access the earliest, most updated versions of Midjourney before they're released to the public.
[06:43] So from here, I'm just going to paste in that screenshot into Midjourney, and it'll add it into my prompts box. Now, from here, I'm just going to click and drag and drop it into the describe box when it shows up.
[06:55] What this does is it breaks down your image into four different prompts that you can use to generate similar artwork. So from here, I can just click the run all prompts, and it's going to shoot off four different image generations, each giving me four options that I can choose from.
[07:10] This is the absolute quickest way to start generating artwork based on what you already know works. And I almost forgot to mention, if you come over into the settings tab, make sure to set your version to version 8 and turn on the HD mode to get the highest resolution images possible.
[07:25] But from here, you can see we got a ton of options. Not all of them are going to be usable, but that's fine because there's a bunch to choose from. And the best part is we maintained a similar style to what we already know works super well, but all of these images are completely original to our shop.
[07:41] This lets you create a product targeting the same customer who's going to buy the original print, but with an original product. And all of these honestly look great. Super high resolution, super high quality stuff that almost any customer would be happy with.
[07:55] It maintains the style and there's tons of detail here. And with Mid Journey Version 8, there's two more ways that we can create artwork to target customers. So if we come over into the explore tab, we can make a search under the images tab for something like a French country landscape painting.
[08:11] This is going to give you a bunch of reference images that other users have created in their Midjourney account. But what's really cool here is that you can go through and find specific paintings that have the art style that you're going for.
[08:24] For example, something like this looks super high quality and it mimics that vibe that a lot of the prints that are selling well on Etsy have. So if I want to use this style in my own painting, what I can do is I can just click on their prompts to inject it into my prompt box.
[08:39] I can click and drag their image and drop it into the style reference so that I get the same style of image. And this time, I'm also going to open up settings, and we're going to generate a horizontal 16 by 9 version of the image.
[08:51] So when I send this off, I should get a really high-quality painting that matches the style that already looked really good. Once again, we have a few options to choose from, but you can see all four options look super great and super high quality.
[09:04] They have a ton of detail, and if I was creating a French countryside pack, this is something that I could definitely include in it. But there's one more method that we can use to come up with great styles for our artwork. If we come back into the Explore tab, we can switch over to the Styles tab, and this shows us a bunch of trending and popular styles that other creators on Midjourney are using to create images.
[09:26] The thing about these styles is it tells Midjourney exactly what you want your images to look like. So if we search styles for something like landscape, we're going to get a bunch of curated styles that other users have used to create a certain aesthetic when making landscapes.
[09:42] There's a ton of different options depending on the style that you're going for. if you want something more rustic and washed out or more vibrant and rich with colors. There's all types of styles that you can choose from to apply to your prompts and these really change the entire
[09:57] vibe of what you're creating. So what we can do is grab one of the prompts that we used earlier and this time I'm also going to apply one of these styles to our prompt. So we'll go for something like this with try style and it submits our current prompt with that style applied. So the
[10:11] cool part is you can come through and generate a bunch of different images using these styles if you want to. And what you'll see is that these styles completely change the artwork that you're selling. You get a completely different mood depending on the style profile that you apply.
[10:25] Now obviously you want to create artwork that the customer is trying to buy, but now you have all of the tools that you need to to create great artwork no matter what that style looks like. I think that these are some of the best paintings that we've gotten so far, and so we're going to use this as
[10:38] our first product. Once we have our artwork made, we have to prepare to sell it. Since we're using Mid Journey Version 8 and HD mode, all of the images are already generated in the highest quality, so we just have to click on download.
[10:50] And with that image downloaded, now we have to prepare it so that we can sell it. There's a couple things that have to happen between now and when our product is posted for sale ready to go. First is we have to prepare the image sizes A lot of these listings on Etsy come in several different aspect ratios so that the customer can choose exactly what they want to get printed so that they can hang it on
[11:11] their wall. And second, we'll have to put that artwork in a mock-up so that it looks nice when we post it for sale. Normally, it would take a ton of time to crop your original image into each one of these aspect ratios just so that the customer can pick the one that they want to sell. But
[11:26] Luckily, we have Claude. I'm going to leave this full prompt right below the subscribe button, but I'm just going to copy the whole thing and come over into Claude, paste it in, and hit run. Since it would take so long to manually crop every single image that we generate into several different aspect ratios,
[11:43] we can use Claude to build out an entire tool that can do this for us without us having to do it manually. You can read through this if you want, but it basically gets Claude to build you an entire app that you could use in this automation for yourself
[11:57] that can run on your local computer so that you don't have to buy any other subscriptions or tools to do this automated cropping for you. And once it's done, it should create a file that looks like this. It's just called the wall art cropper, and we can open this up in our web browser.
[12:13] This is insanely cool. So what it lets us do is drag in that artwork that we created in Midjourney, and it allows us to make all of the crops that we need in bulk. So the first thing I want to do is update the name. We're going to call this one French Countryside.
[12:26] And then we can come down and we can control exactly how the crops are made. So this is a landscape or wider image. And this app that we one-shotted with Claude is already super robust. So we can toggle on or off the specific crops that we want it to make.
[12:41] And we can even enter manual mode. And this lets us override the crop positions for each crop so that we can decide exactly how all of those crops should look on the final product.
[12:53] This way, we can control exactly what content should be in or out of the cropped area for each one of those aspect ratios. From here, we can hit Generate Crops. It's going to process that image and create all of our different aspect ratios.
[13:06] We could download individually, or we can just download them all as a zipped file. And now we have all of those crops in our saved folder, named how we wanted to, and we could go and sell this as a finished product.
[13:19] All of the files have the name of the crop as well, so it's super easy for the customer. The next step is we need to create a mock-up, which is just putting our artwork in a blank frame so that the customer can see exactly what they're buying and what the end product should look like.
[13:31] This used to be hard, but now it's super easy to do. So if we come back in the mid-journey and go into the Explore tab, we can make a search under the Images section for something like a mock-up frame. This is going to give us a bunch of blank mock-up frames
[13:45] that we could use to display our product. You can search for really anything that you want, but I'm just going to try and find a few that I think look good. So for example, we could use this one. It's just a simple blank mock-up frame. And instead of just saving this as a mock-up image,
[13:59] we're going to regenerate our own so that we get the highest quality. And we can do this a few times just so that we have several options to choose from when we actually go to create our mock-ups. And now we have a ton of different frame mock-up options
[14:11] that we can choose from when we go to sell our product. But now we need to put our artwork on the mock-up image we made. And to do that, I'm going to be using a tool called ListingView. Now, full transparency, ListingView is my tool. So if you decide to use it, you're going to be supporting the channel,
[14:25] and you're also going to be able to save a ton of time. In ListingView, if you just go to the Asset Library, this is where we can upload all of those mock-up templates. Once they're all uploaded, we just need to select them all, set them as a category, and define them as mock-up templates.
[14:40] This allows us to use the mock-up generator. Then we'll start with the first mockup. We just need to click view details and define mockup region. This is going to be the region where the mockup is actually generated. So we just want to grab these handles and drag them into the area where the print is actually going to show up.
[14:56] You want to try and be precise here so that it doesn't look weird when we go to generate the actual mockup. But once it looks good, just hit save and now this mockup is ready to use. I'll repeat this for the rest of our mockups and we should be good to go.
[15:10] I'm also going to add them into a frame mock-ups collection just so that I can stay a little bit more organized. Next, I'm just going to grab all of those artwork prints and upload them into ListingView as well. And once they're uploaded, we can use them to create our mock-up images.
[15:23] All we have to do is select one, click Generate Mock-ups. I'm going to select our entire frame mock-ups collection. And for a print like this, I typically like to set it to cover the entire mock-up area. And I'm just going to hit Generate.
[15:35] Once it's done, we can view the mock-ups. And if I open one up, you can see that now we have a beautiful mock-up that shows off our artwork that we could use to sell this listing. And we were able to create all of these in just a few minutes.
[15:47] And now with our mock-ups ready, since everything's in listing view, we can get this product ready to sell. So to get this posted for sale, all we have to do is come over into the listing optimizer tool and click on create and create a single listing.
[16:00] This is where we can build out that product listing for our shop. The first thing to do is just drag in those mock-up images that we made. and fill out all of the core details that SE requires to make this a listing. Then we can use the ListingView AI to fill out all of the SEO details
[16:14] to actually get this listing to sell. So if I open up the AI tray, I'm going to change the model to Cloud Sonnet. Then I'm going to generate the title, tags, and description for this listing. And for the custom prompts, I'm going to insert a bunch of keywords
[16:27] that tell Cloud exactly what this print is. Then I can just hit generate. This works with ListingView and Cloud to create the absolute best SEO so that when we post this product for sale it hopefully get some organic traffic without us needing to buy paid ads especially early on It gave us a title
[16:44] a full description with lots of details, tags for our listing, and so now the last thing we have to do is just upload all of those files into our listing so that we can sell them. All I'm going to do is click on browse library, and then I'm going to link all of those paintings that we
[16:59] created to this listing. And just like that, now we have those five aspect ratios in our listing ready to sell. The way this works is ListingView is going to bundle all of your files, no matter how big or how many you have, into a downloadable PDF that's branded to your shop with your logo
[17:15] and any other customizations you have, like how many download buttons you offer and so on. You can also do things like leave the customer a thank you message or instructions on how to use your download. From here we just have to hit create as draft and so now if I come into my Etsy shop
[17:30] you can see that listing right here. It's got all of the images, it's got all of those artwork paintings bundled inside of this downloadable PDF that the customer can get and you can see exactly what that looks like. It's branded to our shop and it's got a download button for each one
[17:45] of the prints that we included in this bundle. Now this might seem really basic but if we went with a normal process we'd have to come over to Etsy, create a new listing, manually create our mock-ups or create them using some kind of other tool, upload those mock-ups to the listing,
[18:00] manually type out a full description, and then when you realize that you either have too many files because Etsy only allows you to add five, or that your files are too large since you're selling really large wall art prints, then you're going to have to instead go over to your Google
[18:15] Drive, upload the entire folder of your artwork to that Google Drive, copy the share link, and make sure that you have the correct permission set, and then use some kind of tool to create a downloadable PDF that you can add the link to, save to your files, come back into ListingView, just so that
[18:32] you can upload that download link to your listing. So yeah, the ListingView PDF makes it really easy because this is basically what they'd see, and when they want to download one of the paintings, they just click download, and it downloads it directly to their computer. Full 4k resolution
[18:46] and everything. And so now we basically have this entire listing that's ready to be published for sale and if a customer bought it everything is fully automated. And back in listing view now that we have this listing made what we can do is we can save all of the details as a preset. So if
[19:02] I click on presets and save as preset we can give this a title something like digital art and save the preset. So now when I come back to create a new listing for my shop I can apply that digital
[19:14] art preset to my listing and from here all I have to do is change out the files that are added in this listing, change out the mock-up images, and rerun ListingView's AI to create a new title,
[19:26] tag, and description for the next product. Anytime this sells, we wouldn't have to do anything because the customer gets the download and they can access all of the paintings. And so when it comes to selling products, this is as close to passive income as it gets. That basically covers
[19:40] the entire process that we're going to be following. And the cool part is that since we have such clear processes and can break everything down into these simple steps, we can automate each one of those steps using Claude. Now, I created four Claude skills that handle every part of the
[19:55] process from completing research on Etsy, creating the artwork in Midjourney, cropping the images to the right sizes, and even creating the listings. Then, I combined all four of those steps into a master skill that uses each one back-to-back to automate nearly the entire process. Now, it uses
[20:12] the Claude in Chrome extension a lot, and there's some points where it needs user input because Chrome restricts it from completing certain actions like downloading and uploading, but overall it's pretty neat that it can handle each step of the process. The process took around 55 minutes in
[20:28] total to complete two listings, and during that time I had to intervene three different times. Twice to complete a couple actions that Claude couldn't do on its own, and because the third time
[20:40] I actually ran out of tokens to use with Claude, so I waited until the next morning to finish completing the upload process. It's super cool that this is possible and this is as automated
[20:52] end-to-end as you can get right now. But in my opinion, instead of running the entire automation all at once like I've done, it's more efficient to use one skill at a time for specific parts like research collection so that you have more control over the other areas that might be more important
[21:10] to the business anyway. Plus, you'd probably be able to do these other steps much faster than Claude could to begin with. You can download all these skills completely for free right below the subscribe button, but one side note is to be careful downloading Claude's skills off the internet
[21:24] when you don't know the creator. These can sometimes create malicious code on your computer, so just be careful. And this automation is super helpful because if you actually want to get to the point where your shop brings in thousands of dollars a month, you need hundreds if not thousands
[21:39] of listings posted for sale like these shops have done. So yeah, if you're consistent with it over time, I definitely think that this has potential to go into something legitimate, but I just thought that between the Cloud Cowork updates and the new Midjourney version 8, that this is one of the
[21:53] coolest side hustles that you could try out if you're looking for a way to make some money online. Let me know in the comments if you'd try this out, or if you have other ways that you can use Cloud or Midjourney or any other AI tool to make some money online. But yeah, I just thought this
[22:06] was cool and thought you might as well, so thanks for watching, and as always.

⚡ Saved you 0h 22m reading this? Transcribe any YouTube video for free — no signup needed.