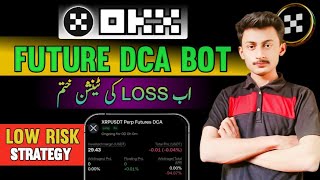

Set Up Your DCA Bot Direction & Price Steps
42sTeaches beginners the crucial first steps of setting up a futures DCA bot in a simple way.
▶ Play Clip"Delivers a solid step-by-step guide for beginners, but includes some filler and repetitive explanations."
This tutorial demonstrates how to set up an automated futures DCA (Dollar Cost Averaging) bot on the OKX exchange. The presenter walks through configuring parameters such as trade direction, price steps, take profit percentage, leverage, and safety orders to automate trades. The video is aimed at beginners looking for a low-risk, hands-off trading strategy.
After verification, click the button on the top corner of the home page, scroll down to find 'Bots', then select 'Future DCA Bot'.
Unlike pre-set AI strategies, the tutorial focuses on manually creating a bot by clicking the 'Create Bot' button.
Choose a coin (e.g., XRP) and set available balance (e.g., $75). Transfer funds if needed via the '+' button.
For a long trade, profit when price rises; for short, profit when price falls. The presenter selects long based on analysis.
Price step defines the percentage drop to trigger a DCA order. Example: 1% means each 1% drop adds a new order.
Set the profit target percentage. Example: 2% means the bot will take profit when price rises 2% from the entry.
Available leverage up to 11x; presenter selects 5x. Confirm by clicking 'Confirm'.
Percentage of balance used for the first order. Example: 5% of $75 is used initially.
Set dollar amount for each DCA order. Example: $3 per price step drop.
Number of times DCA repeats. Example: 7 times means up to 7 additional orders on consecutive drops.
Choose 'Instant' to activate bot at current price, or manually set a trigger price.
The bot shows liquidation level. For long, price must stay above liquidation to avoid forced closure.
After clicking 'Create Long', bot becomes active. Shows margin, profit, and APY earning.
To close early, use 'Stop Condition' and set a trigger (Cross Below for long) with a specific price to exit at a loss.
The OKX Futures DCA Bot allows beginners to automate low-risk trading by systematically adding to positions on price drops and taking profits on rallies. The key to success lies in carefully setting price steps, safety orders, and stop conditions to manage risk.
What does DCA stand for in trading?
Dollar Cost Averaging.
00:01
What is the difference between Long and Short in futures trading?
Long profits when price rises; Short profits when price falls.
01:38
What does 'Price Steps' control in the DCA bot?
The percentage drop in price that triggers a new DCA order.
02:05
What is 'Cycle Take Profit'?
The profit percentage at which the bot will close the position.
02:33
How does 'Safety Order Margin' work?
It sets the dollar amount allocated to each DCA order when price drops.
03:40
What does 'Max Auto Safety Orders' limit?
The maximum number of consecutive DCA orders the bot will place.
03:53
How can you manually close the bot before it reaches take profit?
Use 'Stop Condition' with a trigger like 'Cross Below' for long trades and set a specific price.
06:42
Choosing Long vs Short
Clarifies that the bot can be used for both bullish and bearish strategies.
01:38Automated DCA on Drops
Explains core mechanism of averaging into a position as price falls.
02:05Initial Order Margin
Shows how to allocate only a portion of balance to the first trade.
03:13Start Condition Flexibility
Offers both instant activation and manual price trigger options.
05:22Manual Stop to Limit Losses
Demonstrates how to exit a losing position manually.
06:42[00:01] today I am going to tell you that you can do future trading automatically, how can you do it with the help of Future DCA Board, I what do you guys have to do? If you do
[00:16] After verification, you will see this button on the top corner of the front home page, click here. Right now, as soon as you scroll down, you will button here. You have to click on the bots. Here you people are getting
[00:30] I had told you about the flywheel boat. You guys special topic of today's video is about Future DCA Boat. So you guys have to click on it. Let me tell you guys how you have to
[00:43] you can see it here. Here you can see AIA Strategies. Now we can copy these AIA strategies directly from here. But we have to create our board manually. So here you can see this button
[00:55] click here. Now as soon as you click here, the coin that you can see above here is You can select any coin by clicking here. Let's suppose you can do BTC, Ethereum , 16, you
[01:09] selected the xrp coin. After that, you people have to seen here, available balance. I have about $78 lying around in my can transfer here. If you click on plus, then from here you can easily transfer the
[01:23] When your balance is shown here, then you you how to create the bot. To know the direction whether you want to trade long or short. Now long
[01:38] means that if the price of the coin goes up then you people will make profit. Short down then you will make profit. Now according to my analysis, the price of XRP coin will go up. So from here I selected Long.
[01:51] see below are the price steps. You have to understand that. You people have to understand this setting. What will happen is that our trade will be activated. are busy somewhere or sleeping, even if the market goes down during that time,
[02:05] our position will automatically remain activated. DC will continue to happen. Basically, price down by so much then our DC will be. Let's suppose now our trade has been activated above the current price from here. enter the price within these price steps so that if the price goes down by this much percentage from here, then
[02:20] our trade should keep getting activated. DCA should continue. So here I feel that if the price goes down by 1% from here then DCA should continue in my trade. We put this inside the steps that if the price goes down by 1% then our DCA will continue. The
[02:33] After that, cycle on take profit is seen. This means at what percentage should we take profit? If the price of XRP coin goes up by 2% from here, we will make a profit. Here you can do 1% or even 2%. Every person will make the
[02:46] settings according to his own accord. But S means that you will get 2% upside. Your profit will be booked. Right? You people also understood this. Now here you people are leverage is 11x. Leverage of 11x is available. I will click here.
[02:59] from here I do 5x. After doing 5x, I confirm from here. Our leverage has also been selected. Now the initial order margin is visible here. This means how much margin should be selected on the first order we place
[03:13] ? Let's suppose I reduce it to 5% here. Now 5% of the $75 I have will be used in this trade. Initial means that the first order will be charged 5%. And after that, the safety order margin is visible below.
[03:28] Our other orders will be placed as I have tapped above that if the price goes down by 1% then our orders will keep getting placed and DCA will keep happening. But here we have not mentioned the amount of DCA. So here you can see safety order
[03:40] margin. This means that when the price goes down by 1%, then how many dollars should our DCA be. So here we have to type dollars inside USD. Let's suppose now what I have here is I'll do a DCA of about $3. And
[03:53] here you can see Max Auto Safety Orders. This means how many times it should continue doing DCA. Like a 1% drop would have been a DC of $3. Then if the price falls by 1% then there will be more DCA. How many times should this be repeated? Let me tap here
[04:06] seven times. Now as soon as the price goes down seven times , our you all must have understood it well. Here you can see price steps. This means that by
[04:18] how much percentage the price should go down so that our DC gets activated. So here I tapped 1%. If the price goes down by 1% then my DC will be activated. Take profit per sale means at what percentage we get profit. As soon as the price of XRP coin
[04:30] goes up by 2%, we will get profit. Leverage is visible below. Then here you can see the initial order margin. your first trade will be activated.
[04:45] simple. After that, safety order margin is visible. Meaning, you have to You have to do it according to yourself. I've typed $3 here. Then here we
[04:58] see Max Auto Safety Orders. This means how many times DC is I tapped here seven times. Now as the price goes down person by person, my DC will automatically increase seven times. All this work will be done automatically by us.
[05:10] As soon as the bot is created, everything will happen automatically. If the price goes down then our DC will be. If the price goes up, our profit will be booked. Now here the when will this bot of ours be activated? So
[05:22] you can see the advanced setting. You guys have to click here. see start condition on the bottom side and here you can see instant. You have to
[05:34] click here, instant means that activated instantly on the current price. Your trade etc. will be placed. If the price goes down then your see the price. You can also type the price manually.
[05:49] Let's suppose you think that if the price of XRP coin goes down from here then our gets placed, then you can also type the price manually here. So here I After clicking on Instant, I will click on Confirm.
[06:03] our liquidation is also being shown here. As soon as the XRP coin goes above $1.62, our trade will be liquidated. And what we have to do is activate the trade above the current price. So what you guys are seeing here now is the
[06:15] After doing all this, you have to click on Create Long because we had selected Instant. Our bot has been successfully created and now if you can also check whether the bot has been activated or not. Look in front of you all,
[06:29] margin is also being shown here. Profit is also being shown. In this I did not tell you about one plus point that you will also get APY. APUY get interest etc. How do you guys close the position now?
[06:42] You feel that now this boat should be cancelled. You will click on the peacock. Here you can see the stop condition. You will people are getting to see the end of the cycle. You don't have to do anything to it. This
[06:56] trade will close. But we have to close the instant trade immediately. So this is what you guys are seeing, price stop what when the last price is click here, you will see an interface like this. Now here
[07:10] Here you can see the trigger setting. This means cross above. If you click here, two options will appear. Cross Above means that if you are running a short trade then you have to select Cross Above.
[07:23] If you have a long trade going on and the long bot click on the cross below. So I'm going to click on the cross blow. trigger price here. This means that
[07:39] closed instantly. Like right now the price was 2.13 cents, so here I will send 1335. Here we entered the price. After entering the price, After confirmation, this boat of ours will automatically close within the loss.
[07:53] Now I have explained this completely to you all in details. How do you guys I have closed the boat which is inside my loss. So you guys have to do it this way. able to see the price etc. If you put the price a little higher or lower then
[08:07] close. I hope you found the video infective. If you find the video interesting, in the next video. Till then Allah Hafiz.
⚡ Saved you 0h 08m reading this? Transcribe any YouTube video for free — no signup needed.