
Scalping Strategy That Actually Works
43sOpens with a relatable pain point (fear of losing everything) and promises a solution, creating high engagement and curiosity.
▶ Play Clip"The title promises a working scalping strategy, and the video delivers a detailed, actionable method with real examples."
This video presents a scalping strategy for cryptocurrency trading using TradingView integrated with Bybit. The creator, Sergey, demonstrates how to set up the workspace, select volatile coins, and execute trades based on MACD divergence and moving average crossovers, emphasizing risk management and automation.
Many traders fear losing everything in a few trades. This video offers a scalping strategy that works in TradingView.
TradingView supports direct integration with Bybit via API key, allowing traders to execute trades without switching to the exchange.
Set up workspace in TradingView, add indicators, create a watchlist of coins, and trade directly from there. Bybit serves as a wallet.
Click the arrow in TradingView, go to trading panel, select Bybit, connect, and allow access. The account is then linked.
Select coin, choose long or short, set stop loss and take profit. TradingView automatically adjusts position size based on risk per trade.
TradingView shows risk-reward ratio in real-time. Example: risk $1 to earn $3. This helps traders profit over the long term.
Use Cryptotank platform to filter coins by volatility on Bybit. Volatility is key for scalping.
Use 1-minute chart, volume indicator, MACD (with signal line hidden), and moving averages (9 and 21). Set horizontal lines on MACD at ±0.25 to identify volatility peaks.
Wait for MACD to cross above/below the horizontal lines and a moving average crossover. Enter on the next candle after the signal candle closes.
Enter on a pullback (e.g., 0.5 Fibonacci retracement of the signal candle). Place stop loss just below the signal candle (aggressive) or below the previous candle (conservative).
Move stop loss to breakeven after price moves favorably. Trail stop loss under pullback knees to capture maximum profit.
Set alerts for moving average crossovers in TradingView to receive notifications via pop-up, email, or sound.
The strategy relies on identifying volatile coins, using MACD and moving averages to time entries, and managing risk with a favorable risk-reward ratio. Automation and practice in demo mode are recommended before trading with real funds.
What is the recommended risk per trade as a percentage of deposit?
1% of the deposit.
04:47
How does TradingView automatically adjust position size?
Based on the stop loss distance and the set risk per trade.
05:01
What are the two moving average periods used in the strategy?
9 and 21.
15:16
What is the purpose of the horizontal lines on the MACD indicator?
To identify volatility peaks; trade only when MACD crosses above or below these lines.
15:31
When should a trader enter a trade after a signal?
On the next candle after the signal candle closes.
17:18
What is the aggressive stop loss placement?
Just below the signal candle with a small buffer.
17:45
What is the conservative stop loss placement?
Behind the previous candle before the signal candle.
19:29
What is the key metric for selecting coins for scalping?
Volatility.
09:03
How can a trader automate notifications for signals?
Set an alert for moving average crossover in TradingView.
27:57
What is the risk-reward ratio mentioned as a minimum for profitability?
1:3 (risk $1 to earn $3).
06:10
Risk-Reward Ratio Display
TradingView shows real-time risk-reward ratio, enabling traders to maintain discipline.
06:10Volatility as Key Metric
Scalping relies on volatile coins; using a screener like Cryptotank is efficient.
09:03MACD Horizontal Lines
Setting thresholds on MACD filters out low-volatility periods, reducing false signals.
15:31Entry on Pullback
Entering at 0.5 Fibonacci retracement improves risk-reward ratio.
17:31Win Rate vs. Risk-Reward
A trader can profit with only 1 win out of 20 trades if risk-reward is high (e.g., 1:27).
25:49[00:02] short movements, but are afraid of losing everything in a couple of trades? It's not surprising, this happens to almost everyone. But today we will change that. I'll show you a scalping strategy that actually works right in Trading View. I personally trade using the
[00:15] Trading View + Bybit combination, and it consistently produces excellent profits, especially for scalping. My name is Sergey, I am the author of the SRK Crypto channel, a trader and investor with twenty years of experience. Let's go. Many people don't know that they can trade directly from
[00:28] Trading View without having to switch to the exchange, which makes scalping much easier. Trading View supports direct integration with Bybit via AP key. You can set your risk per trade, and Trading View automatically adjusts the amount to
[00:41] open the position, which greatly simplifies the process of entering a trade and allows you to quickly respond to a signal without wasting time on the exchange interface. Everything in one window. Schedule plus login button. And let's see how it
[00:56] Trading View. Here we will fully set up our workspace, add indicators, create a watchlist of coins, and trade directly from here. In this case, we will need Bybit simply as a kind of wallet where
[01:11] funds for trading will be stored. We connect Trading View and Bybit using the AP key . And then all trading takes place through Trading View. For registration, all links will be in the description below the video. Trading view is a must-have tool for any
[01:26] practicing trader. I also use the Bybit crypto exchange for my trading. This is the top crypto exchange in the world. It features a user-friendly trading terminal, spot futures trading, a variety of earning tools, Spot X,
[01:41] a pre-market, trading, copy trading, and trading bots. In the Banking section of Eorn you can open a crypto deposit. You can also open a payment card for yourself, just like a bank card. Only here you can pay for purchases with
[01:55] cryptocurrency. After registration, we complete verification in the " Buy Cryptocurrency, P2P Trading" section. You can top up your balance using a bank card or any other payment system.
[02:11] description below the video. Don't miss our chance. And if you don’t understand something, go to the channel, playlists. There's a whole Bybit learning playlist here. BYбиit for beginners. In this playlist, you'll find answers to almost all your
[02:24] questions about the Bybit crypto exchange. It also discusses many ways to make money on this crypto exchange. So, to link Trading View and Bybit, click on the arrow below in Trading View. Next is the trading
[02:39] panel section. And as we can see, we have the Bybit crypto exchange. Click right here. Then connect. Here we log in to our BYBIT account. And that's it, a window appears. Link Trading Vi to your Bybit account.
[02:53] You can read the information here. But the point is that here we allow Trading View, access to trading on the Bybit crypto exchange . And as we can see, there is a note here that providing access does not include the possibility of withdrawing
[03:07] click allow. As we can see, our BYBIT account has been connected. Now we can see here the balance, positions, applications, history. account status,
[03:19] notification log, you can switch between spot, inverse contracts, or derivatives. This is futures trading, which we will analyze today using the example of a trading strategy. Here we have a trade button. And since we have
[03:33] selected derivatives and futures trading, we also need a futures chart. When we select the futures chart, the entire trading panel appears here . To add a coin to the Watchlist, we click the
[03:48] plus sign. And here we see that I have set the Bybit crypto exchange filter. Next, to select a futures chart, we look for the name of the coin with a dot and the letter P, written here. For example, we found some coin. Add, click the
[04:05] plus sign. That's it, the coin is on our list. If we need to delete something, we just click on the coin and click delete. That's it, the coin has been removed. We select the schedule we need. And, let's say, we want to open some kind of deal, either to sell,
[04:19] short, or to buy, long. Long means we earn on growth, short means we earn on decline. Well, for example, we want to open a short trade. Click sell. Next, we can immediately set a stop loss. We just take it
[04:33] from here and pull it. Let's look at the graph to see where it would be convenient for us to hide it. The next thing we do is set Take Profit. What exactly is convenient about Trading View? Firstly, we can immediately set the risk per transaction. As we can see, we have this value in
[04:47] dollars. The usual average risk for a trader in a transaction is 1% of the deposit. For example, $100 trade the entire deposit. And we give ourselves a one here. All. Trading view automatically calculates the amount per trade based on
[05:01] where we place our stop loss . That is, we don’t need to do this. This is usually done manually using a formula. Every time we make a trade, we calculate the amount per trade so that the risk in the trade, for example,
[05:15] like here, is not exceeded by $1. Stop-loss, the distance to the stop-loss will be different for each transaction . That is, somewhere we hid the stop-loss here at 1%, somewhere we wanted to hide the stop-loss further at 3.5%.
[05:30] And as experienced traders do, naturally, they don’t increase. In one trade the stop loss will be $3, in the second trade the stop loss will be $2. You wo n't get far with risk management like this . For this purpose, the transaction amount is adjusted
[05:42] . There is a special formula to adjust this, but in Trading view this is not necessary. We move our feet as we please . We see here that the meaning does not change. 1 dollar, as we asked. That means our risk is $1. That's it, no matter
[05:56] move the stop loss, we will always have a risk of 1 dollar. Well, here, as we can see, it can be a couple of kopecks less. It all depends on the acceptable lot. Although, yes, I moved it, moved it, that’s it, it’s adjusted to exactly 1 dollar. The coolest thing is
[06:10] that we can immediately, while moving our take profit, pay attention here. This is our ratio. That is, we, for example, set the risk-profit ratio to one: we trade with this. We move it quickly, once we place it, we see that a three has appeared.
[06:25] And it turns out that we have a clear picture: we risk one dollar in a deal and want to earn three. That is, due to this, traders earn money in the long run. It's impossible to trade all deals in the black; there must be a series of stop-losses, a series of
[06:38] take-profits, and thanks to this risk management, we make a profit over the long term. But, of course, today we'll figure out how to get more than 1 to TM out of a deal. That's it, we're ready. Let's say we
[06:50] have some level here. We are waiting for it to break through , we are in no hurry. Let's click sell. Either here or here. We'll run out of money. Let's say we are waiting for a breakout, and our price has broken through. We want to enter here on a pullback. We
[07:03] waited calmly for this breakout, threw in a limit order, and that's it, we were taken into position, the deal worked. We can also move this limit before it is activated. We can move it a little higher, that is, adjust it
[07:16] to the price and move the stop-loss. Here we must not forget to adjust risk management as well . This naturally concerns a limit order, that is, not based on current values, but when, say, if, say,
[07:30] the price is moving as it is now, we want, when we have a correction, to enter into a continued movement in the long direction. We click buy, drag our limit order here, and hide the stop loss. We set the take profit, adjust it, set the risk per trade
[07:45] and can throw it away, click buy, throw away our limit order. That's it, the limit is worth it. We can move it a little bit somehow . edit. You must click on Edit Request to edit it. And here is a cross to
[07:58] cancel it, right? Next, we have, of course, a market application. At the current price here and now, we can also set a stop-loss take-profit in advance , adjust it to the risk per trade, set, for example, 1 dollar when we
[08:12] risk per trade, and after clicking the buy button, a that is, a purchase. So. And we moved on with the strategy. Now you need to
[08:24] choose the right coins for trading today. There are different ways to do this, but my favorite is the cryptotank platform. I'll leave a link to it in the description below the video. Here we go to the
[08:37] coins section. And what is convenient here? We can go to filters. I already have the filter set up. Now I'll show you what I configured here. It turns out that we immediately set the capitalization so that these are not some kind of
[08:49] shtickoins. Next, we select the exchange. As you can see, I have BBITE selected. Here, when we type in the search, the exchange immediately appears. You can check the box. So, I didn't change anything else here. Let's move on to the tables. And here my favorite
[09:03] filter is volatility. For scalping, volatility is exactly what we need. By and large, it's not so interesting where the coin is moving. The main thing is that it is volatile, so that trading takes place there.
[09:17] Participants pushed the coin up and down. And it is on this swing that scalpers ride. We select volatility. And that's basically it. Then apply. Can be saved as a preset. For example, I saved this preset for myself. All. Click
[09:31] the "Apply" button. And what interests us here ? Find the volatility column and click directly on it. We filter coins by top volatility. That is, not the top by growth or hit or something else, but
[09:44] we are specifically interested in volatility. But, of course, this list will include coins that show some good growth or a good fall. We, in principle, don't care. The main thing is that the coin moves back and forth well. And
[09:57] then we just copy the tickers and the names of the coins. Stand out. It does n't really stand out here. Just right-click and copy the link address. Let's move on to Trading View. We are recruiting a Watchlist. If there is something here, you can select it and
[10:11] delete it. Click the plus sign. We insert the link here and delete everything unnecessary elsewhere. It will probably be easier to type it by hand. And here is the Hyper coin. I watched it today. Click the plus sign. Let's see what we have next. H. Just a coin H. We write H. Here is
[10:27] such a coin. Please note that these are futures. Click the plus sign. Next is sepak. We also click the plus sign. And thus we collect our Watchlist. We open any of the coins. And this is enough for us as an example. Now
[10:41] we smoothly move on to an analysis of the strategy itself. In scalping, details, entry technique, and position introduction are very important. We will now analyze all of this. As always, don't forget to like, comment, and
[10:54] subscribe so you don't get lost. But we continue. So, for example, we opened this coin. We need a minute chart. Next we add the usual volumes, for those who don’t have them open. Then the MACD indicator convergence, divergence of
[11:07] moving averages and Ekrooss this indicator. This is the kind of author he is. Click here. Okay, now we'll set them up. This can be closed for now. We use this indicator to determine market volatility. And
[11:22] what is the main problem with all indicators, moving averages? For example, if we just take some intersections here, we often have these sideways movements where we receive many signals, but at the same time our price does not move further, it
[11:39] goes up and then down. A bunch of these false signals result in a lot of stop-losses, but we need a good signal on a trend, on a reversal, to get a longer movement. To do this, we locally determine, so to
[11:54] speak, the peak of volatility, the strength of the trend using MACD, and in particular the MAGD signal line. Open the settings and go to style. We uncheck this box next to the signal and leave only MACD. OK. And we look
[12:10] at the picture from above, so to speak, from a bird's eye view. We see the volumes. I opened it specifically to show that we have almost no trade. The volumes are weak. And we pay attention to the MAGD line. This indicator has a center -
[12:25] it is zero. There is a scale on the right here. And this center is the zero value. And here we see that there is practically no deviation from this zero. That is, it is here, some small, insignificant, but far, above or
[12:41] below the indicator does not deviate. But when we had a surge in volume, that is, money started flowing into the coin, volatility increased, people were selling and buying back and forth, pushing the coin, traders got involved, they saw the activity,
[12:56] because they also use screeners and found it in the same way as we did now. It doesn’t matter whether it will be the top in growth, the top in decline, the top in volume surge, or the top in something else. One way or another, it all comes down to one thing:
[13:10] this coin will be found by thousands of traders who want to make money on this volatility. And we see how it works further. Our volumes are also fluctuating, and many transactions are taking place. Volumes show the number of transactions
[13:23] traded in a certain period of time. There, in the context, let's say we have a minute time frame, and each column here will correspond to the traded volume. The number of trades completed in this minute . That is, this specifically
[13:36] shows us the activity of the participants. And here we pay attention to the MCD, what kind of deviation we have. We are already deviating much more both upwards and downwards. And here, if we notice the highest peak values, that is, the price
[13:50] peak values, that is, the price jumped somewhere, a peak was formed and a good downward movement occurred. Then again we have a peak value on the indicator and on the chart, and the price has rolled down well. We also see below that there is some kind of peak
[14:04] in the deviation on the indicator. We can also see on the chart that the price then went up significantly. That is, MACD shows us specifically where there was some intense growth or decline. And after this we have every chance of getting a strong
[14:19] backlash. The point is that when the price suddenly flies up somewhere, it bounces back very well on this energy. Like a regular tennis ball, for example. If we throw him lightly against the wall, he will bounce back just as lightly. But if we
[14:33] throw it with all our force, it will bounce back much stronger. The same principle applies here . Well, let's say we've already determined what will give us energy and strength for the transaction . Now it is important to understand where to find these reversals, that is, how to
[14:47] catch them. For example, how do we know that when our indicator is growing, growing, growing, and at what point exactly it will reverse? That is, when this very wall occurs, which the ball will hit, where
[15:01] it will be on our way. This is precisely why we add the intersection of moving averages. This is the next nuance in our strategy. Next puzzle. Turn it on and go to settings. Here we move on to the arguments. Let's take 9 and 21. We are
[15:16] interested in these first two periods. Further into style. We turn off everything unnecessary. That's how it is. That is, we leave a check mark here, here and in this place. OK. That's it , we've set it up. Additionally, on the MCD we set up a horizontal
[15:31] line and set barriers above or below which we trade. When the indicator, or more precisely its MACD line, this blue one, is between these lines, we do not trade. We identify a kind of corridor, a range,
[15:46] which will show us that the price has deviated well and it is possible to enter into the forget to follow the news. In my news events in the world of cryptocurrency. I'll leave the link in
[16:00] the description below the video. Come, I'll be glad to see you all. Here we measure approximately. The task is to exhibit both a little and a lot. In general, we estimate that we will have enough power to cover most of the peak values. When we click here on the strip, then on
[16:14] the gear, as we can see, we can set the coordinates somewhere around 025. Okay, up. And I'll set the bottom one the same way, only - 0025. These are the values. We see on the left that when the coin was trading at a low level, our
[16:31] indicator barely reached the peaks. But then, when we started to experience volatility, there was a good surge in volumes , please, how many signals did we start to receive? So, the next step is to take, for example, some peak for the
[16:46] sample and explain further details. So, let's move closer and see that here we have our peak deviation. Next, we pay attention to the appearance of a signal. That is, a little point like this. It says cross here. We take a vertical line
[17:03] and mark this signal. It is important for us to get closer and look at the candle itself on which the signal was. That is, on this candle we are not going anywhere yet. We have formed a signal, but the candle has not closed yet. That is, we do not have
[17:18] signal fixation. We wait for the candle to close and the next candle to appear. Here is the entry point just on the next candle. That is, the next candle appeared. For example, we are already placing a short position deal here. We enter on a
[17:31] small pullback. We remove our vertical mark. Here you can take a rollback from the middle of the candle. That is, we measure the candle. You can take the Fibonacci grid. We just measured it from top to bottom. We have zero fifth value. And we
[17:45] place our entry point directly and clearly on it . We hide the stop loss behind the candle on which we received the signal. Right behind her, with a little bit of a reserve here. This will be more risky, but the distance needed to reach take profit will be shorter. That is,
[18:01] this is offset by the fact that we will be able to take a take profit faster and exit the deal without just for example, how in this case it was possible to pull out 1:5 on the piika. Here there were 1
[18:13] : positions, it was possible to pull more. Please remember that I do not provide financial advice in my videos . Everyone is responsible for their own decisions. So be vigilant. Ultimately, with such a stop-loss, it would have been possible to pull out 1: But also,
[18:29] transaction support is a separate story, although it is a pretty good number of stop-losses, which would definitely be caught here without it. Again, we need to get rid of this and not blindly believe that
[18:44] some strategy will give us at least five or five positive transactions out of ten. Typically, scalping can have five or even seven, but more often than not, profit is made not on the number of positive trades, but on the overall number of trades. That is,
[18:59] compliance with the risk-reward ratio, when we take at least one to three out of the transaction, cover losses and earn over time. Also, as we can see, you can take literally just a few positive trades out of ten with a
[19:13] 1:1 ratio, easily covering all incurred losses and making a profit. All this, of course, is individual. Here it depends on the time spent and, to some extent, on the market situation. So, we have
[19:29] hide the signal candle, but rather hide it behind the previous candle. There was a signal here, and we hide the stop loss behind the previous candle. Yes, we will be extracting a little less from the deal . At our peak, let's say, 1:10 is not even enough. Well 1: TM
[19:44] could also be grabbed pretty quickly. Literally such a short trade, bam, even one in four. This will be more profitable for scalping trading. That is, scalping here, more speed does not mean fewer holes. There are
[19:59] errors at speed here. In some places I didn't have time, in others I was in a hurry . This, of course, needs to be gotten rid of, but there is no way around it. The human factor is also present. Therefore, here it is already possible to pull one to four , and in some places even much more. And an
[20:11] example of a long entry. Same meaning. We have a deviation, a signal has appeared . We will definitely wait until it forms. Not in advance. Here the candle has closed. Already on the next candle the entry is also long. Somewhere from the middle. You can
[20:25] measure the middle of the candle. Every detail is important here. We enter somewhere from the middle of the candle. Stop loss per candle. We are more aggressive and pulling take profit. Here, everyone has their own options , so to speak. Next, we'll look at the techniques for how to pull things here.
[20:40] Well, here at the peak, for example, it was also 1 :6, like under a ruler. So, now I’ll show you how this works in practice, using my trades as an example. We'll also look at the entry technique and transaction support on video. And at the end, I’ll tell you how to get the
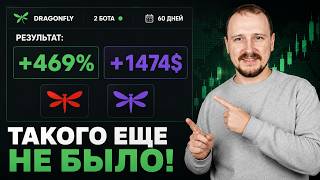
[20:54] most out of the strategy. I have also been using the Dragonfly trading robot to automate my trading for almost 2 years now. To date, a whole line of Dragonfly algorithms has been developed . Conservative ones bring 5-8%
[21:09] . Conservative ones bring 5-8% per month to the deposit. Moderate 8-12% per month to the deposit. Moderate 8-12% monthly. Aggressive - 1220. There are also semi-automatic algorithms. Users achieve profitability of up to
[21:21] 150% per day, but this requires active participation. I'll leave a link to a detailed video and step-by-step instructions for installing it on a real or demo account in the description below this video. So, I wrote down a short example of entering a trade.
[21:35] For example, as we can see, we chose to buy a limited edition . We set a stop-loss and tighten the take-profit. Here, as we can see, I immediately set the risk per transaction at 1 dollar. For example, we take a training deposit of $100, and our risk in each transaction is
[21:48] 1% of the deposit. This is considered a moderate risk. Next, as we see, the entry into the trade is made with a stop loss immediately below the signal candle. I literally made some small literally made some small reserve here. Take profit at a potential of 1 to 100%
[22:02] according to the indicator; we see a deviation of the blue line according to MACD. That's it, as we can see, I additionally set an alert for myself for this intersection of moving averages. I'll show you where to do it today. And here is the
[22:17] transaction support. That is, the price has already passed well. Stop moved to breakeven. If, for example, the price rises from the current level and rolls back, then I will not receive a stop-loss. Here is my orange stop-loss order, already moved to
[22:29] breakeven. This means that the deal will definitely close with a small profit. And then, as always, this last stage just falls a little short of profit. I'm waiting, waiting, waiting. New entry. Here is the transaction support. Stop.
[22:44] Moved it again. That is, everything will already be recorded here. If it squeezes downwards, a small profit will be recorded there. Moved it a little more. Some kind of knee has formed here . I just moved it under him every time. The main thing is to click
[22:57] change. There was just a button. Here, the profit could be moved further away and the stop loss could be pulled along with the price. But I decided to just wait for the take profit to be executed, since the deal is an example, we can see everything, the price touched and
[23:10] jumped even higher, reaching the take profit. So, deals from the diary. Here it was possible to successfully extract the deviation according to MA maD. Adjusted individually to the coin. That is, as we initially looked at,
[23:23] here we go in and see that this coin is Hyperlane. The volatility here is 30%. Well, it's very huge. Naturally, not all coins jump like this. That 's why here I estimated it based on deviations and peaks. On average, I saw that 0.25
[23:39] is normal. That is, it is precisely the peak values that are caught here. That is, it is somewhere in the middle. so to speak, the maximum deviation in volatility and movement of a given instrument. For example, if we take a transaction
[23:52] for the ICP coin, we can see here whether it had deviations, let's say, for other values. This is just a bonus for the most attentive ones. bonus for the most attentive ones. That is, here it is already the value 01. So,
[24:07] in each coin we go in, roughly estimate, and look at what achievements it has had. . We see that we had a peak, that’s it, the price has returned. Further on there is
[24:23] an intersection. The only thing is that here I jumped on the very signal candle. confidence. Maybe I saw something else here. Well, we could have gone to the next one . And it turns out that the red bird is an entry into a short position. The ratio, if
[24:39] you measure it, is our take profit. and immediately behind the candle, for example, or a little behind the previous candle, if you hide it behind the previous signal one. We have a previous signal one. We have a risk-reward ratio of 1:2, which means
[24:53] this is incredibly cool risk management. That is, I just trade, then at any moment I can come back, look at a certain transaction, look at it on different time frames, see what the volumes were. For those who haven't registered,
[25:05] I'll also leave a link to the trading diary in the description below the video. The next deal is description below the video. The next deal is also a beauty. VLD coin. Here we see that we also had a deviation in the magdishka, an intersection. And here we have
[25:19] our take profit, red bird, long deal. The stop-loss here is really small. It could be inserted easily behind the signal spark plug. The risk-reward ratio is just crazy. 1:27. In principle, with this type of
[25:33] risk management, you can take one positive trade out of twenty and earn good money over the long term. There are living examples of successful traders. So, how is a trader's success measured? Not that he predicts the future,
[25:49] but that he makes money. There are real traders who win one trade out of twenty and earn a fortune. In this case, for example, our risk is 10 bucks. And in the end we take $270. And let's say we have
[26:03] 19 unprofitable transactions on top of all this. That's $10 each loss, $190 $10 each loss, $190 loss. 270 - 190 - 80 dollars in plus. Great trade. It is very important to expand your trading, so to speak, consciousness
[26:19] in order to learn to work with statistics, and not look for some kind of magic for predicting the future. and the technique itself, how, for example, to pull off such a deal. It is important for us,
[26:31] naturally, to make a high-quality entrance. Next, we pay attention, of course, we move to breakeven, as I showed in the video, when the price has already moved a decent amount from our entry point. And when we form
[26:45] knees like these, like here, here, that is, we have an impulse, correction, impulse, correction, impulse again. We are developing a trend. We pull our pole under each knee. Naturally, we pull the profit higher, it
[26:59] turns out higher, we move the profit higher and pull the stop loss behind it. That is, this is transaction support in order to extract the maximum. Here the exit was most likely simply at the opposite level. Here we see that we already had a
[27:13] good level of resistance on our way. That is, it is possible to establish some kind of zone here. The price doesn't always come out exactly the same. And before reaching this resistance zone, I decided to jump out of the position and
[27:26] lock in all the profit. So, how to automate all this? This is done in an elementary way. Let's move on to Trading View. Why is it still the number one top platform for trading? There is everything you need for trading here.
[27:42] It doesn't matter, scalping, medium-term, any kind of trading, automatic, semi-automatic, trade here however you want . And so as not to sit and . Here is our Hyper. Here is the indicator, we point three dots and
[27:57] add an alert for the intersection. Next comes the name of the indicator. And here we see that we are setting everything up. Further notifications can be received via pop-up notifications. It will ring. Sending by email, sound signals. Click create. All.
[28:13] When we have some kind of intersection here, we will see a notification like this pop up at the bottom , or we will receive an email, and you can also come there. Thus, we can still automate all of this for ourselves.
[28:28] We've compiled a list of volatile coins here. There’s no need to dive far here either. We don't need many tens of coins to trade. Again, no one is stopping you from conducting your own tests or investigations right here on the chart. It's not
[28:42] necessary to trade with real money right away; it's even better to practice everything in demo mode first, so to speak . We simply take a long position, a signal comes, we look, there is an intersection, all the conditions coincide. We put
[28:57] the deal up for sale here. Here on the left is the instrument we have a long position. Imitation short, short. We placed a trade, hid the stop loss, and carried it out. So we left it like that, went and looked at the result. We figured out
[29:11] how much we could pull out and which stop-loss would be more relevant. And so we take and test 50-100 transactions in a good way. In order to make money, Accordingly, later, when we already have statistics, we carefully record all of this
[29:26] , take screenshots, and put it together so that we can analyze it all later. And after we see that yes, there is a result, we take a test amount, gradually begin to get involved and take our
[29:39] helpful. Be sure to subscribe to the YouTube channel, and subscribe to the Telegram channel. I'll leave a link in the description below the video. That's all from me. All the best and successful
[29:52] me. All the best and successful trading.
⚡ Saved you 0h 29m reading this? Transcribe any YouTube video for free — no signup needed.