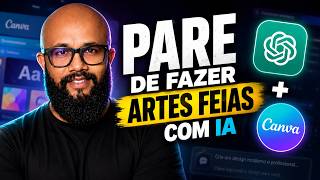

Stop Making Ugly AI Art
43sDirectly addresses a common pain point with a bold statement, hooking viewers who struggle with AI art.
▶ Play Clip"The title promises a method to stop making ugly AI art, and the video delivers a practical, step-by-step guide, though it includes some promotional content."
This video demonstrates a step-by-step method for creating professional-looking AI-generated artwork using ChatGPT and Canva. The creator emphasizes the importance of providing context to the AI and using Canva's editing features to refine and reuse elements.
Many people use AI to create art but lack the skills to instruct it properly, resulting in unprofessional outcomes.
The recommended combo is ChatGPT for precise image generation and Canva for editing and reusing elements.
ChatGPT allows for more precise artwork, especially regarding text and letters, compared to other tools like Nano Banana.
The biggest mistake is not giving context. Use Pinterest or other sites to save art styles you like and feed them to the AI.
Ask the AI to analyze the style of a reference image and extract its 'DNA' to use as a basis for new creations.
Instead of just images, you can provide a link to an event or website, and the AI will analyze it to create a poster.
Use Canva's 'Magic Layers' feature to separate the AI-generated image into layers, allowing for easy editing and reuse of elements.
Generate QR codes in Canva (not in ChatGPT) for event registration or links, and place them in the design.
You can also use links to websites (e.g., Villa Country) to generate posters, and the AI will search for information and create a design.
Check with your printing company for specific requirements. Most accept PDF for printing, which you can download from Canva with the correct color profile.
By combining ChatGPT for generation and Canva for editing, you can create professional-looking AI art. The key is to provide context, extract the DNA, and use Canva's tools to refine and finalize your designs.
What is the main problem with AI-generated art according to the video?
People don't know how to instruct AI properly, resulting in unprofessional outcomes.
00:02
Why does the creator recommend ChatGPT over Nano Banana for creating artwork?
ChatGPT allows for more precise artwork, especially regarding letters and text.
01:13
What is the 'biggest mistake' people make when using AI for art?
Not providing context to the AI.
02:06
What is the 'DNA' of an artwork in this context?
The style and essential elements extracted from a reference image that can be used to create new art.
03:15
How can you provide context to ChatGPT for an event poster?
By providing a link to the event page, which the AI analyzes to create the poster.
03:42
What feature in Canva allows you to edit and reuse elements of an AI-generated image?
Magic Layers.
06:14
Why should you create QR codes in Canva instead of ChatGPT?
Because ChatGPT might not produce a very precise QR code.
07:47
What is the recommended format for printing the final artwork?
PDF for printing.
11:52
ChatGPT for Precision
Highlights the key advantage of using ChatGPT for text-heavy artwork, a common pain point.
01:13Context is King
Emphasizes the fundamental principle of providing context to AI, which is often overlooked.
02:06DNA Extraction
Introduces a powerful technique for replicating styles across different subjects.
03:15Magic Layers in Canva
Shows how to leverage Canva's unique feature to edit and reuse AI-generated elements.
06:14Print-Ready Export
Provides practical advice on preparing artwork for professional printing.
11:52[00:02] like this before, the kind I'm showing you now. Art that was created awful. Take a look. Look at this . Look at this. Every day, more and more people are using artificial intelligence to create
[00:15] art, but the problem is that they don't know how to create art with artificial intelligence, nor do they know how to instruct it to create art that looks professional, and they end up with these horrible results and
[00:29] ruining their reputations. But to solve this and create art like this one I'm showing you, or these artworks here, there are several versions and they don't even look like they were made with artificial intelligence. You only need this combo and the step-by-
[00:41] step instructions in this video. You will use Canva and GPT, in addition to the prompts that I . So, watch until the end, because I'm sure this will help you leave here knowing how to create fantastic artwork to sell, to
[00:57] you want. Okay, let's find out how to solve this problem. To get started, the first thing you need to do is access Canva and GPT. create your free Canva account if you don't already have one. And GPT, you
[01:13] probably already know how to access it. And why do I recommend using GPT and not Nano Banana when it comes to creating images that are used as artwork? Because GPT allows you to create much more
[01:27] precise artwork in terms of the letters, of what's written there, okay? For example, here I have some art styles that have been created, representing various different styles. So here I have a slightly more retro style, here a
[01:40] more two-tone style, here a slightly more modern style, and here a retro and modern style at the same time. And here I have a poster that was made; it could be a painting Canva? Because within Canva you can do something that you can't
[01:53] This will help you a lot. So, pay attention to the step-by-step instructions here. The first step you have to take context into the artificial intelligence you're going to use, which is
[02:06] the biggest mistake people make. People go there, open GPT, simply say they want to create art, bring in a bunch of information, put in schedules and everything else, and end up with those ugly things because
[02:19] artificial intelligence. So, as an exercise, you're going to go on Pinterest or find a website where you can find art, where you can find elements, things that you like, and you're going to save all of that. Here, for example, we
[02:33] have this artwork which isn't an event poster, but it's a really cool piece of art. different styles. If I take this, copy it, bring it into GPT, and paste it here, I can put in a super simple prompt asking the user to
[02:47] read and analyze the style of this artwork in order to act as an art director. This is a prompt; it 's not what you'll actually use yet, but it In that regard alone, he's already giving me numerous insights and
[03:01] information that I can use. And now, based on this, and given some context, he extracted the DNA from this image, so I can do the following: create one of São Paulo with the same DNA. Now he's going to take the DNA of
[03:15] that art and create an art piece based on it. This is the simplest way of a much better way for you to actually achieve all of this. Ready. Look how fantastic! He collected the DNA there and brought all the
[03:30] information here, and put it on the famous bridge in São Paulo, right? He put up some buildings and everything else. And it turned out really cool. I can come here and ask him to correct something if I want to, right? I already have something really cool here. So you've
[03:42] already provided some context, but if you want to do something even better, leave here for you for free. I'll tell you how to access it soon, okay? And here you can simply go there and grab a link to an
[03:55] event or something, or bring in an image, and it will simply analyze it for you and help you create something with it. So, look, I went to the queue's website, there's a marathon happening there, I got the link from
[04:10] my GPT. Here I have a few options. Look, I want to turn a link into a poster. Analyze this image and use it in a style. Create a poster for Instagram or make a poster. In that case, I'll put the link here. And now I'm going to
[04:24] click here. I want to turn this link into a poster. Look how fantastic! He will analyze the link. So I'll put the link here again. He will analyze the link and search for information about what it's about. Look,
[04:37] he's already analyzed it here, confirmed what it's about, looked up the information and everything I want to do with it. I want it here in A1 format. So, let's say want it in A1 format. Here it has three different modes: analog,
[04:53] request other modes as well, okay? I put these here so you can analog here. And he's saying: "Look, as soon as you answer this, he 'll give you the concept, the confirmed information, the
[05:06] visual direction, and the only prompt you can use here, or you can take it to you want, okay? So, look, let's put it here and he'll analyze all this information. Accessing the site again. Done. Look, it's giving,
[05:19] bringing up a lot of information, because this GPT has a whole context following rules, design principles and everything else. And it brought a prompt here want. In this case, what am I going to do? Create the poster. Now he's going to
[05:32] Canva, while it's creating for us, I'm going to show you here. Look, Canva is the only tool that allows you to do this in a simple and free way. After you've created your poster there, we're going to go back and
[05:46] get our poster that's being created, you're going to access Canva here and With this poster that you created, you might want to change something." Okay, modification or even do something fantastic, which is to reuse
[06:01] the elements of this poster. Let's say I want to use this mortadella sandwich and all that. How would I do that? You recently, but now here in Canva, I've talked about this on the
[06:14] about it. If you click on the image and edit, you have here, magic layers. Canva will separate the layers of this image and this will allow you not only to reuse these layers, but also to
[06:28] edit the text and many other things. Look how cool. You see here? The elements are separated here. There's the cool this is, guys. I mean, it transformed all this into layers. Now
[06:42] I can edit, remove something I don't want, reuse. And that's any element , you have the potential to create a component. What does that mean? It means you can transform
[06:56] it into an element that will be in your library for you to use whenever you want for any other artwork, even transforming it into reuse it. So I can click here to create. It will create
[07:09] inside my components. Whenever I need it, I can go to my components, search for this element. It will be there. I can It appears here, components, and that's it. I can put all the
[07:21] components I want here. And I can also use this to make an animation, then animate this artwork. In short, a series of things he made it for us here in the analog style, really there, like a marathon. And
[07:35] then he put the guy running in line 2026 on the date, time and everything else. And here The information. And here he left a little square for you to add the QR code. To add the QR code, you can do it right here within
[07:47] GPT itself, but I don't recommend it because you might not get a very precise QR code . So you're going to save this, OK? If you're happy with this design, otherwise you can, well, make another one and
[08:01] slightly different size than the one I have here, but just so you can get an idea, okay? Our design looks really good here . You can see that there's even the guy there, with the shoe from the Fila brand, the sneakers from Fila and everything. And here you're going to
[08:13] everything. And here you're going to search for QR code in Canva. Look, allow you to create a QR code. And then you're going to put the link to the event or the registration page or whatever your client is selling or the menu, and you're going to
[08:26] create a QR code and put it here. Then you just distribute it and do whatever you think is best. You also You can create an image, click on it, and then click edit. Here you 'll have several options, including
[08:39] changing the background, improving the image quality, and very good quality, but you can optimize it even further. So, there are a number of things example so you can understand. If you don't want to access
[08:52] link will be below; it will be inside my Which is a free community where you can access various resources. artificial intelligence resources there, applications, and everything else. So you can go there and
[09:06] access it; it's free to enter and use. You can simply follow the step-by-step instructions I gave you, bring context, ask the artificial intelligence to act like a graphic designer, applying the
[09:18] principles to that artwork, ask it to extract DNA. Look, I accessed the website of this very famous place in São Paulo, called Villa Country. I'm being paid by them. I'd even like to go there, I've never been. But look... Okay, I'm going to put
[09:31] here that I want to turn this link into a poster. So, let's put it here, see, it will access, analyze, and search for the information. And then I can observe the information and add to it. I can ask it to remove something, to add something,
[09:44] I can bring an image here, say: "Look, put this image of such and such show." internet access, so it can search for this information. In this case, I'm going to put that I want an A1 poster and that I want it to be in a more
[09:56] again? It will analyze the information and give you a prompt that you can use either here within GPT or, if you want, you can take it to Nano. Why? Even though I said at the beginning that I
[10:10] know that many people use Nano because it's free, and it has much more access. I know that GPT only gives you a few images per day. So, look, this prompt here I can ask it to create here. So,
[10:22] let's do an experiment. Look, create the image, create The poster. And I can also go into Google Flow or Gemini and put my prompt here, select Nano Banana and ask it to create it. You
[10:34] 'll see it will look quite different, because the quality of GPT in relation to the image is really better. However, you can take what was created here, take it into Canva, disassemble the layers, remove what you don't want and
[10:46] information and everything else. Look how fantastic, it already created it for us, right? puts here the biggest country music stage in Latin America, Vila Country,
[10:58] you to put the QR code. So, if you Let's save this. And then you can access Canva, put it in else. You can see that there isn't a bunch of random text, there are only the
[11:12] essential information here. Now, look, here in Nano it didn't do such a bad job, but it's not as good as GPT. Give it a Look, you you want to use it, no problem at all . You can use this
[11:25] it into Canva and make the changes. I prefer GPT for this type of work. There you go. And now with the artwork here, you can use the magic layer to separate everything. You can add a QR code, you can
[11:39] turn it into a video. There are a lot of things you can do here that are truly fantastic. And so you already have a professional piece of artwork ready to use. Remember that each printing company works
[11:52] way. So it's important to check use, right? Most printing companies use PDF for printing. Within to create a PDF for printing. Just take your artwork, if you drag
[12:06] that it will already appear here. I'm going to click on it. I can click on " be observed here, and change what's there. To be changed. And then you can click here, to download. And here you can download it as a PDF for printing,
[12:22] see? Look. And here you can even select the color profile and liked the video, that it was useful for you. Comment here what you tool you use most to create images. Take a look at this other
[12:36] also go to the free community to access GPT. As soon as you access the community, just search for Pter Studio in the search tab, just
[12:48] find it, okay? See you in the next video. Bye.
⚡ Saved you 0h 12m reading this? Transcribe any YouTube video for free — no signup needed.