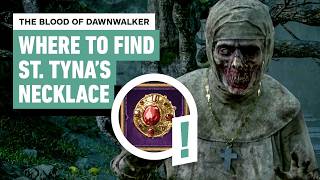

How to Beat the Zombie Nuns in Blood of Dawnwalker
60sHigh-action combat with zombie nuns and a clear gameplay challenge appeals to gamers seeking walkthroughs.
▶ Play Clip"Delivers a clear, step-by-step guide as promised, with minor fluff from puns and sponsor mentions."
This video from IGN provides a step-by-step walkthrough for the main story quest 'Echoes of Silence Spells' in The Blood of the Dawnwalker. It explains how to secure safe passage to the library by finding St. Peter's Necklace, including navigation tips, dialogue choices, and strategies for both daytime and nighttime play.
The quest 'Echoes of Silence Spells' is the seventh main story quest. The objective is to reach the library at St. Tina's Coven safely while avoiding undead nuns.
Fighting off a zombified nun triggers the main part of the quest: following Anka through the refectory building. Recommended level is at least 10.
Dialogue options with Anka don't affect the outcome. After speaking, head upstairs to a shrine to level up skills, then go to the balcony to survey five key areas: infirmary, library, courtyard, dormitories/sacristy/caretaker's shed, and chapel/bell tower.
At the infirmary, use focus mode to highlight the window. Choose the correct dialogue options in order: Introduce yourself, mention looking for books, say Francis must be after something precious, and agree to retrieve St. Tina's necklace in exchange for passage.
The quest marker points to the church, but going directly only triggers cutscenes. Instead, from St. Tina's corpse, turn around, walk straight, look left and up to find a lootable box with a note pointing to the sacristy.
Use shadow steps to sneak across rooftops to a hut guarded by a sleepy sister. Inside, grab the key hanging on the wall. This key unlocks all doors in the area, including the one to the necklace.
Head to the building topped with a cross; the necklace (Crimson Amber Medallion) is on a corpse inside. During the day, the quest is more dangerous—make a quick save and use Compelled Soul on the dead nun in the chapel for extra lore.
Bring the necklace back to the guard. Handing it over secures safe passage; refusing causes the guards to aggro. Either way, Anka's response and the outcome remain the same.
The quest is straightforward once you know the correct dialogue sequence and the key locations. The final choice doesn't change the outcome, so players can choose based on preference.
[00:00] The Blood of the Dawnwalker's main story quest, Echoes of Silence Spells, is one that can easily leave you confused, disoriented, and wondering, wait, didn't I already search that body? In this video, we'll guide you step-by-step on how to locate St. Peter's Necklace,
[00:13] the secure safe passage to the library in The Blood of the Dawnwalker. This is high time you tell me what the hell is going on. I know it, not because you do! In order to save Colin's family, you'll need to gain knowledge to understand how to beat the Valkyrie at their own game.
[00:27] Echoes of Silence Spells is a very early main story quest. If you're mainlining the story, it's the seventh main quest. Our main objective is to get to the library at St. Tina's Coven safely with all the undead nuns mowing about. When you arrive at St. Tina's, you'll have a brief encounter with one of the nuns.
[00:42] Fighting her off will get the zombified nun a little miffed at you, which triggers the main part of the quest, following Anka through the refectory building. To take on this quest with ease, you should be at least to level 10. We'd recommend knocking out some side quests that don't take up too much time.
[00:57] Now just as a disclaimer, I did this mission at the night time when you have your vampire powers accessible, but we're going to show you how to do this quest during the daytime as well. Once you're done running for your life, you'll make your way into the refectory building where you'll have a brief conversation with Anka.
[01:11] Please. You insisted we check the body. What were you looking for? From what I've noticed, the dialogue options here don't affect the outcome of this section, so go with whatever response feels right to you. After speaking with Anka, head upstairs.
[01:23] You'll notice a shrine and you can level up your skills, along with a few other things to interact with. For now, though, head over to the balcony. From there, you can scope out the grounds and get a lay of the land. Looking out from the balcony, there are five key areas to note.
[01:36] The infirmary, the library, our main destination, the courtyard in the middle, across the courtyard, the dormitories, sacristy, and the caretaker's shed, the chapel and the bell tower At this point you need to find safe passage to the library for Anka When ready head to the infirmary
[02:07] Activate focus mode to highlight the specific window you need to interact with. Once you interact with it, you'll be given several dialogue options, but you'll need to pick the right one to secure safe passage. Here's the order. Introduce yourself.
[02:19] Cohen of Laslia. I have to get inside the library. I'm looking for something. Certain books. Must be something precious, to get more dialogue. Francis must be after something precious. I've already left already.
[02:31] Fog or no fog. All right, I'll do it. What is it you're after? An equest. Used to belong to St. Tina. She was buried with it inside the chapel. Cohen will check a deal.
[02:43] Take passage to the library in exchange for St. Tina's necklace. Since the alternative choices are in great, finding St. Tina's necklace becomes our primary objective. Tracking down the necklace can prove to be quite challenging.
[02:55] Checking your map will show a quest marker directly over the church.
[03:13] Thank you Thank you But going directly to the church only triggers story cutscenes dancing by butterflies and a look at St Tina Nosferatu corpse
[03:52] All that teeth, God. Try it out with something sharp. Feel free to inspect the walls and St. Tina herself for more info. From Satina's corpse, turn around, walk straight ahead, then look left and up toward the ledge.
[04:08] You'll spot a box that you can loot with a note inside. This points towards the sacristy on the other side of the courtyard. Before you can get in though, you need a key. Use your shadow steps, or two, to sneak across the rooftops towards the courtyard while avoiding the sleepwalking sisters.
[04:31] Thank you.
[05:01] Make your way to the house guarded by one of those sleepy sisters. Navigating around the sisters can be tricky if they spot you and attack. Once inside the hut, you'll spot a key hanging on the wall right in front of you.
[05:15] Grab it and leave quickly. Sudden movements will aggro the zombie sisters. This key unlocks all the doors in the area including the one leading to Santina necklace With the key in hand it time to retrieve Santina necklace or as some call it the Crimson Amber Medallion Head past the courtyard to the building topped with a cross Go inside and you find the necklace on a corpse right in front of you
[05:35] Collagulations! You've officially secured Santina's necklace. I've been sick already when she hid here. Before we bring the necklace back to the guard, here's the path you can take during the day.
[05:48] It's pretty easy to avoid the nuns if you're careful, but just as a warning, this quest is a bit more dangerous during the day, so make a quick save just in case you get spotted. You can also use Compelled Soul on the dead nun in the chapel during the daytime, and she'll speak of them ripping St. Tina's body apart.
[06:18] Thank you.
[06:48] Now bring the necklace back to the guard, you have two options. Hand it over, you'll secure a safe passage for both you and Anka. Refuse to hand it over, the guards will instantly aggro,
[07:00] managing to kill them alerts Brancis to you and your activities. Either way, Anka's response stays the same and the outcome doesn't change. For more of the blood of the Don Walker guides and plenty more puns, stay tuned for future videos and check out our official wiki page.
[07:14] For everything else in video games, keep it right here at IGN.




⚡ Saved you 0h 07m reading this? Transcribe any YouTube video for free — no signup needed.