
Insulation Hack: Razor Knife vs Table Saw
38sViewers love efficiency hacks and comparing tools, especially when it saves time on a common DIY task.
▶ Play Clip"The title accurately reflects the content: a step-by-step build of a tiny house."
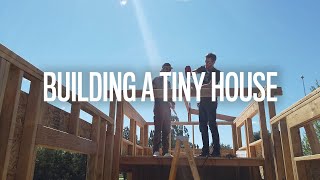
The video documents the construction of a tiny house, covering framing, roofing, electrical work, and insulation. The builder shares practical tips, such as using a table saw for cutting foam insulation and sourcing materials affordably at a public auction.
Initially tried cutting foam insulation with razor knives, but found a table saw to be ten times faster.
Framing the shorter wall first, which includes windows and a loft, and standing it up in sections for easier handling.
All walls except the back wall are framed; building a window seat. Framing is about 90% complete.
Half the roof is done; sheeting is up on the house side, making it waterproof. Only a small piece remains.
Friend Colby helped with the basics of electrical wiring. Framed a pocket door and started the bathroom wall.
Finished soffits before spray foam insulation arrived. This step marks the transition from rough carpentry to finish work.
Using tongue and groove fur boards instead of drywall to avoid cracking during movement. Cost estimate was $1,500, but got materials for $500 at a local public auction.
The tiny house is progressing well, with framing and roofing complete, and insulation installed. The builder saved money by sourcing materials at auction, and the interior will use tongue and groove boards for durability.
What tool did the builder find faster for cutting foam insulation?
A table saw.
Why did the builder choose tongue and groove boards over drywall?
To avoid cracking during movement of the tiny house.
03:30
How much did the builder save on tongue and groove boards by using a public auction?
Saved $1,000; paid $500 instead of $1,500.
03:30
Table Saw for Insulation
Practical tip: using a table saw is much faster than razor knives for cutting foam insulation.
Cost Saving on Materials
Sourced tongue and groove boards at auction for $500 vs. $1,500 retail, a significant saving.
03:30[00:00] [Music] finished putting the insulation on the floor at first we tried to do it with razor knives because I just suck because foam can become the raised mattress should - table saw was what ten times faster gates you exclaiming so today we are framing up same weight just me today framing up the first wall tiny house it's going to be the locks and windows up there it's a shorter wall well that's it it's not as long
[00:44] it's taller wall so figured I'd start there amiri this way so I can stand it up in sections because I think it's easier than setting up a 24 foot piece and getting it up and over the wheel wells [Music] all the walls are framed in except for the back wall and we've got a little bit of a start to that building out a little window seat and then they'll all be just a little off the trailer
[01:28] it's good to have the framing you know 90% way done so one more wall to build the video needs to get on it too but it needs a lot of you know what why not we need wagon wheel video you only cut it off with stick-up why did you only want the sticker video in this [Music] about half of the roof just putting the last pieces on we're getting there then it'll finally be waterproof all the
[02:12] sheeting is up on the roof so for one a little piece right there and we ran out unless we did that in a lot of really small pieces which I don't want to do all the sheeting is done on the house side spruce all that that feels good it's shedding water to the outside which is nice because we got a little too much rain so after this minute somehow strap up your windows and doors [Music] it
[02:57] is all about electrical so my friend Colby came over and he helped me get the basics figured out action shots huh calm down here first I'm doing all this why didn't how its before but haven't you know done everything from scratch girls got this pocket door and you'd see it right behind me got that framed in all level and square and everything that's the start of the bathroom wall so next step will be to build in
[03:41] this side of the bathroom wall right here coming across and I'll be set and then right after that is plumbing plumbing insulation all right there's their heads all me down and over there is where the single be that looks perfect if I need to do that way twisted yeah [Music] family sounds good today's an exciting day bring it spray foam insulation but first I had to finish putting the softens before they get here in like 30
[04:25] minutes or so a few more pieces to put up right up there okay it's done like all the installations and this is such a big step because so we go from like all the rough carpentry and framing and all that to actually moving on to all the finished work of tiny groove up on these walls here and finish out I like to call finish work all kind of stuff it's gonna be so good I'm excited like
[05:09] just like look at that see things all ready to go oh man so good so the inside of the tiny house we're gonna do tongue and groove fur boards all the way up instead of drywall cuz I'm a tiny house often if you move it a lot then drywall can crack or something like that so using the floor boards it's gonna give it more structure in the center anyway got a quote for all this just what
[05:53] it would cost and about $1,500 and so my friend Colby told me about the local public auction they often have these tongue-and-groove boards on there and I was able to get everything I need for five hundred bucks instead of the 1500 definitely a little bit damaged some of it that's why I was disguised I'm also about a quarter of it maybe is wet so as I unloaded from here stuff that's wet stacking up there with an
[06:37] air gap between it to let it dry luckily Idaho has a very dry climate there's no community here so that should dry out nicely and then the rest is going that way [Music]
⚡ Saved you 0h 06m reading this? Transcribe any YouTube video for free — no signup needed.