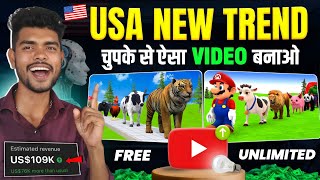

Make USA-Targeted AI Videos in 1 Click!
44sReveals a shocking monetization hack: earning more dollars with fewer views by targeting USA, a dream for many creators.
▶ Play Clip"Delivers a real, step-by-step method, but the 'full course' promise is padded with repetitive instructions and self-promotion."
This video presents a method for creating AI-generated videos aimed at audiences in the USA and other high-CPM countries, with the goal of maximizing earnings. The creator demonstrates a step-by-step workflow using Google Gemini for script and prompt generation, Flow AI for image and video creation, and InShot for editing, culminating in uploading the final product to YouTube.
The video claims that content targeted at audiences in the USA, Brazil, and Canada earns more money per view than content that only plays in India. The creator emphasizes that even with fewer views, USA-targeted content can generate significant revenue.
The entire video creation process is automated using AI. The creator states that the video was made in just 30 seconds with AI assistance, highlighting the ease and speed of the method.
The creator shows a YouTube channel that appears to be run by an Indian creator but targets USA audiences. The channel's videos have high view counts, with some reaching 1.2 million views in a day, demonstrating the potential of this strategy.
The creator provides a 'master prompt' that generates titles, descriptions, thumbnails, tags, and the entire video script. This prompt is available in the video description and is the core tool for automating content creation.
The process begins by copying the master prompt and pasting it into Google Gemini. Gemini then generates a list of 10 trending topics, from which the user selects one. The user then specifies the desired video length, and Gemini generates the full script, including scene breakdowns, image prompts, and animation prompts.
The user copies the image prompt for each scene from Gemini and pastes it into Flow AI (Google Flow Beta). The user selects the aspect ratio (16:9 for long videos) and generates the image. The image is then downloaded.
To animate a scene, the user copies the animation prompt from Gemini and pastes it into Flow AI's chat. This generates a video clip for the scene, which is then downloaded.
All generated video clips are combined in the InShot app. The user selects all clips, removes the watermark by watching an ad, and exports the final video in 4K quality.
The creator copies the title, description, and hashtags generated by Gemini and pastes them into YouTube. The video is set to private initially, and a thumbnail is created using a prompt in Gemini. The thumbnail is then uploaded, and the video is made public.
The creator advises uploading such USA-targeted videos daily to maximize earnings. He also mentions a solution for limited credits in Google Gemini, pointing to another video that lists five websites for unlimited free video generation.
The video presents a fully automated, AI-driven workflow for creating and uploading YouTube videos targeted at high-CPM audiences. The method is designed to be simple and fast, requiring minimal manual effort, and is positioned as a viable strategy for earning money online.
Which countries are mentioned as having high CPM rates for YouTube content?
USA, Brazil, and Canada.
00:26
What is the first step in the video creation process?
Copy the master prompt from the video description.
02:58
Which AI tool is used to generate the video script and prompts?
Google Gemini.
03:38
What aspect ratio is recommended for long-form videos?
16:9.
07:18
Which app is used to combine the video clips?
InShot.
13:19
How is the watermark removed in InShot?
By watching an ad.
13:59
What is the recommended export quality for the final video?
4K.
14:28
Why is it recommended to keep the video private initially?
To allow time to create and upload a thumbnail before making it public.
15:52
What should be selected for the 'AI Use' option when uploading?
Yes, because the video was made entirely with AI.
18:31
High-CPM Countries
Identifies specific countries where YouTube earnings per view are higher, a key insight for monetization strategy.
00:26Master Prompt Concept
Introduces a reusable prompt that automates the entire content creation process, a powerful technique for efficiency.
02:58Google Gemini as a Content Engine
Demonstrates using a general-purpose AI chatbot to generate structured video scripts, titles, and descriptions.
03:38Flow AI for Image Generation
Highlights a specific AI tool (Flow AI) for creating consistent character images across scenes.
06:49InShot for Editing
Shows a mobile-friendly editing workflow to combine AI-generated clips, making the process accessible.
13:19[00:01] I have made this video with the help of AI in just one click and the biggest thing is that this video does not play here, it does not play in India, it plays in USA and when your video plays in USA, then you earn more with less views,
[00:14] yes my dear friends, you also know very well that you make such a video which plays only in India, then brother, even after getting a lot of views, you make very little money, but such a video which is playing on the side,
[00:26] this video is total USA content and it plays only in USA. USA, Brazil, Canada are such expensive countries where even with less views, a lot of dollars can be earned. So if you are also looking for such content which is USA content
[00:39] and is very easy to create. AI will make it ready, so this video is made for you. You will not believe at all that this video playing on the side, I have made it ready in just 30 seconds. First
[00:51] First you watch this video. [laughter]
[01:34] Ok? Look on the side, you can see the screen recording. Friends, here you will see that there is a channel which is absolutely the best in USA. This is some guy from India who is running USA content sitting in USA India. See
[01:46] how their videos get views. Look, I posted it here 14 minutes ago and it has already got 9800 views. Look, I posted it here 4 hours ago and it has already got 228000 views. And all this Look here, look at this, it was posted 20 hours ago, 726000, just 20 hours ago,
[02:01] look here, 1 day ago, it was posted a day ago, it has got 1.2 million views. Look brother, getting views brother, one day ago [music] 659000 1 day ago 434000 1 day ago 80000 now see the video of one day ago here two days ago 1.1
[02:17] million views see here two days ago see here two days ago 753000 views two days ago 5400 views two days ago 6400 views three days ago views come like this all the videos are in lakhs, some videos go for 2-10 million, 3-3 million in a day,
[02:32] like you can see here 5 days ago 2.6 million [music] views went, so ? I will explain the complete step by step in this video. All the work will be done by AI. You just don't have to do anything, meaning you do
[02:44] n't have to do anything. Simply you have to write this, this, this and this will do your work. So let's my screen recording is visible on the side, friends. Now you have to mess around a little bit. I am not going to understand it at all. Remember this. So
[02:58] what's the first thing to do, friends? That I have prepared a master plan by making it myself. and there is so much master prop that he will make a video for you and make it ready. How to upload the video, I will give you the title, description,
[03:12] thumbnail, tags, everything will be given to you brother. I am telling the truth. So look how What do you need to do first? The
[03:24] are in the description. If you click anywhere, you will reach my master propt. master prt is this one. Look, this is so big, my master print. made it myself. I have not copied anyone. Now you have to go and copy this master print
[03:38] from any one of my channels. So let me select all and As soon as you copy my masterprom, now you have to install an app named Google JNI, this is already present in everyone's mobile.
[03:51] from Play Store. You have to come to Play Store and write Google JMI here, okay ? As soon as you search here by typing Google JNI, this Google will appear in front of you at number one. Look, I have already installed it here.
[04:04] So let's open this one. After opening it automatically logs in. sign up by entering any email ID and whatever master print you have copied, a send option appears here. I will click on this send. [Music] Now just
[04:17] n't do any more work than this. Just copy my master script and paste it here in Google Gemini. Now it will start its work. Now it will find the new trending 10 Go topics for you. Will search for the title. Look carefully. Look at the title, it's
[04:31] searching here. Look, I have found this title here and after searching, I have given 10 titles here. and after searching, I have given 10 titles here. brother. Those who understand, please read it. There is no one who understands. Just look at number one.
[04:45] Guess which story it is. But give the topic to 10 and see. 10 topics have been given here. Guess which topic did you like? What I have here is ah number six. Ok? Number six or I'll come here, number four looks good.
[04:58] write four here and after writing four I will simply send it. Whatever topic you one, number two, whatever you want to put. So I wrote number four. As soon as you write four, this question will be asked to you again. He will ask, brother, how many minutes'
[05:12] minutes, 4 minutes, 5 minutes, 10 minutes, 8 minutes How much do you want to make? So if you are a complete beginner, then to learn, first get it made for 1 minute, later get it made for 5 see, I am going to get it made for 1 minute, so write one here and after writing one,
[05:26] simply send it here, as soon as you send it, now brother, this will do all your work, look carefully brother, this will do the entire work for you, see how cool and big he will write the entire story, look carefully, he is
[05:41] gives the details of the character, see, the character is there here, isn't it? After that, friends, here he gives details of all the characters. Look, here he will give all the body details. After that friends, first of all look here, let's break down the scene. This is the story of Scene One. Look,
[05:55] this is the complete story of scene one. okay brother? This is the story of Scene One. Where this image is obtained. Look, this is the image of the story and this is the negative image of it. Ok? Will stay with him only. After that the animation is available. See below
[06:07] everything [music] has been given. So what do we have to do first, brother? Our first scene has no sound in it. So look at our first scene, this is the story of scene one. So what we have to do is simple, first we have to
[06:21] [MUSIC] So what do I do? I will copy the entire image print from here. From the beginning till the end, wherever the image is printed and here the negative is printed, You have to copy the entire image print from where it is written till the negative print.
[06:34] Look, I copied it completely. After copying, I will cut it from the middle. After that friends, now you will have to install another app whose name is go to Play Store and here you have to write Flow Ai, okay, you have to write Flow Ai,
[06:49] Google Flow Beta, it has just been launched in beta version, so look here, if it right now I am not going to do it, so what you have to do with this Flow Ai is to install it and watching brother, how it works, keep watching carefully, as soon as you open it, some
[07:04] option of this type will come, so look here you will get an option of New, we have to click on this New. As soon as you click, you will see that it starts loading here. It takes you a maximum of 30 some such type of interface will appear. Now paste whatever you copied. And
[07:18] Brother, which size do you want to make it in? Long video means do you want to make a short video option is visible below. We will click on this image and after clicking, see Making big videos. So here we will select 16/9. Ok?
[07:32] Look at this now, it is selected on 9/16. If you want to go short then select this and currently we are going long so select 16/9. option 1x, 2x, 3x, 4x, you
[07:44] So for now, we'll create one image at a time. So let's keep it at 1x. And after doing this, see, click on this arrow option. I'll send it first scene of our video will start getting created here.
[07:57] friends, what kind of lovely image has been created here. Made entirely in 3D. Where there are many characters in it like cow and pig. There's a cook here. What do you call a rooster in English? What do you call coke chicken in English
[08:12] Peacock Peacock Peacock dear brother, you have become a peacock. Hey hen hen hen means hen. I do n't know about [ __ ], brother. After that, whatever it is, look here, the photo has been made and is ready. Now
[08:25] click on the three dots and a download option appears here. Click on download it has been downloaded here. Ok? [Music] So look here, our first scene is click on the first scene. Once your first scene is ready, we will also get this scene animated.
[08:39] made, I clicked on it. So look, there's an option at the bottom for Animate [Music]. So we will click on this animate. Now after clicking on animate, the chat has been created and given to you for animation. I come to the chat and come down.
[08:51] After coming down, look here it is written Animation Prop. Ok? What will I do with this? I'm going to press and hold and copy them all. So let me come down and till the bottom where it is written sound effect background music, you have to copy all this
[09:04] add sound effect background music to the video. Look where I copied the background sound effect from. I have copied everything from the video clip to the sound effects and Let's copy it from here. I will copy it and come here. And look here,
[09:17] see a send option appears. I will click on this send. Ok? Let's click on send. So what we did first was that we created the image and after creating the image what convert it into a video and friends, in the last of the video I will tell you how you will be able to
[09:31] convert unlimited images into videos here, if you run out of credits then okay friends, so finally friends, our video with the image is ready. Let's play. Let me click on this and see how.
[09:54] not going to run at all in India, brother, USA content is being made, see here, now clicking, a download option will be visible here, I will click on this download, okay, let me click on download and the first scene is in 720 quality, we have
[10:07] clicked on download, it is showing processing and brother, see, the download has also been done. The already ready. The download has also been done. Ok? The first scene was made. Now the will I do now? I will come again to Chat Djibouti. The first scene has been created. Look, now the second scene
[10:21] copy our image print of the second scene. Let's print our image of the second scene. Come on, what should I do with this? I will copy it. Let's copy it from here. I'm going to copy it over here and then what am I going to do? I will paste it here. This time,
[10:34] select it again. The one with 16/9 and this is already selected by me, everything here. So brother, is that all that was copied here? This is just a small copy. I will do this and remove it. Ok? Only a little has been copied. I'll copy it again. I
[10:48] come from here. This is our image print, we had to copy it from here. Let's take this from here, what will I do? I will copy till here. Now this entire copy has become mine. And after pasting, select the image ratio and
[11:02] simply send it here. Now the second image for our second scene started getting created. started forming here. What can you do? You can generate all the images at once. And as I come here in scene two three. Look here I come in sin 3 and
[11:15] sin 3 is ours. This is the image of sin 3. So what will I do with this image as well? I will copy it from here. Copy the front of this and then come here and Pasted it. Now see what happened to me? We made the first scene and downloaded it as well. The
[11:29] second scene started taking shape. Then the third scene started getting created here. Well, you have to see how many scenes are there in your story. So I see how much scene there is. Four and here this is our five [Music] and here our maximum is five here
[11:43] we have been given scenes. Ok? Look, five scenes of mine have been given in the first story. So what do I do? Look at the scenes of all five stories, my second scene must have been made here. Let me show you. created here. Look, there will be no problem with the character. There will be a consistency
[11:55] character. Look, in the first scene, the cow here was actually a pig. Look at the same thing in the other scene, it is the same hen. Same is the cow here. The same thing as the pig is the same. photo. Look, you will find an option of
[12:08] Let's click on animate. Now I will come back to chatity. This was my second scene. So let me come to the second scene. [MUSIC] Okay? Where is your second scene? So this scene one is going on. And this scene two is going on. What is the animation prop for scene two,
[12:22] brother? So this is the animation prop for scene two. So what do I do from here from here I will copy till where it is written sound effect background music. Look, I copied it. I will copy it and come here and what will I do here? I will
[12:35] send it here. As soon as I send it, our third photo is also ready. photo is also ready here. So now we will do the same. Here we will go to the third photo. We
[12:50] will click on Animate and paste the So let me quickly get all five of you videos made. After that I will tell you how to put all these together. Okay friends, quickly
[13:05] Sara's videos are ready for me. I have downloaded it as well. Click on the video here and after clicking, click on the three dots and as soon as you click, Click on download and your video will be downloaded. By downloading, I
[13:19] time to put all the videos together. So to add friends, I use the Insur app which is available in the Play Store. As soon as you open it, some such option will appear. You have to click on the video.
[13:33] Click on the video. Here you will get an option of New. Click on New. click on New, select Video here above. If yours is on photo then as soon as you do it on video, all the videos that you have made will appear.
[13:45] So this was my first video. Then the second one was this. Then the third one was this. Then the fourth one was this. five scenes in a 1 minute video. I have selected all five. this is the right one. What do we have to do on this right ? Have to click. As soon as
[13:59] videos of all five will appear at once. A watermark can be seen here. Look, the option of insert and cut is visible right here. As soon as you click on this cut, you will see the ad for free. your watermark will be removed. Let me watch an ad. Ok? Look
[14:13] no watermark visible here. Everything has been removed. Now we will see an export You can select the quality here. Like if you click on this then click, you will see that 4K quality option is also given here. So you can also release it in 4K.
[14:28] Let me just do 4K. And after making it 4K, see here and you have to click on export. As soon as you click on export, you will see an ad here also. So please check out this ad also. Let me cut the ad.
[14:40] video has started coming out here. Now what this will do is that So friends, the video does not stop here. Now we will title, description and text for uploading on YouTube have been given in this chat.
[14:55] What will you do first? Let this video become an expert. So here you can see it is about to what shall we do now? We will open Google again and come here last. So look here, look at the title of our video, the title of the video has also been given. It is
[15:10] given in the description of the YouTube video and the hashtags are also given here. A lot has been given. upload the video. Ok? So what will we do? Will upload the video now. So title of the video. So first of all I copy the title of the video from here.
[15:24] copy it from here. So I Now you have to open the YouTube app. So let me open the YouTube app. So icon. You have to click on the plus and as soon as you click on the plus, your
[15:38] so I click on it Friends, as soon as you click on Next, whatever is the title of the video, we have given it to you by the channel, paste it here. After pasting, friends, you have to come down. Here,
[15:52] remember to keep the video private. Because if you create a thumbnail in advance but if you do not create a thumbnail first then you should make the video private now. what is there in our prod to create thumbnails yes thumbnail prom also look at it is given here.
[16:06] is given here to create the picture. What's the matter brother? Let's get the thumbnail made first. do with this thumbnail? I will get it made from here. So first I will copy its prompt and see, it will create the thumbnail right here. Look, you can see two dots, click on them. Ok?
[16:19] ? Will come to new chat. Let me come to the new chat. And whatever prompt was given to us in the chat, I will paste it here. And after pasting, at the end I will write 16/9 here. Ok ? I will simply send it by putting 16/9 here.
[16:32] As soon as I send it, brother, look here, my thumbnail will start getting created. And this chat, sorry Google Gemini, had given it to us that you can make a thumbnail for your video, take the title, take the description, take everything brother. I have given the
[16:44] entire process of uploading the video brother. Take it brother. Look here, my here my thumbnail is ready. Look how cool it is, it is exactly the same cow, the same pig, the same here is the rooster, how cool it is, the
[16:56] click on this and look below, the save option is visible. I will click on this save. Ok ? [Music] As soon as I click save, brother, your image will be saved in one click. Ok? Once saved, your first thumbnail is created.
[17:08] click on them and we will go to the previous chat. Ok ? We will go to our first chat, the chat before this. So this first one, this 3D one, was our chat, so I will click on it and then I will go to the bottom.
[17:21] Ok? After coming to the bottom, now let us go to our YouTube. Now let me put the thumbnail right here. So look, a pencil icon is visible here. I see, the change option is visible here. As soon as you click on change. So now
[17:35] Then click on the thumbnail. Let me click on the thumbnail and then click on Done below. Look up, just click on Done. As soon as you click on Done, you will see that the can directly make the video public. There is no problem. So, by clicking on the private which is visible here,
[17:49] you can now directly put public here. Ok? Let me After installing it, friends, now you have to click on the Show More option which will be visible below. Friends, you have to select audio here. If you click on this here. If you have
[18:04] yes. So let me say yes. The children will see. After that friends, if you come down here, of ad description, so Gemini. Ok? Friends, what to do here after coming to Google Gemini?
[18:17] So you have to copy all these descriptions. Ok? This is the complete description from bottom to top here. Look brother, you have to copy everything from here. You have to copy it and come here and paste it here. Let me paste it. After pasting, now
[18:31] channel is monetized then turn on monetization. Here the option below is very important. Look, I will show you below. Look at the bottom, you will see AI Use written. yes. Because you made the entire video with AI then say yes. Ok
[18:45] n't add tags right now. Now I will tell you not to put tags. Ok? As soon as you click on upload. Let me click on upload. your video is there. Look, whatever is there here will start uploading. And in this
[19:00] way you will have to make USA videos and upload them daily. Ok? See, it is being end of the video, I would like to say that I told you in the beginning itself that if you get limited credit from Google Gemini and your credit gets exhausted
[19:12] or such videos cannot be made, then how will you make videos? So your brother has a solution for that too. Here you can see a video where I have told about five such websites in this video where you can make unlimited videos absolutely free.
[19:26] is visible. So simply you have to click on this video and go and watch it. In this video I have explained in detail how there are five such can generate unlimited videos for free. Ok? If you like the video then please like the video and
[19:39] subscribe to our channel. I will meet you in the next video. Love you meet you in the next video. Love you all. Thank you.
⚡ Saved you 0h 19m reading this? Transcribe any YouTube video for free — no signup needed.