Can't choose audio track? FFmpeg fix!
45sSolves a common, frustrating problem for video editors and creators, offering a quick solution.
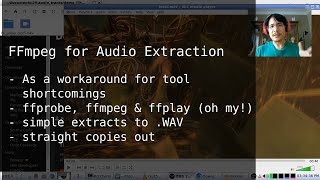
▶ Play ClipThis tutorial demonstrates how to extract specific audio tracks from a movie file using FFmpeg, a free command-line tool. The video shows how to identify audio tracks, extract them as uncompressed WAV or original format, and integrate the extracted audio into applications like Blender that lack multi-track support.
A movie file with two audio tracks is shown in VLC. The first track is the default, and the second is a commentary track.
Blender's video editor loads only the first audio track by default; it does not provide a way to select a different audio track from the movie file.
FFmpeg is a free cross-platform tool for media file manipulation. It can extract audio tracks without re-encoding, preserving original quality.
Advantages: fast, works on many platforms, no re-encoding. Disadvantages: command-line interface, hard to identify tracks, and need to know codec for space-efficient extraction.
Run 'ffmpeg' in terminal; if error appears, install via package manager (e.g., 'sudo apt install ffmpeg' on Debian) or download executables from FFmpeg website for Windows.
Use file manager to open terminal in the folder containing the movie file, or use 'cd' command to change directory.
Run 'ffprobe -i test.mkv' and look for lines containing 'Stream' and 'Audio'. Use 'ffprobe -i test.mkv 2>&1 | grep -i audio' for clearer output.
Command: 'ffmpeg -i test.mkv -map 0:a:0 track0.wav'. This extracts the first audio track as an uncompressed WAV file.
Modify the command: change '-map 0:a:0' to '-map 0:a:1' and output to track1.wav. Press up arrow to recall previous command and edit.
In Blender, go to Add > Sound and select the extracted WAV file. Enable waveforms to confirm the correct track is loaded.
To save space, use codec copy: first check audio codec with ffprobe (e.g., 'aac'), then command: 'ffmpeg -i test.mkv -map 0:a:1 -c copy track1.aac'. Result: much smaller file size (164KB vs 2MB).
Use a for loop: 'for x in 0 1; do ffmpeg -i test.mkv -map 0:a:$x out-$x.wav; done'. This automates extraction of multiple tracks.
By using FFmpeg, you can easily extract any audio track from a movie file and use it in applications like Blender that lack multi-track support. The video also shows bonus tips for space-efficient extraction and automation with loops.
"The title accurately describes the solution and the video delivers exactly what it promises: step-by-step FFmpeg commands to extract audio tracks."
What command extracts all audio tracks from a video file without re-encoding?
Use '-c copy' flag: ffmpeg -i input -map 0:a -c copy output.mka
11:02
What is the default limitation of Blender when importing a video file with multiple audio tracks?
Blender only loads the first audio track automatically; it cannot select other tracks.
01:03
What does the '0:a:1' in an FFmpeg map argument represent?
It selects the second audio track (index 1) from the first input file (input index 0).
08:07
What command lists only audio streams from a video using ffprobe and grep?
ffprobe -i input 2>&1 | grep -i audio
04:32
How can you save space when extracting an audio track with FFmpeg?
By using '-c copy' to avoid re-encoding and outputting in the original codec format (e.g., .aac instead of .wav).
09:51
What is the main disadvantage of FFmpeg for extracting audio tracks?
It is a command-line tool, which may be intimidating for users who prefer GUIs.
02:11
What does the 'for x in 0 1; do ...; done' loop do in the context of this tutorial?
It automates the extraction of multiple audio tracks (index 0 and 1) by iterating through a list of track indices.
12:14
What is the purpose of the 'ffplay' command shown at 07:43?
It plays back an audio file directly from the terminal to verify which track was extracted.
07:43
Blender's audio track limitation
Identifies a common pain point for video editors using Blender, making the tutorial highly relevant.
00:49FFmpeg as a solution
Introduces a free, cross-platform tool that solves the problem without re-encoding, preserving original quality.
01:15Lossless extraction technique
Shows how to avoid file bloat by using 'codec copy', a key best practice for media professionals.
11:02Loop automation for batch extraction
Demonstrates efficiency for multiple tracks, saving time and reducing manual errors.
12:14[00:00] Hello! Do you have a movie file that contains multiple audio tracks and you'd like to work with that movie file, but the program you're using doesn't let you pick the audio track that you want to use? So one solution is to use FFmpeg to extract out the audio track and then you can just load in whichever one you need.
[00:18] Okay, so let's look at a demonstration here. I have on my screen, I have this movie file that's loaded into VLT. You can see here if I go into the audio menu, there are two different tracks. tracks so let's listen to this first one
[00:35] now i'm going to switch it over to commentary second track and we'll play that well proof begins to realize here that here okay so you can see two very different tracks now let's see what happens when we try to load this video file
[00:49] into blender so i'm going to add movie and here it is and you can see here inside of Blender the interface it allows you to select sounds to bring in
[01:03] but not which track so when I click on add movie strip it'll take some time and it'll give me these two strips one video and one audience so I don't have both of
[01:15] them and the one that it happened to bring in was the first one that we're listening to the default track so if I wanted to bring in the second one can't do it just with Blender. But that's where FFmpeg comes in. So what is FFmpeg? Well, it's a free
[01:30] cross-platform tool that you can use to do all sorts of things with media files. I did a video a while ago about how to take an animated GIF and turn it into a bunch of frames that you can load into Blender, but you can't load in animated GIFs in Blender, not directly. So with this
[01:46] solution, there's a bunch of advantages. First of all, it works for a wide variety of media files. It's really fast to run. If you're using it on Linux, it's probably already installed on your computer.
[01:58] And as an added bonus, you can extract your audio tracks without any kind of re-encoding. So you get that original quality. Of course, there are some disadvantages. First of all, FFM Type is a command line interface tool.
[02:11] So if you don't like working with a terminal, well, maybe I can still convince you to give this a try. Another disadvantage is that it's hard to tell what track you actually need to pull out. So what I'm going to show you is just pulling out everything and then figuring out which one was the correct one.
[02:27] And finally, if you wanted to extract out without taking too much disk space or re-encoding, you do have to know what the audio codec is for that extraction. But no, we will talk about that at the end of the video.
[02:39] Alright, so the first thing to know is how to actually get it. But you know what? If you're on Linux, like I said, you might already have it. So let's find out. You can open up a terminal and just type in the command ffmpeg, press enter,
[02:52] and if you get an error message, then you don't have it. You have to install it. But if you get a message like this, then you do have it, so you can just skip ahead to the next chapter. Okay, so let's say you don't have it. If you are on a Debian-based Linux operating system like I am, then you can run the command like this,
[03:08] sudo apt install ffmpeg, and that'll do the trick for you. If you're on other distros, then use the appropriate command there. If you're on Windows, well then you can download the prepared executables, the .exe files,
[03:22] by going to the FFmpeg website and scrolling down to grab the .exe files that you need. So download those install it and then you are good to go And while we here looking at the web browser I just want to point out that the test video file that I demonstrating with is available here at
[03:41] this URL if you want to pick it up for yourself and just follow along. Okay, so if you have ffmpeg installed, the first step then is to go to the folder that the movie file is located in inside of the terminal. So for me, I can do that from my file manager. Here is that movie file.
[03:59] I just need to right-click here, and I'll go to Window, and say Terminal here. So hopefully you have a similar option. Otherwise, you'd have to open up a terminal and then use the CD command to get to wherever that file is. So here is my terminal. I can type in ls, and you can see there
[04:15] is that movie file right there matching up to my file score. Okay, so now that we're here, it's time to figure out how many tracks we need to export. So when we were looking at it in VLC, we did see already that from here we can see we have two tracks, but I want to show you how you
[04:32] can do that using the ffprobe command that comes part of the package with ffmpeg. So let's go into our terminal, and the way to do it is to run a command like this. You start by typing ffprobe,
[04:44] that's the name of the command, you can type "-i", to mean like the input file you want to look at and then the name of the movie file. So I can just start typing test, press tab to autocomplete
[04:56] and I'll press enter. So the ffprobe command gives you lots of output. What we're looking for is any line that starts with the word stream and then also has the word audio in it. So here's one and here is another. So there we go, those are the two audio tracks that this movie file has.
[05:15] Alright, so now we know we have two, but you know what, I'm going to go ahead and show you a different command you can run that'll show you just what you need to see. It's just because we're at the terminal, and I really like using the terminal. So the way we do that is,
[05:27] first we press the up arrow key to recall that last command, and then we have to start typing in a bunch of stuff like this. This is just to make sure that the standard error goes to the standard output. Don't worry about that. And then we do the pipe, and then we say grep,
[05:39] and we can say stream.star audio, and then press enter. So there we go. So we run that command with those additional bits in there and then now we can see very
[05:53] clearly we only have two audio tracks that we need to pull out. Now the one thing though is that it says 01 here and 08 here. Don't worry about those numbers 1 and 8 because when we move on to the next stage we won't
[06:06] be using those. Alright, so now we know we have two tracks to extract, now let's go ahead and do the extraction. So with that we will use the command ffmpeg. we start by typing ffmpeg and again we'll say batch i to say that we're going to give it the
[06:21] input file to work with and that's the touch5 of mkb again. Now here's where we need to type in a bunch more. For this first extraction we're just going to dump it out to an uncompressed wave format. That means it's going to take a lot more file space but it's really easy to do and it's
[06:39] pretty fast. So let's go ahead and do that now and the other bonus is we don't need to worry about what the audio code gives. Okay, so next we type in dash map. This means we're gonna focus in on a specific thing
[06:51] for this input file. Then we type the number zero, which refers to the first input file we have, the only input file we have, then a colon, and then the letter A, which means we want to look at audio tracks another colon And now we gonna type the number zero because 0 represents the first track And then after that we type in the name of the output file we want to create
[07:16] So because it's the track number 0 of this movie file, I will type track0.wav. So by giving it .wav as the extension, then we're basically telling FFmpeg that we want just to take that outer track
[07:31] and dump it out as that uncompressed WAV format. So that's it. So let's go ahead and press Enter, and it's done. So if I look over in my File Explorer, there it is right there,
[07:43] and we can play it back. You know, SSM Tech comes with another tool called FFPlay. So we can do this all in terminal. I'll type FFPlay, and then that name of that track that I just created, track0.wad, press Enter.
[07:55] Okay, so from listening to that, we know that that was the first track, and let's just say that's not the one we want. So now we're going to pull up the next track.
[08:07] So what we can do is just, again, we'll press the up arrow key, so a couple of times. So that brings back the F of MPEG command we've entered, and we just need to change a few things. So going back to this first part, this 0A0, so 0, that last 0 was referring to the first
[08:24] audio track, now we need to pull out the next audio track, so we'll just change that to 1. And if we had to do the third audio track, it would be 2, and then 3, and so on and so on. So we're also going to change the name of the output
[08:36] file to track 1, and that's it. So now, this is our new command, ssmpx-i, the input file name, dash map, 0, colon, a, colon, and then the number
[08:48] of the track, and then the name of the output file. Press enter, and it's done again. And here we go. Let's play it this time again with our ffplay command. So play track1.wav.
[09:05] And that's been really good. So that is how you can do your extractions. So at this point, you can go ahead and load that audio track inside of whatever tool you're working with.
[09:17] So in my case, trying to load it into Blender, I'll just go back to Blender. I'll make sure I'm back at the start. I will go to Add, Sound, and then pick out that specific track. And if I turn waveforms on, we can tell definitely I've got that different track in there now.
[09:35] I can go ahead and start doing my editing and whatever else. Okay, time for some fun bonus content. So first up, how we can do the extraction without dumping it to an uncompressed file. file because if I jump back to my terminal we can see here that these
[09:51] different audio files that I just created are quite large. The first one 8.5 megabytes that's a big chunk of space considering it's so small. So with a little bit of extra work we can extract it out in its original form and
[10:06] it'll be a smaller file for sure, maybe a bit faster too. So let's go ahead and do that. So the first thing we need to know is exactly what the audio codec was. So So the command we ran before with ffpro will give us that information.
[10:19] So I'm just going to press the up arrow key to find it. And where was that? Ffpro, there we go. This was the command. Press enter. So right over here, you can see after the word audio, colon, it says aac, aac.
[10:33] So aac is the audio encoding. That means that when we do the extraction we need to do a few things First we going to change the extension of the file that we creating to because that is what it lines up to
[10:48] We also need a couple of extra things as well. Let's go back to our command. That was ffmpeg. Here we go. We have this, and let's go ahead and keep this part. What we're going to change, though, we're going to delete this for now, because we need
[11:02] to insert a few things. We have to type thatc and thatc is called codec and we just say copy. So it means we're just going to take the original input and just copy it straight to the output.
[11:15] And then now we give it the file name. So this is still track 1 but this time I'll call it aac instead of wav. And I run that command and it's done. And if I take a look at the files again, you can see here is our new aac file.
[11:31] 164 kilobytes compared to the 2 megabytes if we dump it out as an uncompressed audio file. So that's how you can do that. Now, as a second bonus, I want to tell you how you can write a loop to do all this FFmpeg command for you.
[11:47] So let's say, for example, you had 8 different tracks that you needed to pull out. You don't want to have to type up a command 8 times. There's a way to loop through it. Okay, so what I'm going to show you is how to loop through it if you already know how many tracks you need to export.
[11:59] and we're just going to dump everything out again to wav so then we don't have to worry in case the different audio tracks have different encodings. So you start by saying for, we're creating a little bit of a for loop, and we say let's say for x in, and then here's where
[12:14] you type in some numbers. So like we had with track 0, track 1, so we have the two tracks, so we write them out in the same way. We press enter, we type do, press enter, and now we type in our ffmpeg command and it's going to be more or less the same with one big difference.
[12:30] So this part is the same and math is the same but when we get to this part, 0 colon any colon, this is where we make use of the x that we just put in here. This becomes our
[12:43] variable for our loop that will, each time the loop runs, it will start at 0 and then it will go to 1 and if we had more numbers it would go to those numbers. So we'll just $X. So now that's going to be our representation of the track number we want. And same thing
[12:59] for the output, for some we can call it out-$X.wad. So there we go, that's how we can write that command, so it makes use of our looping variable. Press enter, and then done, press enter, and
[13:14] then it'll do everything for us, no more typing after that. So obviously if we only have the have two tracks. Doesn't make that much sense, but if you had a whole bunch then definitely
[13:28] that is something that you might want to look to doing. Okay, so that is how you can extract your audio tracks out of any movie file, either as an uncompressed WAV format or using a straight raw copy. I hope you did like that. If you
[13:43] did, please do give this a like and consider subscribing so you can see more content. And also I'd like to get your opinion on today's session. I was recording it with a very cheerful voice just to see if people like these videos more when I am way more energetic and enthusiastic
[13:59] than normal. So did you like it? I would love to hear your comments. Please do put in some comments and let me know if you like happy Mike or if you prefer normal Mike because normal Mike is actually a lot easier for me. Anyway, that's it. Thanks again and see you
[14:15] next time. Bye now.
⚡ Saved you 0h 14m reading this? Transcribe any YouTube video for free — no signup needed.