Learn Woodworking: Build a Box First
45sShows the simplest and most rewarding first woodworking project that builds foundational skills.
▶ Play ClipThis video teaches beginner woodworkers how to build a simple box using rabbet joints. It covers multiple methods for cutting rabbets, focusing on a safe technique using a single table saw blade with multiple passes. The tutorial includes step-by-step instructions for preparing wood, cutting joints, fitting the bottom panel, and making a lid.
The video introduces box building as a foundational project, promising a simple rabbit joint method that is quick, strong, and yields square corners.
The presenter uses 3/4 inch lumber from a home center, cross-cuts four sides, rips them to width, and glues up the lid pieces while preparing the rest.
Four methods: router table, dado stack, single blade with two cuts (dangerous), and recommended single blade with multiple passes. The latter uses a sacrificial fence on the rip fence and lowers blade to half thickness.
Uses miter gauge and rip fence together for non-through cuts. Warns never to combine for through cuts to avoid kickback.
For long rabbets (bottom panel), moves fence away from blade gradually until bottom panel fits snugly. Uses half-inch plywood for bottom.
Dry fits sides with a strap clamp, marks bottom panel to size, cuts slightly oversized and nibbles to perfect fit. Glues sides and bottom together, using plenty of glue on rabbet surfaces.
Lid is made slightly larger than box to create a lip. Uses same rabbet method on all four edges. A paint stirring stick with sandpaper is used for smoothing rabbets.
"The title accurately reflects the tutorial content: a step-by-step guide to building a box using rabbet joints."
What joinery method does the video recommend for building a simple box?
By using a rabbit joint method.
00:14
What are the four methods for cutting rabbets mentioned in the video?
Four methods: router table, stack of dado blades, single blade with two cuts (dangerous), or single blade with multiple passes (recommended).
02:29
Why should you never use the miter gauge and rip fence in combination for a through cut?
To prevent kickback when cutting completely through the board.
04:09
What is clamped to the rip fence to protect it when cutting rabbets?
Sacrificial fence.
03:18
To what height should the blade be lowered when cutting rabbets?
Half the thickness of the board.
03:34
What indicates you have enough glue in a joint when gluing up panels?
A small bead of glue squeezing out.
02:29
What tool is recommended for holding the box together during dry fitting?
Use a strap clamp or bar clamps on different sides.
06:58
Why do some people prefer special flat saw blades for dados and rabbets?
They leave a completely flat surface, but the video shows regular blade leaves ridges that can be sanded or are fine for strength.
04:47
Rabbet Joint Method
Explains a quick, strong, square joint ideal for boxes.
00:28Sacrificial Fence for Rabbets
Simple safety technique to protect the rip fence while cutting rabbets.
03:18Miter Gauge and Rip Fence Safety
Warns against using both for through cuts due to kickback risk.
04:09Strap Clamp for Dry Fitting
Practical tool recommendation for easy assembly testing.
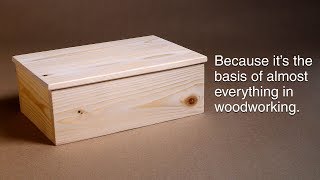
06:58[00:00] Just about everything you could build starts with knowing how to make a basic box. Whether you're making cabinets or drawers or bookcases, desks, beds, they're all just variations on the humble box.
[00:14] This is a great first project if you're just getting into woodworking. And there's lots and lots of ways to make boxes with all different kinds of joinery, but in this video, I'll show you the simple rabbit joint method I use almost every time.
[00:28] It's quick, it's strong, it gives you nice square corners without a lot of clutter. Hey, welcome to Woodworking Premier Board of Works. My goal is to take the mystery out of woodworking and teach you how to build your own project without a lot of space or expensive tools.
[00:42] You can get started today by downloading my free guide to setting up shop for under $1,000 at mytoolist.com. For this demonstration, I'm going to be using regular 3 quarter inch lumber that's available at any home center.
[00:54] Aesthetically speaking, smaller boxes will look nicer with thinner lumber, but making thinner boards is a topic for another video. And if you'd like to make this exact box, I've got free plans down in the description.
[01:06] I'll be able to build this box using this single board. First thing I want to do is cross-cut the four sides to their length. The final two cuts are going to be the lid. I'll set those aside for now.
[01:19] Next I want to rip all the sides down by the same width. A lot of you probably already know when I rip boards I like to clean up one side first then flip it around and rip it to its exact width.
[01:32] I'm going to go ahead and glue up the two pieces that make up the lid now so that they'll have time to dry. And all I'm going to do is shave a little bit off of each edge so it will fit nicely together.
[01:47] The secret to edge joining boards is you just don't want to clamp them down really tight. Just a real gentle clamping will do it. Otherwise they can buckle. Then you want to look down the edge and make sure that it's not curved.
[01:59] I can see it's bending a little bit on this one, so I'll just straighten that up with a couple of cauls. These are just boards where I've got some packing tape on them so that the glue doesn't stick.
[02:14] That flattens it out. It seems kind of silly to use so many clamps for such a small glue up, but each of these clamps is really important. And when you're gluing up panels, what you're looking for is a small bead of glue squeezing out.
[02:29] And that just means you got enough glue in the joint There you go let that dry for a while There basically four different methods for cutting rabbits The first method is to use a router table with a straight bit in your router If you don have a router or a router table the second method would be to use a stack of gator blades in your table saw
[02:49] Some places you can't get gator blades, and if you don't have any gator blades, a third solution would be to use a single blade and make two cuts. one going this way and the other cleaning up that shoulder this way.
[03:05] That method is a little tricky for beginner woodworkers. I don't recommend it. It requires a little special setup, and it can be a little bit dangerous. So what I'm going to do is the simplest method for making rabbits and gators
[03:18] using a single blade and just multiple passes. The first thing you're going to want to do is clamp a board to your rip fence. This is a sacrificial fence, and it'll let you come right into your saw blade without damaging your actual rip fence.
[03:34] The next thing you're going to want to do is lower your blade down to half the thickness of the board you're going to cut. It doesn't necessarily have to be exact, but I like to get it as close as possible. I'll cut the rabbits on the ends of the two longer pieces so that the short pieces fit completely within that rabbit.
[03:52] In other words, the width of the rabbet needs to be three quarters of an inch, the thickness of a board. To make this cut, you'll be using both the miter gauge and the rip fence together. In this situation, since it's not a through cut, it's not going to go completely through the board.
[04:09] This is a safe method. Never use the miter gauge and a rip fence in combination if you're going to be cross-cutting, cutting completely through the board because that is just inviting kickback which can throw that
[04:23] cutoff piece right back at you. So again for this situation and for cutting jade does it's fine to use both. So this is real simple I'll just start at the end of the board and start making cuts advancing the board forward each cut until it stops at the rip end.
[04:47] One thing people sometimes point out is that by using a regular table saw blade to make dados and rabbets that you can't get a completely flat surface.
[05:00] You'll be left with little ridges. And they do make special flat saw blades just for that purpose I never owned one because I never seen any reason for it I get perfectly fine results with a regular saw blade Sometimes there a few ridges in there
[05:17] I can sand those down. If I don't want to sand them down, they still hold just as well. So right about now, you're going to be super excited to see how this all goes together. So go ahead, give it a test drive. Now I can change my setup to cut the long rabbets along one long edge of each piece
[05:35] to hold the bottom panel in place. I won't be needing the miter gauge for these cuts and I will be needing the sacrificial fence for these cuts. And that's because I'll be doing them kind of opposite of the way I did these end rabbets.
[05:49] This time I'm going to start with the fence up close and then slowly work it further and further away until I get a good fit. I'm going to use this half inch plywood for my base.
[06:02] So I'll start with the blade right up against that board. I'll make one pass over the blade with each piece, then move the fence over a little bit at a time until I get a good fit for that bottom panel.
[06:14] So when you think you're getting close to the final width of that rabbit, you want to
[06:30] test it against your actual bottom panel to make sure that you're not going too far. So here I can tell that I still have a little bit further I can do, like half a blade's
[06:43] thickness ought to do it. To get a good fit on that bottom panel, I like to cut it to size by first dry fitting all of the
[06:58] side pieces together. If you have one of these strap clamps, it makes this process a lot easier. I highly recommend getting one of these. I've had this one for probably 15 years and I can't
[07:12] tell you how many hundreds and hundreds of times I've used it. But if you don't have one, you can just use some regular bar clamps on different sides. Rather than using a tape measure, I usually like to just make a mark where I need to cut it.
[07:28] I'll cut this a little oversized to start with so that I can nibble it down to a perfect fit.
[07:42] The bottom panel will help keep the box square while you gluing it up so I like to glue
[07:56] together all the sides and the bottom at the same time. Another reason I like to use rabbit joints is that there's a lot of surface area for the glue. It makes it a really strong joint. You want to make sure that you get glue on both surfaces, this one and that shoulder piece.
[08:11] and I'm not putting any glue on that bottom rabbet just yet. It won't hurt a little bit just on there. Now I can put the glue in this rabbet.
[08:41] Unlike everything else, I'm not putting a lot of pressure on these clamps. Now I can see how the lid turns out.
[08:55] Alright, now all I need to do is cut that down to its final size. but I think I'll wait until this is dry so that I can get a good measurement.
[09:18] I'm going to make my lid a little bit bigger than the box so that there's a lip all the way around. If you want, you can make it the exact same size as the box. And I'll kind of wrap it on all four edges just like I did before.
[09:33] This is a free paint stirring stick that I've glued a couple of pieces of sandpaper to and
[10:01] It's really handy for changing rabbits.
⚡ Saved you 0h 10m reading this? Transcribe any YouTube video for free — no signup needed.