Full Transcript
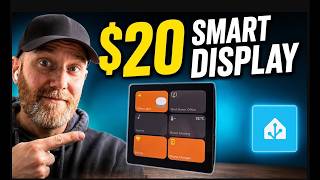
[00:00] So, a lot of people in my last video asked how to access this Office panel. So, today I'm going to run through how you can set it up and how you can get it working with your Home Assistant setup. This is a staple customisable smart display for Home Assistant.
[00:15] It's fast, works on your local network and costs around 20 euros. This panel can be used to turn on and off notes, switches, activate scenes or even run scripts from Home Assistant.
[00:29] I've broken this down into five steps which should be easy enough to follow. At the end I do have some troubleshooting tips. So step one is installing ASPHome in Home Assistant. So if you click on Settings and then go to Apps and then Install App and then just search for ASPHome.
[00:51] And you should see it here. And then you'll see to click Install. It's also useful to have start on beat selected, watch dogs and strong sidebar just so you can have it here.
[01:04] Now step 2 is creating the ESP Home device. To create the device you need to open the web UI either here or in the site menu here.
[01:16] Then you just press new device and continue. New device setup and then just give your device a name. and press next. Now you need to select the device type which is ASP32 S3 if you are using the same one as me.
[01:37] and just press skip for now. Now we just need to download the code that we are going to use. To do this we are going to need another app.
[01:49] So if you click install app and then search for Terno, you'll see Terno and SSH. So you need to install this app. So one thing to note is that this app is only available in advanced mode, so you'll need to make sure that's turned on.
[02:05] So if you go down into your profile here, you should see advanced mode. Just make sure that's toggled on. Once you have it installed, click open web UI and you should have access to your Terno.
[02:18] I going to type ls to this to see where I am And I want to go into this home assistant folder here So psh directory home assistant and then just again I want to be in this esp home folder
[02:30] right here. So I'm going to do cdint. Now we need to download that code using git. So I'm going to do git clone. I'll leave this
[02:44] command in the description. So if we do ls then we should see that folder there. Cool, that's it downloaded. So now it's step four which is configuring your device. So for this you need to change your device's
[02:57] yaml file and the best way to do this is through ASD home builder. So you go back in here and then click edit and that's this file here. So we're going to need to do everything that's in this file because
[03:11] I'll leave a link in the description for this. We're going to add this in. So you should see some errors here saying that these secrets aren't defined. Let's go define them now. So just save and then close this file.
[03:26] So now you need to click on secrets here at the top. And in here you'll need to define your Wifi password and your Wifi name as well. You also need to add the latitude and longitude. This doesn't have to be exact and you can just leave it at zero if you want.
[03:43] This is used by some other weather features that we won't be using. Actually there is one more thing you need to add which is AP password. And this is just for if you want to connect to your device via Wi-Fi. So you can connect to it remotely and use whatever you want here.
[03:57] So let's save that and now edit our YAML file. So this first part is where you configure your fonts, your colours, brightness and your behaviours across the board. Next is your device name and things like that. So that should match the name at the top here.
[04:11] This part here. This is where you set your board and stuff. But if you're using the same one as me you can leave that as is. And this is where you define your WiFi secrets. So that's all imported here.
[04:23] So these are the packages, this is the stuff that you've downloaded from git and these are all being imported and used. So these are the parts you customise yourself.
[04:35] So here you've got your ID, so this is the office life button, this has to be your youth ID you got your phone clock here And this is the ID that relates to the entity in Home Assistant I show you how to get that now So if you go into Settings and just go down to Developer Tools and then Site and I just search right here
[04:56] So I'll search for Office Site. You can see that that's just this ID here, so you just copy this. And if you paste that into the file, then that button will control that entity.
[05:11] And this is just the text for the button, so this will say Office Light for that button, and then this is the column and row for that button. And this is the icon that's going to be used for that button. So these icons are actually defined inside of that package that we downloaded, so you can see them all in here.
[05:26] I'll leave a link for this as well, but this is where you'll find lots of icons that you can use. If you do change them, you'll need to define them at the bottom of the file here, so you just need to change these here.
[05:38] So you'll have to excuse the crudity of this model, I didn't have time to build the scale. But this is hopefully in a minute I'll give you an idea of how the things relate. You can see here that text, Office Light, that relates to the text on the button. And then Ceiling Light relates to the ceiling light icon.
[05:53] And then you have Phone Charger Text which relates to the phone charger text. And then Cell Phone Charging relates to that icon there. Hopefully that helps. So there's lots of different types of buttons you can use. You can see them all defined here on GitHub.
[06:07] there's loads you can play around with. These are all imported here and you can change them by changing these file paths.
[06:21] Once you're happy with your button setup you can just save your YAML file. So this is the final step of compiling Flash. So now we just want to connect our
[06:33] ASP32 display to the computer. Back in ASPHome click the little menu, press install, then select plug into this computer and this can take a bit of time so just be patient with it, it will download
[06:46] eventually. So once it has finished just select download project and select the top one here which is for ASPHome web and then press keep and then you want to select open ASPHome web.
[07:01] Now press connect select the USB port and then connect again Now you press install and just find that file on your computer and then just press install and again this may take a bit of time so just be
[07:20] patient and then all gone well it should just load up I think I messed up the buttons on this one
[07:34] If this is your first time setting it up, if you go into settings and then devices and services you should see it here. Now you just need to press Add and Submit. Now you may also see a warning message like this. So if you do see this you just need to go into devices
[07:50] and services and then you just need to select your ASP home. Select your device here in the menu and then select this hello device so that should fix it. So this last section is just some
[08:06] tips and tricks in case you run into any issues. So the first bit of advice is if you're in the install and you get an error if you try install this here this last option this will then give
[08:18] you the logs on the screen and it'll show you what the error message is. So you see in this particular case it's about an ID of the office flight so we just have a look at our YAML file then for that. I've done this error deliberately because I made this
[08:32] mistake but the problem here is that the office flight is defined in two of them and that UUID needs to be unique. And everything you can do is you can validate the YAML file this way as well.
[08:48] This can take a bit of time too but it will run through and scan the file and tell that there is any errors. If you are changing any of the icons on these buttons it's pretty simple to run what they look like just google them and there's actually this website here
[09:02] that's probably the first of both and I'll give you an idea of what the buttons look like. So I did test this on a Windows machine and I didn't run into any issues but you may need to install these two drivers here. I'll leave a link for them in the description below but I didn't need them.
[09:18] I'm currently working on a Spotify integration as well if that's what you're interested in let me know in the comments and I'll make a video on that too. Cool, well that's it for this video, thanks for watching and please consider liking and subscribing. Cheers, bye.