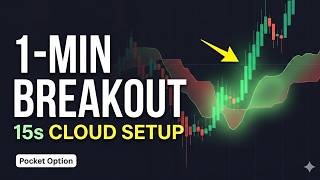

Strip Ichimoku to Just the Cloud
51sDebunks complexity of Ichimoku and offers a simple, powerful hack that traders love.
▶ Play Clip"Delivers a clear, rule-based strategy with live examples, but the title oversells simplicity while the video includes typical promo and risk disclaimers."
This video presents a simplified Ichimoku trading strategy for 1-minute binary options on Pocket Option, focusing exclusively on the Kumo cloud as a dynamic support and resistance zone. The presenter demonstrates how to identify high-probability breakout trades on a 15-second chart, emphasizing patience, confirmation, and risk management over prediction.
The strategy strips away all Ichimoku components except the Kumo cloud, which acts as a dynamic support/resistance zone. Designed for 15-second candles with 1-minute expiry, it aims to identify strong breakout momentum rather than guessing direction.
Many traders avoid Ichimoku due to its complexity. By removing Tenkan-sen, Kijun-sen, and Chikou Span, the chart becomes clean and focused, making momentum and breakouts easier to spot.
Trading involves financial risk. The strategy is for educational purposes only; never trade with money you cannot afford to lose, and practice on a demo account first.
Set the chart to 15-second candles and expiry to 1 minute. Use Heikin Ashi candles for better visual clarity of momentum. Add the Ichimoku indicator and hide all lines except the cloud.
When price is inside the cloud, it indicates compression and indecision. The strategy avoids trading during this phase, waiting for a confirmed breakout instead of predicting it.
For a sell, price should be inside or slightly above the cloud. Wait for a strong red candle to close completely below the lower edge. Enter only after the candle closes, confirming bearish control.
For a buy, price should be inside or slightly below the cloud. Wait for a strong green candle to break above the upper edge and close completely outside. Enter after the close, confirming bullish expansion.
The key is to react to confirmed breakouts, not predict them. Avoid weak candles that barely close outside the cloud. Patience separates emotional trading from structured execution.
A complete PDF guide is available for free via the link in the description, covering setup, breakout logic, candle confirmation, and dos and don'ts.
After consolidation inside the cloud, a 15-second candle closed entirely below the lower edge, triggering a sell. The trade stayed below entry, showing strong bearish momentum with no upper wicks.
After higher lows and bullish momentum building, a strong green candle broke above the cloud and closed outside. The buy trade followed through with continued bullish bodies, and the cloud acted as dynamic support.
A valid buy breakout initially pushed up but then met resistance and pulled back, closing at a loss. This illustrates that no strategy is 100% accurate; risk management is essential.
The video shows both winning and losing trades. Discipline, confirmation, and risk management are what matter. No strategy wins every time.
The clean cloud setup simplifies Ichimoku to focus on confirmed breakouts from the Kumo cloud, using 15-second candles and 1-minute expiries. Success depends on strict discipline, waiting for candle closes, and accepting that losses are part of trading.
What is the recommended time frame and expiry for the clean cloud setup?
15-second candles with a 1-minute expiry.
00:27
Which Ichimoku components are hidden in this strategy?
Tenkan-sen, Kijun-sen, and Chikou Span are hidden; only the cloud is kept.
01:20
What does price inside the cloud typically represent?
Compression and indecision, where the market is building pressure.
01:48
What is the entry rule for a sell trade?
Wait for a strong red candle to close completely below the lower edge of the cloud, then enter a 1-minute sell trade.
02:02
What is the entry rule for a buy trade?
Wait for a strong green candle to close completely above the upper edge of the cloud, then enter a 1-minute buy trade.
02:27
Why does the strategy avoid trading inside the cloud?
Because it represents compression and indecision; the edge comes from trading confirmed breakouts, not predicting them.
01:48
What does the failed breakout example teach?
No strategy is 100% accurate; breakouts can lose fuel, so risk management is essential.
08:17
Compression as a Setup
Explains why price inside the cloud is a precursor to breakouts, helping traders avoid premature entries.
01:48Confirmation Over Prediction
Emphasizes reacting to confirmed candle closes rather than predicting moves, a core principle of disciplined trading.
02:02No Strategy is 100%
Honest acknowledgment that breakouts can fail, reinforcing the need for risk management.
08:17[00:01] Trading Strategies. Today I'm going to show you a breakout setup that removes most of the confusion traders have with the Ichimoku indicator and focuses only on the one part that truly matters, the cloud. Many traders avoid Ichimoku
[00:15] because it looks complicated with too many lines crossing the chart. But the truth is, you don't need all of those components. When you strip everything away and keep only the kumo cloud, you are left with a powerful dynamic support
[00:27] and resistance zone that clearly shows where momentum builds and where it explodes. This is what I call the clean cloud setup. It is designed for a 15-second time frame with a 1 minute expiry. And when used with patience and
[00:40] discipline, it helps you identify strong breakout momentum instead of guessing market direction. Before we go deeper, I want to clearly say that trading involves financial risk. This strategy is shared strictly for educational
[00:53] profit and you should never trade with money you cannot afford to lose. Always apply proper risk management and practice on a demo account before trading with real funds. Responsible trading is always more important than
[01:06] fast trading. Now let's move to the setup. First, set your candle time frame to 15 seconds and your expiry time to 1 minute. For better visual clarity, I recommend using hiken ashi candles because they make momentum strength much
[01:20] easier to identify during breakout situations. After that, add the Ichimoku kinko indicator to your chart. Once you open the settings, turn off the tenkansen, the kijun, and the chiku span and keep only the cloud visible. When
[01:34] you do this, your chart becomes clean and focused. And that simplicity is exactly what makes this setup powerful. The cloud acts as a dynamic barrier. When price moves inside the cloud, it usually represents compression and
[01:48] indecision. The market is building pressure. Many traders try to trade that is not our approach. We stay patient. We wait. We allow the market to show its intention. Our edge comes from trading confirmed breakouts, not
[02:02] predicting them. For a sell setup, price should first be inside the cloud or slightly above it, showing that the market is compressing. Then we wait for a strong red candle to form and completely close below the lower edge of
[02:15] the cloud. The most important rule here is confirmation. We do not enter while the candle is forming. We wait for it to close clearly outside the cloud. Once it closes below with a strong body and clear momentum, we immediately enter a 1
[02:27] minute sell trade. That candle close confirms that bearish pressure has taken control. For a buy setup, the logic is simply reversed. Price should be inside the cloud or slightly below it showing compression. Then we wait for a strong
[02:39] green candle to break above the upper edge of the cloud and close completely outside. Again, we only enter after the candle closes. When it closes clearly above the cloud with strong momentum, we enter a one minute buy trade because
[02:52] that breakout signals bullish expansion. The key to this strategy is discipline. We do not predict, we react. We do not trade weak candles or candles that barely close outside the cloud. We wait for strong, decisive breakout candles
[03:06] This patience is what separates emotional trading from structured execution. As we move to the live examples, pay close attention to how price gets trapped inside the cloud before the breakout happens. This
[03:20] compression phase is where most traders lose patience and enter too early. The breakout candle is where opportunity appears and timing makes all the difference. To help you understand this strategy in even more depth, I have
[03:32] created a complete PDF guide where I explain the setup, breakout logic, candle confirmation rules, and important dos and don'ts step by step. You can download this PDF for free using the link given in the video description. I
[03:47] so you fully understand the structure before applying it. If you appreciate structured rule-based trading education without hype or unrealistic promises, make sure you like this video and subscribe to SAM Trading Strategies.
[04:01] allows me to continue sharing highquality educational content. Also, turn on the notification bell so you don't miss upcoming strategy videos. examples and see how the clean cloud setup works in real market conditions.
[04:16] Look closely at the candle behavior right here. After a period of consolidation where the price was trapped within the cloud's boundaries, we see a surge in bearish momentum. The key is this specific 15-second candle.
[04:31] It didn't just test the support. It closed entirely below the lower edge of the cloud. This is our signal that the institutional floor has snapped. The moment that candle body finalized outside the zone, I triggered the sell
[04:44] order. As the trade develops, you can see the power of the 15-second time frame. While a one minute candle might still be forming, these smaller intervals show us the internal strength of the move. Notice how the candles
[04:57] remain solid red with no upper wicks. This is the institutional slide in action. The cloud is now acting as a ceiling far above the current price, confirming that the trend has shifted completely. By stripping away the extra
[05:10] Ichimoku lines, our chart stays clean, allowing us to see that the sellers are in total control of this price expansion. The trade concludes with a perfect result. The price maintained its downward trajectory and stayed well
[05:22] below our entry point for the entire duration. If you observe the chart closely, price had been moving under the cloud for some time. The structure then something important started happening. The candles began forming
[05:36] higher lows and bullish momentum slowly started building from the bottom. Price then moved into the cloud area which is our compression zone. This is where many traders get confused and enter too early. But remember, our rule is clear.
[05:51] We do not trade inside the cloud. We wait for confirmation. Then we received exactly what we were waiting for. A strong green candle that broke above the upper edge of the cloud and closed completely outside it. That close is the
[06:03] confirmation. It tells us that buyers have taken control and momentum has shifted. At that exact moment after the candle closed clearly above the cloud, I entered a one minute buy trade. There was no prediction involved. It was
[06:17] simply a reaction to confirmed breakout strength. Now look at what happened after the entry. Immediately after the breakout, the next candles continued pushing upward with strong bullish bodies. This is exactly what we want to
[06:29] see after a valid breakout. There was no strong rejection back into the cloud, which indicates that the breakout had real strength behind it. Notice how the cloud now starts acting as dynamic support. Once price breaks above it,
[06:42] that same zone often prevents quick downward movement. This shift in behavior is important because it confirms that momentum has truly changed direction. As the trade moved closer to expiry, bullish pressure remained
[06:54] consistent. There were no large opposing red candles to threaten the position. Instead, buyers maintained control, pushing price steadily higher. This continuation is what separates a clean breakout from a weak or fake one. The
[07:07] planned with the price finishing significantly higher than our initial entry level. Let's break down this specific setup where all the technical indicators aligned perfectly for a high momentum buy trade. After a period of
[07:21] price action consolidation, we saw a significant surge. A solid green candle the upper resistance zone of the kumo indicates that buyers have finally overwhelmed the sellers and a new upward
[07:35] trend is beginning. Based on this clear breakout on the 15-second chart, the capture the anticipated upward expansion. Now, as we watch the trade progress, we see a crucial lesson in market psychology and volatility.
[07:50] Initially, the price attempted to continue its climb, but it quickly met a wall of hidden resistance. Notice how the candle momentum shifted from strong, solid bodies to smaller, indecisive shapes right at the peak. Even though
[08:03] our entry was based on a valid breakout, the market began to pull back toward the cloud boundary. This is a real-time example of why no strategy is 100%. The market is dynamic and sometimes a breakout can lose its fuel just as
[08:17] quickly as it started. As we moved closer to expiry, price started pulling back slightly below the entry level. The bullish breakout did not sustain enough strength to maintain distance from the entry price. The trade closed at a loss
[08:31] most. This loss does not mean the strategy is invalid. It simply means that not every breakout will have strong continuation. Trading always involves risk. There is no strategy in the world that guarantees 100% accuracy. So today
[08:47] you saw both sides of the clean cloud setup. a strong breakout that followed through and a breakout that failed before expiry. That's the reality of trading. No strategy wins every time. What matters is discipline,
[09:01] confirmation, and proper risk management. Always remember that trading content is shared strictly for educational purposes. Never trade money you cannot afford to lose, and always practice before using real funds. If you
[09:15] want to understand this setup in more detail, download the free PDF from the link in the description and study the rules carefully. If you found this video helpful, make sure you like the video and subscribe to Sam Trading Strategies
[09:27] for more structured rule-based trading education. Stay disciplined, trade responsibly, and I'll see you in the next




⚡ Saved you 0h 09m reading this? Transcribe any YouTube video for free — no signup needed.