Why Vodka Makes Tomato Sauce Better
32sExplains the scientific reason for adding vodka to sauce, a controversial and educational tip.
▶ Play Clip
[00:00] Hey, what's up? In this video, I'm going
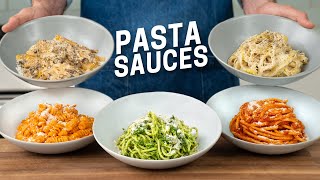
[00:01] to show you five basic 15minute pasta
[00:04] sauces that are super versatile and will
[00:06] cover a pound of the pasta of your
[00:08] choice. I'm also going to show you some
[00:09] restaurant moves that you can use in the
[00:10] home kitchen to bring these pasta sauces
[00:12] to life in the final dish, especially
[00:14] the last one. That sauce is really
[00:16] insane. First up is vodka sauce. It's
[00:19] creamy, it's rich, it's a touch spicy,
[00:21] and I think it's really underrated by
[00:23] home cooks. To make it, I'll drop a big
[00:25] pot of water on the stove for my pasta.
[00:27] Then I'll grab a heavy bottom pot with
[00:29] at least four quarts of space and drop
[00:30] it over medium heat. Once that's hot,
[00:33] I'll add in a long squiggle of olive oil
[00:35] or about 40 grams worth. Then 75 g of
[00:37] minced shallots, 20 g of minced garlic,
[00:39] and then a strong pinch of salt. I cut
[00:41] the shallots into a bruno or a very very
[00:44] small dice because I want them to melt
[00:45] into the sauce instead of being
[00:47] texturally significant. And if you don't
[00:49] have shallots, of course, you can go for
[00:50] red onions. Just make sure to cut them
[00:52] really small like this. After a stir at
[00:54] about 5 minutes of sweating over medium
[00:56] heat, the shallot garlic is translucent
[00:58] and softened. So, next I'll add in 30 to
[01:00] 40 grams of chopped calabrian chilies, 2
[01:03] to three grams of chili flakes, and a
[01:05] little bit more oil to keep things
[01:06] sizzling properly. Next, I'll jump in,
[01:08] stir to combine, and sweat the chilies
[01:10] with the aromatics for about 2 minutes
[01:12] or until the oil is perfumed with the
[01:14] fruity heat of the Calabrians. If you
[01:16] don't have Calabrians, sub in an extra
[01:17] pinch or two of chili flake. 2 minutes
[01:19] later, I'll add in one whole can of
[01:21] tomato paste, which is about 170 gram.
[01:23] Then I'll jump in and fry that in the
[01:25] chili garlic oil over medium heat to
[01:27] round off any sharp acidity, develop a
[01:29] little bit more sweetness, and blunt any
[01:31] canned tomato flavor. 2 minutes later,
[01:33] the tomato paste has turned a little bit
[01:35] rusty and everything is starting to
[01:36] glaze up the bottom of the pot. At this
[01:38] point, it's time to add in the namesake
[01:39] of this dish, vodka. 100 g worth. If
[01:42] vodka isn't morally aligned for you, you
[01:44] can use water here. Just know that
[01:46] you're going to be missing out on a
[01:47] couple of percentage points of flavor.
[01:48] By the way, if you're wondering, vodka
[01:50] helps pull out extra flavor from the
[01:52] tomatoes and aromatics that aren't
[01:53] soluble in water, just alcohol. It also
[01:56] adds just a little bit of bite that
[01:57] makes the creamy sauce taste better
[01:59] without making it taste like booze. 30
[02:01] seconds later, the vodka is simmered off
[02:03] and we're left with a flavorful paste.
[02:05] So, I'll move on to add in 350 g of
[02:07] heavy cream. Then, I'll stir that in and
[02:10] gently bring this up to a simmer over
[02:12] low heat because cream can pretty easily
[02:14] grip the pan and scorch if you use
[02:16] higher heat. Now I'll lazily slowly
[02:18] bubble this sauce for about 5 minutes
[02:20] while I drop one lb of fusili into water
[02:22] that I've salted generously. I love
[02:24] fusili for this dish because the creamy
[02:26] sauce gets caught in these little
[02:27] spiraly folds. And that gives you a high
[02:30] sauce to pasta ratio. And when your
[02:32] sauce tastes as good as this one, that's
[02:34] a good thing. 1 minute before the pasta
[02:36] is done cooking, I'm going to scoop out
[02:37] about a cup's worth of pasta water in
[02:39] case I need to thin this sauce out later
[02:41] on. Sometimes I need it, sometimes I
[02:43] don't. But it's a good thing to have
[02:44] boiling hot water around to thin out
[02:46] your pasta instead of lukewarm tap
[02:47] water. At the 9-minute mark, I'm going
[02:49] to take a little bite ski to test for
[02:51] dness. And we're good. Just a hair past
[02:53] al dente is what I personally prefer.
[02:55] Back at the sauce, the final texture
[02:57] should be what we call in restaurants
[02:59] nape. That means the sauce clings to the
[03:01] back of a spoon, but it leaves a nice
[03:02] trail when you pass your finger through
[03:04] it. To finish this dish, I'm going to
[03:05] flip my drain fusili into the pot. Then
[03:08] add in 75 g of butter and 50 to 75 g of
[03:11] grated parmesan. Now I'll just stir that
[03:13] in off heat to melt in the dairy. Once
[03:16] melted, the sauce should be clinging to
[03:18] each noodle, but not so clingy that it's
[03:20] gloppy or sticky. The overall texture
[03:22] should look smooth and velvety like
[03:24] this. The final step for all pasta
[03:26] dishes, of course, is to taste for
[03:28] seasoning. And I think that tastes
[03:30] great, but I still want just a little
[03:31] bit more high-end from a small pinch of
[03:33] salt. And this sat for a second, so it
[03:35] tightened up a little bit too much. So
[03:36] I'm going to grab some pasta water and
[03:38] splash that in to bring things back to
[03:39] being a little bit more saucy. To serve,
[03:41] I'm going to pile this into a nice low
[03:43] pasta bowl. Then top with a generous hit
[03:46] of grated Parmesan cheese. And then a
[03:47] little fresh cracked black pepper to
[03:49] bring a different kind of heat than the
[03:51] Calabrians or the chili flakes. And that
[03:53] is a dreamy creamy vodka sauce that's
[03:55] teed up for a variety of different pasta
[03:58] shapes, not just fusili. Now, let's
[04:00] taste it. M.
[04:02] That is a freaking party food. It's
[04:05] creamy. It's cravable. It's comforting.
[04:08] And it's so freaking flavorful, guys.
[04:11] The little folds in the fusili perfectly
[04:14] hold this creamy tomato sauce. And then
[04:16] the whole thing is tied together with
[04:17] some parmesan cheese. It's It's so good.
[04:21] I love it. I think more people should
[04:23] make this dish at home. Up next is a
[04:25] maximalist version of tomato sauce
[04:27] called amatricana. At first glance, it
[04:28] looks simple and maybe even a little bit
[04:30] boring, but I assure you that it will
[04:33] expand what you thought was possible
[04:34] from a basic can of tomatoes. To make
[04:37] it, I'll start with some kind of cured
[04:38] pork product. Traditionally, that's
[04:40] guanchchal, which is cured and dried
[04:42] pork jaw. Guanchal is really fatty,
[04:45] though, so cutting it is very hard if
[04:47] it's not hard. So, to firm it up, I'm
[04:49] going to throw it into the freezer for
[04:50] about 15 minutes. Oh, and by the way, I
[04:52] got this guanchchal at my local Italian
[04:54] market. But if you can't find it,
[04:55] panetta or bacon would be a fine sub.
[04:58] Once the jowl is firmed up, I'm going to
[05:00] cut it down into 1/2 in thick discs. As
[05:02] you can see, it kind of looks like I'm
[05:03] struggling a bit here because it's very
[05:05] firm from the freezer, but I would much
[05:07] rather have this pork be harder than
[05:09] softer. Cutting room temperature
[05:10] guanchal is very unpleasant and greasy.
[05:13] Next, I'm going to cut my pork rounds
[05:15] into strips, then turn 90 and cut into a
[05:17] clean, small dice. Avoid large rustic
[05:20] chunks here if you can because those
[05:21] aren't going to evenly render and then
[05:23] they'll kind of stand out as flabby
[05:25] chewy bits in the final dish. In total,
[05:27] I need about a half pound or 225 g of
[05:30] small diced guanchal or some other kind
[05:32] of fatty cured pork. From here, I'm
[05:34] going to grab my heavy bottom pot yet
[05:36] again and drop it on the stove next to
[05:37] some boiling pasta water. Once up to
[05:39] medium heat, I'll drop in my diced
[05:41] guanch chal. Then add in a big splash of
[05:43] water. This water is going to help
[05:44] render the fat much faster and more
[05:47] evenly. From here, I'm going to slowly
[05:49] gently render the pork for about 10
[05:51] minutes, stirring every 2 minutes or so
[05:53] to make sure that the meat isn't getting
[05:54] too brown or crispy. All I want here is
[05:56] to fully render out the flabbiness and
[05:58] get a little development of flavor from
[06:00] the pork frying in its own fat. At
[06:01] around 10 minutes, the pot has started
[06:03] to glaze up with pork drippings. And
[06:05] there's a little bit of browning going
[06:06] on. So to arrest that darkening of
[06:08] flavor, I'm going to add in a splash of
[06:10] water to deglaze. Then I'm going to
[06:11] scrape that up. Man, this is looking
[06:13] really good. Now the pork is fully
[06:15] rendered and tender with zero flabiness.
[06:18] Next, I'm going to move this pork over
[06:19] to a bowl to hang for a sec while I cook
[06:21] the tomato part of this sauce. Back over
[06:23] medium heat, I'll add in 60 grams of
[06:25] olive oil. Then 200 gram of small to
[06:27] medium diced red onion, 20 grams of
[06:29] minced garlic, and a strong three-finger
[06:31] pinch of salt. Oo, I'll also add in a
[06:32] little bit more water to loosen up the
[06:34] remaining porkiness stuck on the pan.
[06:36] From here, I'll just jump in and scrape
[06:37] that up and sweat the onions and garlic
[06:39] gently over medium low heat for about 5
[06:41] to 10 minutes until things are nice and
[06:43] soft. At that point, things will look
[06:45] caramelized, but that's just the
[06:47] meatiness from the pork coming up. Next,
[06:48] I'll add in 20 g of finely chopped
[06:50] calabrian chilies. Stir those in and
[06:52] then fry off with the aromatics. Again,
[06:54] if no
[06:55] collabor chili flake, but you should
[06:57] just get them. Whole Foods, Trader
[06:59] Joe's, Italian markets, international
[07:01] grocery stores, and Amazon all stock
[07:03] them. They're delicious. Get them now.
[07:05] Okay, chilies are sizzled and the oil is
[07:07] looking really flavorful. So, from here,
[07:08] I'll add in 25 g of tomato paste. Then,
[07:11] stir in and fry for about 2 minutes or
[07:12] until it's taken on a bit of a rusty
[07:14] color. Tomato paste is like tomato
[07:16] bouan. It increases the amount of tomato
[07:18] flavor instantly and substantially. I
[07:20] almost never make a tomato-based sauce
[07:22] without it because it ups the perceived
[07:24] tomatoiness of the sauce by at least
[07:26] 50%. Once the paste is fried off, I'll
[07:28] add in 100 gram of dry white wine. I'll
[07:31] stir that in to delaze the pot. Then
[07:32] I'll reduce until the wine is fully
[07:34] cooked off or until a sec, which is
[07:37] French restaurant speak for until dry.
[07:39] Once the alcohol is cooked off and the
[07:41] wine has reduced until my spatula leaves
[07:43] a little trail like this, I'll add in
[07:44] one pureed can of nice tasting crushed
[07:47] tomatoes. Brandwise, I like Bianco
[07:49] DNapoli or Cento best. Then 1 grams of
[07:51] oregano, 3 to 5 grams of sugar, and one
[07:53] more pinch of salt to season the
[07:55] tomatoes. From here, I'll stir and bring
[07:57] up to a low simmer and cook for about 7
[07:59] to 10 minutes while I drop one lb of
[08:01] pasta into my pot. In my kitchen,
[08:03] amatricana gets buatini. I love it
[08:06] because it has this tube shape and that
[08:07] brings a level of textural contrast and
[08:10] springy bite that spaghetti just doesn't
[08:12] have. Before the pasta is done cooking,
[08:13] again, I'm going to reserve some pasta
[08:15] water for adjusting sauce thickness.
[08:17] Then I'll drain off the bukatine, throw
[08:19] it into the sauce. Then to finish, I'll
[08:21] throw in a splash of the reserved pasta
[08:22] water and then 40 to 50 grams of grated
[08:25] pecorino cheese. From here, I'll fold
[08:27] together until the cheese is melted and
[08:29] the pasta and sauce have unified into
[08:31] one beautiful thing. Of course, before
[08:33] serving, one last taste for salt. And I
[08:36] think this needs a little bit more
[08:37] sharpness from the pecorino and a tiny
[08:39] pinch more salt. To serve, I'll swirl
[08:41] into a bowl, then top with a couple of
[08:43] chunks of rendered pork and a little bit
[08:45] more tomato sauce. And then finally, a
[08:47] hefty dose of grated pecorino cheese.
[08:50] And that's amatricana, the queen tomato
[08:52] sauce. For me, it possesses a depth and
[08:54] delicacy of flavor that you just don't
[08:56] get from a basic marinara or a spicy
[09:01] arabiata. Bukatini is a beautiful
[09:03] slurping noodle. And texturally, when
[09:05] those two sides come together and get
[09:07] squished in between your teeth, it's
[09:09] really, really special. Flavor-wise, for
[09:10] a simple tomato sauce, there is a lot
[09:12] going on here. You've got the estestery
[09:14] sweetness from the wine. You've got
[09:15] onion, you've got garlic, you've got
[09:17] fruity chilies, you've got pork flavor,
[09:19] you've got just an overall beautiful,
[09:21] robust meatiness. At the end of the day,
[09:23] this is just tomato sauce, but honestly,
[09:26] it's so good. Up next is a hybrid that
[09:28] smashes up two legendary sauces into one
[09:31] super sauce. But first, I'll thank Wild
[09:34] Grain for sponsoring this vid. If you
[09:36] haven't heard of them, Wild Grain is the
[09:37] first bake from Frozen subscription box
[09:39] for sourdough breads, pastries, and even
[09:41] fresh pastas. When I was a professional
[09:43] bread baker, I actually had a very
[09:45] similar idea. But thank God, Wild Grain
[09:47] beat me to it because there's no way
[09:49] that I could have done it. And I'm glad
[09:51] that it exists. It's extremely
[09:52] convenient. Having baked tens of
[09:54] thousands of loaves of bread myself, I
[09:56] can say for sure that the product here
[09:58] is really nice. And being able to have a
[10:00] fresh baked loaf of sourdough in the
[10:02] house without having to make it yourself
[10:04] is a real treat. In fact, I baked off a
[10:06] couple of wild grain loaves at my last
[10:08] two dinner parties and everyone agreed
[10:10] that it was delicious. But you can get
[10:12] more than just sourdough from Wild
[10:13] Grain. You can customize your box to
[10:15] include whatever baked goods you want.
[10:17] In my last box, I got a croissant loaf,
[10:19] raspberry lemon biscuits, a crunchy
[10:20] loaf, cherry pie bites, and rigetoni,
[10:23] which is perfect for some of this
[10:24] leftover vodka sauce that I have. So, to
[10:26] check out Wild Grain, click the link in
[10:28] my description to get 30 bucks off your
[10:30] first box, plus free croissants for
[10:32] life. Did you hear what I just said?
[10:34] Free croissants for your entire life.
[10:36] How do they do it? I don't know, but you
[10:38] better click this and get the deal
[10:39] before they change their minds. Up next
[10:41] is a sauce I call Alfredo E Pepe. It's
[10:44] everything you could possibly want in a
[10:45] cheesy pasta sauce. To make it, I'll
[10:47] drop 50 gram of butter into a warm pot
[10:50] and melt it. Then I'll get a r going on
[10:52] by adding in 20 g of allpurpose flour,
[10:54] then whisking with a silicone whisk so I
[10:57] don't scratch my duchie. Then I'll stir
[10:58] this up until the flour is lumpless and
[11:01] unified with the butter. From here, I'll
[11:02] sizzle this on low heat for about 1
[11:04] minute to cook off the raw flour taste.
[11:06] Next, I'll add in 500 gram of half and
[11:08] half while whisking to prevent lumps. I
[11:10] like half and half for this sauce
[11:12] because it's richer than milk, so the
[11:14] sauce is a little bit creamier, but it's
[11:15] lighter than heavy cream, so it doesn't
[11:17] get too thick or gloppy. Half and half
[11:19] gives you that silky cheesy finish
[11:21] without overwhelming the other flavors.
[11:23] Once this sauce is up to a low simmer,
[11:25] you can see the flour has thickened
[11:26] things up. So, from here, the heat's
[11:28] going to get turned down to really low
[11:30] or even off while I cook my pasta. Over
[11:32] here, I'll add in one lb of fetuccini.
[11:35] No, stop it, dude. It's not time to
[11:36] become one of those guys that says
[11:38] Italian words with an Italian accent.
[11:40] But notice that while I'm adding it, I'm
[11:41] spinning it and twirling it. That's
[11:43] because fetuccini loves to piss me off
[11:45] and stick together. So, I really go out
[11:47] of my way in the first 2 to 3 minutes of
[11:49] boiling to make sure that the individual
[11:50] pieces of pasta are staying separated.
[11:53] Back in the sauce, after about 5 minutes
[11:54] of gentle simmering, things have
[11:56] thickened and the stability is there to
[11:58] hold cheeses in emulsion without
[12:00] breaking. To finish, I'll kill the heat,
[12:02] then add in 8 g of salt and 8 g of black
[12:04] pepper. I prefer a coarser crack here
[12:06] because powdery black pepper can make
[12:07] the sauce kind of look like gray paint.
[12:09] Next, in goes 75 grams of grated
[12:11] pecorino cheese and 75 grams of grated
[12:13] Parmesan cheese. For this sauce, it's
[12:15] really important that you grate your own
[12:17] cheese because pre-grated parmesan or
[12:19] pecorinos are usually covered in
[12:20] anti-caking agents which make them melt
[12:23] weird. Once the cheeses are in, I'm
[12:25] going to jump in with my whisk and stir
[12:26] until things are melted. The residual
[12:28] heat here should be more than enough to
[12:30] melt it all together, but if yours isn't
[12:32] getting there, add in a touch more heat
[12:34] from the burner. Be careful though,
[12:35] because excessive heat can seize up the
[12:37] proteins in the cheese, which will make
[12:38] it grainy. And after about 30 seconds,
[12:40] I've got a rich, peppery, sharp cheese
[12:43] sauce that is equal parts Alfredo and
[12:45] Kacua Pepe. Once the pasta is just a
[12:47] touch pastel dente, I'll strain it off,
[12:49] then drop the fetachccin into the cheese
[12:51] sauce. Also, right away, I'm going to
[12:53] add in about a/2 cup of reserved pasta
[12:55] water because fetuccini is super thirsty
[12:57] and cheese sauces tend to thicken
[12:59] quickly, so we need extra water. From
[13:01] here, I'll toss to combine. Then give
[13:02] the pot an aggressive little shimmy to
[13:04] release more starch so things get
[13:06] creamier and that much more silky.
[13:08] Texturally, I would say air on the side
[13:09] of being just a little bit thinner with
[13:11] the sauce because it's going to thicken
[13:12] and you don't want things to be overly
[13:14] gloppy. To serve, I'm going to garnish
[13:16] with a bunch more grated cheese. Then
[13:18] give this about a dozen cranks of black
[13:20] peppy to bring the heat and to sharpen
[13:22] things up. Finally, I'll hit it with a
[13:24] drizzle of olive oil to make it lean
[13:26] even more towards
[13:28] kacio. M. It's so silky and creamy, but
[13:33] it's not overly heavy. You get sharpness
[13:35] from the pecarino. You get some heat
[13:37] from the black pepper, or like a lot of
[13:39] heat from the black pepper. You get this
[13:41] bright green fresh tasting olive oil
[13:43] because we put that on top. And then the
[13:44] round umami flavor from the parmesan
[13:46] kind of ties everything together. It's
[13:48] everything you want in a cheesy starchy
[13:50] pasta. Up next is a green pasta sauce
[13:52] called pesto. You've heard of that.
[13:54] Today I'm going to show you how to make
[13:55] a really good version of it. To start,
[13:57] I'll put a 100 g of cubed parm into a
[13:59] food processor. I don't like pre-graded
[14:01] parm because it makes a pasty pesto. The
[14:04] parmesan cubes break down into a coarse
[14:06] texture that gives the sauce a lot of
[14:08] textural interest and a lot more lively
[14:10] parmesan flavor. After a quick 30-se
[14:11] secondond pulse, when I stopped to take
[14:13] a look, you can see that this looks
[14:15] grally. That's exactly what I want. The
[14:17] pieces look like Moroccan couscous or
[14:20] like soil. Next, I'll add in 100 g of
[14:22] untoasted pine nuts, 125 g of olive oil,
[14:24] and 100 g of demmed fresh basil. Yes,
[14:27] that is a ton of basil. It's basically
[14:29] two of these $7 clamshells. But to make
[14:32] a meaningful amount of pesto, you need a
[14:34] lot of basil. And the results here are
[14:35] going to be worth the investment of your
[14:37] $14. Trust me. Also, no toasting on the
[14:40] pine nuts because in my testing, the
[14:41] flavor of the final pesto was basically
[14:43] the same whether the pine nuts were
[14:45] toasted or untoasted. The last thing in
[14:46] is 5 g of salt. Then I'll pop on a lid
[14:49] and spin for about 30 seconds or until
[14:50] the nuts and basil are well broken down.
[14:53] A quick note, don't over spin this
[14:55] because you'll heat things up, which
[14:56] will round off the freshness of the $14
[14:59] worth of basil and it'll start to turn
[15:00] things brown. And stop. After about 20
[15:03] to 30 seconds, you can see that we've
[15:04] got a super bright green pesto.
[15:07] Everything is broken down in here, but
[15:09] it's not broken down so much that it's
[15:11] become a paste. It's still saucy. If
[15:12] yours is looking a little bit too tight
[15:14] at this point, you could drizzle in a
[15:15] little bit more olive oil. To use this
[15:16] pesto, I'm going to drop one pound of
[15:18] spaghetti into a salty pot of boiling
[15:20] water. Oh no, that's not how you do
[15:22] that, bro. Next, I'll pour off the pasta
[15:24] water after reserving a little bit.
[15:26] Then, the pasta goes back into the pot.
[15:28] And then, I'll drop in a ladle of pasta
[15:30] water to keep things loose. Then, I'll
[15:32] drop in all of my pesto. There we go.
[15:34] From here, I'm going to whip things
[15:35] around a little bit to get the pesto
[15:37] incorporated and to get things sauced
[15:39] up. The parmesan's going to start to
[15:40] melt a little bit, and that's fine. You
[15:42] don't want a full melt, but a little bit
[15:44] will actually help the sauce cling to
[15:45] the pasta. And there we go. Emerald
[15:48] green pesto and spaghetti. M. You can
[15:50] actually see how the parmesan and pine
[15:52] nuts colluded to make things creamy. To
[15:54] serve, I'm going to twirl and twist it
[15:55] into a low bowl. Then top up with some
[15:57] grated Parmesan and a few chopped pine
[15:59] nuts to bring a bit of crunch to the top
[16:02] couple of bites. I love this pesto for
[16:03] pretty much all pasta shapes, but it's
[16:05] also great for white pizza or topping
[16:08] skin on fish like trout or salmon or
[16:10] putting on a salad with arugula,
[16:11] tomatoes, and fresh
[16:14] mozzarella. The thing that I love about
[16:16] this pesto in particular compared to
[16:18] some of the other pestos that I've made
[16:19] in the past is that this one is
[16:21] extremely basil flavored. The pine nuts,
[16:23] the parmesan, the olive oil, those taste
[16:25] good and they elevate the entire dish.
[16:27] But the first and last impression that
[16:28] you get here is herbaceious sweet fresh
[16:31] basil, which I love. The last pasta
[16:34] sauce is the most decadent in this
[16:36] video. Mushroom Marsala. To make it into
[16:39] a medium heat Dutch oven, I'll add 125 g
[16:41] of small diced onions, 20 g of minced
[16:43] garlic, a strong pinch of salt. Then
[16:45] I'll stir to get those things sweating.
[16:47] Sweating is more of a mellow cooking
[16:48] process than sautéing or stir frying.
[16:50] With sweating, we want just enough heat
[16:52] to cook the moisture out of the onions.
[16:53] That moisture will then soften the
[16:55] aromatics as we cook them, which will
[16:56] keep browning at bay, which is what we
[16:58] want. After 5 minutes, we've got a soft,
[17:00] clear aromatic base with no
[17:02] caramelization. So, next I'll add in 175
[17:05] g of diced mushrooms and another little
[17:07] pinch of salt. After about 5 minutes,
[17:09] these mushrooms have sweat out their
[17:10] liquid and they've softened a little
[17:12] bit. So, next I'll add in 2 g of chopped
[17:14] fresh thyme. Then, I'll stir that in and
[17:16] continue to sweat things down for about
[17:17] 6 to 7 minutes over medium heat. I'll
[17:20] call things good to go here. When the
[17:21] mushrooms have shrunk by about half, the
[17:23] onions are totally soft, and there's
[17:24] just a little bit of browning going on.
[17:26] From here, I'll add in 125 g of Marsala
[17:28] wine and stir that in to delaze the
[17:31] stuck mushroom fond and to cook off the
[17:32] alcohol flavor. If alcohol is a no-go
[17:35] for you, use 10 g of wirch, a touch of
[17:37] sugar, and 100 g of beefto. Okay, once
[17:39] the pan's scraped up and the marsala is
[17:41] cooked down until sack, like this, I'll
[17:43] add in 200 g of heavy cream, and a small
[17:46] splash of water. Then bring the whole
[17:47] thing up to a simmer and cook down for 5
[17:50] minutes. If you're wondering why I'm
[17:51] using cream over half and half, it's
[17:53] because there's no cheese in the sauce,
[17:54] so the extra fat in the cream is
[17:56] actually welcome. Now, while that sauce
[17:57] finishes cooking, I'm going to add in
[17:59] one pound of frozen raviolis to my pasta
[18:02] pot. Yes, I'm not ashamed to use
[18:04] store-bought stuffed pastas, especially
[18:06] ones from a nice Italian market. These
[18:08] are only like $6 a pound, and they are
[18:10] more than passable in terms of quality.
[18:12] Okay, back at the sauce, you can see
[18:13] that after a little bit of reduction, my
[18:15] spoon leaves a lazy trail when I pass it
[18:17] through. Again, we're looking for a nape
[18:19] consistency here. This thickness is
[18:21] going to grip the pastas beautifully.
[18:23] And I'm also going to just add a little
[18:24] bit more salt in. That's going to do the
[18:26] trick before the pasta goes in. Okay,
[18:27] these frozen pastas are made with fresh
[18:29] pasta, which means that they cook really
[18:31] quickly. So, after 4 minutes, I'm going
[18:33] to lift them out, then drop them into my
[18:35] finished Marsala sauce. From here, I'm
[18:37] going to bring the sauce up to a very
[18:38] bare simmer and stir things to get the
[18:40] pasta bathed in the sauce. To serve, I'm
[18:42] going to pile some raviolis into a bowl,
[18:45] then shower with some parmesan. Then
[18:46] just a little bit more mushrooms and
[18:48] sauce on top. Now, let's taste
[18:51] it. What? It's perfectly sweet from the
[18:55] marsala. The mushrooms are earthy.
[18:57] They're perfectly cooked. There's cheese
[18:58] inside the pasta. And the whole thing is
[19:00] coated in this satiny, beautiful cream
[19:03] sauce. I love it. If you like this video
[19:06] and you want some more meticulously
[19:07] tested recipes explained in detail, then
[19:10] oh man, you're going to love the video
[19:12] linked on screen. I'll see you there.
⚡ Saved you time reading this? Transcribe any YouTube video for free — no signup needed.