
AI Summary
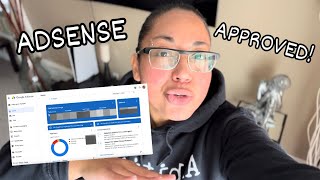
The video explains five key steps to get a website approved for Google AdSense, based on the creator's personal experience of being accepted within three days. It emphasizes establishing credibility, creating quality content, and following Google's policies to earn passive income through display ads.
Chapters
The creator's website, loudmoneymoves.com, was accepted into Google AdSense and started earning within the first 3 hours of enabling display ads. It takes a few weeks for ads to optimize.
Google can take up to 2 weeks to respond to an AdSense application. In the creator's case, it took 3 days (applied Friday afternoon, accepted by Monday morning).
To show Google that a real person runs the site, set up three core pages: About Us/About Me (with photo and personal story), Contact Us (via a form plugin), and Privacy Policy (explaining data collection, cookies, analytics).
A clean, simple navigation menu is crucial for both users and Google reviewers. Include a drop-down menu at the top and links in the footer to make navigation easy.
Create original, helpful content. A 1,000-word post that answers a user's question is sufficient. Use AI as a writing assistant, but avoid generic AI-generated posts.
Use a plugin like RankMath to generate a sitemap and connect it to Google Search Console. This helps Google index posts faster and see the site as active.
Review and follow Google's AdSense program policies. Ensure content is not in restricted categories and avoid copyright infringement, clickbait, or misleading claims.
Mentioned in this Video
Tutorial Checklist
💡 Key Takeaways
Fast Approval Possible
Shows that AdSense approval can be quick if the site is properly prepared, contrary to common belief.
01:15Credibility Through Core Pages
Emphasizes the importance of establishing a human presence behind the site to pass Google's review.
01:27Quality Over Quantity
Challenges the myth that long-form content is necessary; helpful, concise posts are sufficient.
03:28Technical SEO for Indexing
Highlights the role of sitemaps and Search Console in helping Google index content faster.
04:11Policy Compliance is Key
Reminds creators that following AdSense policies is a non-negotiable requirement for approval.
04:50Full Transcript
[00:02] website loudmoneymoves.com got accepted into the Google AdSense program. And since then, it's been earning the minute I turned on display ads on my site. This have done a long time ago. But nonetheless, I have gotten a lot of
[00:16] questions about what did you do to prepare your website to get accepted going to share with you the five things that I did to get quickly approved into something that you want to do, if you want to earn passive income with your
[00:32] website, then definitely stick around so you can learn how to do this. Now, I did first day that I turned on the display website started earning within those first 3 hours. Now, it is important to
[00:45] know that it does take a few weeks for the ads to optimize on your site. And boy, have they started to optimize. Now, I haven't decided whether or not I'm going to be sharing my current numbers, how much my website is currently earning
[00:59] per day with the display ads, but if that is something that you are curious interested in seeing, let me know in the comments down below and I may go ahead And just so you are aware and you know this, it can take upwards of 2 weeks for
[01:15] you to get an answer from Google once you apply. So, just be patient. In my case, it did take 3 days. So I applied I believe it was like a Friday afternoon and by Monday morning I had already received an answer that I was accepted
[01:27] into the program. Okay. So one of the big things that Google wants to see is that you are a real person behind that website. So it's not just being run by a bot. And so that means that you do need to set up three core pages in order to
[01:40] establish the credibility of your site and to show Google that you are in fact a real person. So, I made sure that I had these three important pages live and ready to go on my website before I even applied. The first one is the about us
[01:53] page or the about me page. Now, this is where I briefly shared who I am, what my site is about, and who it's for. Now, I did keep it simple. I just added a photo of myself. I shared a little bit of my story, and I wrote it in my own voice,
[02:06] so it didn't look like a generic AI bot wrote it for me. The second was a contact us page. Now this was a basic WordPress plugin that I downloaded. So it's a basic contact form where people can reach out to me, where brands can
[02:20] that there is a real human running behind the site and that users do have a clear way of getting support from me. And the third page is a privacy policy page. Now this is a page that explains how I collect and use data on my site.
[02:34] So for example, cookies, analytics, email forms, all of that stuff. Now if this on your own. Otherwise, if you're like me, you can generate a free privacy policy using tools like Termly or um I believe it's privacypolic.com
[02:48] and then customize it to match your site and your style. So, I've heard a lot of bloggers get denied getting into Google AdSense for not having a navigation menu. Now, you want to have a clean, simple navigation menu. This is
[03:01] basically just a way for people to easily move around your website. Not just for real users of your site, but you also want Google reviewers to be able to just navigate easily around your site. Now, at the top of my site, I have
[03:14] a drop- down navigation menu. And at the footer of my website, I also have links and other navigation tools there. So, very simple, very easy way to make sure that people can easily navigate your website is to have a navigation menu.
[03:28] into the program is that you create original and highquality content. Now, that should go without even being said, but the good news here, too, is that you don't need to create 3,000word long monster blog post anymore. Now, you
[03:43] can simply write a 1,000word blog post. As long as it answers the question of someone who is searching for that answer and as long as it's helpful, that is good quality content. Now, I make sure that each of my posts has a clear topic.
[03:57] It has simple headings and a straight to the point explanation so readers can get exactly what they came looking for. Now, I also avoid cranking out AI garbage blog posts. I do use AI as a writing assistant to speed up my process, but
[04:11] not to create generic content. Every blogger should be doing this next one, Google so they can actually find and index your content. Now, I use a WordPress plugin called RankMath. They automatically generate my sitemap for me
[04:25] and they connect and send it over to Google. That's because I'm already connected with Google Search Console. Now, if you do all of that, this is not going to magically guarantee that AdSense will approve you. But it does
[04:38] help Google understand your site structure, index your post faster, and see that your blog is real, that it's an active website, and not just an empty shell. The last thing I did is I focused on making sure my site actually followed
[04:50] Google's AdSense program policies. So before I applied, I went through their policy page. Now, I double checked that my content wasn't in any sort of restricted or risky categories, and that I wasn't doing anything like copyright
[05:03] infringement, clickbait, or misleading claims. Now, if you haven't read them yet, definitely take a few minutes to scan the official AdSense program policy page. I will have it linked down for you below. If you have any questions, drop
[05:15] check on those. Now, thank you guys so much for watching. Before you leave, and subscribe if you want to see more information just like this. I will see you again in the next one. Take care. Bye-bye.