
AI Summary
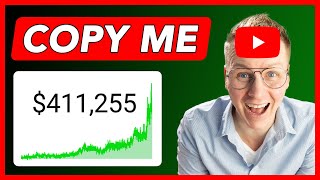
This comprehensive tutorial teaches beginners how to build an affiliate marketing business from scratch using YouTube, a WordPress website, and email marketing. The creator walks through mindset, niche selection, hosting setup, video creation, publishing, and monetization, all while sharing personal earnings proof and a free website template.
Chapters
The core concept of the course: you can succeed with YouTube and affiliate marketing by helping other people, even while you sleep or are on vacation. The video promises a complete step-by-step process from mindset to monetization.
Affiliate marketing is promoting someone else's product or service in exchange for a commission. Example: referring a friend to a driving school for a $50 commission, or using an Amazon Associates link for a camera that earns up to 10%.
No product ownership, no stock, no starting capital, location independence, automated income, exponential growth, ability to stay anonymous, and no customer help desk obligations.
In 2015, the creator uploaded his first YouTube tutorial about the Enfold theme. Within six months, that single video generated $2,100 in affiliate commissions, starting with one $21 sale and growing to nearly $600 per month.
Success begins with deciding to go all in, regardless of results. Most people quit within weeks because they make no sales; the key is to commit and take action anyway.
A niche is a specialized market segment focused on a specific group, product, or need. Examples include photography, home office setup, vegan lifestyle, and AI tools. Narrowing your focus increases your chance of success.
Only promote products you personally like, only promote products that genuinely help people, and know the product deeply before creating content about it. Your integrity is on the line.
Three naming approaches: a completely random name like Apple, a keyword-hinted name like Blender Guru, or your own first and last name like TonyRobbins.com. Shorter and simpler is better.
The recommended setup is Hostinger's Business plan with 50GB NVMe storage, a free domain, free SSL, domain privacy, and a 30-day money-back guarantee. The first billing period is discounted.
Instead of building a site from scratch, the creator provides a free WordPress affiliate marketing template via ferdy.com/am-template. Users import it using the All-in-One WP Migration plugin and then customize it.
You can start with a phone and a cheap microphone. Audio quality is more important than video quality, and the microphone should be as close to your mouth as possible. Lighting can be done with affordable softboxes.
The workflow: research a trending topic on YouTube, watch competitors, take notes, practice the tool, then record your screen, face, and audio. Editing happens in Premiere Pro with After Effects for special effects.
Create a Gmail account and YouTube channel, upload the video, generate a title and description with ChatGPT, add a custom thumbnail, upload subtitles, and schedule or publish the video publicly.
Offer a freebie in exchange for an email address, build a list with OmniSend, and send broadcasts promoting affiliate products. The creator has 60,000 subscribers and has made hundreds of thousands of dollars from email marketing.
Besides affiliate income, YouTube AdSense can be substantial. The creator has earned over $400,000 lifetime from ad revenue, with a best month of $12,000 during COVID. Quality content that holds watch time drives monetization.
The tutorial provides a complete, free system for starting affiliate marketing with YouTube and WordPress. The creator emphasizes that persistence and a genuine focus on helping people are more important than any single tool or tactic.
Mentioned in this Video
Ferdy Korpershoek
person
Jim Rohn
person
Brian Tracy
person
Napoleon Hill
person
James Allen
person
Andrew Kramer
person
Think and Grow Rich
book
As a Man Thinketh
book
Hostinger
service
WordPress
tool
Elementor
tool
All-in-One WP Migration
tool
Redirection Plugin
tool
WooCommerce
tool
Canva
tool
remove.bg
tool
Coolors
tool
ScreenFlow
tool
OBS Studio
tool
Bandicam
tool
Adobe Premiere Pro
tool
Adobe After Effects
tool
Adobe Photoshop
tool
ChatGPT
tool
KoKAto
tool
OmniSend
service
ConvertKit / Kit
service
vidIQ
tool
TinyPNG
tool
Amazon Associates
service
EverWebinar
tool
Kling AI
tool
Runway
tool
HeyGen
tool
ElevenLabs
tool
Google AdSense
service
PayPal
service
Envato Market
service
iStock
service
Enfold WordPress Theme
tool
Tutorial Checklist
Study Flashcards (14)
What is affiliate marketing?
easy
Click to reveal answer
What is affiliate marketing?
Promoting someone else's product or service in exchange for a commission.
06:40
What commission percentage does Amazon Associates offer per the tutorial?
easy
Click to reveal answer
What commission percentage does Amazon Associates offer per the tutorial?
Up to 10% commission for everything people buy through your unique affiliate link.
08:04
Why are digital products often better for affiliate commissions than physical products?
medium
Click to reveal answer
Why are digital products often better for affiliate commissions than physical products?
Digital products have no assembly or shipping costs, so they can offer higher and often recurring commissions, like 40% recurring on EverWebinar.
37:48
What is the first step to becoming successful with affiliate marketing according to the tutorial?
easy
Click to reveal answer
What is the first step to becoming successful with affiliate marketing according to the tutorial?
Make a decision to go all in, then back up that decision with action and perseverance.
24:30
What three rules should you follow before promoting a product?
medium
Click to reveal answer
What three rules should you follow before promoting a product?
Only promote products you like, products that genuinely help other people, and products you know really well.
33:54
What is a recurring commission?
medium
Click to reveal answer
What is a recurring commission?
A commission you receive every year as long as the referred customer keeps paying, e.g., 40% recurring on EverWebinar subscriptions.
37:14
What are the three recommended domain naming strategies?
easy
Click to reveal answer
What are the three recommended domain naming strategies?
A random name like Apple, a keyword-related name like Blender Guru, or your own first and last name like TonyRobbins.com.
55:51
Which Hostinger plan does the creator recommend for beginners?
medium
Click to reveal answer
Which Hostinger plan does the creator recommend for beginners?
The Business plan, which includes 50GB of NVMe storage, a free domain, free SSL, daily backups, and domain privacy.
01:03:48
What is the most important rule of audio recording in the video?
easy
Click to reveal answer
What is the most important rule of audio recording in the video?
The further away the microphone is from you, the worse the audio quality becomes, so keep the mic close to your mouth.
02:01:05
Why does the creator make YouTube Shorts?
medium
Click to reveal answer
Why does the creator make YouTube Shorts?
To grow the audience and push viewers to long-form tutorials; long-form videos generate the money while shorts boost reach.
04:30:42
What does 'the money is in the list' mean?
medium
Click to reveal answer
What does 'the money is in the list' mean?
Your email list is your most valuable asset; once you have a list, you can send broadcasts promoting affiliate offers and generate significant sales.
04:49:55
How much lifetime YouTube ad revenue has Ferdy earned?
easy
Click to reveal answer
How much lifetime YouTube ad revenue has Ferdy earned?
More than $400,000 in lifetime ad revenue from YouTube, with a best month of $12,000 during COVID.
05:07:05
What is a 120-day cookie in affiliate marketing?
hard
Click to reveal answer
What is a 120-day cookie in affiliate marketing?
If a person clicks your affiliate link and buys within 120 days, you still get credit for the sale; after 120 days you do not.
53:30
What quote does the creator highlight about success?
easy
Click to reveal answer
What quote does the creator highlight about success?
Success without fulfillment is ultimate failure.
05:13:00
💡 Key Takeaways
The Definition of Affiliate Marketing
Provides the foundational, testable definition that everything else in the tutorial builds on.
06:40Decision Before Action
Shifts the focus from tactics to commitment, explaining why most beginners fail in the first few weeks.
24:30Only Promote What You Like and What Helps Others
A rare ethical guardrail in a space often dominated by 'get rich quick' messaging; it protects both audience trust and long-term income.
33:54The Money Is in the List
Explains why email marketing is the most reliable asset for repeated affiliate sales, backed by personal success.
49:55YouTube Ad Revenue Can Be Life-Changing
Concrete proof that free educational content can generate over $400,000 in ad revenue alone, separate from affiliates.
05:07:05Full Transcript
[00:00] you can get started and become successful with YouTube and affiliate marketing by helping other people on autopilot, even when you're asleep or on vacation. Let me show you what we will
[00:13] cover in this tutorial. First, we're going to talk about mindset, how you can turn yourself into someone who's actually believing that you can become successful with affiliate marketing. Then we'll do market research, find your niche, choose a business name, grab a free.com domain name, and
[00:27] then I will give you a website for free so you can focus on creating content. Then you will learn how to find the best affiliate products and then you will learn step by step how to create high quality videos, even if you only have a phone or a laptop, but I'll also show you how you can use equipment
[00:42] to enhance the quality of your videos. Then I'll show you exactly how I find a product to promote, how to prepare myself, then how to make a video, edit video, export video, put it on YouTube, then how to create shorts and reels, put them on YouTube and other social media accounts. Then
[00:57] I'll show you how you can turn that content into a blog post using Chat GPT. And I know this can be overwhelming. So true to the tutorial, I will show you step by step why you can do this. And I will do my best to motivate you because it's really important what's going on over here. When you want
[01:11] why I want to help you to overcome those struggles and become successful with this. We'll also talk about and how we can make money with Google AdSense. And when you have done everything,
[01:27] we go all in and you're persevering, you can become really successful with this. With the steps I teach you in this video, I was able to generate seven figures in revenue in the last
[01:39] years. This is one of the products I promote and I was able to make $250,000 in the last 10 years and this month almost $4,000. If I take a look at my PayPal account, the last 90 days,
[01:51] $90,000 came in. Besides affiliate marketing revenue, there's also ad revenue from Google AdSense and in my lifetime, I was able to make more than $400,000. And since I'm convinced that
[02:03] affiliate marketing is still super relevant and super lucrative these days, I decided to start over from scratch and share every single step I take in this journey. So you can also learn how to get started and become successful with affiliate marketing. So let me tell you how my
[02:17] affiliate marketing journey started 18 years ago. I made my first sale with affiliate marketing in 2007. The feeling was amazing. I was like, I want to do this for a living. I tried a lot of things in the years after that. I made a lot of mistakes, lost a lot of money and then in 2015, I decided to
[02:33] take a different approach to affiliate marketing. I was always focused on how to make money with affiliate marketing but in 2015, I decided to start focusing on helping other people. And that changed everything. And that's what I'm about to do in this tutorial. I want to give you as much
[02:47] as possible so you can get started with affiliate marketing and learn how to become successful with it. I have no upsell, I have no thousand dollar course that I will pitch to you halfway the course. No, everything I share is for free and by doing so I get more likes, I get more subscribers,
[03:01] I get more views, my other videos will be watched more and that way I can generate more revenue. So it's a win-win situation. I give everything away for free and at the same time I know it will help me to grow my YouTube channel and make more money. And since I'm being honest with you,
[03:14] I also want to tell you that affiliate marketing is hard work. It's not like, oh I follow Ferdy's tutorial and try a few things and I will probably make a lot of money. No, it's hard work. You need to persevere. You need to be dedicated. You need to decide for yourself that
[03:29] ago when I started out with this new adventure. But when you persevere, the sky is the limit. With a normal job, you get paid every month and every year, your income will probably increase a little
[03:42] bit. But with affiliate marketing, you put a lot of effort in the beginning and you often don't see the results in the beginning. But when you start to receive results, those can be exponential. my earlier tutorials. They're now my friends. They make a lot of money with it was even someone that
[04:02] said to me Ferdy, I have my first thousand dollar in one day revenue. I was like wow, it's working for me, it's working for him but I know he was persevering, he was putting a lot of effort in it. But let's not carry it away with a thousand dollar per day. My goal for you is to make your
[04:19] first sale with affiliate marketing. That's it because that's the hardest sale. If you can get your first sale, the second sale is easier, the third sale is even easier and then the exponential growth can come. So that will be my focus for you or I hope that will be your focus in this journey,
[04:35] your first sale. If you have a first sale, celebrate it man because when you have reached that from that point on, you need to continue what you're doing and then it can become more and more fun. As long as you persevere, perseverance is the name of the game. I've persevered now for 10
[04:52] years and I'm so thankful. If I take a look at my life, I'm married, we have two kids, my wife can be a stay at home mom, she wants to spend time with the kids. at home, so I can go downstairs to my children, to my wife. We can go on vacation where we want, it doesn't matter if it's expensive
[05:06] or cheap. We don't have to take a look at the prices when we do groceries and we can do charity and make a difference in someone else's life. It's super cool that affiliate marketing played a big part in this and I'm super thankful for that and that's why I think that everybody deserves the
[05:20] chance to make money with affiliate marketing. And yes, as I said before, I will say it again, it's hard work, but it's worth the effort. The rewards are higher than what you put in. So but it's up to you to take action. You can watch this video five times, feel good and think, wow,
[05:39] this is such a cool way to make money. But if you don't take action, nothing will happen. I have my idea for affiliate marketing, what I'm doing right now, already since 2012. I was like hey if I'm going to do this, wow that will work. But I have a lot of negative thoughts like English is
[05:55] not my main language, I don't like to be on the camera, other people are better and then three years later, I decided to do it. Why? Because I was getting married, we're saving money for the wedding, and that's the moment I said, okay, I need to make more money. I need to do something.
[06:10] So the idea I already had for three years, that's when I decided to put it into practice. I stopped thinking about all the limitations. I was like, I'm so happy that 10 years ago, I decided to go
[06:25] all in with affiliate marketing. And I wish you the same, that you will find the place, the motivation to go all in, to persevere and then hopefully one day you can say to me Ferdy, I made it. I'm so happy. So I hope you'll be that person in a few years. So how about
[06:40] we start answering the most important question, what is affiliate marketing? Affiliate marketing is promoting someone else's product or service in exchange for a commission. Let me say that again,
[06:53] affiliate marketing is promoting someone else's product or service in exchange for a commission. Let me give you an example. When I got my driver's license, my driver lessons instructor told me, Ferdy, if you make sure that someone else is going to take driving lessons at my driving
[07:08] lesson school, you get a $50 commission. Why? He was probably having not too much new clients and he wanted to have more clients, so he started to give commissions for people that brought him new clients. So what I did, I went to a birthday party, I saw Jennifer, I said, Jennifer, I just
[07:21] got my driver's license and a great driving lesson instructor. How cool would it be if you also would get driving lessons and get your driver's license? So she said, okay, let's do it. She took lessons over there and I got my commission and that is affiliate marketing. Let me give you another
[07:37] example. If I go to amazon.com, I really like the Canon R6 Mark II. That's the camera I use to record my videos. And what I see over here, this camera cost $2,299. And quite a few times people
[07:52] say Ferdy, what camera do you use? The quality is so amazing. And then I can refer them to this link. But what I also can do, I can go to Google, search for Amazon affiliate. And then over here,
[08:04] there's an Amazon associates affiliate program. So if I click on it, what I see, earn up to 10% commission for everything people buy through your unique affiliate link. So what happens? I can sign
[08:19] affiliate link. So I can share this here. And when I sign up for every product at Amazon, I can get a unique affiliate link. So I can share this link and now when people go to this page with my affiliate link, Amazon knows that the people that buy this product are referred by me. So now when
[08:34] people say, Hey, your video quality is amazing. What kind of camera do you use? And I give them that link and they buy this product, I get 10% commission, which is $229. So what happens? People
[08:46] want to buy products. Every day, people want to buy products. I always say every day, people become 18, people want to get a driver's license, people want to go on vacation for the first time, book a hotel for the first time, buy products on the internet for the first time, and Amazon is
[08:58] selling products. So there's the buyer and there's the seller. But as an affiliate, you can promote products from Amazon. And when people buy those products through you, you get a commission. So Amazon is happy because they sell products. The affiliate is happy because they get a commission
[09:12] and that buyer's happy because they bought a product. It's a win, win, win situation. So as I said, every day, there are tons of people who want to buy buy things, laptops, software, courses, games, credit cards, vacations, renting places through booking.com or Airbnb. People are going
[09:30] to buy that, but how cool would it be if they're going to buy it through you as an affiliate? So how do you get in between the buyer and the seller? So you get all those commissions. That's exactly what I'm going to show you step by step in this tutorial. So let me show you another example.
[09:45] If you search for the best WordPress themes, so I skip all the sponsored stuff, I click on it. The 10 fastest WordPress themes free and paid. So there's a table of contents, there's a blog
[10:00] post over here, lightweight themes, themes with their own page builder. So if I click on this one, for instance, Divi, I scroll down, I see the title Divi. Divi is a powerful visual page builder, a small text, an image, performance results for the Divi page builder. And if I click over here,
[10:18] look at this. What do I see? I see the affiliate link. So I know that when I buy this, that person from this website, WP Rocket makes money. So I scroll down and what I see, I search for
[10:32] affiliate program. I can also, if I don't find it, search for affiliate. I click on it. Look at this. This is crazy. We offer 50% commissions on new purchase and all subscription renewal payments.
[10:44] So every year, as long as people pay their divi subscription and they are referred by me, I make money and I am an affiliate of this program. So if I click on affiliate login, look at this over the years, I have been making 234, almost $235,000 with this particular product. How by
[11:04] offering value around this product. Not spamming my affiliate links, buy this, buy this to people who don't need it. No, offering value around this product in so many ways and I will show you
[11:16] step by step how you can also do that and become successful with affiliate marketing. Why affiliate marketing? Why not dropshipping or having your own e-commerce website or selling courses? Let me give you eight reasons. The first one, you don't have to own your own product. You don't have to
[11:31] create your own product. I don't have to create my own iPad. I can just promote this one. If I would create something like this, I need to have a team, I need to invest a lot of money, I can just
[11:44] promote products from other people. So I don't have to create my own course, my own software, my own product, I can just promote other people's products which will save me a lot of time. I also don't have to buy five iPads and try to resell them and make a profit. No, I'm promoting other
[12:00] people's products so I can promote an iPad through Amazon and then I don't have to pay for it myself. I don't have to have it in stock. I have no stock. So I can buy five iPads, try to resell them. If this is not working, I have no stock. So no risk. If I don't sell the products I promote,
[12:15] I still don't have any stock. Three, I don't need to have any starting capital. The only thing we need is a website. We get a free domain name, then we need to have space on the internet to store our website that is called web hosting, that's around $4 per month. And even if you don't like it,
[12:29] you can get your money back within 30 days. Besides that, there's no starting capital. When I did dropshipping, I had to pay $100 per month to be able to sell products from a really big store in the United States and then when people bought it through my website, it went automatically to
[12:44] that front door, but I had to pay $100 per month only to be able to sell their products. That's a lot of money if you're getting started. With affiliate marketing, that's not the case. You can work from any place in the world. A few friends of mine who are also active with affiliate marketing,
[12:59] they live in Dubai, they live in Bali, they rent a place there, they have their laptop and they can work from any place in the world. I have my family over here, I have my friends over here, I want to stay over here in the Netherlands but you can work from any place in the world. If I
[13:11] want to, I can go on vacation to a beautiful place and work from there. That's what I really like, I can work remotely. Another one, the fifth one, everything runs on autopilot. If I decide to turn everything off right now, go on vacation for two weeks or just spend time with my family or
[13:26] do both, nice combination, everything still goes on. I even make more money during my vacation than I spent because everything runs on autopilot. Even if I'm asleep, even if I'm on vacation, people still watch my tutorials, read my blog posts, see my social media, everything runs on
[13:42] autopilot. Let's go to the sixth one. The growth can be exponential. I'll show you in a minute how it went with me. I had the first sale and a month later I had 10 sales. And what also is really nice
[13:55] about exponential growth, in the beginning you need to apply to become an affiliate for products, but later on when you start to become successful, people reach out to you and give you special affiliate commissions or give you a lot of money. A few months ago, a company came to me and said,
[14:11] you know what, I want to offer you $45,000 to make four videos about a certain tool. $45,000! I really did not like the tool, so I declined friendly, but those are some crazy
[14:23] numbers. So the longer you do this, the more lucrative it can become. And that's part of exponential growth. The seventh one, you can do this anonymously. Anonymously, hard word to say. People don't even have to know that you are making those videos or making those blog posts or
[14:40] social media posts. And even with AI, you can just choose your voice. People don't even have to know that you're behind this. So that's also really nice. Some people prefer that to not be known as
[14:52] the person that is really active on YouTube and making a lot of money with what they are doing. So you can do this without people even knowing that you're doing this. And then the latest one, one of my favorites, you are not a help desk. Again, I can close my laptop, go away for two
[15:09] weeks and I have no obligation to anyone in my company. Why? I'm only providing free tutorials, sharing them with people, sharing my blog post, sharing my knowledge through various platforms and when people have questions, of course they can ask them and I can do my best to answer them,
[15:25] but I have no obligation. What I can do if I promote, let's say the Divi theme for instance, a WordPress theme and people have a question about it or get stuck, I can say, hey you can go to the support of that theme. So I have no obligation and that's what I really, really, really like about
[15:41] affiliate marketing. I saw the course before a few years ago, a WordPress course and when people pay money for it, I was also a help desk. So I went live to answer questions and stuff and man,
[15:53] that sometimes took a lot of time and I was happy to do it because it's part of the deal when people buy a course. But if I promote someone else's WordPress course, I still make money with it, but I'm not their support. So that's what I really like and all those other things about affiliate
[16:10] marketing. That's why I'm so excited about this. So let me tell you how it got started for me and I hope it will inspire you. It started 13 years ago in 2012. I had the idea to create a website with a YouTube channel teaching people how to work with WordPress related tools like plugins, WordPress
[16:27] people did not have to go through blog posts and images to find out or figure out how things work, but just watch my video and then I could learn through videos how those tools worked. But I had
[16:39] so many reasons why it should not work. English is not my main language. It was hard for me to sit in front of a camera. I had so many reasons why not to do it. But then in 2015, I was engaged with my wife and we need to save money for our wedding. Around the same time, someone asked me if I could
[16:54] do a live stream where I would teach people live through a webinar how to make a website. And she said, in order to know if you can really do this, please make a recording on how to make a website from A till Z, from start to finish and send it to me so I can see if you're really capable of doing
[17:11] this. So now it was a paid job. So what I did, I press record on my computer screen, I created a website using WordPress and after two hours, I pressed stop and I had a two hour tutorial where I show people how to make a website. I sent it to her and from that moment on, I knew I can
[17:28] do this. No more excuses, I can do this. At the same time, I found out about the Enfold theme, a premium WordPress theme for $60 that can help you to create a professional looking website even
[17:40] if you don't have a lot of experience with making websites. And since I used that theme, I was like, making a website has never been easier. Wow, this is crazy. So what I did, I believed I could make the tutorial. I found an amazing handful theme. So I decided to use that theme in my tutorial. The
[17:59] theme costs $60 and I became an affiliate of the theme. So this is what happened exactly 10 years ago. I started recording that tutorial and after a day of exporting, because it took a long time to export it because it was a four hour recording, one take, I found out that the audio filled. I had
[18:15] so much momentum. I was like, I need to, I need to do this. I need to make this work. So I did a recording again the night after that and again the audio failed but this time I had a backup audio so I could start editing and exporting my video. So I did in a few days I exported my video and then
[18:32] June the 2nd 2015, I went to my parents because my internet was not fast enough with the video, the tutorial on my computer, I uploaded it over there and June the 3rd 2015,
[18:44] I uploaded my first video to YouTube. I had so much determination that I even wrote a blog post, it was the 22nd of May 2015 saying, so through tutorials, videos and blog posts, I want to share
[18:57] my knowledge with the whole world and I will work on it weekly until it becomes a success. I had so much problems and trouble with making websites over the last 10 years that I was like, okay, with this Enfold theme and with the right web hosting and with what I've learned, it's time
[19:13] for me to share with others how they can make a website without going through all the hardships I went through as a web designer. So I was focused on helping people. So I uploaded my tutorial,
[19:26] June the 3rd, if I go to videos on my YouTube channel and I go to the oldest one, this video, three hours and blog posts, how to create a nice header, how to create a transparent header, how to
[19:52] use images, how to have nice animations. So if I click over here, June the 3rd, 2015, 10 years ago, look at this. Over here I have an affiliate link. Also in my tutorial I said go to ferdy.com or
[20:05] wordpressking at that time .com forward slash enfold and when you click on it, you can get this theme added to the cart for $59. And when people would buy this through my affiliate link,
[20:17] I would get 30% which is around $20. So let's take a look over here. If I go to the analytics, look at this in July, a month later, 27 views, 22 views, around 20 views per day. Then look at this,
[20:31] I went to 300 views per day. This is I think when I did some advertising and then 730 views per day, 500, 600. So it went from 20 to 600 and that's also what you see in my earnings. The first month,
[20:48] I made one sale, $21. But the month after that, also one sale. But then look at this, the third month, $200. The month after that, 340, 440, 460, almost $600 in one month. So you see in
[21:06] total, I had $2,100 in my first six months by promoting this only using this one video. I remember after two months, I was getting kebab in Maslajus where I live and I took a look at my
[21:20] phone, I refreshed it and it was like two sales, $40 in one day. I was like, wow, this can really work. I said to my fiance, we can use this money for our wedding. The beautiful thing is that at
[21:32] our honeymoon in Cape Town, while I was looking out of the window, seeing the Table Mountain, $1,000 was deposited on our bank account, money we made through my YouTube channel and I was like
[21:45] wow, this is really working. I want to do this for a living. So what I did after that, I made no more videos and I just started living from it. No, of course not. I started making more videos. Instead
[21:59] of counting money, I kept on going, kept on making more tutorials, see if I could improve myself, have better audio, better video, better equipment and now 10 years later, I can do this for a living, we can make a lot of money with it, be a blessing to a lot of people and have the lifestyle
[22:14] we like to have and it was all because I got the idea and I acted upon it. So I will give you the ideas in this tutorial and it's up to you to act upon it. I hope this was inspiring for you.
[22:27] Now let's get started. Let's talk about you, how you can make this work for yourself. Ladies and
[22:39] marketing is to make a decision. We need to decide we're going all in. We're going to do this no matter what happens. Most people quit affiliate marketing within a few weeks. You know why? They
[22:54] make no sales and then they decide to give up. I have been there. In 2007, I had my first sale and I was hooked from that moment on. I was like, I want to make money with affiliate marketing. I started trying a lot of things, I even lost a lot of money with advertising and then I decided to
[23:08] give up. I was like, I don't know how this works. I already told you before the story, but in 2015, I was getting married, we were engaged and we needed money for the wedding. I was making not a lot of money, we were saving a little bit, but I was like, something needs to happen. And that's
[23:26] when I made a decision. I am going to do this no matter what happens. I had so much momentum. I was like, now it's going to happen. I made that webinar, that recording and from that moment,
[23:38] I believed I can do this. So nothing could stop me. That's how I felt. I had so much momentum, like okay, this is going to happen. Even if I don't see the results right away, I will continue to do this until it becomes a success. So that's when I created my first video. It failed with the
[23:56] audio, but I was like, no, no, no, no, no, no, I'm unstoppable. So I made the recording again. I added the video like crazy. I think in two days, I finished the whole video. I went to my parents, I uploaded the video and then I continued to make more tutorials and then after two months,
[24:12] I saw sales and after three months, I saw so much more sales. So I decided to go all in and that's what you need to do. If you want to become successful with affiliate marketing, the first step is to decide that you're going all in and then you need to pick up the decision with action.
[24:30] The great thing about decisions, those can be made at this moment. At this moment, you can decide I'm going all in and when you do what you need to do, you need to follow all the steps in this tutorial,
[24:42] you need to take action. And I can imagine that when you make a decision that in the beginning you're very motivated, but it can be, there's a very big chance that in the first few weeks, you will make no sale. And that's when people start to doubt and they think, I want to give up.
[24:56] So let me give you a few resources that can help you to not only believe that you can do this, but to improve yourself as a person, to be happy, to get more excited about life because I think of course things can happen to us in life but we are also for a big part in charge
[25:13] on how we respond to things in life and how we go through life. So there are three resources that really helped me to become successful and not only with affiliate marketing but also in my life with my self-confidence, with how I look at life. I think life is something beautiful and
[25:29] even though hard things happen, I think we can have a wonderful time on this earth and there are three resources that help me to believe like that and to make something beautiful out of this life and to be successful with my business. So let me show you those three resources. You can go
[25:44] to ferdy.com forward slash Jim Rohn, motivational speaker, and I listened to a teaching from him from 1980, already 45 years old. Jim Rohn is not among us anymore, but his teachings are. So if
[26:01] you scroll down this video and the title is Jim Rohn, the major key to a better future is you. And the great thing, the first minute alone, I love it. It's so inspirational, new word. And yeah,
[26:20] just listen to it. I cannot show it to you over here because then I can get a problem with YouTube and with copyrights but what I can do, you can go to ferdy.com forward slash Jim Rome and then you can watch the video over here. There he is. There is my man Jim Rome. The second resource is below
[26:37] that. Brian Tracy's secrets to a self-made millionaire by Brian Tracy. 45-46 minutes, I listened to it over and over again and this is more practical. It's really about setting goals
[26:52] and then sticking to it and taking action every single day. That's what I'm also applying right now in my tutorial. I want to do something on this tutorial every single day. I just moved,
[27:04] there are a lot of things going on in my life, but I decided, you know what, no matter what happens, every day I want to work on this tutorial. And those are the things you also learn in those teachings. How to become motivated and how to start to take action. The name of the game,
[27:18] there are so many names of the game, but one of the names of the game is taking action, being perseverant. Man, those English words, to persevere, have perseverance. Look at this,
[27:31] my English is not perfect but I'm still taking action, doing my best and somehow left, right, it comes back to me and I seem to help other people even though my English is not perfect. If
[27:43] I would have waited until my English was perfect, I would not start my YouTube channel yet. So just go with what you have, give it your best. And then the third, it's not over here, but it's a book. The third resource is called Think and Grow. Rich, an all-time classic. I think I've read it 15
[28:02] times now. Oh man, there are so many gold nuggets in that book. So how can you apply this in your life? When I do the laundry, just kidding, I don't do the laundry but I do the kitchen and sometimes
[28:15] I drive, sometimes I go for a walk, sometimes I just like to listen to something when I'm in the bathtub or somewhere else cleaning my office. And what I do, I listen to Jim Rohn, to this one
[28:29] over and over again. I can listen to this one from Brian Tracy and then I can read the book Think and Grow Rich on the couch or in the sun on vacation or I can listen to an audiobook of Think and Grow
[28:41] Rich. So to sum this up, the first step, make a decision. You can do it right now. If you're ready, like I'm going all in, Ferdy, I'm going all in. If you do so, please leave a comment saying, hey, I'm going all in and then back it up with action. The first action, watch this tutorial and
[29:00] put into practice what you learn. And if you want to develop yourself as a person person so you'll be more motivated to make this work and believe more that you can really become successful with affiliate marketing, then listen to Jim Rohn, Brian Tracy and if you want to think and grow
[29:15] rich. If I could choose only one resource, it will be this one from Jim Rohn. If I could choose two resources, Jim Rohn and Brian Tracy, and if you could have three resources, then first Jim Rohn,
[29:28] second one Brian Tracy and the third one Think and Grow Rich in book form or audio book. Yes. So are you ready to make a decision to make this work? So even though you get setbacks or not everything is
[29:42] working out as you want it to be, you know I made a decision and I'm gonna be successful with this. If that's the case, congratulations, your life can completely transform and I'm so happy for you. So,
[29:56] since you've done that, let's continue with the second step. Okay, let's talk about step two, finding your niche and your name. What is a niche? Well, we can go to chat.jpt, what is a
[30:14] niche? By the way, this part, I did not prepare this. Normally I prepare in all my tutorials, I practice so I can give you the best result. But what I want to do, I want to take you with me on my journey in finding a niche and then starting all over with affiliate marketing. So instead of
[30:29] preparing everything, knowing what to say, knowing what to search for, I just want to be normal, like really authentic and take you with me on the journey. So I just press record, I'm going
[30:41] to talk and I hope what I say is amazing. I think it is. So what is a niche? A niche is a specialized segment of a market or area of interest that focus on a specific group of people, product or needs. Well, what is that? I don't understand it. So let me give you an example. A
[30:57] niche can be a product that you want to promote or a group of product. So a niche can be photography and if you have photography as a niche, your whole website or your social media, your YouTube channel
[31:10] could all be about photography related things. So you could make a review of a photo camera, you can make a review of a lens, you could compare lenses with each other, you could
[31:23] promote Photoshop tutorials or you could create Photoshop tutorials, how to edit photos. You can refer to Photoshop courses, you can refer to photo editing software. But what you should not do is
[31:38] having a link to a course on how to train your dog. That's outside of that niche. So a niche is a specific group within the whole marketplace and when you focus on one niche there's a bigger chance that you'll become successful. If you have a website where you sell photo cameras,
[31:55] give dog trainings and you sell stuff that can make you strong, supplements, then you're all over the place. That's not working. So you need to choose a niche, a product or a group of products
[32:10] that you can promote. So let's go to chat GPT. Can you give me 20 examples of affiliate marketing niches and the products you could promote with those niches. Bring it on! Absolutely. Wow,
[32:33] thank you. Fitness. So fitness is a niche. There are also sub-niches, fitness for women. So you narrow down your niche with 50% since 50% of the people are women. The home office setup.
[32:48] So you can have a YouTube channel or a website about how to set up a home studio. If you have a small space, which camera should you use? Which lens could you use? How to make videos using your phone? Which audio is the best tool? Should you have audio in front of your face, in front of your
[33:02] mouth or should you have it outside of the frame? Which computer to edit your videos? Which editing software? Oh, I really like this niche. Maybe I should do this one, home office setup, standing
[33:14] desk. It's not even about making videos. It's about desks, chairs. I just got carried away a bit but that would also be cool. How to make your own studio and then you can become an affiliate of
[33:27] the cameras, of the lenses, of the tools. You can have courses that you refer to, a lot you can do. The vegan lifestyle. So you can talk about vegan supplements, cookbooks, meal plans, vegan and
[33:42] skincare. So before we dive deeper into this list, let me give you three things you need to keep in mind when you are considering to promote products or promote a certain niche. The first one,
[33:54] only promote products that you like. If you don't like the product, don't promote it. Trust me on this one. I tried to promote things just to make money, you know 2008, 2009, just to make money.
[34:07] I didn't care what kind of program it was, I just want to make money. I lost a lot of money with it and my whole idea was to make money instead of helping people and it's harder to help people if
[34:19] you don't like the product. So the first advice, only promote products that you really like. The second one, only promote products that are really helping other people. A few years ago, I started
[34:32] promoting a tool. They offered me money to make a video about the tool and then I said, okay, I will make a tutorial about it. And while I was making the tutorial, I found a lot of errors with that tool and I was like, come on, I cannot share this with my audience. This is not helping people,
[34:47] if people buy this, it will make them frustrated. My name is on the list, how do you say it? My name is, I am promoting this so I'm standing behind this product so my name, my integrity is on the,
[35:00] how do you say it? On the line, not on the list, on the line. So I sent back the money and I said, sorry, I can't make a tutorial about this. And I've learned from that normally when people offer me money, I always check, do I really like the product? If I really like the product and they
[35:13] offer me money, I'll take it. But I will never let money be a reason for me to promote things, especially since my name, my integrity is on the line. So first, only promote products you like and
[35:25] only promote products that help other people. And then the third advice, before you start to create content about a product, if you find products that you like and that are helping people, make sure you get to know the product really well. If you promote a camera, make sure you
[35:40] know what everything is, how it works. So when you help people, when they ask questions, you can really help them, answer them and really offer value in that way. So first, make sure that you
[35:52] like the products you promote. If you don't like it, don't promote it. Make sure that the product you promote is helping other people. If that's not the case, don't promote it. The third one, if you promote something, make sure you get to know the thing you're promoting. Okay, since we
[36:05] got that out of the way, let's talk about another really important subject. Should you promote physical products like a camera, like a computer, like a phone, like a lamp, like a microphone, like a cup or should you promote digital products? Well, let me show you the difference. If I search
[36:22] for the Canon R6, let's go to the store, the Canon R6, it says $2,500. Keep in mind that you get around 10% for this. So when people buy this, you get $250. That's an amazing amount,
[36:40] but people have to spend two and a half thousand dollars for you to get $250. If you would go for a digital product, let's go forever webinar, affiliate. If I would go forever webinar for
[36:56] instance, that's a digital tool. I click on plans and pricing, look at this. If people will go for this one per year, $500, what you get as an ever webinar affiliate, it says over here,
[37:14] join the webinar jam or ever webinar affiliate program and get 40% recurring. So that means every year, as long as people pay through your unique affiliate link, you get 499 times 0.40,
[37:31] which is 40%. You get $200, almost as much as the camera, but this time people only spent $500 and every single year when people pay for this, you get that same amount. Here you get it only once.
[37:48] Why do you get less commissions with physical products? Because they need to be assembled, they need to be shipped, there's so much more cost involved that there is less room for a commission. So I prefer personally to promote digital products like EverWebinar. Let me show you in 2019,
[38:06] maybe YouTube ever webinar 30 tutorial. It's not even written right. Ever webinar. Look at this six years ago, six years ago, a 38 minute video. I made one video about this. Affiliate link over
[38:27] here. Look at this, with this one video, I made a total of almost 24,000 euros with this one video, 38 minutes. It took me two days to create. Let me see if there's, yeah, look at this. As you
[38:43] see February 2025, after six years, it starts to decrease, but still after six years, still making $180. But if you take a look over here, there were months that I made $2,000. Look at this, May 2020,
[38:57] 2,000 euros. The month after that, a thousand. Month after that, 1600. So that's the power of digital products with affiliate marketing and with recurring commissions. There are commissions you
[39:09] get only once and there are commissions that are recurring. So as long as the person that buys a tool through your unique affiliate link stays a member, even if they stay a member for 10 years,
[39:21] every single year you get a commission of what they pay. Do you understand why I get so excited about affiliate marketing? I should make a new tutorial about this. So I prefer to promote digital products, but if you really like certain physical products by all means,
[39:36] go ahead. So I wanted to share that with you. So let's go back to chat GPT, give me 20 niches for affiliate marketing and the products you can promote with it. Only digital products, don't you
[39:55] like chat GPT? I do. Okay. Digital products, online courses and e-learning, promote Udemy, Coursera, Skillshare, Teachable. So what you can do, anything you want to learn. So for instance,
[40:11] YouTube, how to cut someone out of a picture in Photoshop. Just a random search. 2 million views,
[40:24] 2 million video. So you can make this, you can learn this in one day and you can make a video in one day. And what you can do now in the description, hey, do you want to learn more about Photoshop? Here is a link to a Photoshop course on Udemy so you can become a Udemy affiliate.
[40:39] I don't know what the commissions are but when people buy that course on Udemy, you make money. I had a video a few years ago, I think I took it offline, so I think it's not here anymore, but it was how to create a Facebook page and it went viral. I think in a few years, I got 500,
[40:54] 600,000 views. So I placed a link in the description about a Facebook course on Udemy and almost every day, I got $5, $10, $5. By one video that went viral and keep in mind in that video,
[41:08] I gave my everything. I really went dive deep, creating high quality recordings with good audio, we're going to talk about that and I went the extra mile like the things that other people don't do in the tutorials because it's too hard, I did it and the video took off, I made a lot of sales
[41:24] by promoting Facebook itself, it's an affiliate program. But I want to help people that had a business and a website to create a Facebook page, so they could place it on their website. So that's why I made a tutorial, link in the description and every day five or ten dollars. So it was only the
[41:39] first one. You can promote anything, so let's do another one. Blender tutorials. Blender is a free 3d tool. A year ago, 8 million views on how to create something like this. Oh, here's even a full
[41:54] course course, just like this tutorial. Actually, you can also place full courses on YouTube, but what you can do over here in the description, if you go to udemy.com and you search for Blender,
[42:12] complete Blender mega course beginner to experts, it costs just 10 euros, $10. And when people buy this and they get it through your unique affiliate link, you make money. And if 8 million
[42:25] people watch your tutorial and a few people, a small percent just clicks on this link, you can really make a lot of money. So what else? Oh man, email marketing, all convert kit, review, there's
[42:45] a website, if we skip the sponsor stuff, email tool tester, I love this. Look at this website, email tool tester. An overview, look at this, those are the people that are working. Well,
[42:57] you need to pay four people so there must be some revenue over here and the only thing they do, they promote other people's email marketing tools. So this is in the niche of email marketing or marketing. So look at this, if I go to OmniSend, you get a 4.1, the best for e-commerce, the worst
[43:17] limited integrations, deliverability, OmniSend review and try it for free. If I click over here, look at this. There's an affiliate link, affiliate general, click ID, program ID, partner ID. So
[43:35] when I book a demo for free and after that I decide to go with the pro version of Omnisent, the person from email marketing tool or email tool tester makes money. I hope you start to understand how this can all be super cool. If you find a niche and you start to make content about
[43:51] it and people start clicking and you start to make money. So let's go back. What else? ClickFunnels, well that's the program. I was promoting it but I took it offline because I was like you pay
[44:03] $100 per month and you can do the same things with cheaper tools. So then my integrity is like, okay, let's make less money, but keep our integrity high. Ooh, Jasper AI. So I'm interested in
[44:18] promoting AI related stuff, helping people with AI related stuff. Why? Because a lot of people are searching for that. Look at this this AI tutorial. If you take a look at the first result,
[44:30] 1.8 million, 1.5 million, 133,000, 1.6 million, 870,000. So what you can do, Jesper AI tutorial.
[44:44] I don't know yes, I've heard of it, but I don't know the tool. So a year ago, okay, 73,000. Okay. Not that much as I was expecting, but let's take a look at yes, per AI. Yes, per AI. What is it?
[45:04] AI for marketers. okay. Free trial. Okay. What I do then, Command F, affiliate, there's nothing.
[45:18] Then I search for Jesper, or is it Jesper or Jasper? Jasper AI affiliate, that's what I google. Affiliate marketing, how to get started with AI affiliate marketing partner program. Apply now,
[45:35] does it say anything about commissions? And commissions, recurring commissions. So if I would go to Jasper and I go to pricing and people go for the $39 per month, let's say the commission
[45:54] is 30%, so 39 times 0.30 per person that signs up and stays a member, $11.70. So let's say after a
[46:06] few months, you have 100 people that do this every month that has this package 100, then you get $1,170 per month and this is only one tool you are promoting. If you have the niche AI, then
[46:19] you can have Jasper AI, Leonardo AI, all the other tools that people want to learn and probably have fitted programs. So let's go to YouTube. This is also what I do. I use chat.gpt, I use Google and
[46:31] I use YouTube. So what I would search is how to change yourself into a avatar video video AI. Look
[46:44] at this three weeks ago, 50,000 views. Wow. This one, 18,000 views. How can I, how can you do this? So I watch this. You can create talking video content without actually being in front of the
[46:58] camera. My avatar says whatever I want him to say, and that's how you can create it yourself. First of all, you need to design the set. I just take a screenshot So I want to keep on watching to see
[47:14] how they do it. Let's see if they have a... Okay. Studio ID, studio ID. Okay. What I can do now, I
[47:39] can search for affiliate or partner. Okay. I don't see that. So what I will do, I will search for D
[47:56] ID affiliate program, affiliate program terms. So there is an affiliate program. So what I can do
[48:08] then, I go to YouTube, D dash ID tutorial. A year ago, 44,000 views. Okay. I made 24,000 or $25,000
[48:24] with a video with 86,000 views. So every affiliate program is different, but I know this could make a lot of money. They have their own platform, which is also always nice. They can watch those videos and see based on what they do. You can also make a similar tutorial. You can make comparison videos,
[48:43] DID versus HeyJen. Which one is better? 66,000 views. People want to learn this. So what I am thinking to do is to create an AI platform where I talk about the best tools on how to make AI
[49:01] videos. Turn your video into AI animation. You see people are searching for that. Yeah. Look at this full thought on YouTube. We have a little bit of a problem. This looks cool. I don't know
[49:13] what else to do besides make these videos. Want to know how I made this follow along to find out. Follow along to find out a little bit of a problem. AI is kind of taking over everything. And I don't know what else to do besides make these videos. Want to know how I made this all along
[49:30] to find out follow along. Okay. And then I go to YouTube channel. Okay. So this guy's kind of doing
[49:42] what I want to do. Let's see, six months ago. So this is the video and I can watch the video,
[49:58] see what he does. If I click over here, that is an affiliate program. So he uses Runway,
[50:10] so I can learn more about Runway, play around with it, practice a lot and then also make a tutorial about it and put it on YouTube. I can make blog posts about it, I can compare this tool which he
[50:22] uses with another one and in that way when people are searching for how to turn your video into an AI animation and my quality of my video is great, then I will appear better in the search results.
[50:35] So that's what I did with my own YouTube channel. I have another YouTube channel, C4D. does it still exist? Yeah, look at this 11 years ago. And I did the same thing. I want to help people to get
[50:51] solutions. So I created a tutorial, how to create something that looked like a glass teapot. I would
[51:04] turn anything in 3D in glass. 144,000 views and I could refer them to a course where they learn more about Cinema 4D. So I had multiple YouTube channels and then I finally got stuck with one I
[51:18] like the most and that's making websites. So this is how I play. I take a look at tools we can use, then I see if there's an interest in on YouTube and on blog posts, and if I like the tool and I
[51:33] know it can help a lot of people, then I want to learn everything there is about the tool, dive deep and then make the best content possible. How? In blog posts, in YouTube tutorials or reviews and on social media with Reels. So we got stuck, let's continue over here. You can use VPN.
[51:53] VPN is very interesting if you're, it's all about safety within going to the internet. So you can make a lot of real nice content about that. Finance and investing, I don't like that that much. Productivity, time management, self-development, e-commerce, dropshipping,
[52:10] very popular as you see over here. Content creation, Jasper AI, Grammarly, music production,
[52:22] language learning, it's also interesting, yeah. Photography, podcasting and YouTube. So that's how you can do it. You can also, instead of searching for a niche, what are the best affiliate
[52:37] products to promote right now. Digital marketing tools, SEMrush, active campaign, click funnels,
[52:54] online courses, teachable, Skillshare, and then you see over here more information about what you can do with that. They offer $200 per sale. So if you become a SEO guru, we can go to YouTube, SEO
[53:11] course, you'll learn a lot about it. Then you can start to make videos and then you can use SEMrush in your videos, learn everything about SEMrush there is, and then when people buy that through your affiliate link, you get $200. $200 is a lot of money. Even for the free trial, people get $10,
[53:30] 120 day cookie. That is that for if people click on your link right now and after 100 days decide to buy it, then it's still within the 120 day cookie, you still get the affiliate. If people
[53:42] go back after a year and then they buy it, it's not within those 120 days anymore, so you don't get credit for that sale. So you can scroll down and see what is in your niche and you can also
[53:57] Google for it. What are the best digital products to promote as an affiliate marketer in 2025. Here
[54:09] you see already a few online courses, photography, software, ebooks. So you can also focus on one software. What the guy did in Blender 3D, there's Blender Guru. Three million subscribers that are
[54:25] interested in learning things in the 3D and the great thing about this tool, Blender 3D is free. So you can get started for free, you don't have to buy an expensive software package. And with the ad revenue from YouTube itself through advertising, you can also make a lot of money. So
[54:42] yeah, now it's up to you. What do you like? Which product is really helping other people? And if you found that product or that niche with a lot of products, then dive deep. Watch tutorials. So I
[54:57] will show you how I will do it. So what I will do, I will figure out what I want to promote. I think it will be about AI related stuff and then I need to come up with a name for my business. That's the
[55:09] next thing we're going to do. So I decided to go with AI. What kind of name fits with that? Let's talk about it after the commercial break. No, let's talk about it right now. What we're going
[55:25] to do now, we're going to think about the name for our business, our online business. And at the one hand, good to think about it, at the other hand, don't overthink it. I did not start my company in
[55:37] 2009 because I had no logo. I was like, I have no logo, okay, I don't know how I can operate as a business. Sometimes those little things can get into the way. So let me give you three tips
[55:51] on how to get a domain. The first one, choose a random name, totally random. Apple.com and Apple has nothing to do with a MacBook or an iPad. It was just a name. Hey, let's go with Apple and now
[56:08] it's a super big brand. So if you want to go the hard route, choose a random name. Another example,
[56:21] Grayscale Gorilla. If I heard that name for the first time, I don't know what it is about. It is about making 3D stuff using Cinema 4D, a software tool. It's all made with 3D,
[56:35] but the name is just random. Grayscale Gorilla. So that's the first option, choose a random name and go with it. And if your brand becomes so big, then people will remember it, link it. For instance,
[56:50] Nickelback, they became popular, 50 cents, they became popular. Even though it says nothing about the person. So that is the first option, choose a random name. The second one, that's what I really
[57:04] like, is a name with some hints in it. So this one, video copilot. You know, when you're in the plane, there's a copilot that is helping you. So this person wants to be your copilot
[57:18] when it comes to making videos. If you take a look over here, I loved these tutorials. I've watched them so many times on how to work with After Effects, make special effects in your videos. It's from Andrew Kramer and then he decided to go with video copilot. So in the name of the domain
[57:36] is already a hint to what it's about. It's not about horses or dogs. No, it's about video and then a copilot. Then there is the Blender Guru, talked about him before. Blender is software and
[57:48] there's a guru. There's a guru is something that's like he's totally into what he's doing and in this case with Blender. So blenderguru.com is a nice domain name for someone that wants to create tutorials or content about Blender related stuff. So that's the second option, have something
[58:05] that's related to what you're operating in, into video or into Blender. Then there's my favorite, your first and your last name. If that domain is still available, please go with it. You can do
[58:19] anything with it and if you decide after 10 years you want to do something else, you can shift it. Then your name can be used for anything. So Tony Robbins is also a guru or he's not your guru, but he's helping people to get more out of life. So his first name and his last name .com. Then
[58:36] there's Brendan. Hey, he changed his domain to AI. He had .com for a long time. Brendan.com, Brendan.ai, only his first name, well that's not available anymore probably. If your name is John,
[58:48] John.com is probably already taken, but go with your first and your last name. What I see in the logo, really simple, Brandon Pritchard. Then Gary Vaynerchuk, that's quite a hard name, but it's
[59:02] marketer, shares a lot of information on how to do marketing. So his first name and his last name, that's his brand name. So that's what I suggest you do. If the domain is still available,
[59:14] go for Gary Vaynerchuk. Well I mean go for your first name and your last name.com. And And in some cases, this is quite a hard name to say, so sometimes he changes his name to
[59:26] GaryVee.com. Let's see if that's also, yeah, that goes to, because that's easier for people to write. My name is FerdyKorpershoek.com, that's the domain name I have. It's so long for people,
[59:39] people have a hard time pronouncing my last name. So I changed it to Ferdy Korp and last year I had the privilege to buy ferdy.com to make it easier. Ferdy.com, that's my brand right now and I want to
[59:51] teach people how to make a website but if I want to change something in the future, I want to be all about mail modeling obviously, then I could change it. So the shorter the domain the better,
[1:00:05] so to wrap it up, a random name, apple.com or grayscale gorilla or something with the keyword in it, video copilot, blender guru or your first last name Tony Robbins, Brandon Ferdy or Gary
[1:00:21] Vaynerchuk and ferdy.com or you go with your first name and your second name. In some cases, if people want to maintain the privacy for their family, they can use the first name and their
[1:00:33] second name. My name is Ferdinand, my second name is David, so I could go with FerdinandDavid.com and then you can do anything under that. So it doesn't have to be related to your name.
[1:00:46] So I used Ferdy Korpershoek and I made a lot of money with it, even though my last name is hard to pronounce. So if I can give you an advice, go with the second option or the third option,
[1:00:58] go with your name if that's possible, your first and your last name or go with a keyword related one, Blender Guru, photography with 30, passive income with 30. So what we're going to do,
[1:01:16] we're going to create a website where we can place our content, it can be our blog posts, it can be our videos, it can be our reels and we can use it for our affiliate links. Because affiliate links can be quite long, but if you have a website you can narrow down to
[1:01:29] your domain name.com forward slash Jasper AI or forward slash Canon R6. When people hit that, that's so much easier for them. So what I will do, I will put into practice what I said, so I will go
[1:01:42] with my name ferdykorper.com. So I will see if that domain is still available and then we're going to create a website and the great thing is I want to help you to focus on creating content. So the website we're going to create, I already created it for you so you can focus on creating
[1:01:58] content. So we're going to get web hosting, we're going to get a free domain and then I got to get a free website from me. So you can focus on creating content. So let's do that. Let's take a look at the steps we're going to take in order to make this happen. So first you get your free domain
[1:02:12] name and we will get a web hosting. What is a domain name? A domain name is the address of your website. Web hosting is a special computer that's turned on 24 seven that contains all your files, all your emails, all your images, all the content on your website. So with your freedom, a name and
[1:02:27] web hosting, you are visible on the internet. Then we will install WordPress and WordPress is completely free. It's the best tool to create a website without having to know anything about coding because WordPress is doing all the hard stuff for you. And then we will import
[1:02:40] my pre-made affiliate website. If you already have a domain and web hosting, you can do two things. here that can show you step by step how you can do that. If you already have installed WordPress,
[1:02:53] you can skip step two and go directly to step three and I will show you right now where you need to go in the tutorial in order to follow along from that point on. So ladies and gentlemen, let's get started. If you already have a domain name and web hosting, you can skip this part. If you
[1:03:07] don't have it, you can go to webhosting64.com, hit enter, and then you can click over here to go to Hostinger. Through the years, I've been searching for the best web hosting companies that are also affordable, and then I came across Hostinger. I've already been using their service for seven
[1:03:23] years and I love it. And I'm not the only one. If you take a look at the reviews at trust pilot, Google trends, you see that hosting her is taken over the web hosting industry. And why? Because
[1:03:35] their quality is top-notch and they're really and then you'll see three plans and I will make it really easy for you. The premium plan offers 25 gigabyte of SSD storage. That's quite fast,
[1:03:48] but the business plan offers 50 gigabyte of NVMe storage. NVMe storage is up to five times as fast as SSD storage. So I would go with the business plan. Why not the cloud startup plan? Because
[1:04:00] you can always upgrade later. So when you would have created 30 websites with the business plan, then it will be great to upgrade to the cloud startup plan. But when you're getting started, I highly recommend the business plan. So what does the business plan have? You can have up to
[1:04:12] 50 websites. You get 50 gigabyte of NVMe storage. 50 gigabytes is more than enough. You get a free domain with other web hosting companies that cost money. But here at Hostinger, you get it for free.
[1:04:24] You get unlimited free SSL, which will make your website secure. You get daily backups, free CDN, which will make your website fast all over the world. What I also really like about hosting is that you get free domain privacy. What does it mean? Normally when you register a domain name,
[1:04:39] all your information, your address, your phone number, your email address will be visible on the internet. And when that information is available on the internet, a lot of people can send you spam With domain privacy, that will be hidden. And with other web hosting companies that cost money,
[1:04:55] but here with Hostinger, it is free. And to make it even better, there day money back guarantee. So if you somehow don't like the service, you can get your money back. No questions asked. So I scroll down and I click on choose plan and then it says you pay $30.99 per month, but I can
[1:05:12] give you extra discounts. So if you click over here, have a coupon code, you can fill in 30, click on apply and you get 10% extra discount and you pay $3.59. Hostinger will reward you if
[1:05:24] you go for a longer period. So the first period you get web hosting, you get an extra discount. So if you would go for four years, 48 months, you pay $3.59 per month for the next four years. The only thing is you have to pay right now. If you want to go for 12 months, click over here,
[1:05:40] you pay a bit more per month, you pay $4.49 per month, and after your first period, 12 months, 24 months or 48 months, after your first period, you start to pay $13.99 per month. This is still worth
[1:05:53] every single penny. If I think about how important a website is for your business, $30.99 is still really affordable and the first period you get extra discount, so or you go for 12 months, you pay $4.49 per month, or you go for 12 months and pay $4.49 per month, or you go for four years
[1:06:07] and you just pay $3.59 per month for the next four years. So do you want to go for four years for $172 or do you want to go for one year and pay just $53.89? I will go with 12 months. So I scroll
[1:06:23] down and I click on continue and then I need to register. I can do that with Google, with GitHub or with my email address. So I will use my email address. I need to create a password and then I click on register. We can choose a domain name later. Then we need to fill in our information
[1:06:39] over here. So I will fill in my first name, my last name. I'm from the Netherlands and all this information can be filled in later. So I will leave it as it is. If you have a company, you can
[1:06:51] add your details over here. So I will say what my company is over here and then I click on continue. Then there's the payment method and depending on the country where you come from, there are a lot of different payment methods. So I can pay with credit cards, PayPal, Google Pay, Apple Pay,
[1:07:05] Alipay, but if you're from another country, it can be that you also see your local payment provider over here. So I want to pay with credit cards, so I'll fill in my details over here. So over here, I click on submit payment. It says your payment's done. Let's go set up your service right away to
[1:07:22] start using them. Congratulations with your web hosting package. Now let's get a domain name. I already told you how to find your own domain name. Now I hope you thought about it. If not, your website and then let's see if it's still available. So I can click over here,
[1:07:42] if English is not their main language and look at how many languages there are. There are so many more than the last time when I checked. So if you see your language over here, you can select it and then you can continue in your own language. I will continue in English. So for who
[1:07:55] is this website? This website is for myself or my business. I click on next. Do you want to create or migrate a website? I want to create a website from scratch. So I click on create website, next.
[1:08:08] How do you want to build your website? I want to use WordPress so I click on next, and now I need to create the login details for my WordPress account. So my WordPress admin email is this one.
[1:08:23] I create a password, then I click on next. I want to create a blank site, so I click over here. What domain do we want to use for this website? So now we can choose a domain name for our website. And
[1:08:36] since you get one for free, you can pick your free domain name right now. So I want to go with this domain, and then I can see if it's still available. I want to go for the .com version, so I
[1:08:48] click over here and then I click on next. Do I buy this for personal use or for my company? For my company, so I click on next step, then I will fill in the information over here, and then I click
[1:09:02] on finish registration. So it's registering the domain and now you need to think about the people you want to reach, where are they living? If they live in Europe, you can select France or the
[1:09:15] United Kingdom. If they live in the United States, you can select one of those two. I go for the United States, so I click on next. We go directly to our website. I want to go to Hostinger,
[1:09:28] so I click over here, go to Hostinger. I close this and then here at my domain name, I want to go to the dashboard. Now here we are at our Hostinger dashboard. It says boosting time almost 24 hours
[1:09:43] left. So what will happen now? Our website will go live. It can go live any moment. In some cases, in most cases, it's live immediately. So what I can do now, I can click over here and then I will see if my website is live already. So I click here, then I will be redirected. And what I see,
[1:09:59] I'm already live. Look at this. This is my live website, my domain. So if it's not the case for you, just be patient for five minutes, 10 minutes, and if you click over here, your website should be live within 10 minutes. So what you see over here is the backend of WordPress. This is where we can
[1:10:18] adjust our website. If I click over here, I see the front end of my website. This is what people will see when they enter our website and it looks okay, but of course we're going to make it look so much better and because we are logged in, we see this bar over here. Other people that are not
[1:10:35] logged in, they don't see this bar. With this bar, we can navigate from the front end to the back end by clicking here. So now I want to close the other two tabs. This is the backend of our website, this is the frontend. On the backend of our website, we can adjust our website. We can create blog posts,
[1:10:53] we can add videos, images, PDFs, we can create the homepage, the contact page, the about us page, we can moderate comments when people have a comment on a blog post or a product we have. We can change the look and feel of our website with themes. We can add extra functionalities to our website. We
[1:11:09] can add other users that can do things for us on our website. There are WordPress tools and there are settings. So congratulations, you're live now. I like to work in a tidy space. Also here, everything is tidy and I like to do the same on my computer. So I just installed WordPress, now
[1:11:27] let me show you how you can clean it up a little bit so we can work more efficiently. How can we do that? Well, the first thing, I want to dismiss this message, then I want to go to the screen options and uncheck everything. So the overview of our dashboard will be clean. Of course,
[1:11:44] afterwards I want to install Google Analytics, so I see an overview of our dashboard will be clean. of my website and if I have a webshop, I want to see the amount of sales. For now, I want to leave it empty. Then I want to go to the website, to the front end. There's one blog post that will
[1:11:59] come with every WordPress installation and in this case, it is here. Hello world. If I click on it, it says my domain forward slash index dot php, all that stuff. I want that to look better. So
[1:12:11] I go to the backend, to settings, permalinks, and there I want to change the custom structure to post name. So I'll see my domain.com or dot whatever, forward slash and then the name of the
[1:12:28] posts. So I click on save the changes. Now I go to my website, I click over here. Now as you see, it just says forward slash hello world, that's so much better. Then I go over here, howdy ferdykorp,
[1:12:41] I click on edit profile, I want to scroll down, I want to fill in my first name, last name and then change the display in name publicity to ferdykorpzoek and now it says howdy ferdykorpzoek.
[1:12:58] If you want to have an image like this, let me save it first, update my profile. I scroll down, you can change or create your profile picture on Gravatar, so you need to open this link. Then you
[1:13:12] can sign up, leave your email address which should be the same as on your website and upload an image and that will be displayed over here and over here. Okay. Over here at the admin color scheme,
[1:13:26] we can change the look and feel of the backend, the color. So I can click over here, it will be light, modern, blue, ocean, etc. You can choose something you prefer and I prefer the default
[1:13:41] one. Let's go to posts. I want to select all the posts even though there's only one and I click on bulk actions, move to the trash, apply, go to the trash, empty the trash. Then I go to pages,
[1:13:58] select all pages, bulk actions, move to the trash, apply and add the trash. I want to empty the trash. Then I want to go to plugins, select all plugins, bulk actions, deactivate,
[1:14:15] apply, select again, bulk actions, delete. I want to start from scratch with no plugins. Of course, we can add plugins later but right now I want to start with nothing. Now if I go to my dashboard,
[1:14:32] it looks so much cleaner already. Then I want to go to the settings, general and make sure that over here in my WordPress URL, it says HTTPS and not HTTP. If there's no S,
[1:14:45] you can add it over here and also over here, and then scroll down and save the changes. If you need to change it, you need to log in again, go back to settings, general, and I scroll down,
[1:14:59] you can change the site language, you can change the time zone. If I say I'm from the Netherlands, so if I focus on people from the Netherlands, I can just say AMS Amsterdam. I search the city
[1:15:13] that is in my time zone and then automatically everything will be synced to the right time zone. Then there's the date format, I like to prefer the upper one, you can change it to another one or have a custom one. The time format, I like to use PM in capitals. My week starts on Monday,
[1:15:30] so I click on save the changes. Great. Let me ask you a question, what is your goal by following this tutorial? Your goal I guess is to make sales with affiliate marketing, passive income. Isn't
[1:15:42] that what we want? Well, I can show you step by step how to create a website from scratch, but what I prefer to do is to show you how you can import a website that I have already created that is specialized for affiliate marketers so you can save time and focus on creating content.
[1:15:59] Because remember, that is one of the names of the games, creating content, taking action, perseverance. So instead of showing you step by step how you can create a website, channel is about teaching people how to make websites, but right now I will show you how you
[1:16:17] can import the website I have created for you. And then I will show you how you can adjust it because you're not probably gonna make exactly the same website having the exact same niche I have. So I will show you how you can tweak it. Are you ready? If so, say yes. Yes.
[1:16:37] You don't have to do that. Maybe it's too late already, but if you have not done so yet, you don't have to do it. So right now my website looks like this. We can make it look better. In order to
[1:16:49] do that, we go to ferdy.com forward slash AM, that stands for affiliate marketing and then template. Hit enter, you'll be redirected to a landing page. Download the affiliate marketing template and this
[1:17:06] is the place where I will ask you for your name and for your email address. The interesting thing is that in this tutorial, I will also show you how you can build an email list. So what you do, you give something for free in exchange for a name and an email address. So that's exactly what I'm
[1:17:21] preaching. I'm practicing what I'm preaching and the great thing is if you download the template, you can unsubscribe anytime. But what I can do, if my email list will be built by people that download this, I can say hey I have a new tutorial about affiliate marketing and then I can
[1:17:36] send it to all the people that once downloaded my affiliate marketing template and never opted out. So that's how it works. I have 60,000 people in my email list and if I have a new tutorial, I've sent it to all those people, then I get traction from the first moment on,
[1:17:51] a lot of views and that can help me to boost my views. So I highly suggest later in the tutorial to start an email list. So that's what I wanted to say. My name is Ferdy, my email address is this
[1:18:04] one at gmail.com. I click on downloads, I need to check a few things because I'm from Europe. Subscribe is all done by ConvertKit. I also use OmniSend. Now check your email to confirm
[1:18:22] your subscription and download the affiliate marketing website. So I go to my gmail account, and there it is Ferdy Korpershoek, important to confirm your subscription. Thanks for signing up, click the link below for your subscription and we will be on your way. I should change this to
[1:18:38] download the website. So I click over here, there goes my website. What you need to do now, you need to go to your website to plugins, add a plugin and over here I type migration. I love this tool.
[1:18:56] I use it almost, if not every day. Install now, it's so easy to export websites, import websites. So I've created a website for you, I just exported it and I'll import it and you can do the same. So I click on activate, because we're going to use all in one WP migration and backup,
[1:19:14] a beautiful name for a plugin, a long name. And over here, I go to all in one WP migration and I click on import. I unzip the download, right now it's just 32 megabytes but if I unzip it,
[1:19:28] look at this 157.8 and I drag it over here, there it goes and what will happen? This website will be overwritten with the website I have created. But the thing is, I also have my own username and
[1:19:45] password over here, so we need to change those. So first I will show you how to log in, and then I'll show you how to change all the information so you can have your own login details and not mine. Okay. I click on proceed, I click on finish. So now when I go to the dashboard it will say,
[1:20:03] no way Jose, I need to log in again and with the same details I have in my website that I exported, I'm the only one that knows them so let me share them with you. The username is capital A and then
[1:20:16] affiliate and then the M capital marketing and the password, let me show it to you, not this one. So I start with Q on the keyword, then the W, the E, the R, holding shift, then 1, 2, 3, 4,
[1:20:35] and then again 1 Login, it works. So I don't have to save it because I will change it. So the first
[1:20:53] thing I will do, I will create a new user, add user. That username will be in my case Ferdy, the email info at ferdykorpershoek.com. The first name is this one, the last name is this one,
[1:21:10] a website and I hide this and I ask for a new password. Oh, then it will be shown. Okay. Let me create one. Then I don't need to send this and I want my role to be an administrator. Add the user.
[1:21:28] Okay. Now I will log out and now I will log in with the details I just created. Okay. I go to the screen options. I missed a letter in my own name, Fetty Korpershoek. I can change it over here,
[1:21:45] edit, Ferdy, update. Now if I take a look at the website, this is how it looks. Scroll down,
[1:21:59] some text about us, we can show the latest post. Over here we have the blog page or we can place blog posts, we have the contact page, people can reach out to us and a subscribe on YouTube button so people can become a subscriber. In the process of making tutorials, making websites,
[1:22:16] doing everything in life, I keep on learning new things. So in the tutorial, I show you in area. And I decided to get rid of the tutorial area and only use the blog area. And then on top
[1:22:30] of the blog post, I will place my tutorial. So I don't have two separate areas. I have one area, but it can be that in the tutorial, you'll see the menu item tutorial. So if you don't see that in the template, everything is perfectly fine. I decided to get rid of tutorials. So that's what
[1:22:46] I want to say to you up front, so you don't get confused. Let's continue. The first thing I want to do, I want to create a logo so we can make use of the logo that we're about to create. So let me
[1:22:58] show you how to create a logo. By the way, before we continue, one more important thing, you need to go to users and you need to delete the old user. So I click on delete, attribute all content to
[1:23:12] the new user, confirm deletion. So now the user affiliate marketing is not existing anymore, so not other people can enter your website. So now you're the only user, you're the administrator and now we can create a logo. So before we're going to create a logo, let's take a look at what other
[1:23:28] people do. So I go to YouTube and I search for Blender tutorials. So Blender Guru, what if I
[1:23:42] would search for blender guru? How does it look? This logo look like blender guru and a donut. Okay. Let's go for, um, HubSpot tutorial. Kevin Stratford. I like the audio. Go to the site.
[1:24:12] Look at this. This is exactly what I was hoping for. Kevin, just his first and his last name. So let's do something else. Does it still. Web Joomla. Let's see if he has a website,
[1:24:54] Mr. Web. Just this text. Well, I already showed you Tony Robbins. This guy knows how to do marketing. So when his logo is like this, he thinks about every single pixel on his website.
[1:25:10] So if this is his logo, that means something. So that's actually what I want to create and we can do two ways. I can go to the customizer, then I can scroll down to site identity and change the
[1:25:26] title to Ferdy Korper. Thing is, this is also really important for the search results. So I would rather not do it like this, what I can do, let me bring this back. My WordPress and here,
[1:25:42] say Ferdy Korper, publish, go back and I click over here and then my site title, here I can change it, Ferdy Korper. And now if I go back to the homepage settings, sorry, sorry,
[1:26:06] sorry, not the homepage, the site identity. Here it is still my WordPress, I can even get rid of this. We're going to talk about site title later. So now my name is displayed like this. If you want
[1:26:18] it to be like that, it can be the case. Here at design, we can go for my, the color I use in my website. So if you really want to be really simple about this, you can do it like this,
[1:26:30] or if you want to, you can go to ferdy.com forward slash Canva, then you need to sign up. We're going to make use of the free version. I already have an account. Okay. Then I click on
[1:26:47] create a design and I go for a square for a logo. And the logo is square. Not scare, but square. So I don't even know if scare is an English word. In Dutch it means poor. People don't want to be
[1:27:03] scare in the Netherlands. So I go to the text area and I click on add a text box and then I.
[1:27:29] And now I want to make it bold. Okay. You take a look at Tony, it's in capitals. That's why I also prefer Tony Robbins. So in capitals, 30, then I want to make it bigger.
[1:27:49] As long as everything fits in one square. Command D, control D on the PC and I say, corporate. Now
[1:28:01] I can play around with this by, let's say, command on, plus, plus, plus, plus. I can make this closer to each other. So there's a cool, that's not cool. Or you can have some space in between,
[1:28:14] or just as if there is no space. Now let's talk about the colors for our website. Yeah,
[1:28:26] what do you want to do? These are nice colors. You can go to kudlars.com, start a generator, hit space until you think, I like that color. Okay. I like this one, so I can lock it and
[1:28:45] then paste. I like these, so I can drag this one. Let me see over here. So I can use those colors, so I lock this, hit space and see which colors complement those colors. And maybe I like,
[1:29:06] okay, I like this color, so I unlock it or I make it a little bit lighter. Well, that's how you can play around with colors. If you like the color, what you can do, I like to
[1:29:19] maybe let ferdy be. Now, corporate, I want it to be a little bit grayish, not too dark. So I click over here. So I go here at the left a little bit up, not too light, but not that super dark. Okay.
[1:29:38] And then the first one, I want it to be this one or this one. Let's go with the blue one. So I copy this and I go to Ferdy, Maybe you're like, hmm. You can also play around over here,
[1:30:16] or use the orange one. It's a bit reddish and this can all be changed later. So it's not like
[1:30:30] you have to make it perfect at once. Better a logo than nothing, but it doesn't have to be perfect. Right now, I can go with this. What I will do, CMD plus, get rid of this. Okay. Now I say on the PC,
[1:30:56] print screen and on a Mac, CMD shift 4, then I drag a selection with some space like that. Now I go to my desktop because there the image will appear. I can call this one Ferdy Korper logo,
[1:31:16] but the thing is the background is white. So what I can do now, I can go to background remover, PNG maker, remove background from image for free. Remove.bg, upload an image. I will go to
[1:31:34] my desktop, open it and the magic will happen. Now I can download it in high resolution, there it is.
[1:31:48] I can rename this to Ferdy Korper logo and then I can drag it to the desktop. Now I go to WordPress,
[1:32:00] I click over here, here at general, I select a logo, upload files, so I select files on my computer and there I go for the logo PNG. We're not there yet, I click on edit, then I want to
[1:32:18] make a selection. Let's see, how do I do that? They changed this, that's interesting. Let's go to the media library over here, edit the image. Now I can crop it. So I make sure that it's as
[1:32:48] I save the edits. Awesome. Okay, command zero. Let's close this, select the logo again. Now I select this one, select. I get rid of the site title
[1:33:06] by clicking here, and then over here, the logo height, I should make that smaller, a
[1:33:24] like that. What we can do now, we can say FK, zoom in, or AI. So I like this one, shift command 4,
[1:33:43] let's make it bigger, shift, shift command 4, try Something like that. Then I go back to remove.bg,
[1:34:17] upload an image and I go to the desktop. I go for this one. I click on download. It's not quite a square but almost there and I say favicon. I go to the website, to site icon, upload files, select
[1:34:37] files, I go to my downloads, my recent download. Okay. Set as a site icon and now I need to make a square of it. Crop the image, save the changes and look at this. FK. So you're on this website
[1:35:01] and you see, Hey, I want to go back to FK. I need to make it bigger. So, um, I should actually make it less. Try to do it like this. And then again, my camera is getting hot so I need to and then
[1:35:53] I go to the backend, to settings, general, change the site icon, upload a new file which is slightly bigger, select, perfect. Drop the image, save it and voila, now it is bigger. Awesome. Now,
[1:36:17] let's take a look at the site title. We can go to the dashboard, to settings, general and this is quite important. The site title right now it says My WordPress, let's change that. So if I
[1:36:31] would search for HubSpot tutorial and I go for the search results, you see that the videos are first, that's why you focus in this tutorial on videos, making videos is these days more efficient, more
[1:36:45] lucrative than blog posts and it's in my opinion, easier to do. Maybe bigger learning curve. I skip the sponsored stuff. HubSpot CRM training. So I search for HubSpot tutorial and here's HubSpot in
[1:37:02] the title, HubSpot tutorials. Platform tutorial, HubSpot tutorial for beginners. So that's really important. Don't make a, use keywords in your title. Don't say welcome to this website. No.
[1:37:20] So my website, Ferdy Korper is all about become an AI pro. It's not very appealing,
[1:37:33] so what I can do, I can go to chat GPT, give me a iConverting I converting clickable title for a website that makes tutorials about a lot of AI related tools. It is a WordPress website.
[1:38:09] AI made simple. Okay, command. What I can say? AI tutorials. I want to be found on AI tutorials.
[1:38:22] And then I like to use a pipe shift backslash, learn the tools that shape the future. I love it. Before we're gonna adjust the content, let's take a look at the colors in our website. I chose
[1:38:36] those colors, you can adjust them and let me show you what happens when you adjust those colors. We're working with global colors. So if I would go to the customizer of the Bloxy theme, and I would go to colors, if I change this color, let me copy to green. Look at this, everywhere I use the
[1:38:59] green color in my website, it automatically, or I use this global color right now, it's this one. It automatically adjusts. So in a few clicks, we can change the whole look and feel of our website. So
[1:39:17] I like to work with this color. I like to work with the orange color, this is the one from the logo. So you see it adjusts over here. Then we have the darker blue. If I would change that,
[1:39:29] then it will look like that. So we see it coming back everywhere and that's how you can adjust the style of your website in a short amount of short time. So one more time, if I would make this,
[1:39:41] let's say greenish and also this one greenish, then it looks totally different. So I want to work with bluish colors. So I go for this blue color as the main color, then a darker version
[1:39:58] of that color over here. And that's how you can play around with those colors. If you're like the base text should be different, you can choose a different color over here. I click on publish,
[1:40:13] close it, so I'm happy with those colors. If you want to adjust the header, you can go to the customizer again, go to the header and there are a few things we can add. So right now we have
[1:40:27] everything on one line, but if I would go for the socials and I drag them here on top, look at this, new area appears. And then here at the left top, I could have a text, but it's dark. So I can
[1:40:41] click on the HTML elements, go to design, change the default state color to white and I can say sign up for the newsletter, something like that. Or I can do it over here, change that. If I don't
[1:41:02] want to use the button, I just get rid of it and then I can drag search to the right, there was a voice crack, I leave it in. So you see there are quite a few things we can do and if I scroll down, everything disappears but as soon as I scroll up, it is back. All using a free
[1:41:20] theme. So I bring it back. I don't know, should I or not? Let's keep that YouTube button for later. So now it looks like this, real simple when I hover over it. Excuse me, something happened.
[1:41:38] I should have a sip of water, but I don't have that with me right now. Let me come back in a minute. So that's better. Let's continue or shall I start over from the beginning? No,
[1:41:59] no, no. Let's continue. So let's take a look at the content over here. In order to adjust that, we can go to Elementor, edit with Elementor, the best free page builder for WordPress in the world.
[1:42:12] And if you open this for the first time, we can get rid of a few things, messages, and then what I like to do first, I like to click on the Elementor logo over here, go to the user preferences and
[1:42:25] then make it dark mode, that's my preference, you don't have to do that and show quick edit options. Okay. I close this, I click over here or I go over here. Okay. Choose a title with the service you
[1:42:40] offer. So what I will do, I will go to chat GPT. I'm not a real good text writer, but chat GPT is, so I say, I have a website where I showcase my AI related tutorials. I teach people how,
[1:43:00] through tutorials, how to work with the best AI tools. Give me a title, a H1 title for my
[1:43:15] homepage. Let's see what it comes up with. Master the best AI tools. Master the best AI tools. I don
[1:44:20] this one. Learn to use the top AI tools like a pro. That's what I really like. That sums it up. Step-by-step tutorials for creators and innovators. Yes. I could say start watching or
[1:44:37] watch the latest tutorial, tutorials or sign up for the newsletter. Right now, call to action, watch the latest tutorial. And then I would link it to the tutorials page. Okay. Over here,
[1:45:01] I want to upload an image of myself. I choose an image, upload files, select files and then I go to tutorials, misc, Ferdy. This one or this one? I think this one is better. It's really big, so
[1:45:21] let me see if WordPress will make it smaller for me. I guess it will do that. Let's edit the image, scale, and I'll say that it can be 1200 pixels. Scale, and I can go to the style, change the
[1:45:49] percentage in pixels, publish. Let's take a look and what I don't like is that it is over here,
[1:46:02] just out of that, it doesn't look nice. What I want to do, I want to place this here below. So in order to do that, let me show you a little bit more about Elementor and get rid of the minimum height. Okay. And I go to advanced, I go to transform and then the offset, I select it, bring
[1:46:36] this back to zero and then I do it like that. And here at layout, uncheck margin top, I decrease it a bit, like that. This is what you don't see in the builder or in the live page, on the live page.
[1:46:59] Learn to use the top AI tools like a pro. It's really big because I had a shorter title. I can
[1:47:12] go to the line height over here. It's also easy to do with Elementor. I really like it. Learn to use the top AI tools like a pro. Okay. Step-by-step tutorials for creators and innovators. Watch the
[1:47:28] latest tutorial. Publish image of myself, about you, what I can do. Let me show you, I can get rid of this one. Then I go over here to this inner section, I change the width to,
[1:47:44] let's say, pixels 600, and then over here, bring it to the center. About 30. Write where you are,
[1:48:01] who you are, why you started doing this and what your goal is. So let me write something and then I will be back with you. So here's my text, I prefer it to be in the center so I go to the style of the
[1:48:17] heading, bring it to the center, also here, style, center. Okay. So far so good. Publish and now our
[1:48:30] website is up and running. Congratulations with that. And what I would do 10 years ago, I would start writing blog posts, but the world has changed. Now a video is so much more lucrative
[1:48:42] and important than blog posts. So what we will do, we'll create a video and based on this video using chat gpt and other tools, we will create a blog post that's perfectly legal, totally in line with everything we're doing because it's our own video and using chat gpt and other tools, we'll
[1:48:58] convert that into a blog post that will save us a lot of time. So what I'm going to do right now, I will show you from scratch how you can create high quality videos that can get you sales and
[1:49:11] help people at the same time. Let me show you. Ladies and gentlemen, I have been looking forward for a few days to record the session. It's now Monday morning. On Fridays, I don't work. So I
[1:49:26] so I have to wait for three days to get started and I'm so excited about this part. It can be maybe the most challenging part of building your online business with affiliate marketing and making videos and having a website but it's also the most rewarding one. I told you that I'm gonna
[1:49:42] start over again from scratch. What I would do, well this is what I would do. We created a website which is really good, but 10 years ago or maybe 15 years ago, a website was the thing to begin with, creating content, blog posts and stuff. But there has been a switch in the latest years and now
[1:49:58] video is far more important than blog posts. I make so much more money by making videos than by making blog posts, but I also understand that making videos can be more challenging,
[1:50:10] especially when you want to put yourself in front of a camera. Well, let me tell you upfront that it is not necessary. It is better to show your face a little bit, but recording audio and recording
[1:50:25] your screen is sufficient. You can make sales with that. So I challenge you to go all in, also make videos and show your face and I'm going to show you step by step what you need in order to make
[1:50:38] videos and how I would make my video. Well, before we get started, I want to share something with you. Since it's a long video, I feel the freedom to sometimes tell you a story. If you take a look
[1:50:50] over here, you see my face and it says over here, as a man think, my furry corpse look is not right. I did not create this ebook, but this is an ebook on my e-reader with a picture of mine. And if I open this, I can read, maybe it's too light, but I can mark things. And what I've done, there's an
[1:51:13] amazing book as a man thinks by James Allen. It's already almost a hundred years old, 45 minutes, a really short read with a lot of good information. And I had it in English and I changed it to Dutch
[1:51:26] using chat GPT. And then I started YouTubing. Hey, how can I put this word document into an ebook, an e-pop book so I can read it on my Kobo. So I think it took me two hours with some breaks and
[1:51:39] just having a chill time on my couch. and now I have my own ebook. So now I know how to make an ebook and the interesting thing is, I have watched more than five videos in order to get the result
[1:51:51] I had in mind. The first one was on how to put an EPUB book on your Kobo reader. There was one how to convert your Word document into an EPUB, but then I was like, yeah, now it's converted
[1:52:07] but the style is really bad. Then I had one, a document with how to format your Word document so it will be readable on an EPUB, using EPUB on the e-reader. So I had to watch multiple videos to
[1:52:23] get the result I have in mind. What I can do now, I can make a tutorial showing my face like this. Hi people, my name is Ferdy and in this tutorial I will show you from scratch how to go from nothing or just an ID towards a fully working ebook on your e-reader. You can even put it on Kindle,
[1:52:40] you can even put it on Amazon, you can even sell it, give it away for free. Let me show you step by step what we're going to cover and then after that I will start and then I'll share people, okay, you can write it in Word. How to format the headers, how to format the text, how to do the line height,
[1:52:56] how to optimize it in a way that will be readable on all eReaders. Then I would say, okay, now we have this, we have formatted the Word document, let's convert it using this free tool to an EPUB
[1:53:08] document. Now, how can we bring it to our eReader? How can we create a cover? So I could make one tutorial which will make life easier for people that want to publish their own eBook, because I
[1:53:21] had to go to three eBooks and that is, I say it again, eBooks and that is, I say it again, that's the name of the game, let's not say that anymore, that is how it works. I have watched three videos, but I would rather have watched one complete video so I don't have to search. It took me two hours.
[1:53:38] If I would have watched one video of 20 minutes that showed me from scratch how I could have done everything, it could save me a lot of time. So that's what I want to do in my tutorials. I want
[1:53:50] to create tutorials, I want to create videos that give people the complete solution. This chapter is about equipment or it's about how to make a video but I wanted to give this introduction
[1:54:02] just to show you how important it is to have a video that is better than other videos. That brings me to the next thing, there's a beautiful saying, be the first one or be the best one. When
[1:54:17] it comes to making videos, maybe there are already people on the internet making videos about AI. There probably are a lot. I've seen that a lot of people want to learn things about it. So in order to stand out, I need to make better videos. I'm not the first one anymore, so I need to be the
[1:54:33] best one. And that's my mindset when I create videos. And let's go to YouTube for a moment. I go to YouTube, I go to my channel, to the videos, to the oldest video.. It's a really amazing video.
[1:54:58] Wow. Oh yeah. This one. What's this really your first video? Fantastic quality right from the start. Impressive. It's not a few weeks ago. I got this comment. This is three years ago. I
[1:55:10] never responded. That's not good. But how cool is that? I remember when I was making my first video, I remembered I want to have good audio. I want to have a cool, good resolution for my screen.
[1:55:22] And when people say, is this your first video? It really stood out. Well, that's what I want to help you with. How to create a video that stands out. And the great thing is, you can do that with a lot of equipment, with $20,000 worth of equipment, but you can also do that with no budget. Assuming you
[1:55:39] have a computer and assuming you have a phone, you can get started. So what we're going to do, to show your face. We're going to talk about audio, audio is really important. We're going to
[1:55:52] talk about lighting, so people can see you. We're going to talk about screen recording software and we're going to talk about environment. How can you put it all into a nice view? So let's get
[1:56:04] started with the first one. Let's go to ferdy.com forward slash equipment, like that. Hit enter and it will be redirected. That's why I use my website to this blog post which I just created. I did not
[1:56:19] even create a category yet. The best equipment for YouTube videos. And what I'm going to do, I'm going to talk about free tools and I'm going to talk about cheap tools that can give you some quite nice results and I'm going to talk about high quality stuff. Over here,
[1:56:33] I think I have more than $25,000 in equipment, second camera, lens. The thing I see over there which I'm not even using right now is worth 6,000 euros in total. Yeah, but it's because I'm already
[1:56:49] doing this for 10 years. You can get started with almost nothing. I had my laptop and I had a microphone. The microphone, the Zoom H4n was $400. I use it for my work. So I put it in front of me,
[1:57:01] from that moment on, the audio of my videos was great. So let's go to cameras. What I could do, I should do that, I should use affiliate links. That's the whole thing what I'm trying to teach
[1:57:13] you. I'm offering value in this tutorial, but if you would buy this through my affiliate links, I have no affiliate links yet over here, but if you buy the snowball microphone through my affiliate link, then I make money. That's how it works. I've not done that, but I will do that in the
[1:57:26] future. So when you buy one of the things could start out with your phone. You don't have to buy an expensive camera in order to succeed with this. Let me show you. So I have my iPhone, I know it's
[1:57:43] a really good iPhone. So I put it on the stand and say, hello people, my name is Ferdy and in this video, I will show you how you can turn this face or your face in your videos into a cool animation
[1:57:55] like this. I can also turn the camera around, so I have a bit better quality. I can put it on the stand and I say, Hey people, my name is Ferdy and in this video, I'll show you how to transform yourself into a nice animation like this. Hi, my name is Ferdy. Let me show you how we can do that.
[1:58:11] So also with your phone, you can create something like that. And the great thing is, if your phone is over here or over here, close by, then it can be that the quality of the audio is good
[1:58:24] enough these days that you don't have to use other equipment. But we're going to talk about camera audio later. So when it comes to video, if you can use your camera, then you don't have
[1:58:37] to spend something because lighting and audio is more important than video. These days, all those cameras can make equipment, do record things. So if you have no phone and you want to get started,
[1:58:49] there was a really cheap phone over here, $40 that is relatively cheap. It has a camera on it. You can get started with that. If you want to take it to the next level, I have the Canon R6,
[1:59:01] I think in the Netherlands it was $2,300 or euros. And I have the Canon 85 millimeter 1.2 lens, that lens was $2,000. So total of around $4,000. It's not necessary, but I like to go all in. This is my
[1:59:17] work. I make a lot of money with it so I can buy the best equipment. I could buy a $5,000 camera, but it's overqualified. So for me, the Canon R6 is good enough. Right now there's the Canon R10.
[1:59:29] I could make this an affiliate link and it is around $1,200. And the great thing is this one is with a camera lens on it. And that lens can zoom from 18 to 150 millimeters. So it
[1:59:45] can zoom out. You see a lot of space and you can zoom in right now. What you see over here is 85 millimeters. So 150 would be a lot more zoomed in. And 35 would be that you would see the whole space
[1:59:59] around it. Let me show you with my camera what I mean. This is zoomed out, this is 35 millimeters, I think it's even 24. This is 35. This is maybe 60 or 50. This is 135. So depending on the range,
[2:00:16] it has a totally different look. So I can record myself like this and then you see the whole background behind me. So and the great thing is when you have a lens that can do that, zoom in. So that can be really nice. So when it comes to cameras, really simple, use your phone,
[2:00:33] put it on the stand. Want to find out iPhone stand or iPhone tripod. This is how I roll. Just Google $30, 13 euros, Timu $8.40. This is amazing. I have one like this. I don't know where it is,
[2:00:53] but I could put it on the stand and then use that. So then I can invest relatively not a lot of money so I can film myself. As I said before, audio is more important. The rule with audio is the
[2:01:05] further away the audio source, the microphone, the worse it gets. So I have my microphone just out of the frame. Hello, my name is Ferdy. This is really close by. Right now it's over here. I
[2:01:19] think the audio is great. If I go back, hey, my name is Ferdy and the audio is farther away. So the farther away the microphone is, the worse the quality becomes. I should speak up more. So when
[2:01:31] it comes to a microphone, you can do two things. You can have a microphone out of the frame, you can have a microphone in the frame. For years, I've been using this microphone you see over here and the audio is great because the microphone is really close to my mouth and I
[2:01:46] was also not getting distracted with a lot of noises outside of my room because I was using a cool condenser microphone, but I think it's better to use my hands to have no camera in front of me. I prefer that. This is a really expensive camera, $2,000, the Sennheiser MK50, I'm not sure.
[2:02:06] But let's start with the budget ones. As I said, if you use your phone and you hold it close by, because you want to use audio. So what you better can do is use a camera or a microphone that can be
[2:02:22] linked with your computer. So when you record your computer screen, which we're going to talk about, then it automatically also records the microphone. That's what I have right now. This recording is not linked with my phone, my word, my camera is linked with my computer because of the computer
[2:02:38] I'm recording right now. So the first option, if you want to go for a budget is to snowball Mike, it's $28 and I use this one. The quality is great. If you just put it in front of you, you can
[2:02:50] talk and start talking and the audio is great. And as I said, the audio is more important than the video. Audio is so important. If I go to YouTube, I want to learn something and the audio is bad, I'm gone. You want to have high quality audio, so people don't leave you. And the more people leave
[2:03:07] your video on an early state in the video, the more YouTube thinks okay this video is probably not good because people click on it, but then they leave. So the more, the longer people watch, the more watch time you have, the more you will be shown in the search results. So that's why
[2:03:23] it is really important to do everything possible to make people watch. So good audio, good video, good lighting, but especially be good at what you do. Yeah, go straight to the point. Don't talk too
[2:03:37] much in the introduction because people are like, okay, 20 minutes or 20 seconds in the video still talking about, not about the subject. Bye bye. So what I do is, hi, my name is Ferdy and in this video I will show you how you can turn your face into an animation like this and then I show the
[2:03:52] animation. I'll do it in editing the video. Let me show you how it is done. The first thing we need to do, we need to go to ferdy.com forward slash change your face, and then a shorter URL, and then
[2:04:05] people go to the link, and that can be a pay tool, and when people pay for the tool, I make money. So I'll be straight to the point. So I was talking about audio. I'm all over the place. I'm excited. And at the other hand, I'm, I'm a little bit all over the place. I hope you bear with me. Let's
[2:04:22] go to the second option. You can have a wireless camera or microphones like this. You can put this one over here. You link it to your computer or to your audio interface. We're going to talk about
[2:04:34] audio interfaces. Those are a step in between the microphone and the computer so we can enhance the audio a bit. You can put this in your phone, so it will be going directly to your phone and when you've done that, your audio is here but your video can be over there and then you still have
[2:04:49] good audio because it's wireless. There is this option, 169. If you want to go for the better option, there is the road wireless pro two. I think I have this one road wireless go gen three,
[2:05:05] $259. You just put it over here and it starts recording automatically. Uh, man, it's, it's doing an amazing job. It's really easy to bring it from the device to your computer afterwards in,
[2:05:17] Afterwards, in the editing, you can put it next to each other, below each other. Really nice tool this one. It makes it really easy also to record outside and when you just put it here, no matter what you do, the audio is there. And there are millionaires on YouTube who have great YouTube
[2:05:32] channels with more than a million subscribers and they just use this and they see a big thing over here. But since everybody's doing it, it's perfectly fine to do that. And then if you want to go next level, there's the Rodecaster Pro. I use that one. I have the Rodecaster Duo because
[2:05:47] it's smaller. And in this device, I already set up a lot of settings like how to deal with if it's silent, then it cuts away the low noise and you can set it up like that. And then I link my
[2:06:01] road coaster directly with my computer. And when I record my computer screen using ScreenFlow, which is screen recording software, which I kind of talk about later, then everything will be in one fell, my computer screen and the audio of that. And then I grabbed my camera files. I put it in,
[2:06:18] I sync it in Adobe premiere, and then everything is working perfectly fine. This is what's more expensive. Um, so it depends on what you want to go with. If you use those wireless things, you can just direct them into your computer, do some audio editing with it and then you have also an amazing
[2:06:34] result and you don't have to buy this one. If you buy this one, you also need to have a microphone and then there is one that goes with it. The Rode PopMic Pro. Rode PopMic Cardioid Dynamic Broadcast
[2:06:47] Mic. It's just $99. The audio quality is insane. Sometimes I consider to get that one but I don't want to have a microphone in the frame anymore. So if you would get the Rodecaster with this one,
[2:06:59] you have super, super, super good quality audio. So that's what you can do. And as I said before, I have the Sennheiser MHK 50, 1600 euros. I linked it with my Rodecaster Pro and then it goes into my
[2:07:18] computer. I'm happy with the results. I'm happy that you don't see it. It's just over here. I like the whole setup. So that's the next level and man, you can take it as far as you want. The Shure
[2:07:32] SM7B, Shure SM7B with an H is also an amazing microphone, 400 euros. It's doing a great job.
[2:07:44] It's right in front of your face. So those are the audio options, and then we can talk about light. So what I will do, I'll turn off all the lights. Some I have to do manually, some I have to do with
[2:07:58] my phone. So I turn this one off. So what I see right now is two backlights. I have one light that's focused on my YouTube button and there's my one backlight. Now I have only one light that's
[2:08:12] from behind. I like the cool effect if I turn it off. I hope you were able to hear me. So now I have nothing, only my computer screen. So there are three lights you can use. There's a key light,
[2:08:25] that is this one. If you have this one, you already have something. It's a bit dramatic. So oftentimes you can fill it up with a fill light. So just a key light, it's the main light. And the
[2:08:38] bigger the source, the more, less harshness you have in the shadows. So if I would turn this off, and I would use my phone, which is a really small source, and it would look like this. Really hard
[2:08:53] shadows. Hey, but there's also a nice opportunity and look at this, if you go have a light from the back, you get a nice glow. Yeah. So I really like to play around with this. I recently moved,
[2:09:06] so I played around a lot with it and this is my, so far how my studio looks. So there's the key light. I can have a fill light, this one. If I turn this off and I turn on the other lights,
[2:09:21] you get a really dramatic look. So this is my backlight, so this shines a bit more. Already really cool to make it more dramatic. This is also a really cool look because this is quite
[2:09:33] dark and then there's light, but I prefer, I don't know if I prefer it. If I do this, this is also really cool. I don't know, what should I do? Let me know in the comments. And
[2:09:48] then I use two Philips Hue lights to give the background some cool lightning, not too much. And I have one light that's pointing towards my blue computer. It's a blue light, it makes it a
[2:10:01] bit more blue, otherwise I just like it if it's a bit more blue. So this background gives a little bit more dynamic in the frame, but I have to say, I really like this without the second light. I'll
[2:10:18] think about what I will do with this. But man, yeah. While doing things, you learn things. But let's talk about what kind of lights. The bigger the source, the softer the shadow. So what
[2:10:30] my suggestion is, use one big softbox and have it as close as possible, but not in the frame. I have it in the frame a little bit, I'm okay with it, but don't make it be over here. So you can use
[2:10:43] this one that's 90 centimeters. Oh no, no, that's not true. This is the budget option. So for $40, you have a light like this, put it 45 degrees like that and 45 degrees like that and then it
[2:10:59] shines. Super cool. You get a nice triangle is what they say in the shadow. Then you can have a smaller fill light, it could be the same light but a little bit less power and then one light. It
[2:11:11] can be a small light from the back. So you could search for small backlight, best small backlight. That's how I roll just for YouTube studio. Well, there's a small one, 70 euros. I use this one,
[2:11:31] something like that, but then with Philips Hue, yeah, you can learn so much things from this. I learned things from Ben Johnson, who's really good in making cool studios, cool lighting. So I have,
[2:11:46] what I already told you, I have a softbox over here. Let me just show you how it looks. This is my main light, really big, 90 centimeters in diameters. Then there's the second light,
[2:11:58] really it's not that bright. Computer screen, there's the backlight for the blue thing. Then there's this one, really ugly how I made it and then there's this light that shines
[2:12:11] on my YouTube button and two backlights which are almost not visible on the video. Then my camera is all over there. But the light needs to be powered of course. So it's really cool
[2:12:29] if I can have a softbox like this one. This is a really cool softbox, relatively cheap. I use Aputure, but it's more expensive, three times as much, but this would also do the job.
[2:12:43] But then you need a light source and that, yeah, if you don't have a lot of budget, it's still $239 or you could just search for cheapest light for YouTube studio and there are some great lights. So
[2:13:03] 15, 15 euros. Timu, I don't get it with Timu, you have to gamble, skip the promotion and to cart, well, take a look at the reviews, but you can do something that's relatively cheap. But if it's
[2:13:24] possible, I would go with the Nanlite FS30B and you have a lot of power and if you put a softbox on top of it, the one from Neewer, then you get something like this. Then you can also have a
[2:13:37] have a smaller softbox for the second light and maybe softbox for the lighting on top. And if you have more money, you could buy three of those. I use three of them. I use the Aperture Storm,
[2:13:51] something too expensive, $2,000, $1,000 and two expensive sub boxes from aperture. So a three light setup will be great. Then you have the key light, the fill light, the second one is to fill
[2:14:04] up your face, the shadow and then the third one is the opposite 180 degrees from the key light and that is the backlight and those three together give a really beautiful look. I know it's a lot of
[2:14:19] money but with this you will be done except for the soft boxes that you need. I have this package and I'm really happy with it and the great thing with those lights, you can have RGB lights. So the
[2:14:33] blue one is not possible with my aperture, but with this one I can have all the colors in the world. So that's it for lighting and remember the bigger the source of the softbox, the more
[2:14:46] soft it becomes. That's why I have a softbox on my backlight, otherwise the shadow over here will be too harsh on my desk and now it's a bit softer as you see. So that's why, oh man, I love that. The
[2:14:58] bigger, man, if I will be a photographer, I would buy the biggest softbox there is. And then if you make pictures of people, it becomes so beautiful. I hope you like this style. I was also really happy with my older office, but there you could not see my hands, there I had a microphone. So
[2:15:13] I think through the months, through the years, I will make it better. But that's it about lighting. So we already covered the camera, audio and lighting. Then we also have environment. I don't have anything about that over here. But yeah, if the environment is smaller, you could capture
[2:15:32] yourself with a wide view, a wide angle fish eye, they also call it. Then put it over here and then this and this. If you have a bigger space, you can zoom in a bit more. Then you can put it on
[2:15:45] one or on two or on five. And that's what I've done. I use an 85 millimeter lens. It's totally at the other side of the room. I need to walk to it in order to make sure it works and be creative.
[2:16:01] What I would say about environment is make sure that you're able to make it completely dark, so we can do all the lighting with artificial lights, with lights, not with the light from outside,
[2:16:14] the sun or the clouds, because if that's the case, you're always, you don't have complete control. So if the sun shines and then it can become too bright, and then if it starts raining, it becomes
[2:16:26] too dark. If it's night, it's darker. So make sure you are able to be in charge of the light. But now I use the 35 millimeters. I use another camera with another lens, it's the 35 millimeters,
[2:16:40] it can zoom in until 70. So let me continue with this and now you see I'm a little bit, the camera is a little bit closer but I zoomed out a little bit more, so now the whole frame is different
[2:16:54] than with this. So I'm still figuring out what do I like the most. I think, I don't know. But as long as I'm in the picture, the quality of what I show, what I tell, what you hear, what you see
[2:17:07] is great. And what I teach you is straight to the point, then I think I'm good to go, no matter if I use that zoomed in lens or this lens. So I continue, what I want to talk about right now is screen recording. Because if you want to show people how to do things on a computer, you need to
[2:17:23] record your computer. So I'll close all this stuff for now, and then we go to screen recording. Yeah there's a free version of OBS studio. I have to be honest, if I see software and it costs
[2:17:37] money and I really like it, I tend to stick with it. Even though if there are free alternatives, well, there is a free alternative. It's both for Windows, Mac and Linux. And what I like and really like about my current software scheme, screen flow is that I can make my pointer bigger. So
[2:17:55] people can see where I am in the video. Otherwise it can be such a small thing and people are like, where is he going? I don't know if that's possible with OBS studio. If it is, it's great, but I stick with the one I use. The thing I like about ScreenFlow for a Mac is that you only pay once.
[2:18:13] I pay $169. If there's a new version, I need to pay for it. But oftentimes that is not necessary because it does exactly what I want it to do. Um, but I like it. That is one price for one time, not every year. If I would go to Camtasia for the PC or Ben, let's go to Benny cam and you click on,
[2:18:34] buy, you pay per year. And it's not a lot, it's $49 or it's $33. But what I don't like is the idea of paying every time again for software I use. I prefer to pay at once. So if you're on a Mac,
[2:18:48] I would definitely go with ScreenFlow. That's also what I will use in my tutorial, my course. If you're on a computer, you can go with Bandicam or I would go with OBS studio, and then you can
[2:19:00] go to YouTube and search for how to record your computer screen using OBS studio. And there again,
[2:19:14] link your audio with OBS studio. You can link your computer screen with OBS studio. You can even link your computer with OBS studio and with screen flow so that you can push on a button and then you see yourself in the full view. The next thing is you push another button and then you see your
[2:19:29] computer screen with you in the corner. And the third option is to only show your computer screen without you being there. So there's a lot of, there are a lot of cool options. I want you to see a lot of people want to learn this. So I could also make a website and a YouTube channel and
[2:19:43] social media about how to become a video maker. That's actually what I'm doing in this tutorial, but normally this YouTube channel is focused on focus on helping people to make a website, but you see how many people are searching, are watching this. So if you want to learn people how to make
[2:20:00] videos, you get a lot of, you can get a lot of views if the quality is great. So this guy has probably made a beautiful video. If I would make this, I should make it better. That's my role. So, um, um, yeah, it's up to you. You can go with the free version, both for Mac or PC. For the Mac,
[2:20:18] I would go with ScreenFlow. For the PC, I would go with Bandicam. I've used it. It was really simple to use. So that's it about equipment. If you want to use a free version of OBS studio, that means that if you install it, you're going to use it that today you can start to make your video. If
[2:20:36] can use your phone, you can use one of the things I've shown you over here, and if you go with a microphone that goes directly into your computer, then I'll show you later on how you can link that
[2:20:48] with your software. So now I'm going to show you how I will make a video and I want to show you the process. So it's not like, okay, now I'm going to record something, now I'm going to do research,
[2:21:00] I'm going to watch a few tutorials and I'm going to take you with me so you can see exactly how I come up with an idea, how I prepare, how I record, how I edit, how I export, how I put it on YouTube and all the other things. I'm going to show you every single thing. If you can appreciate it,
[2:21:15] then please like this video, feel free to subscribe for more upcoming videos. And hey, why not? If you want to share this with someone else that can maybe benefit from this, feel free to do that. Thank you. And let's continue. It is time to start preparing for my first video and also this
[2:21:38] part is something that I did not prepare. Why? Because I want to take you along with me. If I would come up with a perfect idea, with a perfect outline or script of the video I want to create,
[2:21:50] how am I helping you? So I've not prepared, I only saw something on YouTube and I'm like, hey, that's something I would like to create and that's how it goes. As I said yesterday, I created this e-book myself, so from now I can write my own book and publish that and show that
[2:22:09] on an e-reader so I can read it myself or let other people read it. That's how my life goes. I'm in the car, I get an ID. So when you read Think and Grow Rich, listen to Jim Rohn, to Brian Tracy,
[2:22:23] you do your best to develop yourself as a person, sometimes IDs pop up. So sometimes I search for an ID, like hey what is hot topic right now in the niche I'm active in, but most of the times it's
[2:22:36] just when I'm just doing life that I get an idea. So I was on the internet and I saw a video like how to turn yourself into an animation. So that's what I want to search for and see if people are
[2:22:49] really interested in that. I thought that video had already 200,000 views in a few weeks. And then again, yeah, other people are already doing that. Well, I'll do my best to do it better. And then the goal of course is to sell or promote tools that have an affiliate link. And sometimes
[2:23:06] if they don't have an affiliate link, that's also fine because then you can get more views, more traction, and your YouTube channel can grow. If people watch videos from you that don't have affiliate links in it, but people watch it for a long time, that can also help you,
[2:23:21] your other videos to be shown more. So in the end, I promote everything that is helping other people. Keep in mind, that's what we started this whole course with, it's about helping people. How can I help people as good as possible with the videos I'm about to create? So this video
[2:23:37] I'm recording right now, I want to use an animation for that. So I'm going to find out how to do that. So I will search on YouTube for how to turn your video into an animation with AI.
[2:23:53] Okay. Something like that. It's already a year ago. This is something that looks really cool. A lot of views. It was not a short, but there was an other video that I saw. I got a lot of views.
[2:24:11] It's less than a month old. Wow. This looks cool. This looks really cool. So I need to start out. It was this one. Oh, it was this one. Look at this. Oh, wow. Emmanuel crown. Super cool.
[2:24:29] So that's why I'm interested in. So what I'll do, I will click on it. And what I will do, I will open my notes, make them a bit bigger. And I say video to AI animation tutorial. And
[2:24:58] I'm gonna watch the video and make notes of what I see, So here, consistent character. So you can
[2:25:22] even make a whole video movie out of this since if the animation will stay the same. So that's really interesting. By the way, I really like a studio cameras close by a little bit of fish. I know.
[2:25:37] Yeah, you see a lot of the backgrounds, really nice. I don't want to make all scripts and all storylines. What I want to do is make this shot into an animation like this. That's it.
[2:25:53] So, but I keep the, I take time for this because it's really important. I want to make a really good video, not go through it too quickly. So I'll just watch the video, maybe I will fast forward a bit, make some notes and then I will be, I'm not sure if there's an affiliate program. So
[2:26:26] I'll say affiliate program, creative partners. I could apply pronouns, Twitter, Instagram, YouTube,
[2:26:38] portfolio. I do want to become a member of CCP. Then I can say, I want to make tutorials. So, but first let's make a video. So what I will do, I will search for more tutorials on runway. So
[2:26:56] I get the hang of it and then I'm going to try it. Tutorial. I see people are watching it. Also
[2:27:10] six months old, five months old, four months old. Oh, look at this one. In this video, I'm going to show you how to create and animate an expressive character. So I'm going to watch multiple videos
[2:27:26] and then I'm going to make one video. That's really good. What I thought about the first video, I thought it was really good video, the content, but maybe, maybe I shouldn't say that, maybe it
[2:27:38] could be a bit less boring. I don't know, but okay, what I can do, I can do it the way I will do it. I like to make it shorter, go straight to the point so people don't have to wait. So I will
[2:27:54] see if I can differentiate myself from others by making it shorter and more straight to the point, and I'm going to watch this video and that's how I roll. I'm going to take my time for this, as I said before, that's why I'm not going to show you everything, but I will keep my
[2:28:08] computer running so you can see what I'm writing down over here and then there comes a time that I want to try the tool. So I'm going to watch this video and then I'll be back with you. So what's
[2:28:21] happening right now, it says you can use runway. So there's runway, but you can also use cling. So I will note all those other ones. So I can also make the torrents about those other tools.
[2:28:44] So I converted an image to a video using my own audio. If you're seeing this video has the potential to completely change your life. My name is Ferdy and in this tutorial,
[2:28:58] I will show you everything I know on how to get started and become successful with affiliate marketing. In my opinion, the best way to make money on the internet. Let me show you what we will cover in this tutorial. Okay. Interesting. Weird backgrounds. Okay.
[2:29:18] Nice try. And that's how I keep rolling. I keep trying things and if I'm like, yeah, this is what is happening. So I continue. Okay. What I will do,
[2:29:43] I will go to iStock photo and I search for a beautiful, beautiful girl or woman.
[2:29:58] Let's see if we can use this one. Okay. Now I go back to Hey Jen, to the homepage, photo to
[2:30:11] video. I drag this on over here. Okay. I can also create a script so I can say surprise me. Okay. I
[2:30:24] get the script. I've chosen the voice. I click on generate video. So let's take a look at this one.
[2:30:50] Wow, I'm impressed. I really like this. So what I want to try now, to see if we can also make it horizontal. So what I can also do, I can create a tutorial how to turn any image into a talking
[2:31:06] avatar. But again, then I'm not going the extra mile. That's like, okay, I'm going for the easy stuff. So I'll dive deeper, continue to see what is possible. I still want to create something
[2:31:20] like this. So I'll continue to do research. Look at this. There's so many cool things you
[2:31:36] can do with runway and I can make tutorials about them. This one is two months old, already 108,000 views. Two months ago, 14 of the 43,000 views. Interesting. I think this one is really what I
[2:32:10] was looking for? Yeah, there was the video I was looking for. So now he's talking about cling AI.
[2:32:23] So let's search for cling AI. Okay. Awesome. The question is, is there a Kling AI affiliate
[2:32:40] program? Let's skip the sponsored stuff. So there is an affiliate program. That's great. Let me see what does it cost Kling AI. I will make my first tutorial about Cling AI,
[2:32:55] but as I've already seen, there are so many tools I can promote. I really like it. So it's now a day later, I've watched, I think three hours of tutorials, not three hours of
[2:33:10] tutorials, but for three hours I have been going through the internet, watching videos, seeing what I like. I made a lot of notes. So if I take a look over here, yesterday I made a lot of notes and this is how it is. A little bit chaos, but for me that works. So right now,
[2:33:27] this is what I have for my tutorial. How to turn yourself into a 3d animated character. I want to give an introduction, this is what we're going to do and then I want to go straight to the point. Create an avatar using chat GPT, you need to have a reference picture of yourself.
[2:33:42] I'll show people how to do that. Then we need to go to ferdykorper.com forward slash cling AI and that will be an affiliate link in the future. Then at cling AI, we're going to turn an image that we create using chat GPT into a video. Then I'm going to give it a prompt like how should it
[2:33:59] behave. Then we're going to add lip sync, so I'm going to upload a file, an audio file of my introduction, bring it to Cling AI so that the animation character will do exactly what I say,
[2:34:12] use hands, gestures and stuff. And then people will have a final result and to give the extra, to go the extra mile, I want to give something extra like, hey, we've done this, but you can also create something like this or this or this. What I should do in the tutorial, I should refer to
[2:34:28] another video because if people watch two videos of you on YouTube, then you will be in their algorithm. That's what you want. So give a lot of value over deliver and then refer to other videos
[2:34:42] so when people click on that, then they watch the second video of you and then YouTube will show your videos more and more. So this is how I do it. Of course, I could make a perfect structure,
[2:34:55] but this is just how I do it and it's working for me. So feel free to do your own thing. What I should do, I should practice this first, so I should create another account, play around with
[2:35:09] everything, see if everything works and if I get stuck, I need to fix that, watch a few more videos until I practice it until the point that it's completely working. Because what I can do now,
[2:35:22] I can do the tutorial without practicing, right now it's all theory but then when you get stuck, you will come across less confident. So first I'm going to make myself confident by practicing
[2:35:35] what I'm about to show in the tutorial and when everything is working, I adjust my notes and then I will be able to do it. I have a second computer over here. What I really like, they're both Macs, so I can go with my mouse over here to my other screen. Really simple using Bluetooth or Wi-Fi,
[2:35:55] I don't know. So here I practice and then here I record it. And then the question is, do you want to show your face during the whole tutorial? That is a bit harder. What I normally do,
[2:36:09] I record my intro, hey in this video we're going to turn yourself into a 3d animated character. blah. Let's get started. And then I stop the recording of my video, then I'm only going to
[2:36:21] record my computer screen and then I use my second monitor over here because I'm not recording myself in the camera anymore because I don't like this when it's in front of me while I'm recording, but then I just take a look at my notes and then I'm like, okay, we're going to do this and
[2:36:36] this and this. We're going to do this and this and this. And then at the end of the tutorial, please like it. Feel free to subscribe for more upcoming AI related tutorials. And if you have
[2:36:48] any questions, leave a comment and you the best in what you're doing. Bye bye. Something like that. In my tutorial, I will do both. I will both record myself, the whole tutorial and my
[2:37:00] computer screen and of course my audio. So I will prepare, do everything, what I want to do in the tutorial and then if everything is working, I will come back to you, show you my setup and show you
[2:37:12] how I will record my tutorial. I'm excited. Today, I'm going to create a tutorial. Yes, I hope you will also record your tutorial very soon. I hope you're excited. If you like this
[2:37:24] video, feel free to like it and subscribe for more upcoming tutorials. Okay, I'm going to prepare. Before I get started, I want to really quickly show you one more thing. There is an affiliate program with Cling AI, but right now I don't have it. So I search for clingai.com, I copy this link
[2:37:40] and now I go to my website ferdykoper.com, I want to log in. I want to make a redirection to an affiliate link. So I go to plugins, add new, I search for redirection and then I click over here,
[2:38:00] redirection more than 2 million installations from John Godley, I activate it and now I want to set up my redirection setup or finish it, start to set up, continue, finish it up, continue, ready to
[2:38:20] begin. Now, the source URL, I want people to go to ferdykoper.com forward slash, so forward slash and then Cling AI. And when people do that, they will be redirected to ClingAI.com, but later I can
[2:38:35] to become an affiliate, I will do that after the tutorial. So I can, I'll do it after making the tutorial. So I add the redirection. So when people go to ferdykoper.com, forward slash, clingai,
[2:38:53] they will go over here to clingai. And then now go over here to cling AI. And then now it is time to start recording. What I will do, I will turn off all the lights and then I will show you step by step how my setup works, show you exactly what I will do, what I will turn on first
[2:39:08] etc. And then I will start the recording of the tutorial. I'm excited and I hope you are too. Hello people, it's very dark over here. I'm going to show you how I start my recording. It's
[2:39:21] tutorial time. Within 20 or 30 minutes, I hope to finish my recording of my first tutorial but first let me show you what I do. Right now there are no lights at all. So I have my key light over here, now you can see me. Then I have my second light, I'll turn it on. I have a few back lights,
[2:39:39] let me turn it on. Then I have my Philips U lights, they give the background a little bit of color and the back of my computer screen, so I turn those on. So all my lights are on,
[2:39:52] you hear that the audio is not good because I'm using the audio of the camera. I want to use this microphone over here. I practiced over here. Also over here. What I want to do now, I want
[2:40:06] to turn on my computer screen and modules here. I use ScreenFlow for that. I just click over here, hit record and if I don't have open ScreenFlow, I just search for screen flow, then there pops up something like this and I can hit record and then it will, as you see, it will record my audio
[2:40:22] from here and my built-in display. So I click on record and when I do that, what you will hear is that the audio will drastically improve. Why? Now I'm not using the audio of the camera anymore.
[2:40:36] I'm using the audio of this microphone and I'm recording my computer screen right now. So now I want to record the front, right? Right now this is just for reference. If I turn everything off,
[2:40:49] this one will still be running. So I will grab this SD card, I make sure I have enough space and I go to my camera over there, the Canon R6 and I make sure I use an iPad as a reference monitor.
[2:41:08] It's not necessary. I can also just hit record, but I prefer to do it this way. It will link now with the camera so I can see what is happening. So in a minute, I will have good audio, I will
[2:41:24] have my screen recorded and I will have good video from the front. So if I hit record, now you see me from the front. So I put it out of the frame, I put my drinks in the frame, I put my phone
[2:41:44] out of the frame, I close this one. Everything is rolling. This one is also still rolling. How are you doing? Nice to see you over there. And I will keep this one rolling because sometimes I turn off the camera and I still want you to see what is happening. So it's tutorial time. I'm really
[2:42:00] excited, but I can understand that when you do this for the first time, it's super hard. I'm doing this already, not only for 10 years, but so much longer. I've been making videos since I can remember. So I made notes and I'm just going to follow those notes, intro, create an avatar and
[2:42:19] chat GPT, okay. So I'm ready to get started with the first recording and then it's really going to happen. So this is how I will do it. I'll just record and if something goes wrong,
[2:42:31] I record it again. I keep everything rolling and then afterwards I will edit it and I will show you how to edit your videos. So the introduction is how to turn yourself into a 3D animation
[2:42:43] like this. So let me show you how I would do the introduction. In this tutorial, I will show you how you can turn yourself into a 3D animation like this. I'm going to do it again. In this video,
[2:42:56] I will show you how you can turn yourself into a 3D character like this. Let me show you how. Another one. In this tutorial, I will show you how, this is what happens when I take a sip. In
[2:43:12] this tutorial, I will show you step by step how you can turn yourself into a 3D character like this, and how you can do that for free. Let me show you how. What I need to do, I need to clap because then I can sync. Now there's a peak in my audio, I can sync that peak with my camera audio,
[2:43:30] my computer audio which is from this microphone, so that makes it easier for me. So I want to get straight to the point. I don't want to blah, blah, blah, soon subscribe, like, no straight
[2:43:42] to the point. I need to cough. Yeah. There's also a peak in the audio. So I'm getting right into it.
[2:43:59] The first thing we need to do, we need to turn one of our images into a character. Let's do it again. The first thing we need to do, we need to turn our, the first thing we need to do, we need to turn one of our images into a 3d character. We can use chat GPT to do that. So I go to chat GPT.com,
[2:44:17] hit enter, you can sign up for free. What I will do now, this is included in the free version. I have two images over here. One is from my studio, this one, and the other one is from my phone, which I took five minutes ago. So maybe you don't have a studio yet, but you just want to create a
[2:44:33] cool effect. Well, let me show you how you can use this in order to put yourself into a studio. But first I want to drag this one over here and I want to give this a prompt. So I will say, okay,
[2:44:45] now I'll go to my prompt because I don't know the prompt anymore. Turn me into a 3d Pixar character,
[2:44:59] blur the background, show the YouTube button at the right and a plant at the left.
[2:45:11] Wow! That looks very cool. So what I can do, I can download this and I can also download this one. What we're going to do now, we're going to turn this image into an animation. So in order to do
[2:45:23] that, we go to ferdykoper.com forward slash Cling AI, hit enter and with this tool, you can do so many cool things with AI and video. It is crazy and it's developing like crazy. Look at this.
[2:45:39] So in order to create what we're going to create, I click on create. So what happened is that since I already used this tool using a different account on my other computer, because of the IP address
[2:45:52] of the Wi-Fi probably, I had to wait 40 minutes instead of one minute. So I had to wait 40 minutes and that's discouraging, but I waited for 40 minutes. I already exported a few files. So those things can happen. There are setbacks and then the question is, do you continue or do you give
[2:46:08] up? I continue and I suggest you do the same. So I will continue with the tutorial as if there was no 40 minute delay. So let me get back into this. That always helps. And there it is. I click on it.
[2:46:47] So that's the way the cookie crumbles. If you want to learn more about Kling AI, how to work with that, then follow this tutorial and then you can learn more and I wish you the best in your AI journey. My name is Ferdy and I'll see you next time. Bye-bye.
[2:47:02] So I finished my recording. So what I do, I start to record at once again. So I'm recording again my screen. Now I want to show you what I will do when I upload a new or I export a new video. So I
[2:47:14] finished the tutorial, what will I do? I say CMD S, so I save it. Then I want to go to my finder, to tutorials. If you don't have the folder, you can create that one, new folder and I call this
[2:47:28] one 701. I give every tutorial a name and I say video to 3d character. Then I'm going to
[2:47:40] create seven folders. The first one is a video. I put all my video files in it from my computer screen and from my camera. The second one is audio, all the audio files I export. The third
[2:47:52] one is images. Sometimes I place images in my tutorials. The fourth one is images. Sometimes maybe a reference video. Five project files, that's for my video editor. The sixth one is
[2:48:07] all my screen flow files and the seventh one is the finals, when I export the final tutorial, finals. Okay. So I save this to tutorials, screen flow, and I say 01, video to character. Okay. Now
[2:48:35] I want to grab my video fell. So let me get it. There it is. Now export this. So come on. E four K four K I go bring it to the tutorials for our seven Oh one video open exports. Now I
[2:48:57] go to the finder to video commands. And then I go to the video fell, the camera fell this one.
[2:49:17] And then I want to give it the same name as this one, enter command C and here I paste it and I say R6 because that's the name of my camera. And I go back to the folder for videos
[2:49:32] and I drag it over here. Normally I like to do this at the end of the day because then it can take some while to export everything and to copy everything. And sometimes I'm like,
[2:49:45] I want to do it immediately to keep the structure, keep everything organized. That's the main thing for me, keep things organized. I never want to lose files or like that I, yeah, to lose files or like that I lost files. That's really not cool. If you put a lot of effort in
[2:50:00] something and you lose it, not cool. So that's why I keep everything organized and this works like charm. Shout out to Rob Adams, credit where credit is due, a videographer for weddings,
[2:50:13] he told me this 10 years ago, 11 years ago, and I had to keep this with a lot of structure. So my video file is copied. So I will do this with everything and then I will be back with you.
[2:50:35] So ladies and gentlemen, it is time to edit our video. If I go to tutorials 701, I have my video files over here, both the camera videos as the screen recordings. Okay. So what I will do,
[2:50:53] I use Adobe Premiere. In order to get it, go to ferdy.com forward slash Adobe, hit enter. Not everything I have through ferdy.com is in the affiliate link, but I like to keep track of how many people click on the links I have in my tutorials. So you can start a free trial. If
[2:51:10] you're going to make sales, it's worth the money. It is $59.99 per month. But if you're a student or you have a business, you get some discount. Let's see if you're a student. If you're a student,
[2:51:27] you can do this for $20 per month and man, you get everything. Look at this, Photoshop, Adobe Illustrator, Premiere, After Effects. You get everything you need in order to make amazing
[2:51:39] videos. So you can go for the seven day free trial. So if you want to, you can create five videos in the first week and seven days without having to pay anything. Then you click on continue
[2:51:51] I have already done this. So when you've done that, search for Premiere. That's what I will use and I'll start from scratch so you can see exactly what I will do. So I click on new project,
[2:52:10] I go to the folder, choose location and then I go to tutorials, 701 project files. And there I should call this one video to 3d character create. I, by the way, use a Mac. You can also use a PC.
[2:52:32] Okay. I want to skip this. So I click over here on skip. Okay. Now I go to my finder to tutorials. I want to go to 701 and I want to drag audio images. Those first three folders, I want to drag them in,
[2:52:50] click on the name. So I have video, audio, images. Then I create a new folder for after effects,
[2:53:04] five sequences and that's it. Now I go to video, I want to make sure that I grab the double click, double click, the files from my computer screen, because that's the frame rate I want to have,
[2:53:20] 60 frames and I drag it over here and then I will create a sequence. Awesome. Then I have the sequence over here, I click on name, let me see. That's fine. So then I go to video again,
[2:53:43] to the second one, the third one, the fourth one, all with small capitals, no capitals. Those are all my screen files. Okay. Then I want to drag them all a bit to the right,
[2:54:01] select the last four, drag them to the right, select the last three, drag them to the right, the last two, the latest one. Because now I want to add the R6 files, the video files. First one,
[2:54:15] holding CTRL, or you know what, I can do it one by one. So I drag it on top over here. So we have tracks, first track, second track. Then the second one, the R6. The third one, R6, the fourth
[2:54:37] one and the fifth one. What I like to do, I like to keep things organized that's why I create this. All the R6 files, all the files with my face on it, I want to select them, right mouse click,
[2:54:53] label and you can give them a certain label. I created my own label, so you can go to Premiere, think settings, labels, and then you can rename them and give them another color. So I set orange.
[2:55:07] Okay. I want to go to Adobe edition. That's also in the Adobe collection, Adobe edition 2025 and all the files I created with my desktop, my screen, those I want to drag them over
[2:55:27] here. This is a bit tricky because depending on the microphone, depending on the settings, you can adjust the sounds. So right now it sounds like this.
[2:55:51] So I want to make this better. So what I've done, I've created a template. I always say last applied rec. When I hear this now, it's so much more vibrant, the audio is so much better in
[2:56:09] my opinion. So what I've done, the first effect I added was dynamic processing. You can take a look at these numbers, try to rebuild them. I've done so because I had those settings on my laptop. So
[2:56:21] I recreate them over here. So that's what you also can do. So here's a point, here's a point and then I have the second parametric equalizer. You can just use the exact numbers, but you can also play
[2:56:35] around with it until you think like, hey I like this. The best thing you can do is use headphones and see how bright, how nice the audio sounds. Then there's a third one with some other settings
[2:56:49] and the fourth one, the hard limiter, that means if the sound is a bit low, it will make it harder. But if it's too loud, it will make it less loud. So the audio waves, I will show you what happens. They will be more on the same level. So if I talk soft or I talk louder, everything will maintain
[2:57:06] the same audio. Otherwise, sometimes you're like, I can't hear you and then the other moment you're like, whoa, this is too loud. So when you've done that, you can apply it. Look at this, what happens to the waves? They all become bigger and more even like that. Then I say command shift E, I click on
[2:57:27] browse, I go to tutorials, 701 audio, save it and then over here, I rename it by getting rid of the underscore 01. Okay. Second one, last upright, plight rack. Third one, last upright, plight rack.
[2:57:48] Fourth one, this is how I roll, this is how I do it. And then I go to the second one, shift command E, arrow right, backspace, backspace, backspace, three, command export, four, export, five,
[2:58:10] export. Then I go to Premiere, to the Finder, to Audio, there they are. I drag them all over here and then I want to replace them with these ones, the upper ones. They're exactly the same length,
[2:58:27] like that. If I hit arrow on the keyboard, arrow down twice or three times, I end up at the second one and I drag that one over here. Make sure it snaps. If you don't see that, there's an icon over here. You need to turn it on. Arrow down, the third one, the fourth one and the fifth one.
[2:58:55] Okay. Then I click on the name or I click on the, let's see, number one should be on top and then I want to click on the label like that. I select all those and I direct them to
[2:59:11] the audio. Okay. Now I want to sync the computer screen audio from the microphone with my video, because right now it's not the case. So you see they're not synced. So I do this manually. So
[2:59:30] oftentimes I clap so I can sync it because then there's a high note somewhere. If I cannot find it, I just take a look at a peak and I make sure that the blue audio lines up with the green audio.
[2:59:45] There's a peak over here. So what I can do, I can drag this to the right, click over here, click on the plus, plus, plus, drag it to the right, plus, plus, plus, drag it to the right and
[2:59:57] then a command or control, right, right. And now it's exactly matching. Then I get rid of the blue audio, if that's linked. So if this is selected and I select this one, I also select this one. So
[3:00:13] make sure this is turned off, linked selection, so I can get rid of this one. So now we have the video and audio in sync and the audio in sync. So there's the video camera, the computer screen
[3:00:26] and the audio is all in sync. So we're going to do it a second time. I click on the orange one, I hold shift, I click on the blue one and then I'm going to sync it. There is this one, I bring
[3:00:40] it over here, zoom in, command left, left, left, left, left, left, left. Yes. So if I clap, yeah, it's perfectly in sync. Get rid of the lowest one. Then I go to the third one, plus plus plus plus,
[3:00:57] hold, grab the orange one, hold shift, grab the blue one. You can also make this bigger so you can see better if it's aligning and you can also play around a play to hear if it's aligning. So there
[3:01:14] it is. And then I can say CMD left, CMD right two times. Awesome. So again, everywhere we have
[3:01:26] the orange one is the camera, the blue one is the computer screen and the green one is the audio. So what I will do now, arrow up, make sure that all the tracks are turned on here are all blue arrow
[3:01:42] down, shift commands. Okay. And everything in front of it, backspace selected arrow down, shift so everything will be cut from this point on. Arrow down, arrow down, shift command K,
[3:02:02] get rid of this. Then I click on the empty area, there's a white area and if I hit backspace, it snaps. Arrow down, shift command command K. A bit of this one, arrow down twice,
[3:02:16] shift, command K, select it, arrow down, shift, command K, arrow down twice, shift, command K. So I know it's a lot, but you will get better at it, as you see how fast I can do this.
[3:02:41] So what I see over here, there is 32 minutes of video and I need to bring this down to a shorter tutorial. I hope I can make it less than eight minutes. So arrow up. I know I was
[3:02:58] also preparing for this tutorial. So let me see when the tutorial starts. Okay. I already started
[3:03:11] here. So let's see what I do. Always a command S that's over here. I have the timeline. I already I can scroll through it with the mouse clicking on and then dragging. So I want to search for
[3:03:24] the beginning. And when I play, I hit space bar. When I want to play it fast forward, I press L if I I want it to be even faster, a lot of times L, but I always do L one time. So play, spacebar,
[3:03:40] L. And while I'm going through the timeline, I zoom in and I zoom out so that my head, this area I call this the head, will always stay a bit in the center. You don't have to do that,
[3:03:55] that's something I already have done for 15 years, so I don't know. It's just a tick. Zoom out. Okay,
[3:04:11] I can skip this. So if I'm over here, everything before this can be gone, how can I do that? Using
[3:04:27] Q, that's it. If not everything snaps, make sure that all those tracks over here are blue, V1, V2. So this, uh, what I will do just before the audio starts over here, I can drag this down,
[3:04:41] zoom in just before it. So at once the audio starts like this, I'm going to do it again. So Q,
[3:05:03] so everything, because the first take was not good. Okay. When it is done, I do shift five
[3:05:16] times to the right. One, two, three, four, five, command shift K. And then I go to the next part.
[3:05:30] I think that one is better. So just before, Q and I don't need this one anymore. So I select it, option delete. So it snaps at once to the right. Okay. Shift 1, 2, 3, 4,
[3:05:50] 5. When I am happy with a recording, then I do a clap and then I can see over here, oh yeah, that's
[3:06:18] the beginning shift left. 1, 2, 3, 4, 5, command shift K option backspace. So now you don't see my screen. If I would say shift command E, well I select the orange one,
[3:06:35] then you will see my screen because it's beneath, it's in the track beneath it. What I want to do, I want people to see me in a circle over here at the right when people see my screen. So what
[3:06:47] I will do, I will select all the orange areas, command C, then I press the home key or arrow up, click on the plus. Now I lock this one and this one and I paste it. So I have twice the same
[3:07:03] row. Then I want to hide the upper one, lock it. So over here, I want to make this a circle around me and I put it in the corner so behind me, you can see the screen. So before there was a really
[3:07:17] cool effect, it was called circle, but they got rid of it, but I still got it. So what I will do, I will help you to get it. So we go to ferdy.com forward slash circle, hit enter, they will
[3:07:31] download something. You can keep it, it's safe. Go to the finder, open it. So there it is. Now I can open this by double clicking and then over here, there's the file. I go to effect controls,
[3:07:50] I want to copy the circle effect, then I go over here to video to 3d character or the name of your sequence, click over here and paste it. Oh, now I can adjust it. So in that way you can get it.
[3:08:04] I want to make it smaller, make sure I am in the center. You can scroll a bit to see if you stay in the center. Okay. I'm happy with this. So now I need to go to motion, scale, bring it back to 50.
[3:08:25] So it's a lot smaller. Then I go to the right by the position. Let me drag this down a bit. I want to drag this down. Maybe it's quite big. I can also go to the circle, make the radius smaller
[3:08:51] and then play around with it like that. I like to keep the aspect ratio the same. So over here, it's over here. So maybe a bit higher. Okay. And now I can hit the tilde key, it's next to the Z
[3:09:11] and then I see this panel as a whole. Okay. Let's bring it back. Also bring it up a bit. So what I want to do, the settings I have over here, here at the effect controls, the motion, command C, I want
[3:09:25] to paste them everywhere. So I want to paste them over here and I want to make a selection of those four and paste it. Okay. Then I want to go back to the second one. I want to copy this circle, paste
[3:09:41] it over here. So it becomes a circle and paste it over here. So everywhere I have a circle. So now when I get rid of this, what I can do, if I want to show myself, I have this one active. If I don't
[3:09:57] want to show myself, I do a cut and then from that point on, command shift P, new. So I paste it and I say, make the aspect ratio 16 by 9, 1920. And if I want to bring myself back full frame, C,
[3:10:17] click CMD shift E, pi, and I like that. So let's continue. So I will go over here, shift 1, 2, 3,
[3:10:34] 4, 5, command shift K. Get rid of this. So I go to chat GPT, hold C, want E. Okay. What I will do,
[3:11:03] both the orange tracks, I'll select them, do option up, like that. And I want to use after effects. After effects are really cool effects that you can use to create special effects. So
[3:11:16] when I want to use special effects, I bring the track up. So I know at the end of the tutorial, when I edit everything, okay, those areas should be used with after effects because I will do the after effects later. Why? Because it's called after effects and not during effects. That's
[3:11:33] why. I need to turn off my camera because it's getting too hot. It's also very hot in here. Hey, I'm on the roll. So I will continue, but without the face camera. Okay. What I see is that I did
[3:11:45] not rename the video files. So they're still from the big affiliate marketing course. I'm making a course where I show how to create a video. So there's a lot of overlap with videos. It feels like inception. So that's why I did not rename this by accident. So because I dragged this video
[3:12:00] into a sequence, into a timeline, that's also the name over here. So I want to change the name to video to 3d animation or character. Double click. So I want to continue to do that. So I go to chat
[3:12:17] GP. When I go to chat GPT, let me make the audio wave less high. Then I do a right mouse click over here, delete tracks. I want to delete all the tracks of audio and video that I don't use, oh,
[3:12:33] except for those two, I'll also drag them up, option up, or I select them all and I drag them up like that. Okay. Now I want to zoom in. So I go to chat, I say, see based or a cut. Yeah. So
[3:12:58] I go to check the GPT.com. I do a C over here and then I select this one option up. So now I know at the end of the tutorial after the editing, Hey, there is an area that I need to adjust with after
[3:13:11] effects. And if your computer is not handling the two tracks on top of each other, the computer screen 4k and a 4k video format, then I can turn the eye on, we turn it off. And then that way my
[3:13:27] computer has to load less and can work faster. So I'll continue to show you how I edit my video. Let's bring this down a bit like that. So I can make this a bit bigger. Okay. There I go. So I
[3:14:10] want to zoom in over here and I want to give this a prompt and I want to use After Effects for that. Maybe it's not necessary, but After Effects gives a style that's a bit better than Premiere and I want to make it better. A lot of times people ask me, how do you do those cool
[3:14:25] effects? I'm about to show you. I'm going to give away everything for free. And until this point, it has not disappointed me in what I get back from it. So let's go all in. So I will say, Oh, what I
[3:14:41] do? There's, there's, I see there's nothing over here. So I say, come on, shift K until it begins. And then I Q and I continue. Okay. Now I'll go to my prompt because I don't know the prompt anymore.
[3:14:56] That's not part of the tutorial. That's part of the bigger tutorial where I explain what is going on. So this should not be in the tutorial of this tutorial I'm going to create for my AI channel, but it's for the tutorial of my other channel. It's maybe a bit confusing. Turn me in. So Q
[3:15:15] then over here, I lift up shift arrow up because I want to zoom in for after-effects. If it takes too long, come on, shift K L L Q character L one shift K until I start typing star style character.
[3:15:40] Q turn me into a 3d. All arrogant. Yeah. This all era can be gone. Well, you added to the same day
[3:15:53] the same day that you record, sometimes you can remember it. So that that's going to be handy if you edit it soon after you record it. Turn me into a 3D Pixar style character. One shift K,
[3:16:05] LL, Q, blur the background. Show the YouTube button at the right and a blank at the left. Show the back of my computer. round. I started all over again. I think so.
[3:16:20] That's what I remember. This is all getting So I can skip this whole four minutes stuff.
[3:16:48] Okay. Now I'm missing a lot. So I need to finish this. The background, show the YouTube button at
[3:17:06] the right and a plant at the left, show the back of my computer monitor. Make me super attractive. Okay. Make the background, make it 16. I'm almost there. In my editing, I wanted to look like there
[3:17:21] was no background. Blurry. Make it 16. Perfect. So after I say enter of a video, so I say, see,
[3:17:37] click, bring this down. So this whole area will be created in After Effects. And then I zoom in and that's a cool effect. Let's see what will be cooked over here at the GPT. This is what I will skip. Fast forward. Okay. I like this one. So that's the first one I also can do
[3:17:52] prompt. Web account. Okay. So... Web account. Okay. So... I will zoom in again. What I'll
[3:18:09] do over here, I'll change this to... Put me into a YouTube studio about how to make AI tutorials. So I was able to finish the editing of this video. I think it took me one and a half hour,
[3:18:24] maybe an hour. I don't know. I'm doing so many things, but I've done everything in one day, the preparation, the recording, the editing. So now what I will do, I will show you what you can do with After Effects. So first I do a right mouse click, delete tracks. So I keep it organized.
[3:18:42] Okay. So what I will do, I will close. Let me see. I bring this up one track. I close 4, 3, 1 and A.
[3:18:55] Then I do an arrow down. Sorry, I also get rid of the blue thing. So only V2 is blue. Arrow down, then I go to the first After Effects file. So what I do, right mouse click, replace with an
[3:19:08] After Effects composition. It needs to load After Effects and when you do this for the first time, it will ask you to save the file. And what I always do, I go to tutorials, to the project files and give it the same name, video to character. Save it. Okay, there I go. Now I will drag this,
[3:19:30] all the way to the right, not all the way. Then I bring this to the left. What I will do now, arrow down twice, one, two, and zoom out a bit, select this whole area, right mouse click, replace
[3:19:46] with After Effects composition. Then the next one, replace with an After Effects composition. The next one, and if they are next to each other, I always make them one After Effects file,
[3:20:00] right mouse click, make a composition, right mouse click, make a composition, right mouse click, make I select it because there are two in a row. Okay. Arrow down, right mouse click. Thanks to
[3:20:23] video copilot, I learned how to work with After Effects. Thank you Andrew Kramer, you're my hero. Right mouse click, replace with After Effects composition and that's it. So I save the Premiere
[3:20:37] file, double click over here, I save this one. And when I have two compositions over here, I always say command shift C and make it a composition. So this looks different than a Premiere. So let me
[3:20:52] show you what I do. And in the beginning, it can be overwhelming. I do my best to show it to you really easily. So what I do mostly is zooming in. So I click over here on the block and on
[3:21:04] the motion blur, then I hit P of Peter from Peter on my keyboard and shift and R, Roy. Then I create a key frame with the composition by clicking here and clicking here. And then I say shift page down
[3:21:20] five times or six times, one, two, three, four, five, six, until I am at a second. Then over here at the position, the third option, that's the zoom option. I zoom in and if I hold shift, I zoom in
[3:21:32] faster. Then at the orientation, the middle one, I go to minus five. So I get a cool tilt. Then with my mouse, I click to the right to the area where I want to be. Okay. Then I say page down, shift one,
[3:21:50] two, three, four, five, six. And then here at orientation in the middle, I do arrow down a few times. 1, 2, 3, 4, not too much. I hit the key frame of the position. Now I select the first key
[3:22:06] frame. Oh, right mouse click. I make this a ease, ease. then I say, I select them both, command or control C, page down, command and control V. Then I go to the second area, right mouse click,
[3:22:25] keyframe assistant, easy ease in, the other one, right mouse click, easy ease out. What I do, normally I like to work productively, but when I'm doing this for a large tutorial, I really watch a
[3:22:39] movie on my other screen because this is just, when you get used to it, just doing it. For me, for a long tutorial, it takes me one and a half hours. So what I do, this is the animation I create. You see it scroll, you see nice tilt and then go back. Okay. When it's done, command S and
[3:22:58] command or control W, and then I will do the next one over here. I zoom in, hold space and then I click this to the center. Then over here, layer, new adjustment layer. Then over here, I create
[3:23:15] the use the rectangle tool and I can select this area and I go to effects, Gaussian blur,
[3:23:33] command shift C, enter. This one, this one, and sometimes I can copy it. So I go to project, to comp 11, copy those two and go to nine, paste them, U so I can see all the key frames. Then I
[3:23:52] go to 11 again, latest to command C, close it over here. I paste it. I think I should not do
[3:24:07] this. So, okay. There I go. One, two, three, four, five. What is, oh yeah, I see it. Okay. If it's
[3:24:20] too short, if the clip is really short, I do one, two, three. One, two, three. So I have second, I zoom in again, then I go to this area. I say three, page down, one, two, three,
[3:24:36] maybe two, two in value difference. So from three to five, select this command shift or a shift six,
[3:24:48] copy paste. Here I do shift seven, shift eight, but it's because I changed the shortcuts. So easy. So I went to after effects, edit keyword shortcuts, and then I search for ease,
[3:25:08] easy ease in. So I select this one. And then I said, shift seven and this one shift eight. We double click and then create it. So come on W. So let me do this real quick. Pam,
[3:25:23] pam, pam, pam, pam, pam, pam, pam, pam, pam, pam, pam, pam, pam, pam, pam, pam, pam, pam, pam, pam, pam, pam, shift on two, three, four, five page up. I bring it down a bit further, six months,
[3:25:40] placed, select seven, select eight. That's how I roll. The script again, so I can go to 11,
[3:25:53] paste it, U, paste the latest one, drag it to the right. So I come because it was at the same place. Okay. Close this one. Close this 6. Zoom in, middle 5,
[3:26:16] paste down 1, 2, 3, 4, 5, 6, paste 7. Okay, that's it. So now when I go to,
[3:26:34] let me save it. When I go to After Effects or to Premiere, everywhere it's pink, there's an After Effects. So you see me over here and then you see that I zoom in.
[3:26:49] I love it. So we're almost there. What we need to add is some cool animations like swooshes. We need to add some music in the beginning, maybe a subscribe button so people can subscribe, like an invitation and then we're going to export it. I'm going to do that tomorrow. Looking forward
[3:27:05] to it. Thank you for watching this video and good luck making amazing tutorials. It's a new day and it's time to continue with the tutorial. I'm so excited about everything I'm going to record today for you. So the first thing I want to do today, I want to clean up my Premiere file. So over here,
[3:27:24] all those files you see over here are After Effects files, those pink ones or red ones. So I select the first one, I hold shift, I select the last one and I drag it here in the after effects folder and I close it and I go to the wave files and bring them to audio and this one to video and
[3:27:45] the work files also to video. I want this to be below, so let me see how I can do that. Yeah, that's how you can do it. One, two, three, four, five, and then the current sequence over here. So
[3:27:58] that's the first thing I wanted to do. Now I want to spice up our video a bit. I think it's really cool with our face over here, the animations, the audio is good. The video is good. What I want to
[3:28:10] do now, I want to spice it up with some swooshes. So over here for free, the first thing we need to do, we need to do for free. So I want to have a swoosh over here. What I do for every new chapter,
[3:28:30] I make a mark using one or M and then over here, if I want to go to the next mark, I say shift M and then I go over here right, I double click, I wait till I see over here that it's imported.
[3:29:08] It's imported. Okay. Now I zoom out, minus, minus, minus and now look at this. For free. The first thing we need to do, don't you think that's cool? For free. The first thing we need to do, so again,
[3:29:21] shift M dot com, hit shift M. I think there's no, it's not necessary anymore to do it. Maybe at the end. End result. In this tutorial, I'll show you how to do it for free. So yes, so over here,
[3:29:43] I want to do it also. Plus, plus, plus, plus. Warp right. Okay. But you don't have this tool. So in
[3:29:55] order to get it, do that for free. So that's okay. I go to Google Chrome and I search for ferdy.com forward slash V H video. Hi. If I hit enter and I will be redirected to Envato markets. Let me see.
[3:30:17] I want to go to the video area and then I want to search for swoosh or transitions, transitions, transition pack. I think it's this one, this from Envato. Okay. I will scroll down. This one,
[3:30:36] $69. So it's up to you if you want to buy this. You have to buy it only once. Look at this, 28,000 sales. Look what this guy made. Calculator, let's say 28,000 times 69. Maybe I should make a
[3:30:55] tutorial on how to, it's $2 million on how to make a tool or software. I use this, I love it. So if you want to buy this, click over here, add to the cart, keep browsing. The second thing I want,
[3:31:13] I want to have a subscribe thing. So what I do, if I ask for people to subscribe, I go to my finder,
[3:31:26] tutorials, misc, and I go for a subscribe MOV. If I drag it over here, look at this, what happens? How to work with that, then follow this tutorial and then you can learn more and I wish you the
[3:31:41] best in your AI journey. My name is Ferdy, really nice animation. I just drag it wherever I want. So I can also do that halfway through the video, like, Hey, subscribe. I can drag it. It would be
[3:31:54] better if I would take a look where I place them. So if I do something really nice, then after that, like, hey, maybe this is the right moment for the subscribe thing. So there it is. I
[3:32:07] click on play. And then the third thing, oh first let's search for that. So I search for subscribe
[3:32:19] animation. Yeah those things for instance. How about this Envato elements again? That's also cool. That is a subscription and then you can use everything that's in it. Millions
[3:32:35] of files. So this could be good enough. Yeah, this one, you see the one a lot. Let me see.
[3:32:49] Something like that. I like it to be, I don't like this. It's totally not in the would be
[3:33:22] great. So you can buy this or add it to the cart, add it to the cart. Is it added to the cart? Yes. Keep browsing. One more thing. I want to have a song in my video. So I have a song. I think it's
[3:33:43] called the channel song. See, where is it? Channel song. Okay. What I need to do, I need to drag it all the way down. Okay. Then I bring the audio gain to minus 20. Let me see. Let's start there.
[3:34:09] Maybe audio gain, set it to minus 15. Let's see what happens. I'll show you how to turn yourself into an animation like this. Let me show you how you can do that for free. The first thing we need
[3:34:23] to do, we need to turn one of our images into a 3d character. We can use chat. Okay. What I can do, I can unlock this and I can mute my audio, hit the tilde key, bring this down, zoom in. Okay. From
[3:34:47] that point on, the new higher wave, I want to give it a nice fade, so I also search over here. Yes.
[3:35:02] So also here, see, click, remove this and bring this all the way here, zoom in. So let's see if there's a fluid transition. Not too fluid. So what I will do, I make this blue A4, arrow down,
[3:35:24] command shift D, then I make it a bit smaller. Listen to this. Awesome. So I have a small
[3:35:43] intro. So now everything together, arrow up or page up. In this tutorial, I'll show you how to turn yourself into an animation like this. Let me show you how you can do that for free. The first
[3:35:55] thing we need to do, we need to turn one of our images into a 3d character. We can use chat GPT to do that. And to be honest, I think after the introduction, the audio can be gone. So I will get rid of this. Not only use this one in this store, I'll show you how to turn yourself into an
[3:36:12] animation like this. Let me show you how you can do that for free. The first thing we need to do, we need to turn one of our images into a three. I love it. Channel song goes to audio. So in order
[3:36:25] to get a channel song, we go to audio and then all items are music, popular items. And I can listen.
[3:37:01] I understand why this is the most popular one. So you can click on add to cart, add to the cart, go to the checkout. But now, we have only one thing in the shopping cart, so we need to But now,
[3:37:15] we have only one thing in the shopping cart, so we need to go back to video. There I have two things and I want to go to the checkout. I can continue. And then you can pay with PayPal or credit card
[3:37:32] or other ways. Then you'll download those, unzip them, then you drag them into Premiere, just like I did with the subscribe thing and with the check thing. And the seamless transitions is
[3:37:44] something that needs to be installed, but there are really clear instructions on how to do that. So now we've spiced up our video with a few things, with a subscribe button now and there, now and then, or here and there, with some transitions and with some music. And the great thing is with
[3:38:01] the transition, there's also sound. That's for free. The first, you should see over here. So, um, I'm happy. So we're going to the next part of the tutorial. We're going to export the video
[3:38:20] and in order to do that, we click on command, so while there's a blue line, file, export media,
[3:38:41] then I go to presets and I want to go for YouTube high quality, YouTube ultra HD. That's it. So the entire source, then I click over here on location,
[3:38:58] I go to tutorials, 701 finals, and then give this a good title because that's also something that YouTube takes a look at. So if I would go to YouTube and I search for, turn your video into a
[3:39:18] 3d animated character or animation. Let's see what pops up first. How to create a full animated? No.
[3:39:38] I could say create a 3D avatar for free or create your own. It's about what people are searching for. So what will people search for? Create your own 3d avatar for free using AI. Everything with
[3:39:57] AI is super hot and interesting. Now, since you have premier pro, you also have the media what I prefer because then I see the progress of where I am in encoding the tutorial or in
[3:40:12] exporting the tutorial. So there it goes. I love the whole Adobe creative suite. Everything works together. It works with Photoshop illustrator in design, even though I don't use in design only
[3:40:25] now and then wanting to put things together for PDF. So ready? I click on play. And I think since the video that's 10 minutes, it will take also 10 minutes. So congratulations. If you follow along
[3:40:41] and you did all the steps I said, then that means that you're exporting your first video right now. I hope you can appreciate it. If you do so, please like the video, give a comment to appreciate it.
[3:40:53] Or if you have any questions, let me know. I will be back with you when the export is finished. Right now, what I see is that it's taking longer, 22 minutes, 23. That's because the after effects
[3:41:05] use, I use motion blur in that and that will slow down the export like crazy. If it's up to me, I export long tutorials. For instance, this one I'm recording right now is probably six hours, maybe longer, I don't know. But that export will take a whole day, so I prefer to export at night
[3:41:20] when I stop working. But when the video is 10 minutes, I'm like, okay, let's go for it. What also makes it really longer is that I use myself in the video, as you see over here with the round thing. So that's also what makes it slower. But at the end of the day, it's all adding up to
[3:41:37] the quality of the video. I'm really excited to upload this today. I hope people will see it and think like, hey, I want to subscribe to this. So I've also seen a lot of AI videos that I'm like, there's so much you can do with AI. I have this YouTube channel already, but if I would start
[3:41:53] over from scratch, I would give this my all. I would go all in and I know that in six months, I can do this for a living if I go all in. Maybe I can combine it a bit because I really like AI and explaining things to other people and in the same way, make money with it. Maybe I can combine
[3:42:08] it with my current YouTube channel. I don't know yet, but for now, I stopped the recording and I will be back with you when the recording is finished. While our video is exported, we can also export the audio and I will tell you why I will do that because we're going to create subtitles and I
[3:42:22] have a tool that will help you to do that. You can do that with YouTube if you want to, but you can also do that using a tool that is really cool and helps you to get really good subtitles. So it's
[3:42:35] not mandatory, but I always do this. What I will do, I will mute all the sounds that are not from my audio. So I don't hear the music anymore. Then I say command M again or export. And this time I
[3:42:48] want to use the format MP3. I want to go to audio and I want to go for the best quality. I go to the location and I say the video to 3d animation. Okay. Then instead of going, sending it to media
[3:43:07] coder, I can export it at once and it will take probably five seconds. Now I go to the internet to ferdy.com forward slash ko-ka-to. And now we can sign up or we can get started for free. No
[3:43:24] credit card required. Then you need to create an account with your email address or password. I already have that. So I click on login, continue. I use this for every single video I create. Now, I go to the finder, to tutorials or let's see, 701 finals audio. I drag it over here.
[3:43:44] It will be uploaded. Now I can view the files and in no time, the transcoding will be done and I have amazing subtitles. The great thing is I can use those subtitles to use chat GPT
[3:44:02] to create a beautiful description for my YouTube video or create the text for my YouTube video or create a blog post based on what I cover in the tutorial. So that's also really great advantage of using this method, but at the other hand, you can also do that with the subtitles that
[3:44:17] are created by YouTube. So again, it's not mandatory, but as you know, probably by now, I want to use the best tools, the best cameras, the best lighting, and this is, in my opinion, the best tool. Look at this to create the best subtitles. In this tutorial, I'll show you how
[3:44:32] to turn yourself into an animation like this. I almost never see an error. The only thing is when I export it, let me export it as a txt, I check nothing, export. The only thing I have to do,
[3:44:50] let me click on it. I need to go to edit, find and replace and everywhere there are two spaces, I need to replace it with one. Add some 80 places, all and then the first one I get rid of the space.
[3:45:08] Okay. Let me save it for now. Now later I can use it in YouTube. So now we also have beautiful transcriptions. So as you see over here, our video is finished the export. So I go to tutorials,
[3:45:27] the final folder over here, this store, I'll show you how to turn yourself into an animation like this. Let me show you how you can do that an animation like this. Let I also have the audio. So ladies and gentlemen, it is time to put our video
[3:45:45] on YouTube. And in order to do that, we need to have a Gmail account. If you don't have one yet, let me show you how to get one. So in order to do it, we go to accounts. You know what? I'll use an incognito window. That is a window as if you're never, if you're a never logged in yet. So your
[3:46:01] new incognito window, then I go to gmail.com and I can sign in or continue to Gmail. Well, I want to create an account. So I click over here or my personal use or worker business. I
[3:46:18] say personal use. My first name is 30. I lost name is optional. So I leave them at what my first name next I'm from June, the 28th, 1986, really 30. Thank you. Yes. I am a male. I want to create
[3:46:42] my own Gmail address and I will go for Ferdy AI if that's possible. AI Ferdy already available.
[3:46:55] 30 corporate AI. Okay. I need to create a password. I click on next. I need to fill
[3:47:10] in my phone number. Now I get a confirmation code on my phone. I click on next, recovery email, the one I always use for my business. Get more from your number. No, thank you. I want to skip this.
[3:47:28] Choose your settings. I want to make one choice and I click on accept all, confirm. Of course,
[3:47:40] you should read this. So I have my Google email account, my Gmail account. With the Gmail account, we can create a YouTube account. So that's the next step. We'll take, turn off smart features,
[3:47:58] turn off and turn off. Okay. Now I want to go to YouTube and create a YouTube account. So,
[3:48:16] ask me in a week, here's my account Ferdy Korper AI. Now I want to create a channel and the name, I want it to be Ferdy Korper. It's both available, I want to select a picture from my computer. I'll
[3:48:35] choose this one and then I click on done. Okay, this is an important moment. This moment can mark a really important part of your life. I'm going to click on create channel. Ladies and gentlemen,
[3:48:50] we have our own YouTube channel. There you go. It can take some while, take a while before the app becomes a picture or just to make things sure, I can click over here again, continue. There it is.
[3:49:04] So for now, I want to create a video, upload my video. So what I will do, I will click on create, upload videos, select files. Then I want to go to tutorials 701 finals. I want to upload this video.
[3:49:24] Since I already have a YouTube channel, I want to have my second YouTube channel in the same account as the first one. So I showed you how to create it from scratch. Now I will create a new one, a second channel. Let's see if ferdy.ai is still available. Ferdy.ai, create channel, awesome. I
[3:49:42] click over here to see if that's the same thing that my picture will be added automatically. Yes. So it's time to upload my first video. I click on create, upload videos, select files,
[3:49:59] then I go to tutorials, 701, finals and there it is. 2.81 megabytes or gigabytes, so it can take a while. My internet connection is not that fast over here, but it is what it is. 12 minutes,
[3:50:15] that's doable. But in the meantime, we can create a title. So create your own 3d avatar for free using AI. And now our subtitles come into place. By the way, what you see over here is vidIQ,
[3:50:29] how I create, how I made a three day, maybe that's even better. So I get suggestions from vidIQ. If you want to learn more, you can go to ferdy.com forward slash vidIQ. That's the tool
[3:50:46] I do not suggest you get it. You can get the free version right now, but first it's time to get our content out there. So what I will do, I will go to chat GPT, remember we created subtitles. So I
[3:51:04] copy this and I say, give me a perfect converting YouTube video description based on the subtitles
[3:51:19] of the video below. Okay. So that's the description that I will place over here.
[3:51:36] No studio, no problem. Really nice. So I copy this, paste it. This is so cool. Then I want to
[3:51:50] have three hashtags, AI video, AI 3d character or 3 I say over here, based on the information above,
[3:52:27] give me max 500 characters of YouTube video text related to the information above. I already said that but hey, just in case. So now I get a different format. Look at this. Copy and it says
[3:52:48] Pixar style animation, chat GPT tutorial, Kling AI. So I just paste those over here at the text.
[3:53:00] Over here, I have to say it's not made for kids. It's made for kids. That's what I mean. No, no, it's for adults. Playlist, I create a new playlist and I call this one AI tutorials, create done.
[3:53:26] I should upload a thumbnail. I'm going to talk about it in a minute, I click on next, subtitles that will be activated when we have confirmed our accounts. So right now it's okay. Checks,
[3:53:43] we are checking things and then I can schedule this PM. Schedule. Okay. It needs eight minutes
[3:54:04] yet to upload the video because my internet connection is really slow. I go to content, so there it goes and now it's time to create a thumbnail. Let me show you, I go to Photoshop,
[3:54:21] that's my favorite way and we can make it really simple. What I can do? I can go to my tutorial, I can go to this one, images, are they here? Let me go to downloads,
[3:54:40] this one and this one. I copy those, go to tutorials, images and I say any or caret,
[3:55:03] zero one, zero two. So I can do a few things. I can do something like this and then a big text,
[3:55:40] create this for free. Command A, I use Avenir as a font. I'll make it bigger. Now what I like to do,
[3:56:00] maybe there's a better way, but I like to drag a selection, no, no, no, no. I like to go over here to rectangle, drag it over here, the bigger, okay. And then I go to the text over here, I make
[3:56:22] it bigger and I change the line height. So I bring it up and then let me see. I click over here,
[3:56:38] I make sure it cannot go anywhere anymore so I lock it. So I can drag this one here, then it a
[3:56:51] bit bigger. Okay. I can change the color, make it stand out. So what I do now, I hold option,
[3:57:09] hold shift and I drag it down again and again. Then I click over here, edit, transform, scale,
[3:57:29] click over here, transform, scale, bring it to the left and then this one, and this is a matter of
[3:57:41] trying. What is converting better? I have a tool that can do split testing, I love that. So you can always optimize your logos. I can also bring it to the right a bit like that, have a dark background.
[3:57:57] Let's say, let's grab a color, this one for instance, and I paste it here. Okay, and then what I want to do with this over here, I want to create a mask by clicking here. Then
[3:58:14] I want to go to the brush tool, to black, right bracket so I make it bigger. I click over here, I make the hardness really soft. I hold shift and I drag it down, up and down like that. Then
[3:58:32] I go to the rectangle, hold shift, let me get rid of this text block, try to unlock it. Hold shift, rectangle one, shift right, right, right. And this whole area can That's great how it is.
[3:58:58] Okay then I want to do something with this picture. Okay. So I click over here, then I go to single adjustments here at adjustments and I want to go for curves,
[3:59:10] layer over here. Make it pop. Okay. And then I want to go over here, lighter or make a gradient
[3:59:41] by doing this. Blending options, gradient from left to right and then the first color is this one. And the second color, which can be here, is this one. Let me see. Okay. So that pops a bit
[4:00:08] more and sometimes what is working is to create a line. So I right mouse click, blending options, stroke at the inside. Does it work? It only works when you have content over here. So I
[4:00:25] create something with this tool, I click over here and then I go to the fill and I get rid of it. And now I can use the same red 20 or 25. Okay. Create this for free. Okay. Then I do file,
[4:00:50] export, save for web, 100% totally fine, save it. I call this one, create this animation for free.
[4:01:09] Okay. Now I click over here, details, scroll down, upload files, unlock more on YouTube to add custom thumbnails, verify your phone number. So I click on verify, text me the verification, confirmation,
[4:01:30] submit. You can close this window and go back. Okay. So now I can upload a thumbnail,
[4:01:43] refresh the page, upload files tutorial, or I go to my desktop. There it is. And I click on save.
[4:02:00] Now in 49 minutes or 39 minutes, my video will be published. So let me continue from this point on because that camera is overheating. So I will use this camera instead. So I want to show you that
[4:02:17] there are no restrictions. And if I take a look over here, it's not live yet in this, but I can see it's in HD already. And it's also in full four K. So full resolution. So my video is finished.
[4:02:31] Now I want to play some, um or subtitles. So let me show you, I can go over here at subtitles, set a language. Well, by default it is English. Let's see English. I do English United States. No,
[4:02:52] I just do English. Make this default language for my channel. Okay. Well then there's automatic captions. I want to upload my own captions. So I click over here, subtitles, English video
[4:03:04] language, click over here and then I can go to auto sync. Then I want to go to my text file, copy it and paste it and look at this. Automatically, I used to pay a lot of money for people to do this
[4:03:19] manually and now it's all done the right way. Okay. The only thing I want to do, I want to check the links I use. So if I say to people go to Ferdy Korper, I want it to go to Ferdy Korper.
[4:03:36] Ferdy Korper watch slash cling AI, chat GPT. I click on publish and it can be handy if you also
[4:03:58] give different subtitles. So the automatic one, I remove it. I can add another language. Well, if you get more statistics, you see which people watch your videos the most. So I could say
[4:04:10] Spanish, Portuguese, Hindi, Dutch, and then I can click on Dutch, auto translate by Google, Hindi,
[4:04:36] auto-translate, publish. And as soon as somebody said in the comments, says, do you want to, okay, also add this language. I always do that for the upcoming videos because then I want to help people to follow my videos. Auto-translate, and then it's almost time that we're going to publish this. Auto
[4:04:58] translate, publish. Okay. I go back, everything is looking great. So what I will do, I will click on
[4:05:13] this on details, and then I want to scroll down, change the visibility from schedule to public,
[4:05:25] done. And now I want to save it. And that means that we are live. Our first video is live. So in
[4:05:37] this tutorial, I'll show you how to turn yourself into an animation like this. Let me show you how you can do that for free. The first thing we need to do, we need to turn one of our images into a 3d character. We can use chat GPT to do that. So I go to chat GPT.com hit enter. You can sign up
[4:05:54] for free. What I will do now, this thing. So let me tell you what happened. I uploaded the video,
[4:06:06] but before I uploaded the video, I exported the video, but then only the audio. And when I exported the audio, I turned off all the other layers. So if I go to the video, the background music, the swooshes, they were all turned off. So after I uploaded the video to YouTube,
[4:06:22] I had to export it again, wait for an hour. I uploaded it again. Now it's an hour later and those are things that are things that just happen sometimes. Yeah. So I could think, you know what,
[4:06:34] I'll just upload it and publish it, but then it's not, it takes an hour and now for the rest of my life, this will be my first video that I upload on this YouTube channel and I can feel good about
[4:06:47] it instead of, oh that was the video that was not perfectly. So that's what I wanted to share with you that sometimes things go like that. So what's happening now in four minutes, the
[4:06:59] video will go live. So what I will do, I will use all my resources, all my social media channels to share this video with people. So I have an email list, I have my Instagram, I have my Facebook,
[4:07:14] I have LinkedIn and I'll do my best to make people watch. So the first people start to watch, so the statistics can start and YouTube can see how well my video is doing and decide if it will share this
[4:07:27] video with more people. The first thing I want to do, I want to click over here. Let me see. I have four minutes left. Okay. So what I will do, I'll go create a new broadcast based on the information
[4:07:49] above. I want to tell my email list that I made my first video for a, let's see what it comes up
[4:08:02] with. Okay. I'll just write it myself and let's, um, Hey, I make it better. Hey, I say, make this
[4:08:18] text better, it's my most used prompt, the video is live. So let's see. So let me copy this.
[4:09:13] people. Continue, send broadcast. Then I want to go to chat.gpt,
[4:09:36] Copy, paste. Also use it for Facebook.
[4:10:02] Then I go to the video again, share, copy. So the game has begun. When I have my first subscriber,
[4:10:17] I will celebrate. When I have my first view, I will celebrate. Okay. Let me see if it pops up.
[4:10:29] Next post, then I go to LinkedIn, paste it. There's the preview post. Okay. So I place it over here. no, no, no, no, no,
[4:10:59] it's posting. So I sent an email, I posted on Facebook and posted on LinkedIn. And I can also post on social social media, like Instagram. So now we have published something and it is online.
[4:11:19] Now the journey can start and we should not stop here. Of course we need to continue. I already have an ID for a second video. So not a lot of views yet, but let's see how it will go. I have
[4:11:35] the idea that everything is quite dark over here. So maybe I should lighten it up for my next video and so I can keep on improving. So we have done so many things already. Congratulations with that.
[4:11:51] It's now a day later. Let me refresh this studio page from YouTube. What I see 578 views, 11 comments, a lot of likes, but what I need to do now, if I go to my website ferdykoper.com to the
[4:12:08] backend and I go to tools, redirection, I see that four people already clicked on Cling AI, but I have no affiliate link yet. So let me show you how to apply to become an affiliate. So I go
[4:12:20] to clingai.com. The first step, this first place I always look is on the homepage, all the way down program, become a cling AI affiliate. Apply now. I need to sign up. Really important to read
[4:12:42] this. It is, they with impact. This is different for every single program you want to apply for.
[4:13:09] So I just go through these steps, let me see which one should I take, I don't know, I'll do this one. I agree, I approve the contract. Okay. So now over here, when I will be approved,
[4:13:34] I can create a link by selecting Cling AI, then I grab this link, then I go to my website, edit this, paste it and then when people buy something through my affiliate link,
[4:13:50] through my tutorials which I created for free on YouTube. I make money. So as I said before, this is different for every single affiliate program. So that's why I just went through it.
[4:14:02] I cannot explain how it will work with your affiliate program, but when I'm accepted, I get an email and then I will change this redirection link and I can start to make money. Now, I want to turn my video into a blog post. I want to share my video on my website and
[4:14:23] I want to have a blog post below that. So in order to do that, I click over here and go to the video, copy that link, then I go to my website, to post, add post, I need to give this a title. Let me ask
[4:14:43] for chat GPT's help. I go to post based on the transcription of a YouTube video below.
[4:15:04] Look at this. And since we are the owner of this video, this is perfectly fine to use AI to write a blog post for you. How to turn yourself into a 3d character for free, step by step tutorial. So
[4:15:19] I can grab this copy, okay. What I could say if I want to, I could say rewrite it and use Kling AI
[4:15:40] and 3d animated character a few times as keyword in the tutorial, in the blog post. Absolutely.
[4:15:59] So awesome. Let's use cling AI as keyword. So I do it again and here's the blog post. I want to
[4:16:12] copy this whole thing. I love it. I love it. Copy, copy. I paste it here. Then I need to see if the format is okay. Change it to a paragraph. It looks really good. So if I publish it and I go to the
[4:16:53] homepage, let's close this for now. I go to the website, I scroll down, I see this and if I click on it, it looks like this. Well let's spice this up because this can be done better. What I will
[4:17:07] do, I will go to tinypng.com, drop your images here, then I go to the desktop and I grab this image, which is now 1.4 megabytes. I want to make it smaller. We want to maintain a fast website. So
[4:17:25] it will be optimized, 263 kilobytes. I download it, I already have it over here. So now I want to go to the blog post by clicking here, edit the post, set a featured image, upload files,
[4:17:39] select files, then I go to my downloads and I grab this one. Then I get rid over here of the dashes.
[4:17:53] What I should have done or what I will do, I delete this. I will copy this. I'll go to my
[4:18:05] downloads and rename it because I can be found based on the images. So if people search for Cling AI tutorial, sometimes Google shows images and then if you have not renamed them correctly,
[4:18:23] this will not appear over here in the search results. If your image is called 0001, it will not be shown over here. But if your image has a keyword in it, then it can be found in the search results. So upload files and then we have this beautiful
[4:18:42] image. I copied a title with beautiful text. I paste it in the alt text and in the description, set the featured image. Okay. Then I want to scroll down, go to Yoast and I will use cling AI
[4:19:01] as the phrase I want over here to the post, go to categories on to create a category. AI tutorials,
[4:19:27] tutorials, enter. Okay. I can also have a new category, Cling AI. I can also have a subcategory. So I can have AI tools and then as a subcategory Cling AI, but for now it
[4:19:58] 3d character movie to animation. So now I can also be found based on text or I can, the structure of my website will be quite easy when you use categories. So if I click over here,
[4:20:15] I go to the website, I go to the blog post, then I see I use those two categories. If I click on this category, I'll see all the blog posts that have this category and in that way, people
[4:20:29] can navigate through the website more easily. Okay. I'll get rid of blog posts too. Edit post, move to the trash or I go to the backend to post, select those two, bulk actions, move to the trash,
[4:20:46] apply. I go to the trash and then I click on empty the trash. So now if I go to the homepage, I have only one blog post with a tutorial in it. No, the tutorial is not YouTube studio, content, view the
[4:21:26] content. Okay. I paste it here. There you go. What we can do now, we can add images and we can do
[4:21:41] that based on Adobe Premiere. So what I will do, I will get rid of my face like that. Okay. post.
[4:21:55] You can do it all for free. So I will grab, um, I can go to tutorials, um, images, character one,
[4:22:12] and let me see, I can go to Premiere. So I can do two things. I can go to the desktop,
[4:22:31] open this in Photoshop, then I open the character I created.
[4:22:44] Okay. Then over here, I like to work with aspect ratio of 16 by nine. If you go to Google, it can
[4:23:00] be anything. So this is more square. You see a lot of 16 by nine. So that's what I also want to do. So what I'll do, I will, let me see, edit. Let me uncheck this. Then I go to edit,
[4:23:18] transform, scale. Let's see how we can do this.
[4:23:40] Copy. You know what I will make? Okay. I will make this one smaller and I will make sure they have the same size. They don't have to have the same size. What I will do, I'll just place them next
[4:24:01] to each other, make this one smaller. Okay. And then I will make a selection. You cannot be ranked
[4:24:47] for text in an image at this moment. Then I say CMD option, shift S or over here, file, export, save for web. And then also this should have a name that people can search for. So I say video
[4:25:12] to 3d character animation. Okay. Then I'm going to create a second one. And I want to go to tiny PNG,
[4:25:30] drop those two images because they're 1.4 and 1.5 megabytes. And this is also, I will take quite some time for this because I want it to be a great experience for the viewer to read this blog post.
[4:25:50] So in the store, I'll walk you through the studio, no problem. Okay. So here I'll say forward slash image, upload, then I go to the downloads, this one, and then I can have an alternative text. I
[4:26:48] turn your photo into an animated character with chat GPT. Okay. So what I can do, I can go to
[4:27:29] Okay. I'll make a picture by clicking here. Okay. And I want to open
[4:28:02] PNG, to the desktop, I drag it over here. Then I go to my blog post,
[4:28:16] image. as I said in the beginning of the tutorial, it's hard work. This takes time. I'm taking the time because in the long run, I know it can make you a lot of money. What you put in it is what you get out of it. download the image, upload downloads. There you go. Anyway,
[4:28:48] it would cling. And then I can share the result over here, forward slash video, upload, open it.
[4:29:11] Okay. I save it and that ladies and gentlemen is how you can create a blog post. So I go to it, people can watch the video from here. And the great thing is that if they watch the tutorial
[4:29:23] from your website, then it will also count as time that people are on your website which will rank your website better. So a few images, nice example and then people can leave a comment. And over
[4:29:40] here, I can have an affiliate downloads, Cling AI and then link it to https://ferdykorper.com.com.au
[4:30:13] in a new tab. Update. So now if I go to the website and I go to the blog post and people start reading, they're like, okay, interesting. I want to use it. I click over here and then my
[4:30:29] affiliate link will be used. And that is the way the cookie crumbles. Remember that I told you that
[4:30:42] when people watch two of your videos on YouTube, you will be in their algorithm. So your videos will pop up as a suggestion on their YouTube channel. That is for me, the main reason why I create shorts. I have to say, I do not focus a lot on making shorts, but I know if you get a short,
[4:30:59] create a short that will go viral, it can tremendously impact your channel and that will also reach your boost for other tutorials. So I have tutorials, not short form but long form tutorials that will generate me the money but with the short form, I can grow my audience. So that's
[4:31:16] I want to do when I want to create shorts, I want to do market research. So I go to YouTube,8, a
[4:31:40] half a million. So if I watch this, well, that was actually a very bad short. It did not say a lot. Let's take a look at the comments. Okay. So let's go back. What I can do, I heard that AI voice,
[4:32:04] sometimes I think, hey, how can you create that? So I can search for how to create that AI voice because everybody should know which one it is. I want to get the viral AI voice,
[4:32:19] 400,000 views. Okay. I go to my notes. First short AI voice 11 labs.com, I think, tens of thousands
[4:32:54] of credits. Choose Adam, voice. Wow. The short is like 15 seconds. So 400,000 views. And what you,
[4:33:27] the great thing is you can click over here and then go to a, then you go to a long form tutorial. So I can create a short of every tutorial I make. So I made a tutorial on how to do the 3d character animation. I can make a video about that or about this voice. Let's go with the one
[4:33:42] that can refer to my longer tutorials. So that will be a 3d character animation. That's how I do research. Just go to YouTube. So what I will do now, I will start talking about the text I want to
[4:33:57] say in my script. I can go 3D animation. Then I can right by script and make the script better.
[4:34:28] Make this script for short, better. So I can start the script. So I start typing,
[4:34:40] maybe I will fast forward. Well, there it is. So what I want to do, I want to show my face in the
[4:35:02] beginning of the video and then I want to overlap that with the 3D character I'm going to create. And after that, I'm just going to read what it says in a really nice way. Then I'm going to cut the audio into a maximum of 60 seconds short, and then I'm going to add a video files and I
[4:35:18] will show you how I will do that. So I'm going to start with the video right away. Want to turn yourself into a 3D character like this? Want to turn yourself into a 3D character like this,
[4:35:30] or like this one, or something else. Here's how to do it quickly. Here's how to do it quick and easy.
[4:35:46] I'll put it all into computer and then I will be back with you. So what I've done, I've imported all the files, the camera file, the computer screen file and the audio. I put
[4:36:01] it all in one place. Actually, I can get rid of the screen file because I did not record anything on the screen. So what I want to do now, I want to change the aspect ratio. Right now it's 16 by 9. I want to make it a format for a short. So I go to sequence, sequence settings and I bring this,
[4:36:18] the frame size to 1080, the horizontal size to 1920. I'm aware that I'm cropping the video and then I go to the beginning, select this, then I go to the effect controls. I bring this down,
[4:36:34] the scale, until I see the edge and then I bring it a little bit to the left. So let the left.
[4:36:56] Want to turn yourself into a... So now I will, it's a two minute, 43 second video. I need to bring it under a minute. So I will fast forward and then I will be back with you. Look at this,
[4:37:12] 48 seconds. So I have this whole video, it's in 48 seconds. So now I need to add images, the video files or the screen files on the places where I talk about things. So if I say go to chat GPT, I should show go to chat GPT. So what I will do, I'll just walk,
[4:37:30] go through the video and then start adding things. And I will show you how to do it. And after that, I will ask for it again. Want to turn yourself into a 3d character like this?
[4:37:42] I make a mark animation, animated, animated character. One, one to turn yourself into a
[4:37:54] 3d character, like to this or like this three, this one, or something for one. So I will have
[4:38:15] four different things. So people can see in the four first five seconds that I four different character types. Anything else? Here's how to do it quick and easy. Okay. Here's the first one. Uh,
[4:38:29] jet GPT. Go to jet GPT. And for every mark, there's a new video. There's a new, um, new,
[4:38:42] uh, screen area. So over here, open chat.gpt. So I want to share over here. So'll fast forward
[4:38:55] again. So, so, so what I will do, I'll go over here. Let's say nothing else. Here's how to do it quick and easy. Go to chat GPT, go to chat GPT. So I have this area over here in the beginning. I
[4:39:13] copy this and over here, I lock this, these both go to chedgy. So, or something else, here's how to do it quick and easy. Go to chedgy. So what I'll do here at the facts, I'll zoom in a bit. Go
[4:39:46] to go to chat GPT. I go back to the video. I will fast forward from this point on. So I created a
[4:40:17] short, just added things, adjust a few things in After Effects. I think it took me two hours, especially because I had to wait for all those animations to be exported. And now I want to add subtitles in the screen. In order to do that, I select all the text over here, then I go to
[4:40:36] window, text, if I don't see that, it's over here. Then I go to transcripts and I click on this blue buttons, transcribe. And it will transcribe all the audio, make text of it based on what
[4:40:51] the audio says in the video. There you go. Now I can go through this to see if it's working. I want to get rid of all the points. So double click, get rid of the point. It says Jiboo not
[4:41:07] something. I should make a chat and double click. Okay. When I'm finished, I click on CC over here,
[4:41:21] create captions, subtitle default and I want to set up a little bit. So what I want to say, maximum length and character want it to be 30, minimum duration wants to be two and I want to
[4:41:35] have single lines if possible. I click on create captions and what I'll see, those captions will be created over here, really small. So what I will do, I will double click and then this pops
[4:41:48] up. Let me drag it over here so you can see the result. First I want to change the font to Avenir, medium and you should see the change at once. I make it capitals, make it bigger. Okay. So
[4:42:05] the line height. Now scroll down. I want it to be in the center, but a little bit below the center. Then I want to have a background, which is dark blue and fully opaque. So no 75,
[4:42:24] but 100. I want to make it a bit bigger and create some corners. I want the text also to be a bit bigger. Okay. Now I want to click on the plus, create a style and call this one shorts,
[4:42:43] subtitles. Okay. And now if I go to another place in the video, I see it. So I can check it, go to the video. If something is not aligning, I can zoom in. I can make it shorter or longer.
[4:43:07] And then when I'm finished, I need to export the video, command M. It's still on MP3, so let me bring that to H.264, then I go for YouTube 4K Ultra HD, then I go to video and I
[4:43:25] say match the source. Okay. I want to have the range, uh, entire source. I click over here. Then I go to tutorials, seven Oh one finals like over here. And then after that, I say short,
[4:43:46] I go to the media encoder. Then I click on play and then the video will be exported. Well, this is going on, I go to YouTube, I'm already there. And over here,
[4:44:02] I click on create, upload video, select files, I go to the finals and then I wait until the video is exported. It goes quite fast now. Awesome. Now I go to Google,
[4:44:25] I select the file, the short, I click on open and then it will be uploaded. So in this case, we don't have to create a thumbnail. When it comes to playlists, I like to create a playlist list
[4:44:39] called shorts. And for the description, I want to keep it short. What it will do, I will go to chat GPT. I'll also go to Adobe Premiere or even, even better. Just go to media encoder, duplicate it,
[4:44:59] change it over here to MP3, 256. Then I want to go to KoKA 2, login. I go to tutorials 701 finals.
[4:45:22] There you it. Then I go to chat a YouTube short, give me a perfect
[4:46:30] this, paste over here, cling AI and a few titles,
[4:46:51] create your own 3d avatar. Yes. Okay. Next. It's not made for kids. Next. At a related video. This
[4:47:09] is so cool. I edit and here you go. I can add subtitles. They're already there. to publish it.
[4:47:44] Publish. Awesome. So if I refresh the page, we have one video and we have one short. I
[4:47:56] hope it will get a lot of views and when people watch this, look at this. There is a link to the complete tutorial. What I like about this video is that within two seconds, you see already the
[4:48:14] results. I love it. If I could do it over Quick and easy. Go to chat.gpt. So let's see how it will
[4:48:39] perform. I don't have to place it on my website, so that's okay for now. And if I take a look at my analytics so far or my channel, I got 71 subscribers, more than 500 views already, 40 hours
[4:48:57] of watch time. This is also interesting because if you get 4,000 and you get a thousand subscribers, then you can monetize your content and then you can also start to make money with advertising. I make around $4,000 with advertising per month with all my YouTube channels. It has
[4:49:14] been 12,000 dollars and it was during Corona. Twelve thousand dollars in one month, only with affiliate, not with affiliate but with ad revenue from YouTube. That's crazy. And then you also have
[4:49:26] the affiliate revenue from things that people can buy through your tutorials. So congratulations with creating your first short, but we're not there yet. What you can do now, open a TikTok
[4:49:38] account, LinkedIn, Facebook, Instagram, Snapchat, and place your short on all those platforms. If you already have created it, why not share it as much as possible so you can reach more people?
[4:49:55] This part of the tutorial, we're going to talk about email marketing. One of the most important things when it comes to affiliate marketing, the money is in the list is a saying, and it's still true. I have made hundreds of thousands of dollars with my email list. So what I want to show you is
[4:50:11] how to create an email list and how you can fill it up with people and how you need to do that is by the following. You need to give something away for free that is helping your visitor or your viewer. So in this tutorial, I shared with you my free template. I shared my website template,
[4:50:28] I shared some stuff for Adobe Premiere, the circle thing. And what I've done in my own YouTube channel is I gave away images and I gave away Elementor templates in exchange for an email
[4:50:44] address. So if I go to kit.com, log in, if you take a look over here at Elementor templates, more than 42,000 people, they follow my tutorials and in the tutorials, I said, hey, let's make a
[4:50:59] 42,000 people did that and they were all on my email list. Then I can send broadcast emails to them, to the whole list and then people watch my tutorials, people can buy things because
[4:51:14] sometimes Elementor Pro had a certain discount. Then I could send an email to all the people on Automatic Pilot with the message, hey there is discount for Elementor Pro and all those people use my free Elementor template. So I knew there were users of Elementor and a lot of people bought
[4:51:31] it. Sometimes my best day was $7,000 in sales in one day by selling an affiliate marketing course. Now I'm giving it away for free, but that shows you a bit about the power of an email marketing
[4:51:44] tool. So what I would do if I were you, make sure that you have an info at your domain name.com. If you want to learn how, then go to YouTube, search for Hostinger tutorial Ferdy. There it is,
[4:52:00] three months ago and there you can learn how to create an email account. I have mine over here, then I want to go to ferdy.com forward slash omnisend because you can get a free version for that and you can use this with affiliate marketing with kit or convert kit, they can do a little bit,
[4:52:16] they can make it a bit hard for you to use affiliate links in your emails with OmniSend, that's not a problem. So what I will do, I will start for free and I want to sign up with email,
[4:52:28] my business email is info at ferdykoper.com. I need to create a password, my business I can always add it later. I agree with the terms and I don't want to sign up for this. So I click
[4:52:41] on sign up. Now I've got an email. So over here at my inbox, complete your registration. Then I click on verify the email address. Now I need to fill in some details. My first name, my last name,
[4:52:58] my business name is Ferdy Korper. My website name is hpsferdykoper.com. I click on continue, my business address and then I click on continue to OmniSend. Awesome. It says connect your store.
[4:53:17] We don't have to do that. What I want to do, I want to go to forms. I want to view other types of forms and I want to create a simple form. If you want to learn everything about
[4:53:31] OmniSend, go to ferdy.com, search for OmniSend. I have multiple in-depth tutorials, you can watch one of those tutorials over here, more than two hours long. Right now I will just
[4:53:46] show you how to create a signup form so people can fill in their details and send their email address to you in exchange for something you give them. So I will go for a really simple form.
[4:54:03] Let's go with this one, use this template, then I go to input over here, I drag it here and there I
[4:54:15] want to go to add label, turn that off, enter your first name, enter your email and then over here I can say, get the best prompt to turn yourself into a 3d character using chat GPT. I can change the
[4:55:05] layout if I want to. Right now I want to get rid of step two. So I click over here, delete. And if I go to success, I get rid of this and I can say, go, bring it to the center. Okay. Save and close.
[4:55:41] Then I open it again. I click over here at edit and I say opt-in form, free roms with chat GPT.
[4:55:56] Update. Okay. I click over here, button. I want to go to the button settings, primary button, change the color to the one from my website. So I go to colors, the second color, copy it, paste it,
[4:56:21] hit enter and I want to change it to this one. Okay. That sounds great or that looks great. Save and close. Now I need to open it again. I want to enable the form. I want to stay on the free plan,
[4:56:38] continue. Okay then I click over here again on the prompt or on the, sorry on the email and I go to theme settings and I change the form layout to a landing page. Update the live form. Now I
[4:56:55] click on the form again, now I have this external form. So if I paste this, people can fill in their details over here. So what I will do, I will go to ferdykorper.com, to the backend, to redirection
[4:57:14] and then forward slash prompts and then the landing page. So now I can do two things. I can send people in my tutorials to ferdykoper.com forward slash prompts. Then I can fill in the
[4:57:32] details or you can create something over here, which will make people opt in to your email list. So let me show you how you can do that. In order to do that, we need to go to plugins, add
[4:57:44] a plugin, we need to download WooCommerce. Even if you're not selling things on the internet, install now, activate, then I go to Omniscent, update the form, click over here or click over here
[4:58:03] on Omniscent, connect your store. I want to use WooCommerce, download the Omniscent plugin, then I click on download, plugins, add a new plugin, upload a plugin and then clicking here. I approve.
[4:58:41] Okay. Now I can adjust the style. So I can use the colors of my website, save brand assets. I'll do this later. I'll do this later and I'll do this later. So now I want to go back,
[4:58:58] let me clean it up a bit. I want to go back to Omniscent, then I want to go to forms. I rename this one to landing page, update, update live form. then I want to click over here and copy the
[4:59:18] form. I give this a new name, opt-in free forms with github. Pop up, website, update. Then I go
[4:59:31] to the theme settings, form layout and I change it to a pop-up. Where should it appear? Well, I want it to be in the center. So I go back, I go to behavior, when should this pop-up appear? We go
[4:59:47] to display and it says the rules. When somebody is two seconds on our website, then I want it to appear. So I go back, I want it to appear one time per day. So if they click it away the next day
[5:00:06] again, they will see it. So update the live form. Okay. Since this is connected with our website, if we go to the website, after two seconds, it appears. So people can enter their first name and
[5:00:21] their email address, then they click on get the prompts, go to your inbox to check the prompts, but we have to fix this because at this moment, nothing happens. So now we need to go
[5:00:36] to automation. I click on explore all workflows. Let's start with a simple one. Welcome. And when
[5:00:48] this will be triggered is when it is submitted to marketing and I can filter a trigger, I get rid of all this and the filter, the trigger is when they filled in a form and the form is the pop-up form,
[5:01:08] save it. I want to add another trigger when the form is the landing page form. Save it, update. So when people fill in their form, both in the pop-up or the external page, then they will put
[5:01:23] on this automation. And I call this one, get the free prompts. So when people fill in that form, which I just did, what should happen? Well, we can wait for more one minute. I prefer not to wait.
[5:01:40] No, an email should be sent. And right now it's called welcome to blah, blah, blah. I will change this. Here are your prompts and I want to make it personal. So I click over here and I go for the
[5:01:54] first name, insert the pre header. These prompts can be used for chat GPT. The sender's name is
[5:02:09] Ferdy Korper. When people reply, I want them to reply to info at ferdykoper.com. Let me update this. Now I can adjust the content over here by clicking on edit content. Yes, save it. And now
[5:02:22] we can change this whole content thing. So I can get rid of this and I say, Hey. So what I can do,
[5:03:03] I can duplicate this. Yeah, I can get rid of good luck and cheers. Here I can get rid of the beginning and then over here in between, I want to have a button, drag it over here, bring it to
[5:03:19] the left, go to, it can be anything, it can be a PDF. So if you would go to your website to media
[5:03:48] and you would upload something, anything, let's say this one, you can copy the clip, copy the URL to the clipboard and you could paste it over here. What I've done, I create a blog post, you can also
[5:04:00] create a PDF or something else. I created this blog post and click over here. I copy the URL,
[5:04:12] so I redirect them to my website. That can sound a little bit cheap, like, okay, you could also send me to the website. Now I have to leave my email address. So I would prefer to put it into a PDF, make it stand out. For the sake of the tutorial, I will just do it like this. And I click on finish
[5:04:33] editing. Okay. Start a workflow, really important to start it. It was not started yet when I opted in. So I will do it again. In incogn My email address ferdykorpershoek at gmail.com. I click on
[5:05:01] get the prompts. Okay. Now I will go to my Gmail account and then over here, I get, Hey Ferdy, below you can find the prompts I promised. Use them in chat dpt in order to turn yourself into
[5:05:13] a cool looking avatar. There I go, people can use this and now if I go to Omnisent, I close this and I go to reports or audience, contacts, I see I have two contacts already, George and Ferdy
[5:05:28] Korpershoek and that way I can grow my email list and now if I want to send something to everybody I can go to campaigns and send an email to everybody that is in my list or to a specific segment. There's so much more to OmniSend, so if you want to learn more about that, again, go to ferdy.com
[5:05:46] and then search for OmniSend or go to YouTube and search for OmniSend tutorial 30. And there
[5:05:58] you go. Migrate to OmniSend, start building your email list. This is the best one, two months old. This is more for people that want to start with WooCommerce. This is if you don't use WooCommerce.
[5:06:10] So a lot of value. And now in your tutorials and in your blog post, you can refer people to this thing you offer and then you can grow your email list. And then when there is a certain deal for
[5:06:22] a special AI software thing, in my case, I can send that, use my affiliate link and in a short amount of time, I can make a lot of money while at the same time helping other people. So let's
[5:06:37] talk about another really interesting subject, about making money with revenue from YouTube. Let's talk about a really interesting subject because besides affiliate revenue,
[5:06:52] you can also make money with YouTube itself with ad revenue. When people watch your tutorials and you are able to use or place advertisements, you can make money with that. I made over
[5:07:05] $400,000 in ad revenue from YouTube. So I'm not talking about affiliate revenue. No, besides that, there's also revenue through views. So the better the quality of your videos, the longer people will watch, the more YouTube will place you in front of other people to watch your videos,
[5:07:21] the more money you can make with advertising. So I have turned on my phone. If I go, by the way, if you go to the app store or if you use a different device, you should search for YouTube
[5:07:35] studio and download that, then log in and then you can see all the statistics. So over here, you see, I have a million, 240,000 subscribers. The last four weeks I had around $3,000 in revenue. That
[5:07:53] has been a lot more, but I don't know, things happen. If you take a look at the last 365 days, it has been decreasing. If you go to the glory days that was COVID, I had around $500 per day
[5:08:06] sometimes in my really the best days. So you see 540 was the top, a little bit below that $500 in one day with ad revenue. My best month was $12,000 with revenue from YouTube views and these days,
[5:08:20] now it's back to $3,000 in the last four weeks. It is what it is. I focus on creating content. I've also, I've been moving the last year, so maybe I created less tutorials. I don't know exactly
[5:08:32] what happened. Maybe there's more competition, maybe there's more other things, I don't know. But if you take a look at the lifetime, the total, you see almost $411,000 in revenue.
[5:08:45] And I live in the Netherlands, so I pay taxes. So let's say that it's $200,000 in real money that I can keep after taxes. In euros, that's let's say 180,000 euros. Quite cool for someone who
[5:08:59] uploads free videos to YouTube. But what I like if I take a look at the videos that I created, that's why I was transparent in the beginning of this tutorial. With this video, I will make a lot of money. Even though I give everything away for free, I could sell it as a course, I could make so
[5:09:15] much more money with it, but I decided to give it away for free so I can make revenue with affiliate revenue from this video and from ad revenue. So my best working video is also create an affiliate
[5:09:27] marketing website. So $20,000, but what I really like, take a look at this one, contact form 7, this video took me one day to make. I know what I remember is that I really did my best to bring it
[5:09:43] to the next level, but it earned me $8,000. The video is around 30 minutes. Right now, I should make a new one because it only has 40 views in the last 48 hours. So the last hour only
[5:10:02] one view. So I think it's seven, six years old, so I should make a new one. But here you see all the videos that make me money and yeah, that's what I, I hope to inspire you with that, that
[5:10:16] besides affiliate revenue, that you can also make tutorials for things that do not have an affiliate program. So even if you're promoting videos that do not have affiliate programs in it, it will
[5:10:29] still help your channel grow. If I take a look at my own channel, I go to the oldest video. Let me see oldest. This one brought me revenue from the, the, the end fault theme, as I talked about in the
[5:10:42] beginning. But after that, look at this, maybe it was my seventh video. This was as 178 views on a thousand, one on a thousand, one on a thousand. Look at this one, 341,000. This one went viral.
[5:10:57] This one blew up my YouTube channel. And it's a 56 minute video without any affiliate link, nothing. But what happened, people started subscribing through this YouTube channel and they saw my other
[5:11:13] videos with affiliate links. So this video has no affiliate links, but it helped my channel to grow, get more subscribers, get more views. And then that way, YouTube started showing other videos online, including affiliate links to viewers on YouTube because they saw, Hey, people are watching
[5:11:28] this for such a long time. This channel must be good. So all the videos are 30, we'll share them with more people. So again, don't focus on making money, focus on helping people. And if there's
[5:11:40] something that people can really benefit from, and it has no affiliate links, just go all in and share what you can share with them. And then left or right or up or down, some way it will come back
[5:11:53] to you. People talk about karma, I don't know. What I believe in is what you reap is what you sow. If you sow love, you will reap love. If you sow money, you reap money. I started giving away
[5:12:08] money in 2011. I made a really conscious choice from now on I will give away so much more money than what is normal. So to the church, to charity, but on birthdays I did not give 5 euros, I gave
[5:12:22] 20 euros. I wanted to go all in with giving even to the point that sometimes I was not wise and I lost all my money or I had no money left and then I borrowed it so it's not one big success
[5:12:34] story. But I believe now 15 years later, thanks to all the sowing in money in other people's lives, now I reap so much more money. So I also do that with this video that I give to you is for me
[5:12:47] sowing in other people's life and I believe that when I do that, I will also reap from it and that will make me really happy. There's a really nice quote from, I don't know from who, but it says,
[5:13:00] success without fulfillment is ultimate failure. Man, that struck me. There are rich people, there are famous people who commit suicide. They're successful in our eyes, but they are not
[5:13:14] fulfilled. And when you don't have fulfillment, success is worth not a lot. So I want to feel the fulfillment. Now do I get that fulfillment knowing that I'm helping other people even while I'm asleep? I see it in the comments, I see it in the emails, people are happy with what I'm doing,
[5:13:29] they think I'm a nice person, I think so too. And that's really, really rewarding. And the fun thing is when I'm on vacation on a beautiful area and I'm not working, I still make money. So yes,
[5:13:42] even if there's no affiliate program attached to the video you create or the blog post, you're still helping other people and that will not be forgotten. My God, maybe you think it's the
[5:13:55] universe. I think it's God. Let's not discuss it. Just take my word for it. No, just kidding. Hey, um, that's it about the revenue. You can make a revenue with videos. $400,000. I think that's a
[5:14:09] lot of money. Even after taxes, still a lot of money. Why? How? By offering value. It's more money than I ever made with all the business I did combined, I think. I'm not sure. Yes, I think so. So that's why I'm so excited about Philip Mart. Let's talk about what is next. What should you do
[5:14:26] next? So dear people, we've created so many things already. We created a website, we created a video,
[5:14:39] we created a short. If you put everything into practice, you already should have some views. So what is next? After I created my first video 10 years ago on my YouTube channel, I decided to
[5:14:51] create a second video and a third one and a fourth one. And as I've said before, it was the ninth video or the seventh video, my WooCommerce video that made my channel took off like crazy. I know in the first six months I made around $6,000, but that video, I think I made it after six or seven
[5:15:07] months that made my channel go viral, kind of like that was the moment that my channel started growing. So instead of waiting now for views and sales, make a second video, make a third video,
[5:15:19] keep on going. So in the time I was making my first tutorial last week, I saw that there is a new video of, um, Google VO three. And if you take a look over here, eight days ago, 80,000 views,
[5:15:39] five days ago, 41,000 views. So what I should do, I should take a look at all these videos, 10 days ago, 63, look at, oh, this is crazy, four days ago. And I should make videos about Google
[5:15:53] VO because now it's time to start making content about what is relevant. I could make a tutorial about something that's totally not relevant right now. I should not do that because if I want to grow my channel, I need to be in the game. But what YouTube wants is more views because the more
[5:16:10] people are on this platform, the more money they make. So they are trying out every single video to a certain audience in order to see if people are watching that. So when you make a video,
[5:16:23] Google will test it to see if it's performing well. That's why I said in this whole course or in this whole tutorial that you should create high quality videos. Well, if you take a look at this,
[5:16:35] what people are searching for, man, you need to take a look at what is relevant and I use YouTube for that. So what I do on my YouTube channel right now, I'm on my YouTube channel of Ferdy.com, but
[5:16:49] if I would use my brand new YouTube channel and I search only for the things I'm interested in, I start to subscribe to a lot of people that do the same thing as I do. So I would subscribe to all my competitors. Then the algorithm will show me more videos about, um, the, in my case, AI and
[5:17:05] what I also see, let's just do it. I switched my account to Ferdy AI, 82 subscribers already. So, okay. This guy is talking about AI. I subscribe. Then I go back to search Google VO,
[5:17:23] VO. My internet is slow. I already subscribed, so let's go back. Planet AI,
[5:17:42] subscribe. So now if I go to the homepage, I can go to subscriptions and I see a list of all the people that uploaded things recently. So if I see, okay, three days ago, 3000 views, okay,
[5:17:57] not that interesting. Two days ago, 66,000 views. Okay. This is interesting. It's just a four minute video on what I should do now. I should dive deep into video. And I already heard that this is only
[5:18:09] for the United States. So then it depends. Then my thinking decides if I will be successful with this or not because I'm like, I'm not from the United States, so I will not try it. Or I start thinking, hey, what can I do to still use this so I can make a tutorial about it? So what I could use is,
[5:18:25] I use a VPN server and using a VPN server, you can do as if you're from the United States, So that's what I will do. And then it only has to be one video that goes viral,
[5:18:40] that will make your whole channel go like crazy. And that's when the exponential growth comes, maybe that's when your first sale will come. So now it's a matter of creating more content,
[5:18:52] repeating the whole process. And if you really go all in and after months and months and months, nothing is working, then I would go back to step one. That is the decision step. Like,
[5:19:04] hey, I said I will go for it. And in some cases, things just don't work. Then you need to change your plan. Start over again. And what I would do, go to ferdy.com slash Jim Rohn and then watch
[5:19:21] this video. And watch this video from Brian Tracy and start reading Think and Grow Rich. And what I found in my life and what I see in other people's lives is when you keep on improving yourself, that
[5:19:33] idea will come. That brilliant idea for a YouTube channel, for a business and affiliate program, it will come. And sometimes it fails and then you need to start over again until it goes. And
[5:19:46] there's a really nice saying, maybe a bit cheesy but I believe in it 100%. Winners never quit, quitters never win. If you never quit, if you keep on doing this, you keep on trying new things,
[5:20:00] you keep on improving yourself, becoming better in making tutorials, becoming better in front of courses about that, you can watch videos about it, improve yourself until the point then all
[5:20:14] of a sudden success will come your way. Success is not something you should pursue, success is something you attract by becoming an attractive person, how to by developing yourself. This is
[5:20:26] literally from the video from Jim Rohn. Success is something you don't pursue, but it's something you attract. I've been reading a lot of books. I've been watching that video from Jim Rohn,
[5:20:42] from Brian Tracy over and over and over again. It motivates me. It starts to believe that I can make a difference in this world and even though I can think English is not my main language, who am I, other people are better. I decided to go all in and now 10 years later, exactly 10 years after
[5:20:57] I uploaded this video, I'm super successful with YouTube. I can spend more time with my family, I can go on vacation, I don't have to take a look at price tags anywhere and I'm so thankful for that. But it all started 10 years ago with a decision, I will go in. I will not stop. I did not stop and
[5:21:15] this course, the ability with the knowledge I have to give to you for free so you can start doing the same thing. Winners never quit, quitters never win. Are you a winner or are you a quitter?
[5:21:32] Well I wish you sincerely the best of luck in this journey. I hope you can appreciate that I created this tutorial for you all for free. If you do so, please like this video, feel free to subscribe if you want to learn more about WordPress related topics or WooCommerce or WooCommerce is the same,
[5:21:49] I mean e-commerce and affiliate marketing. Good luck with your journey. God bless you and may he give you peace in everything and may you experience his peace in your life. I think
[5:22:01] that's the most important thing we can have in life. Peace of mind. I believe we can get it from God. He wants to give it to us. Other people get it from other things. There is one piece, the Bible says, that's beyond understanding. Like wow, how can we experience that? And the great thing is
[5:22:17] that we can experience that also when we don't have money, when we only don't have success in this world. And that's what I wish you. The peace of God that surpasses all understanding. Well,
[5:22:29] it has been a privilege to make this video. I love making this video. I'm also looking forward to create a shorter video the next time because this has been, I've been going crazy like weeks. And
[5:22:41] yeah, if you want to follow what I'm doing, you can follow me on YouTube. You can follow me on Instagram. And then one more time, I wish you the best of luck. If you have any questions, let me know in the comments and then I will do my best to help you. God bless you and bye-bye.