
AI Summary
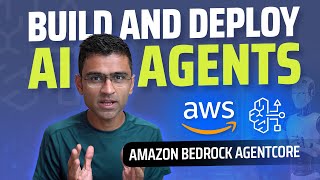
This tutorial walks through building, deploying, and operating AI agents using Amazon Bedrock AgentCore. It covers a complete customer-care use case with LangChain and LangGraph, from local development to cloud deployment, memory, observability, and advanced features like gateways and policies.
Chapters
Most AI agents remain stuck in the prototyping phase; AgentCore helps deploy them to production securely.
Build an AI agent that answers customer questions using a CSV knowledge base instead of human agents referencing it.
Includes memory, built-in tools (code interpreter, browser), gateways for external APIs/MCP, identity, policies, runtime, observability, and evaluation.
Time to value (no infrastructure management), flexibility (any framework/model), and trust (security guardrails, IAM, and scalable AWS infrastructure).
Create a read-access token on Hugging Face to use sentence transformers and embeddings.
Groq is a free cloud platform offering models like GPT-OSS, Llama; create an API key for the agent.
UV is a faster alternative to pip; running `uv sync` installs all dependencies declared in pyproject.toml.
The agent loads FAQ CSV, creates embeddings with sentence transformers, uses FAISS vector store, and defines tools like search_faq and reformulate_query.
Set up an IAM user and group with Administrator, Amazon Bedrock Full Access, AWS CodeBuild Admin, and AgentCore Full Access permissions.
Run `aws configure` with the IAM user's access key and secret, set the default region (e.g., us-east-1) and output format JSON.
Only two additions are needed: import `BedrockAgentCore` and create an entry function with payload/context; the agent runs in the cloud.
`agentcore configure -e <file>` creates a YAML file with deployment type, entry point, source path, and AWS account details.
`agentcore launch` packages and deploys the agent as a container to the AgentCore runtime in AWS.
Create a memory object in AgentCore with summarization and factual extraction strategies, then assign its ID to the agent.
Checkpointer handles session-level (short-term) memory; Store handles cross-session (long-term) memory.
Traces, logs, and KPIs in AgentCore help monitor invocations and find errors, e.g., a wrong memory ID causing a resource-not-found exception.
Gateways securely connect agents to external tools (MCP, REST, Lambda); policies enforce business rules like blocking refunds above a threshold.
AgentCore eliminates infrastructure overhead so developers can focus on agent logic. With just a few lines of code, a local LangGraph agent becomes a production-grade, cloud-hosted service with memory, observability, and security built in.
Mentioned in this Video
Tutorial Checklist
Study Flashcards (10)
What are the three key highlights of Amazon Bedrock AgentCore?
easy
Click to reveal answer
What are the three key highlights of Amazon Bedrock AgentCore?
Time to value, flexibility, and trust.
03:11
What command generates the AgentCore YAML configuration?
easy
Click to reveal answer
What command generates the AgentCore YAML configuration?
`agentcore configure -e <file>`
29:27
What command deploys an agent to AgentCore?
easy
Click to reveal answer
What command deploys an agent to AgentCore?
`agentcore launch`
32:19
What command invokes an AgentCore agent?
easy
Click to reveal answer
What command invokes an AgentCore agent?
`agentcore invoke`
33:14
What is the difference between checkpointer and store?
medium
Click to reveal answer
What is the difference between checkpointer and store?
Checkpointer provides short-term memory for a single conversation; store provides long-term memory across conversations.
45:00
What are the two built-in memory strategies mentioned in the tutorial?
medium
Click to reveal answer
What are the two built-in memory strategies mentioned in the tutorial?
Summarization (preserve critical context) and factual extraction (extract general knowledge from conversations).
38:17
What is the purpose of middleware in AgentCore memory?
medium
Click to reveal answer
What is the purpose of middleware in AgentCore memory?
It provides pre-hook and post-hook hooks to manage memory and telemetry around LLM calls.
46:27
What types of targets can an AgentCore gateway connect to?
hard
Click to reveal answer
What types of targets can an AgentCore gateway connect to?
MCP server, Lambda function, REST API (and a fourth type not specified).
55:11
How can you enforce business rules like blocking refunds above a threshold?
medium
Click to reveal answer
How can you enforce business rules like blocking refunds above a threshold?
Use the policy engine associated with a gateway.
55:41
What is the agent sandbox used for?
easy
Click to reveal answer
What is the agent sandbox used for?
To test the agent by providing an input payload before production deployment.
53:44
💡 Key Takeaways
AgentCore's Core Value Proposition
Explains the three pillars that make the platform attractive: time to value, flexibility, and trust.
03:11Cloud Deployment in a Few Lines
Demonstrates that moving from local to AgentCore requires only importing a library and adding an entry function.
28:10Two Memory Layers
Clarifies how short-term and long-term memory are handled differently in the agent architecture.
45:00Observability Uncovers Deployment Errors
Shows a real error (wrong memory ID) being found and diagnosed through trace logs.
51:29Policy-Driven Agent Safety
Introduces a mechanism to enforce business constraints (e.g., refund thresholds) on agent actions.
55:41Full Transcript
[00:02] but most of them remain stuck in prototyping phase. If you want to unlock a real business value out of it, you need to deploy them to production at scale. And there is one platform that allows you to build, deploy and operate
[00:16] these AI agents in a secure manner. The name of that platform is Amazon Badrock Agent Core. In this beginner-friendly tutorial, we are going to first build customer care AI agent using Langchen and Langraph. Then we will deploy it and
[00:32] operate it from Amazon Bedrock Asian core environment. We are going to cover all the essential features of this platform and in the end we are going to announce one challenge. The top 20 winners of this challenge will get $250
[00:46] of AWS credit. All right, let's get started. Let's look at the problem statement of our project. There is this company called Loki phones which is in a wireless calling business similar to Verizon or Reliance Jio and they want to
[01:00] build an AI agent that can answer the customer's questions. So right now they have this uh CSV file with questions and answers. So right now the human agents that they have whenever customer is calling uh the call center and when they
[01:15] ask any question they refer to this CSV file. So this is their knowledge base. Okay. So we are going to use this knowledge base to build an agent in knowledge base to build an agent in langraph using rag agentic rag actually
[01:29] and once that agent is built we will deploy it and operate it using agent core environment. This diagram highlights the main capabilities of this platform. You will first build an agent using any framework of your choice
[01:45] langraph crewi etc. So you are essentially writing the code in any of these frameworks. Then you will use some of these capabilities to build the agent. For example, you need memory for your agent.
[02:00] Then you use this memory feature of agent core platform. You can also use code interpreter browser which are the built-in tools. You may want to call external rest API or MCP server. And for that you can use
[02:18] gateways. For inbound and outbound authorization you will use identity. And you don't want to run your agents without setting up the proper
[02:30] boundaries. For example, if a customer is issuing a refund beyond certain is issuing a refund beyond certain threshold, then you want to stop there. And to do that, you will use policies. So you can have a policy which will say
[02:44] So you can have a policy which will say that do not allow to issue refund beyond certain threshold. So these are the resources you will use along with the code which is written in any of the frameworks to build an agent and then
[02:57] you will deploy it using runtime. Once the agent is deployed when you want to monitor it you will use the observability feature. So here you can monitor and debug your agent. You can also use this evaluation feature here.
[03:11] By using pre-built evaluators and custom evaluators, you can figure out how good your agent is. So there are three essential highlights here. The first one
[03:23] is time to value. See, you are just focusing on the business value that your AI agent is delivering. You don't have to worry about your infrastructures and to worry about your infrastructures and operational headaches. Okay. So you know
[03:37] that AWS platform is very popular because uh in general it helps you avoid those operational and infrastructure headaches for your regular software developments. Similarly agent core will help you remove the headache of
[03:53] infrastructure and op management for your AI agent. The second key highlight here is it is very flexible. You can create your AI agent using any framework
[04:05] or model. And the third one is it is trusted. Okay, there are uh security trusted. Okay, there are uh security guardrails. There is AM authentication. You can deploy them. They can scale well, right? In the end, it's AWS. So
[04:20] you can scale them in a reliable manner. We are going to explore all these We are going to explore all these features when we build, deploy, and operate our AI agent. All right. So as the next step we are going to now do the
[04:33] gro setup, hugging face setup and we will start building the agent in langraph. Hugging face is a platform that allows you to access variety of models and data sets for free. We are going to be creating an account by
[04:48] clicking on this sign up link and having this account created will give you the HF token and we can use HF token later on in this video. I have given my email on in this video. I have given my email id and password. Let's click on next and
[05:03] here just give your name right full name uh you can give other details if needed and then create an account you'll go through some verification some more verification and success okay now check
[05:21] verification and success okay now check your email so I'm going to open my email in another link and copy paste that particular link which I got from my got in my email and your
[05:37] got from my got in my email and your address has been verified. Now here you can go to access tokens and create a new token. So it has three type of tokens. We are going to be using read because we'll be
[05:50] using the the read operation mainly. So just give a token name. You can say agent code tutorial whatever just just just say something
[06:02] and then copy that and save it at a safe place. For LLM we are going to be using this Gro platform. It's a free cloud platform that allows you to use all these amazing models. Look at this GPTOSS Lama all of that. Creating an
[06:19] account is pretty straightforward. You can use Google or your email and just create an account. Once the account is created, go to API keys and create a new API key and note down that API key at some secret place. This is like your
[06:34] password and we will be using that API key later on. While we are going to use Grock for this learning project, many companies which are in AWS ecosystem companies which are in AWS ecosystem prefers Amazon Badrock for LLMs. Bedrock
[06:49] provides so many different LLMs. So you can click on this and you will see see all these models. You have Claude Opus, Amazon Nova, Quain you have so many
[07:03] different models that you can choose from and for enterprise setup staying in same ecosystem makes so many things easier for your project. Let's create a easier for your project. Let's create a folder to store our code. So here I will
[07:18] folder to store our code. So here I will create a folder called agent core tutorial. Okay. And we are going to provide you all the code of uh this uh complete
[07:30] video and that code is in agent course uh crash course. So if you check the video description below you'll be able to download this entire directory and from this I want you to copy pi project.toml toml file and also loi qna
[07:47] csv file. Okay. So let's Ctrl C these two file. Actually the third file is two file. Actually the third file is sample env. Ctrl C and put this here.
[07:59] Then launch the ID of your choice. I like PyCharm. And in PyCharm I'm going to open that project. So that project is where it is in C code directory. It is
[08:13] called agent core tutorial. So I'm selecting that folder. I'm going to open it. Okay. So I have this different code window. So I'll move it here. And then
[08:27] this is the project where I'll be doing my work. So we're going to first create my work. So we're going to first create the local agent. Okay. And we will be using UV as a package manager for Python. Now UV is a alternative of pip.
[08:43] Okay. It allows you to install the packages and so on. So go to their website if you have not already installed it. You can go to their website and you can install it. See I'm in Windows. So I'll go to my PowerShell.
[08:57] in Windows. So I'll go to my PowerShell. Okay. So you can open your PowerShell power shell from your command prompt and in that PowerShell just copy paste this this command and it will install it. Okay. So UV is installed for me and now
[09:13] I will go to terminal and in this particular folder I will call it UV in particular folder I will call it UV in it. Okay. So here project is already initialized in this. Okay. So this file is already exist because this toml file
[09:28] exist. It will say okay this project is initialized. Okay. So that is fine. Now you will say uv sync. So what this will do is so let me open pi project toml. So see here I have specified all the dependencies for this project you know
[09:43] all the modules we need lang chain lang graph sentence transformer and so on. So when you say uv sync it will read that pi project toml file okay and it will install all of it. If you want to add any additional package, right? Like you
[09:58] can just say whatever. For example, let me just let me just type the same thing like lang for example
[10:14] and see. So this way it will initialize the environment for you and it will uh install essentially all these dependencies for you. The next thing you will do is look at this sample env file. Okay. So, Ctrl Ctrl +V you will copy it
[10:30] Okay. So, Ctrl Ctrl +V you will copy it as env file and in this file put your HF token and grow KPI key. We already got the values of these two. Okay. So, just copy paste the token and API key. Okay. So, I set those things up. Now, let's go
[10:45] to agent core crash course directory and copy this 00 langraph agent.py pile. copy this 00 langraph agent.py pile. Okay. So, we are going to copy this here Okay. So, we are going to copy this here and then I will go open this file. Now,
[11:00] see this is the simple agent that we have created and what this agent is doing is a pretty simple thing. We have this Loki Q&A CSV file, right? So, let me open it in a Excel so that it's uh there is a better visibility of it. It
[11:17] is just a question and answer pairs for this particular company. Okay. Any customer department in any company will have this kind of FAQ. Okay. If customer ask question how long does activation take? Okay. Give this answer. Okay. So
[11:32] take? Okay. Give this answer. Okay. So we have this particular file here and we we have this particular file here and we are reading that file. See load faqsv. So we are reading that file by calling this uh load faqsv function. See here we
[11:48] are loading that this particular file. Then we are using hugging face embedding sentence transformers. Okay we are also using this rag approach. Now if you other tutorials. I'm going to provide
[12:02] you a link. So the purpose of this video is not to explain you rag. Okay. We want why uh I'm just keeping things uh really uh quick and you are loading dot environment through which you will load
[12:16] those environment variables and here we are creating a chat group using the GPT are creating a chat group using the GPT OSS uh model okay and then as a next even if you don't do this it's okay because we have done the load
[12:33] environment okay and we are using creating this agent create agent which will take our model GPTOSS model and tools. Okay, what are the tools? Well, that we have two tools. Okay, so first tool is search FAQ. For a
[12:48] Okay, so first tool is search FAQ. For a given query, it will do rag approach. So in rag, you will retrieve the semantically matching text blocks from your vector database. Okay, so vector database is phase from Facebook and then
[13:03] we pass that to our context uh in the llm and let's say if you want to reformulate the query you use these two tools okay so we essentially have these two tools folks look at this code it's pretty straightforward as I said if you
[13:17] to provide you another tutorial link okay so we have created this agent which we are asking these questions okay explain roaming activations So now let's
[13:29] right click and run it. And before you run it, you need to set your system run it, you need to set your system interpreter properly. So interpreter. interpreter properly. So interpreter. Okay. So what is my interpreter? So here
[13:42] Okay. So what is my interpreter? So here my interpreter as you can see is agent core tutorial in which you have v environment script python. Make sure this setting is set up. Okay? Otherwise you can add a local interpreter. Let's
[13:55] say if this is set up to a different value, you can add a local interpreter. You can say select existing and you can go to your directory uh agent code tutorial v environment scripts and here here
[14:11] select python. Okay. And which is what I have already. So I don't need to make any change. Okay. And then right click and run the project. So now it's using
[14:23] that particular virtual environment and it is running my agent. It took some time but here is the answer. I asked the question on okay roaming related question and it provided me this answer. Okay. So my local agent is now built and
[14:38] ready to be deployed to agent core. Agent core runs within AWS. So obviously we have to set up AWS account which is something we are going to do next. If you already have the account created then skip this section folks. We will be
[14:51] using AWS in the upcoming chapters. So let's first set up the account. You can Google create AWS account and click on this link here. Click on create a free
[15:03] account link. If you already have an account then you can skip this video. You can log into your account. But if you don't then sign up for AWS and here provide your email address. Okay. And then you can
[15:18] provide some AWS account name. I'm going to say code basics double whatever uh account name doesn't matter that much. But here you can provide your Gmail ID. Once you do that, it will send an email to your email ID to verify. So I have
[15:35] to your email ID to verify. So I have done the verification and now I can uh provide my password. So just provide a password and proceed further. Okay. At some point uh it will ask you for selecting your plan. So I'm
[15:50] going to say okay free 6 month plan. Okay. So let's select that. And uh you Okay. So let's select that. And uh you can provide all the details here.
[16:08] me for my credit card. It is not going to charge actually they just do this credit card verification. So you will get some free credits. Okay. So you can provide your credit card details etc. And then it will um ask you for this SMS
[16:24] just for another verification. So here it send a code on my phone. So I'm just confirming my identity. See it will require multiple step of verification. Okay. So now see my AWS account is set up. At any step if you're feeling stuck
[16:41] folks use common sense. You have to use common sense. Take help of chat GPT. a rocket science. You should be able to figure it out folks. Okay? So please do figure it out folks. Okay? So please do that. And now I can go to AWS console
[16:55] where I'll be able to kind of see different offerings and different different offerings and different options that AWS has. Let's now install options that AWS has. Let's now install AWS CLI version v2. So just Google it
[17:08] and you will uh go on this particular page. AWS CLI is a way to access your AWS environment via command line interface. Now based on the OS you have
[17:21] you can click on one of these. So I have Windows. So I'm going to click on this install it via MSI. So if you click on it you know you can just execute this and install it. The other way is you can use a command line. So I'm going to use
[17:36] command line. So just copy this thing and in Windows start the Windows PowerShell and you will get this and
[17:50] and you will get this and hit this and it will come up with this uh thing. Okay. So it will install it. It will take some time. Just follow your common sense uh steps to finish the installation.
[18:08] and I'll be back when this is complete. It installed after few minutes it was actually slow and when you run AWS version I can see AWS CLA version 2. I'm into my AWS management console where you can see different services. So here you
[18:24] can see different services. So here you can click and search for S3 for example. So S3 is a service within AWS environment that lets you store objects and people use it for data lake and variety of other purposes. You will also
[18:37] variety of other purposes. You will also see agent core. Okay. So bedrock agent core you will see all kind of services and whatever service you have used recently they will be visible here. Now one of the important services is
[18:51] identity and access management. So we will go here and we will create a new user because see right now you are logged in as a root user which has all kind of access. We want to create a user with some limited access.
[19:08] with some limited access. So let's call it agent core user. I will give it my name. Okay, double and provide access to AWS management console. Which means this user will be able to login into this account, right?
[19:23] This particular account that I have and they will have access to this management console. Okay. So autogenerated password is good. User must create a new password. Okay. We can uncheck it. It's a learning tutorial. Then you go next.
[19:39] a learning tutorial. Then you go next. Add user to a group. Okay. So I will Add user to a group. Okay. So I will create a new group. I will call it agent core group. Um let's say I'm in the AI team.
[19:54] Okay. See these groups are used to group the users. So let's say you are working in a company. There is a data analysis team, there is AI team, there is data engineering team. So you'll create three groups, right? AI, DE, DA, those kind of
[20:09] groups. And here you are going to give certain accesses. So I'm going to give certain accesses. So I'm going to give it administrator access. Okay. Then I it administrator access. Okay. Then I will also give the Bedrock full access.
[20:22] So let's search Bedrock. Amazon Bedrock full access. Bedrock. Amazon Bedrock full access. Okay. So let's do this. and then uh code
[20:34] Okay. So let's do this. and then uh code build. So AWS code build admin access build. So AWS code build admin access and the fourth one is bedro and the fourth one is bedro agent core full access
[20:50] essentially I have created a user group who has access to all these capabilities. Okay. So what are the capabilities? Okay. They can access bedrock. they can access agent core you can give access to S3 and so on then you
[21:05] select this so the user that I'm creating I want it to be part of this creating I want it to be part of this particular group click on next I think default options all okay everything is good create a user and when it creates a
[21:20] user it will give you the console sign in okay so let's say whenever you want sign this username and this particular
[21:32] password. So you can note it down somewhere in a safe location. You can also download the CSV file which will contain those credentials. So that CSV file that I downloaded has this username console signin URL and the password.
[21:48] console signin URL and the password. Okay. So now let's return to the user list. So I have that CSV save. You also save that CSV file to a safe location. Now let's go to that user. Click on this user and click on create access key.
[22:06] Click on command line interface. Okay, I understand the above recommendation. So right now what I'm doing is for this user I'm creating an access key for this user I'm creating an access key which I will supply to AWS CLI. Okay.
[22:20] And that way from CLI which is a command line interface. command line interface I will be able to access this account as will be able to access this account as that particular user. Okay, as we as we
[22:32] understand what I'm trying to do here. Just say create access key. Now it has created access key and secret access key. So now go to your PowerShell and key. So now go to your PowerShell and say AWS configure. So you have AWS CLI.
[22:49] It will configure the default account. And what is my default account? Well, it is this particular user agent core user dual and for this you need agent AWS access key ID. So AWS access key is this. So let's type in this. Okay. And
[23:07] this. So let's type in this. Okay. And then the password. So copy this.
[23:19] keep it default. If you are in Asia something provide your region okay and you can Google you can use chat GPT and you can say okay I'm in Delhi whatever Mumbai what region I should provide or sometimes you know you can you can see
[23:33] your region here like from the drop down so use your common sense figure out I live in US east coast so I'm going to say US east one the default output say US east one the default output format I will say it is JSON
[23:47] and that's it now I want to make sure that This configuration is okay. So let's type in this command. AWS STS get caller identity and I see my user ID my
[24:00] caller identity and I see my user ID my account right so my user ID so if I go to let's click on done. You haven't viewed or downloaded a secret key. Oh I see. So I will also download this secret key somewhere. Okay. So it's in another
[24:16] key somewhere. Okay. So it's in another CSV file. Okay. We had initial CSV file for my user credential. This one is the user's access key. So two CSV file. Okay. So let's make sure you have copied it to a safe location. I will click on
[24:31] it to a safe location. I will click on done and see here when I say STS get caller ID my ARN which is Amazon resource number right it's see resource resource number right it's see resource name is this user agent core user double
[24:44] see so it has configured it properly. You can also run this command where you say AWS S3 LS. So it will list down the buckets that you have. Okay. So in my account here, see it is showing me all these buckets. Sportsbar DP sales double
[25:00] these buckets. Sportsbar DP sales double SF1. And when I go to my S3 service SF1. And when I go to my S3 service here, let's go to S3. And if I look at my buckets, see I'm finding all those buckets. You see sports bar, sales, DF,
[25:13] buckets. You see sports bar, sales, DF, stocks, daily data. So this means my AWS C cli so CLI I'm running on my local computer via Windows PowerShell it is having now access to my AWS account on cloud. So now using this command now I
[25:28] can perform different operations on my cloud account. Now comes the most interesting part which is running agent in the Amazon badro agent core environment. So here type in badrog agent core. Okay, click
[25:44] type in badrog agent core. Okay, click on it. So, it will show you the page for badro agent core. And it has different capabilities or or different services capabilities or or different services such as runtime, identity, gateways,
[25:56] such as runtime, identity, gateways, memory, observability and so on. Right now, we are going to use runtime to run our agent which we ran locally our agent which we ran locally previously into agent core environment.
[26:09] previously into agent core environment. So let's go to our code and here let's So let's go to our code and here let's create a new file. Okay. Or maybe I can just copy paste this. Ctrl Ctrl +V and let's call this agent core runtime.py.
[26:24] Okay. So this is the file I have and this is the agent that we ran previously. So we know it is working. So now we are going to import some library here. So let's uh import
[26:40] this bedrock agent core runtime. From that you are importing bedro agent core that you are importing bedro agent core app and you are creating an instance of app and you are creating an instance of this app. Okay. And then you will write
[26:53] an entry function. So let me show you that entry function. So that entry that entry function. So that entry function is going to be let me see here is the system prompt agent let me put it here.
[27:10] Okay. So whenever we call this particular agent from the agent core environment due to this annotation it will invoke this particular function and it has payload and context. Okay. So what what
[27:26] payload and context. Okay. So what what you get from payload and and context is payload is used to pass information such as prompt. So it's a dictionary. It will have different elements. One of the important elements will be prompt. So
[27:41] when you invoke this agent, you will supply this prompt and it will come in supply this prompt and it will come in payload uh variable and then you will invoke it. Okay. So once you have a query of course you will
[27:55] the same agent object that you use you will invoke it then you will have uh the result here we are just printing all of that for our verification and you return that for our verification and you return this uh result in your main file you
[28:10] will just say app.run run. All right. So now we have made our agent such that it can run in the agent core environment and you you saw that this API is so good that we have to make only few lines of code change, right? We just added these
[28:24] two lines and we created this invocation function. So in a few line of code change now your agent is ready to run on agent core environment. Now let me okay let me use this terminal. Okay. So in my PyCharm I am in
[28:40] this particular terminal and let me just move it on the right. So move to right right top that way I can show you things side by side and here I am going to run
[28:56] side by side and here I am going to run this command agent core help. Now I got this command agent core help. Now I got this command because in pyro.tml TML toml file if you remember we have installed all the necessary libraries.
[29:09] installed all the necessary libraries. Okay. So the help shows couple of functions. So the first function that we are going to use is agent core configure. Okay. So let's do this. So I will say agent core configure-
[29:27] e and then see in this directory right agent core tutorial directory I have a agent core tutorial directory I have a file called zero agent core runtime this is the file right this is the file we created so
[29:43] agent core runtime dopy let's see what this will do and then I'll explain the the purpose of it. So here I'm running this command and it is asking me bunch of information. So
[30:00] essentially I am creating a YAML file which will contain all the necessary which will contain all the necessary information for agent core to run this particular agent. So first it is asking me for the name of the agent. Okay. So
[30:15] let's provide name of the agent then. Okay. Dependency file is pi project.toml. Yes, exactly. Let's do this. Execute role ARN name. Press enter to autocreate. So I will just say enter.
[30:31] It knows. Remember we configured AWS configur. We configured everything. So it will know which ARN to take. ECR is Amazon's uh elastic container
[30:43] repository. Okay. So it will use that. We are going to provide it as a default. And also by the way deployment configuration we have used container uh deployment type as container. So container is a dockerbased deployment.
[30:57] So it will create a docker and use the docker for the deployment. So ECR press enter to take whatever is the default. Configure o by default it uses AM. Okay.
[31:09] I want to use IM. I don't want to use O. So let's say no here. And then configure request allow head. Okay, hit enter using allow head. Okay, hit enter using default and then u here memory manager
[31:25] initialization for no existing memory resources found. Press enter to create new memory. Type s to skip memory setup. So I'm going to skip the memory setup. So I'm going to skip the memory setup. So press s enter and that's it. Okay.
[31:40] So press s enter and that's it. Okay. Now what this did is it has created this Now what this did is it has created this bedrock agent core yamel file which I'm going to open. So our agent is not deployed yet. Okay.
[31:53] So our agent is not deployed yet. Okay. Uh all it did so far is created this yl file and it's a configuration file right. It says okay platform is this deployment type is runtime your entry point is this particular file your
[32:07] source path is this. uh it is showing me all the all my AWS my AWS account ID all of that okay so you can you can explore this file now the next step is to use
[32:19] this file now the next step is to use launch so agent core launch and here we are going to supply the environment variable because our environment variable because our environment variables are stored in environment
[32:37] I'm going to supply so I will say that uh here grock
[32:49] key. Okay. So I have supplied my key. Hit enter. And now it is launching this a agent. Right. So it is launching as in it is uh deploying this agent to the
[33:02] Asian core environment. After some wait looks like it worked. Okay. I see only green boxes. There is no error etc. And now we are ready to
[33:14] error etc. And now we are ready to invoke our agent. So we can just say agent core invoke and type in your question. So now this is going to call the agent and I will get my response. So I had some issue with the formatting
[33:27] which I fixed. So I am passing double quote outside and single quote inside. quote outside and single quote inside. So it called the agent core in the cloud environment. So my agent is now running in agent core AWS cloud environment and
[33:42] when I said invoke this it sent this request to that agent and then I got this response back here and when I go to bedrock you see my agent is ready. So
[33:55] when I actually launched it at that time this agent was ready. Make sure you are passing the correct region. Okay, so I was having east two. East two doesn't have anything. But remember we used east one as a
[34:08] But remember we used east one as a region. So it has this also you get this region. So it has this also you get this jai dashboard. So if you click on it, I will get this link where I don't see anything. But let me change my region to
[34:20] anything. But let me change my region to two. So ES2. And here let's see what it is showing. I think it's not showing anything because there are two things like you need to wait for 10 minutes or so and it also
[34:34] ignore this for now. One additional thing I want to mention is this page thing I want to mention is this page that mentions AWS capabilities by region. So if you say start exploring and let's say you want to figure out a
[34:48] specific capability whether that is available in a specific region or not. available in a specific region or not. In that case, let's say we want to know Asian core where is it available. So right now I'm in US East one and it is
[35:03] available there. But here you can choose different regions. Okay. So let's say Tokyo for example. So in Tokyo, let's see if I remove it. Yes, it is available. And
[35:17] And let's look at Hyderabad here. So let's remove here. So see Hyderabad it's coming in 2026 Q3. So this way you
[35:30] have awareness on which service is available in what region and you can make architectural and design decisions accordingly. But see here you can see that this particular agent is running.
[35:45] Okay. You can see like a different you know like the observability runtime sessions runtime throttle rate all of that. Uh you can see all those observability parameters here. You can also monitor the logs. So it has
[36:00] something called log insight. So if you click on this log insight. Okay let me click on this log insight. Okay let me open that. And you want to see the logs which are you know in last few seconds whatever logs came by you want to see
[36:14] it. So you will say so let me just do it in a different way. I will click on view in logs insights here so that I can see it easily. Run query and when I run it see I see those logs. Uh the context the prompt the payload right now remember we
[36:31] prompt the payload right now remember we put that code for the payload. So the payload is nothing but in this particular file we had the print statement received payload and context. See received payload and
[36:45] context and that is what you are seeing here. Received payload payload has just here. Received payload payload has just prompt that's it. And the context has this session ID and a request header. Now let me clear this out. Okay. And let
[37:03] Now let me clear this out. Okay. And let me ask a different question. So I will me ask a different question. So I will say activate it for Dubai. Okay, I asked say activate it for Dubai. Okay, I asked question on the roaming. And now I'm
[37:15] asking a follow-up question. Activate it for Dubai. See it doesn't have memory. question. So it is just giving general answer. Activating your service for Dubai. Let me type in a better question. I can say which country am I talking
[37:31] about? It should say UAE right because Dubai is in UAE but it doesn't have any memory. So it is saying I'm not sure which country you are referring to. So as a next step we will look into the memory. To set up the memory let's click
[37:47] memory. To set up the memory let's click on memory option here and click on create memory. Here you can specify for how many days you want to keep your how many days you want to keep your short-term memory. I will say 99 days.
[38:01] Okay. And you can give some memory name. You can say that agent core You can say that agent core or let's say customer care agent memory. And here in the built-in strategies, there are couple of strategies here. I'm
[38:17] going to click on the first two which is summarization. This will summarize interaction to preserve critical context and key insights. So this is a strategy to extract long-term memories from raw
[38:30] interactions. See as a human also we do all the raw interactions but our brain somehow keeps the key points from those interactions so that we can recall. Similarly here you are summarizing the interactions to preserve critical
[38:46] context and key insights. Okay. So it's some kind of strategy. Then second one click on that too. So this will extract general factual knowledge, concepts and
[38:58] meaning from raw conversations. Okay. Now agent core is a brand new platform. It is evolving. We are seeing new and new options being added. So if you see new options either in memory or anywhere else, don't be surprised. Okay, they're
[39:12] making it better and better day by day. All right. I think built-in strategy add your own strategy for memory management, you can click on add management, you can click on add strategy here. Okay. And this one is
[39:27] self-manage. Anyways, for this project, uh this much setup is enough. And when you say create memory, see this type of memory is created. So now when I go to
[39:40] memory, see here I will see this memory. It is still creating it. Okay. So here this is the memory ID. So now in your agent when you specify this memory ID,
[39:53] it will use this particular object in AWS environment to store that memory. AWS environment to store that memory. Now folks please open the folder of the code that I have given to you. Okay? And in that copy this file agent core
[40:07] memory. Copy this file to your agent core tutorial folder. Okay. So I have core tutorial folder. Okay. So I have copied it. And now I will be able to see it here. Now see here in this code I have added
[40:23] the memory management. So my region I will say US East one. So update the region here. Okay. Whatever is the region for your AWS account you should region for your AWS account you should have that region here. And also the
[40:38] memory memory ID. Okay. Copy it from here and put it here. So this is your memory ID and remaining things are as it is. So
[40:50] what I'm going to do is first uh deploy this new agent and then I will go over the code and I will explain you know how this thing works. So first let's see the final impact and then I will explain. So here what we are going to do is now we
[41:07] will uh use this particular file. Okay, this particular invocation function from this new file to build our agent. So what are the steps? Well, first is agent core config. Okay, so you will say agent core config and in that config you will
[41:25] add the name of this new file which is 02 aent core memory.py. Okay, so let's 02 aent core memory.py. Okay, so let's run this. So here you need to give the
[41:37] agent name. So I will just say inferred agent name is this. Okay, I'll just keep it like this. Agent core memory invalid agent name. Okay, the agent name is invalid. Okay, it should start with a letter. So let's call it agent core with
[41:55] letter. So let's call it agent core with me or just simple right like agent with memory. Okay, pi project toml file. In case if you have a requirement txt file, you can change it. Okay, you can specify what
[42:08] file you want to use it as a dependency. And for container, we are going to use the dockerbased container environment. We want it to infer the AR name. ECR repository is whatever is a default. So just hit enter. Here you will say no.
[42:24] just hit enter. Here you will say no. Here configure request header no. And Here configure request header no. And then now this is amazing. See it then now this is amazing. See it detected that you have this memory
[42:36] object called customer care agent memory. So simply just hit one. So one is the ID. Let's say if you have multiple memory objects, it will show 1 2 3 etc. And you have to give the ID. So right now we have just one. So I will
[42:50] right now we have just one. So I will say one. Enter. And now what it did is it configured this new agent using this new file. The agent name is agent with memory. and it used that memory object that we created in the agent core. Now
[43:05] that we created in the agent core. Now the second step is the launch. Okay. So let me run launch launch and you'll specify your grog key. Okay. So let's specify your grog key. Okay. So let's hit enter here. After some wait my agent
[43:19] is now ready in my agent core environment. So if I go to my agent core environment. So if I go to my agent core page here I will see this. See agent with memory. It is ready. At this stage, we can make some invocation. Okay. So,
[43:33] invoke by asking that basic question. Tell me about roaming activations. And see, it fetched that answer. Okay. Now, I will ask the other question which
[43:46] Now, I will ask the other question which is activated for Dubai. And now it should remember that uh previous question. See activating roaming for. See it knows that previously I was talking about the roaming and here let
[44:02] me ask one more question which is which country was I referring to. Now due to country was I referring to. Now due to the memory it should know that see previously you are referring to Dubai which is United Arab Amirat. All right
[44:16] look at this. This is so amazing. my uh agent is now having this memory due to which it is able to remember the previous context just like chat GPD. Now I want to point out few things. See when we did agent configure with that second
[44:30] agent if you have noticed our YAML file in YML file see previously we had this one agent but now it added this another agent agent with memory and you can see all this configuration. So I I encourage you to look at it so that you can get an
[44:45] idea on what's happening under the hood. Now let's look at our code for this agent core memory. Right? We have not understood this code yet. So here in this particular code, this is the main statement. Okay. When you create an
[45:00] agent at that time, you can specify the memory. Now we added these three new parameters. So checkpointer and store are basically your short-term memory and
[45:12] your long-term memory. So checkpointer is a short-term memory. Short-term memory means for this session for this conversation. Okay. If I go to check GPD questions during that particular session, it will remember the previous
[45:29] context. So that is short-term memory and it is specified by checkpointer. Long-term memory is something that it will remember between the threads. So you might have noticed that you log off your computer right and after 2 days if
[45:43] you ask something it would have remembered uh your personality your way long-term memory and that is something that you specify using this store object. Okay. So if you uh look at the documentation for lang chain okay for
[46:01] documentation for lang chain okay for this create agent function here you will this create agent function here you will find that the store right the store and checkpointer so optional checkpointter saver object used for persisting the
[46:13] state of the graph for a single thread meaning single conversation whereas meaning single conversation whereas store is used for multiple conversation summarize, this is short-term memory. This is long-term memory. We also
[46:27] This is long-term memory. We also specified the third argument which is middleware. Okay, so what exactly is middleware? So let's look at it. So if you look at the documentation here, a sequence of middleware instances to
[46:40] apply to your agent. And if you look at the documentation for middleware, it is essentially a hook, you know, pre hook and post hook before you make a call to LLM if you want to add something. So usually what happens is
[46:53] the way memory works is you before you make a call to LLM in your prompt you will add the previous context and after the call is made after you get the
[47:05] response you might want to add the new question to your memory or you want to do something related to telemetry right all of that can be done by middleware okay so the plain call without middle aware will look something like this
[47:19] right request model tools whatever And with middleware it will look something like this. See before model after model. So you are basically having this hooks. So let me show you what kind of hooks we have. So first of all let me
[47:34] object. So if you click on checkpointter see we have imported this classes from lang graph. Now we have another langraph video. If you go watch it on our channel we have talked about checkpointer. So checkpo pointer is a way to store your
[47:48] conversation your memory in langraph. Right. So from lang graph you're importing agent core memory saver. Agent core memory store. Memory saver is a short-term memory. This is a long-term memory. So we created these two using
[48:02] the memory ID. Right? Memory ID is something that we created in our agent core environment. And then the middleware. Okay. So let's look at how middleware is nothing but a class. See if you look at middleware here it is a
[48:17] class and the class has this pre hook and post hook. So in prehook what you're doing is essentially you are getting this store object in the function right and if you look at the store object is derived from base class base store class
[48:32] and if you look at all these classes right see this class if you look at it it is eventually derived from base store. So you you can trace back uh all that and you can confirm it. Okay. So let's go to middleware now. So here from
[48:48] your store from your memory store right from your memory store premodel hook. So in premodel hook see you will first get the agent state. So in lang graph it's a graph and you get the state and from state you are getting the messages and
[49:04] that message you first put into your store. Okay. And then save the last human message to long-term memory essentially. essentially. And you want to do the search uh in your
[49:17] store semantic search right retrieve user preference from long-term memory search across all the sessions. And previously whatever question I asked right do by whatever it will retrieve that from the store. So these are the
[49:30] preferences and that you will add to your memory context so that it knows that previously I was talking about Dubai and in the post model hook let's say you got the response from your uh LLM and after that if you want to do
[49:46] that. So one thing you want to do is save the last AI message to your store. are saving it here. All right so that was a quick information on how this memory class works. We are glad that now the memory feature is working for our
[50:00] agent. Let's explore few more features. We will look at observability. So if you click here, you will go to the observability page where you will see different agents that you have running. So right now the agents are loading and
[50:16] So right now the agents are loading and it shows me this three agent. So it shows two agent with memory because I had created multiple agents with agent error scenarios and you can see some errors here. Okay. So what you can do is
[50:34] you can click on this default and go to the dashboard for that agent. Okay. So let me go there. This is the new agent that I created. So if I click on default here, it will show you all the traces for that agent. Okay. So if I click on
[50:50] this, see I made like those three invocations. Correct? And I can click on this and it will show me the trace. See here it says invocation completed successfully. It will show you the timing, the breakdown of all the calls.
[51:04] You can look at the trajectory, right? See, it will show you the the visual See, it will show you the the visual like graphical representation of all the calls which were being made. You can also look at the JSON object here. See,
[51:17] now once I had an error where I gave a wrong memory ID. Okay. So I I gave this and I built that agent and that is the second agent that you are seeing. Okay.
[51:29] And that resulted into this error. See and when you look at the trace I was able to find out what was the issue. See resource not found exception customer see C is missing. So I purposefully introduced that error and
[51:43] when I ran that agent you know through this observability platform I was able to find the exit error. You can also go to runtime by the way and look at any agent and here see you can go to the logs or dashboard. So let's look at the
[51:59] dashboard. You will find the same UI that we have right. So here you have overview you have sessions. So how many sessions did we run with that particular agent. So see here we just had one session correct? See we have these three
[52:13] traces. There is this one session. Uh folks I will encourage you to explore this. You'll you'll be able to see all the CPU consumption, memory consumption. Here it shows you the KPIs, you know, like
[52:28] client errors, throttles and so on. Let's explore a few more features. Identity is used for authentication. So for example, you can use oath. Let's say using your Google credentials or using your Facebook credentials, you can
[52:44] authenticate yourself. Okay. So here there is inbound O. So as you can see in the picture, let's say you are creating this uh customer service AI agent. So the caller will call and it will do the authentication at this level. And there
[53:00] is outbound authentication. So the hosted agent can access some of the resources in AWS environment. For that there is this outbound authentication as well. Then there are built-in tools. So you know that in agent that we created
[53:17] we passed the tools which were just Python function right. So if you look at Python function right. So if you look at our agent here the tools that we used actually see these were the two tools and they were customdefined Python
[53:30] function. But let's say you want to use a browser. So in that case you can use this particular built-in tool. So you can create a browser and you can configure it. You can also use code interpreter. In some of the use cases,
[53:44] you might use code interpreter as one of your tools. Then we have this agent sandbox. So let's say you created an agent and you want to test it. So you can test it here. So let me copy input payload here. Right? So this is my agent
[54:00] with memory. Okay. Endpoint is whatever is the default. And when I run it here, you see the response. So in the sandbox environment if you want to test it uh this feature becomes pretty handy. Observability is something we have
[54:15] looked at it. Evaluation is very important. These agents are nondeterministic in nature. They they are generative. They generate different answers. So it is very essential that we use evaluation feature here to evaluate
[54:29] them. Okay. There's a way to create the evaluation configuration uh custom evaluator and view results in agent core observability. In the agent that we created, we are using Python functions as tools. So these are the Python
[54:44] functions that we define in our codebase. But sometimes you may want to use the built-in tools which we already saw in our agent code platform. These built-in tools are browser, code interpreter and so on. And on some other
[54:57] occasion you might need external tools such as calling some MCP server or rest such as calling some MCP server or rest API. So now Python function is something something that agent code platform provides. But how do you exactly call
[55:11] provides. But how do you exactly call MCP server or rest API? For this we have a feature called gateways. See gateways they allow you to use external tools within your agents in a secure way. So when you create a gateway you can do all
[55:26] the configuration and you can specify what is your target whether it's MCP server it can be a lambda function it can be rest API okay it can be any of these four types of target there is also this option of policy where you can
[55:41] create a policy engine which is a collection of policies that will evaluate and authorize agent tool calls. Let's assume you have this customer care AI agent and the person who is smiling right now is asking for a refund to this
[55:56] right now is asking for a refund to this AI agent. Now let's say you have this AI agent. Now let's say you have this rest API. This rest API is called refund right like or issue refund. So that is the function call that you have and you
[56:09] want to create a policy where if the refund is above certain threshold you don't want to allow it. In that case in this policy engine you can put your policies right you can create like bunch of policies. One of the policies is that
[56:23] if the refund amount is greater than certain threshold right if it is more than certain threshold then don't allow it. So this way you can establish necessary restrictions which are necessary for your business operation.
[56:37] As they have mentioned it here, when you associate it with a gateway, it will intercept all the agent request and determines whether to allow or deny based on the policy. That's it folks. Now, let's talk about competition. Check
[56:52] video description. You will find a PDF file that contains the exact problem statement and how do you exactly participate and submit your solution in order to become a winner in this competition. The first 20 winners, each
[57:05] competition. The first 20 winners, each of them will get $250 of AWS credit. So, please check it out. We want to thank Amazon Bedrock Agent Core team for providing this uh credit course and also for sponsoring this video. If you have
[57:20] any questions, there is a comment box below. Thank you for watching.