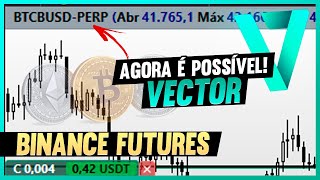

Trade Crypto Futures on Vector Now!
45sDirectly addresses a common trading pain point (ditching a bad platform) and promises a solution, creating immediate engagement.
▶ Play Clip"Title accurately promises a guide on trading crypto futures on Vector, and the video delivers step-by-step instructions."
This video provides a step-by-step guide on how to trade cryptocurrency futures on the Vector platform, enabling users to go long or short. The presenter explains how to connect a Binance futures account to Vector, configure API keys, and start trading with leverage and margin settings.
Vector platform now allows trading cryptocurrency futures directly, enabling both buying and selling (shorting). Previously, only spot trading was possible.
The main advantage of futures is the ability to trade in any market direction, not just long. Leverage is secondary; shorting allows profit from falling markets.
Assets with codes ending in 'PEP' (or similar) are futures-tradable. These allow short selling, unlike spot-only assets.
After downloading and installing Vector, log in and use the simulation account to practice before risking real money.
Click the arrow on accounts, select 'Add Account', then enter the API key, secret, and account name from Binance.
In Binance, go to API Management, create a new API key with a name, complete security verification (email and Google Authenticator), then set restrictions.
Enable 'Enable Futures' and 'Enable Spot & Margin Trading' restrictions. Save the API key and secret securely.
After entering API details in Vector, click 'Add Account'. Restart Vector if the account doesn't appear immediately.
Deposit margin directly into the futures account on Binance to enable trading. The balance will appear in Vector after restart.
Vector offers isolated and cross-margin leverage. Beginners should avoid high leverage; the key benefit is shorting, not leverage.
Vector has good support with real human agents. It's not free but reasonably priced for active traders who want more than just portfolio accumulation.
Vector now enables futures trading with Binance, allowing both long and short positions. The process involves creating an API key in Binance, configuring it in Vector, and depositing margin. This setup is ideal for traders seeking active management and short-selling capabilities.
What is the main advantage of trading futures over spot trading?
The ability to short sell (trade in any market direction), not leverage.
01:49
How can you identify which assets are futures-tradable on Binance?
Assets with codes ending in 'PEP' (or similar) are futures-tradable.
02:29
What two API restrictions must be enabled for futures trading in Vector?
'Enable Futures' and 'Enable Spot & Margin Trading'.
07:19
What should you do if the futures account doesn't appear in Vector after adding it?
Restart Vector.
08:28
Where do you deposit margin to trade futures via Vector?
Directly into the Binance futures account.
08:57
What are the two types of margin available in Vector futures?
Isolated margin and cross-margin.
09:25
Short Selling Advantage
Clarifies that the primary benefit of futures is the ability to profit from falling markets, not leverage.
01:49API Restriction Setup
Critical step to enable futures trading; must enable both 'Enable Futures' and 'Enable Spot & Margin Trading'.
07:19Vector Support Quality
Highlights that Vector offers real human support, which is a key differentiator from other platforms.
10:07[00:03] futures directly here on Vector. You can now trade cryptocurrencies, buy and sell, which wasn't possible before, directly on this platform. I'm Bruno, this is my charting studio, and
[00:16] this video will solve your problem of trading futures directly on Vector and finally ditching that awful Bahia platform that I'll explain step-by-step exactly what you need to do
[00:30] to start trading and configure your platform. If you're already subscribed, leave a like because you know the content is subscribed and this is your first time here, I invite you to subscribe to the
[00:43] channel, but don't leave a like yet. Just leave a like if I can help you. If you watch the video, give me a chance. If I can't help you, you can still subscribe for free and give me another
[00:55] video every Sunday on the channel studying the market, made a video about it when the platform was launched; I'll leave the link here. Here are my first impressions from
[01:09] when Vector was launched. I signed up right at the beginning, and one of the negative points I noticed in that video was precisely the issue of not being able to operate the chart perfectly. It wouldn't accept orders. We
[01:22] could see the open trades through the screen, but I couldn't open or close trades or make changes to the orders displayed. Now that's possible, I contacted Vector support at the
[01:35] time, and they told me it was a matter of national legislation. I do n't know what changed to make it allowed now, but it's working now, and that's what I'm going to show you in this video. First, you can trade like a
[01:49] sports player, right folks? In other words, you can only trade long, and the big advantage of being able to trade futures isn't leverage, which is also available here. You might think the advantage is leverage, but
[02:04] in my opinion, the advantage is precisely the fact that you can trade in any direction the market is going. In a sports player, you can only trade long, and you'll depend on the market going up to make money.
[02:16] And once you're short, when the market is falling, you can also trade that way. And to trade futures on currencies, whether it's Bitcoin, the tag Solana, or any asset available in Bahia, not with that
[02:29] ending PEP, it's all like that. All the assets that end close to this, here at the end of your code, are assets that you can trade futures on, that is,
[02:41] also short selling. Okay, so the first thing you need to do to be able to trade this account directly from Bahia, that is, Vector, is to you don't already have this account in Bahia, I'll leave the link here in the
[02:55] channel. Register through that link, you'll get a discount on fees if you register there through my link. And if you don't already have a Vector account, you company's website. I don't have any partnership with them, but I would like to
[03:12] video. I receive many questions from students and followers about this platform, so it might be interesting for them too. Leave a comment here asking Vector to sponsor the channel, and you will receive the download link for the platform in your email as soon as
[03:25] you sign up. You will download the file. And then, after installing everything else on your machine, it's all normal, just like you would with POF. There's no secret or anything complicated in this process,
[03:37] so I won't even go through it here; it's all exactly the same as you do in POF. After machine, you'll log in, open the platform, and you'll notice that here, in the accounts you opened (my account where
[03:52] you registered), there will be a simulation account and a normal Spot account, which is the main account you created once you managed to route this
[04:05] managed to route this Spot account here in Vector. The cool thing here is that there's a simulation environment, and for those of you who are starting out, it makes sense to use this simulation account before buying and selling in the simulation
[04:17] to see how it works before you start risking real money. It makes sense to take advantage of this simulation environment, as I said before, all the assets that are in the simulation... Here there's a tab here in the
[04:32] quotes grid that you can access by going to free quote tools, it will open this, there will be a tab based on these filters here, and no... All the assets are here, but all these assets are already available for
[04:47] trading, both bought and sold. You 'll notice that there are some final versions, the SBT, which are the parents, and there are others that are some that say it's the Bahia dollar,
[04:59] not itself, and the other you can trade here as long as it has the final version. The base has a security system that doesn't allow me to record the screen of the application or the website. When I'm recording my
[05:13] screen to make the video, I took a lot of pictures with my able to show you what you have to do. Remember, if forget to leave a like. Okay, so you're going to come here, click on
[05:27] this little arrow here on your accounts, and click on add account. You're going to click on account management and start, and this screen will open for you. screen you're seeing here is enter your extension, which
[05:43] in most cases is the bar, I don't know, but you can have others here too. The API key, the secret of the API, will work. And the account name, the account name is this name here, it appears up here, I put "future smeg" there so I know
[05:59] call it whatever you want. And now, where are you going to get this key from Apiaí and the secret to Up? Now we're going to get to the photos I mentioned before, and here's your right within Bahia. If you don't
[06:13] have your rented account, you'll go to the user center and you'll be in apartment management until a screenshot here. So, this is the step-by-step process you'll follow: you'll click on this yellow circle, "
[06:26] Up management," then you'll create a new apartment, and you'll put a name on this key here and click "create open." You'll put the name you want and click "create apartment." You'll have to do the security verification,
[06:40] both with your email and Google Authenticator. So you'll do these two security steps here, and then you 'll be able to create this 'll be able to create this new apartment. As soon as you do that,
[06:53] it will create the app for you. And right below, all the lists you've already created will appear, probably including "Sports" and this new "Futures" list that you clicked on and created. Now you're going to click the little
[07:06] yellow "Edit Restrictions" button on the right side of the list that appeared. on the right side of the list that appeared. another screen will appear with a series of options for you. It
[07:19] will probably be marked like this: " these restrictions is this: you're going to activate these two options here, '
[07:32] Dedicated'. Okay, leave these two options activated here. After you do that, you'll notice here above, there will be the API key and the secret key. Don't forget to save after you
[07:47] type in the restriction there, click save. Okay, and then a huge number will appear here for you, a very large code here for the API and the secret key. These are the two codes that will appear here that you're going to put in. It's that
[08:01] little while ago, after saving, that part with everything you changed. After you've changed everything, in this part here... You come here again, do this again, put in the neighborhoods and everything else, and you're going to copy and paste the
[08:15] opening key and the ICU secret. You should never give this to anyone, okay? This is something you should keep very safe, don't show it to anyone. And then you 'll just click on "add account." After
[08:28] you click on "add account," a little bit will pop up here on the right, as if it were an executed order, that the account was added here in Vector. After this was done, I needed to restart Profit. No, I
[08:42] had to restart Vector. It didn't work the first time. I restarted it and everything worked perfectly. And of course, you have to put margin in the balance to trade futures directly on the bar. No, you have to put the margin
[08:57] directly in the futures account to be able to... yes, put the deposited guarantee. And this part here will all go wrong. When you have the guarantee placed, you'll be able to see here, the
[09:12] guarantee that's deposited there will appear here for you, and then you'll be able to trade after you restart the machine. I needed to restart Vector here, so maybe with you. You don't need to worry about this here; you'll have all the
[09:25] normal leverage options, just like on the Balance platform. You can Balance platform. You can operate with isolated margin and cross-margin. Just read the difference between these two types
[09:37] of leverage here; it's pretty self-explanatory. Just read here, there's no work with the minimum leverage possible because the advantage of being able to trade futures isn't in the leverage itself, but in the possibility of short
[09:53] selling. As I said before, you'll come here, put it in isolated margin, and work here with maximum leverage. And if you're a beginner, avoid working with leverage. Some points
[10:07] I wanted to reiterate about Vector are that it's truly the best platform we've seen on the market, even with some flaws. Virtually, its support is very good. You can come here to help and seek
[10:20] direct support; a real human being will talk to you, and they understand what you're saying, which is very good. Nothing is free, right? It could be cheaper in my opinion, but it's a very small price for those who are willing to
[10:33] pay. Operating in this type of market with a focus on trading and not just portfolio accumulation, as is the case with the Bahian market, then for those who like to trade a little more and have a bit of active currency management, it makes perfect
[10:48] I hope I helped you with this video. Don't forget to subscribe to the channel and follow me on Instagram too @meio.com. Chart study. Health to you and your family. Thank you for watching and until the next video,
[11:01] watching and until the next video, bye!
⚡ Saved you 0h 11m reading this? Transcribe any YouTube video for free — no signup needed.