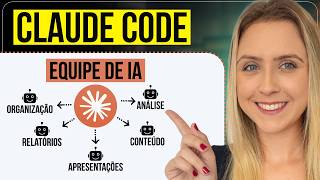

AI Team Works 100x Faster!
45sThe bold claim of 100x speed improvement grabs attention and promises extreme productivity, sparking curiosity.
▶ Play Clip"The title promises an AI team that works 100x faster, and the video delivers a practical, detailed tutorial on building exactly that."
This video demonstrates how to build a personal AI productivity team using Claude Code within VS Code, even for non-programmers. The presenter, Tainara Schimit, walks through creating a structured folder system, defining a project manual, installing official skills, and building custom skills and agents to automate file organization, report generation, presentation creation, and task management. The example scenario is a language teacher managing classes, materials, and a trip to Chile.
Claude Code is not just for programmers; it can be used to build a personal and professional productivity system, organize files, analyze routines, generate reports, create dashboards, and more.
Links to download VS Code, prompts, and other resources are provided in the description and pinned comment.
The project folder 'AI Productivity' contains subfolders: 00_inbox (messy files), 01_organized files, 02_Reports, 03_Dashboards, 04_Presentations, 05_Educational PDFs, 06_Infographics, 07_Notion tasks, context, templates, and SOPS.
A claude.md file serves as the main manual, explaining how Claude should behave within the project. It can be generated by Claude itself.
In VS Code, search for 'Claude Code' in extensions (by Anthropic), install it, and start a new session selecting the project folder.
Official Anthropic skills for working with documents, presentations, spreadsheets, and files are available on GitHub and can be added via /plugins command.
A custom skill to organize messy folders: identify file types, separate by category, rename files, create an index, and generate a report without deleting anything.
A skill that generates reports (summary, analysis, recommendations) or dashboards (visualizations with metrics, charts) based on user request.
By analyzing existing presentation templates, Claude creates a skill that generates new presentations following the same visual style for different languages.
Skills are procedures for specific tasks; agents are specialized team members that can think, decide, and use multiple skills.
This agent connects to Notion via MCP, reads the task board, analyzes routine, deadlines, and overdue items, and generates priority plans and dashboards.
This agent takes text content and decides the best visual format: slides, PDF, infographic, or dashboard, based on content type.
The entire AI team handles a messy folder, Notion tasks, and class preparation, producing organized files, reports, dashboards, and lesson materials.
By combining Claude Code with custom skills and agents, you can create a powerful AI productivity team that automates file management, reporting, presentations, and task analysis, saving significant time and effort.
What is the difference between a skill and an agent in Claude Code?
Skills are procedures that explain how to perform a specific task. Agents are specialized team members that can think, decide, analyze, and use multiple skills.
18:55
What is the purpose of the claude.md file?
It serves as the main project manual, explaining to Claude how it should behave within the project, including folder map, rules, and behavior.
04:33
What are the three essential folders recommended for the project?
Context folder (general information), templates folder (visual templates), and SOPS folder (standard operating procedures).
02:56
How do you connect Notion to Claude Code?
By using MCP (Model Context Protocol). You ask Claude 'Help me connect Notion via MCP' and it provides step-by-step instructions.
20:24
What does the visual transformer agent do?
It takes text content and determines which visual format makes the most sense: slides, PDF, infographic, or dashboard, based on content type.
23:58
What is the rule for the file organization skill regarding deletion?
It must never delete anything without permission.
09:28
How do you install official Anthropic skills from GitHub?
Type /plugins in VS Code, go to Marketplace, paste the GitHub link, and add it. Then install the desired skill from the plugins tab.
08:27
What is the purpose of the SOPS folder?
It contains standard operating procedures (step-by-step processes) so that the AI team doesn't start from scratch.
03:39
Claude Code for Everyone
Demystifies the idea that Claude Code is only for programmers, opening up productivity automation to a wider audience.
00:02Skills vs Agents Distinction
Clearly defines the architectural difference between procedural skills and decision-making agents, a key concept for building AI teams.
18:55Visual Transformer Agent
Demonstrates an agent that autonomously chooses the best output format based on content, showcasing advanced AI decision-making.
23:58Full Team Integration Test
Shows the entire AI team working together on a complex, multi-step task, proving the system's practical value.
28:03[00:02] is only for programmers, but that 's not true. And you can even use Cloud Code to build an entire personal and professional productivity system, or even for your studies. Capable of organizing your
[00:17] files, analyzing your routine, consulting your task board, generating reports, creating dashboards, transforming texts into beautiful PDFs, putting together presentations, and even deciding which visual style makes the most sense for
[00:34] each type of content you include. My name is Tainara Schimit and welcome to the Business in Mind channel. Here you'll learn everything you need to know about artificial intelligence. In this [snoring] video, I'm going to show you
[00:47] in practice how to create this productivity team in Cloud Code within VS Code, and you'll be able to replicate it even if you're a beginner. As an example for this video, let's suppose I am a language teacher. I
[01:02] teach Spanish, English, and Korean online, and I also have a trip to Chile planned. And that's an important detail for Claude to consider when he's analyzing my class schedule, because there can't be classes
[01:16] mentioned, we're going to use the cloud within VS Code, and it's the visual dashboard, while Cloud Code is the team working behind the scenes. Don't worry about links right now, because I'll leave some
[01:30] free material here in the description and in the pinned comment of the video with all the links you need, including to download VS Code and also the prompts used in this video for us to create the skills and agents with the prompts,
[01:43] of course, with customizable fields for you to add your personal details. To begin, I created a folder on my laptop called AI Productivity. Inside it, we're going to organize everything as if it were a
[01:57] digital office for this AI, for this AI team. It's better this way. this AI team. It's better this way. So, the folder named "00" (inbox) is where files with strange names, various things mixed together, screenshots, receipts,
[02:11] vouchers, class materials, in short, it 's usually where our downloads folder tends to look, right? The folder "01 organized files" will receive the files after Cloud organizes them, because I don't want it to delete or
[02:26] replace any files. Folder two, " Reports," will store the reports that it generates. Three dashboards, all the same thing. The folder containing presentations, educational PDFs, and infographics is all the same thing. These folders are also intended for
[02:41] the type of material that Cláudio himself will generate. And folder seven will store files related to the Notion task board. In addition, we have three other very important folders: context, templates, and I am
[02:56] or SP. The context folder stores general information about how I work, what my priorities are, what types of tasks I do, what tone I like in reports, and how I want
[03:09] materials to be organized. And that makes a big difference, because the cloud won't simply execute isolated commands; it will understand how that project simple detail, but it's something that makes the cloud work in a much more
[03:25] consistent way. Well, the templates folder will store visual templates, such as a presentation template, a report example, a PDF example, in short, an example of any visual material that you already have and want to follow that standard. And the
[03:39] SOPS folder contains procedures, which stands for standard operating procedure, that is, a standard step-by-step process for a task. This helps a lot because our A-team doesn't start from scratch; they already receive an organized work environment
[03:54] , except for our messy folder. But I'm talking about context, templates, and procedures. But you can start with just the context if you don't have the rest, is that okay? And you can even generate the templates
[04:07] using AI itself, such as GPT chat or human interaction, for example. And you can also generate the procedures with AI, if you want. Now, if I had to tell you something you absolutely need, it's a
[04:20] context folder with your detailed context and a folder where you should place the created, generated files. Let's start by creating a file called cloud.m. This file serves as the
[04:33] main project manual. This is where you 'll explain to the cloud how it should behave within this project, within these folders. And you can even ask the cloud itself to create the first version. So, in VS Code,
[04:47] we're going to select extensions in those little squares and search for Cloud Code. This is the first one that appears here with the Antropic label. Now let's click install. It'll be quick. When it's finished, the cloud code icon will appear
[05:02] here in the left corner. Let's click. You can close this initial tab and let's click on new session. Okay, it's loaded and the prompt box will appear here. Now I'm going to select "
[05:17] explore" up there and we'll select our workbook, which in this case is " AI Productivity". Just click on the folder once and then click on select folder. So, it includes the subfolders as well. Here you check the box because it indicates that VS
[05:34] Code can automatically execute features and code within this folder. Then click the blue button and that's it, now we can see all our folders within AI productivity, as well as the files. Now I can
[05:49] little while to open. Then we'll select a new session. I'm going to click on the explore folder to show our sample folders and then I'll paste the prompt to create our cloud.m file. In the prompt
[06:03] I mentioned that this is a productivity space for a language teacher who teaches online, and then I listed all the folders. I also defined the main rules. He should read the project context, follow the
[06:18] procedures in the SPE folder, use the templates when necessary, organize files but without deleting anything, separate personal documents from class materials, and consider the trip to Chile for agenda planning. And here it is
[06:34] asking for permission to write the file to our folder. I already gave permission for all edits to this section and that's it, it quickly created and displayed the structure as an overview, folder map, etc. And here is the
[06:49] cloud.m file. And when you open it, it looks like this. He details the entire project, folder map, rules, and everything else. As you can see, it's a very large and detailed file. And opening the folder here on the laptop as well,
[07:04] we can see the MD file. And this file is not definitive. As we create new skills and new agents, we can update this manual so that the cloud knows exactly when to use each resource. Before we create
[07:19] our own skills, we'll add some official ones from Antropic itself. And those skills are on GitHub. Don't worry, Well, these skills are mainly useful for working
[07:33] mainly useful for working with documents. Presentations, spreadsheets, and files. If you're looking for IAS to do more in less time, then you need to know about Monday. Even before
[07:45] artificial intelligence emerged, Mondei was already one of the best productivity tools on the market, used by companies of all sizes, freelancers, or even people who just want to be more organized and productive
[07:58] in their daily lives. Now, with its new air conditioning features, it has reached another level. In addition to helping you organize your work and your life, it 's ideal for those who want to bring projects to life and achieve their goals
[08:12] much more quickly. And best of all, there's an excellent free plan for you to test all the features. Click the link in the description and give it a try. Now I'm going to copy the link from GitHub,
[08:27] I'm going to copy the link from GitHub, go back to VS Code, type /plugins, and select it. Then I'll go to Marketplace, paste the link, and add it. It takes a few seconds and then, presto, it appears here. And then I can close this little
[08:43] window. Now I'm going to close this window and open a new one. Type " barraplugins" again, and several skills will appear in the plugins tab . I'm going to install that document skills thing. Then I just need to scroll down here and select "
[09:00] install for you". I'll do it one more time to be sure. And that's it, now just click restart. If I type barraplugins again, it will already appear here as an active plugin. Having done that, the first skill I want to create with
[09:14] you is the file organization skill . And this, folks, is very satisfying. This skill will be responsible for taking a completely messy folder and transforming it into something extremely organized and even
[09:28] categorized, you see? He must be able to identify the type of each file, separate them by category, rename the files using a clear pattern, create a spreadsheet or index, and generate a report explaining what was done. And most
[09:43] importantly, never, ever delete anything without permission. The inbox folder for him to organize will be the one with the hyphen (00 dash), which is the one I showed you at the beginning of the video. And in here, folks, it's like this: there are super messy files with
[09:57] all those strange names I showed you. I'm showing you again. Now I'm going to ask Cloud to create a skill called file organization. This skill should be used to organize any
[10:10] messy folder specified by the user. She needs to analyze the files in the source folder, identify the type, content, etc. I added a few more details and sent it. Now all we have to do is wait. Again, he's asking for permission. I will authorize it.
[10:26] Ready. He created the skill and showed the steps the skill will follow when organizing a folder. And here in the poncud folder, the skill document is already there, just like in the notebook folder, look, there's already a file organization folder
[10:40] with the skill inside. With the skill created, we can test it. So, just to remind you, this is the whole messy folder with strange names. So, I've already gone back to VS Code, pasted my prompt asking it to use the skill and put the
[10:56] organized files in the organized files folder ( which is the name), separating them by category and creating an organization report of what was done. Here it's asking me to install a PDF tool. I'll install it and then I
[11:09] can go back to the task chat; it will continue normally without me needing to notify them that I installed it. Now he has asked to allow a command in PowerShell. Let's approve it. Okay, 10 files organized, and he's already listed the four
[11:24] folders he created and which files are inside each one. So let's check it out . Here in the organized files section, we have the four folders and the files related to the organization. In Korean, he created the initial subfolder and included the
[11:38] already renamed files. Spanish folder also with renamed files and the same situation in English and travel. Clud analyzed the files, understood the type of
[11:50] each one, and organized everything automatically. Look, is n't it wonderful, folks, if truly come to make our lives easier? Now we're going to create a second skill. This skill will generate reports or dashboards. If I request a report, it
[12:06] will generate a report with a summary, analysis, and recommendations. If I request a dashboard, it will generate visualizations with metrics, charts, and indicators. And if I don't specify, he has to decide for himself. This can be used with
[12:22] productivity data, tasks, organized files, ongoing projects, etc. So I'm going to paste the prompt, which is even included in the free material, and send it. And now, once again, all we can do is wait. Down here, we can decide whether
[12:38] it should ask before making any edits or choose to edit automatically. You also have the option for it to send you a plan beforehand, or the automatic mode, where it chooses the best permission for each task. And I'm going to
[12:53] leave it on automatic mode. We can also select the effort level, and the higher the effort, the more tokens it will cost. Okay, skill created. And here it explains what it covers, how it works, including lists of
[13:09] accepted data sources, such as tasks, indexes, spreadsheets, Notion, classes, etc. And in our cloud folder, we already have a subfolder for that skill as well. Then we can test both modes. Starting with the report, let's assume I
[13:24] have a document detailing the progress of some students, which is this document here with name, language, level, frequency, focus, and priority. Each student has their own
[13:36] strengths, weaknesses, and recommended materials. I'm going to scroll down here so you can see all the material with all the students, and at the end there are observed patterns and materials that need to be created. I'll click here
[13:51] for more. and attach the file. And I'm going to ask him to generate a report showing the students' progress, recurring difficulties, materials that need to be created, priorities, and recommended next steps . A few minutes later, the
[14:05] work was done and, as is standard practice, he summarizes it here, for example, what he added to the report. So, let's see how it turned out. Starting with the report here in the folder, it turned out well- organized and visually appealing, including the
[14:19] main findings, individual progress of each student, recurring patterns by language, and materials for creation. So, I thought it was very nice, I liked the spreadsheets in the report, and it also has next steps; in short, very complete.
[14:34] Now let's generate a dashboard. I'm going to use the same conversation and ask him to generate a very visual dashboard, based on the same data. Ready. I'm curious to see how this one turned out, including getting everything right in the
[14:49] dashboard folder. He started with general indicators, then moved on to distributing the students, even down to their grade level. And then there's this wonderful spreadsheet that I loved, with the individual view of the students, the recurring patterns, uh, in boxes, right? I
[15:04] liked this design, the materials to create followed by alerts and next steps. I loved it. Tell me what you thought. Therefore, the same skill can deliver two different formats. And that's important because in everyday life
[15:20] you don't always want the same thing. Sometimes you want a report dashboard to see something visual, to visualize something more quickly. Now let's create a presentation skill. But first, enjoy this
[15:35] video and subscribe to the channel to stay updated. Leave a comment below telling me what you think of Cloud Code so far, and especially if the " hype" button appears, please click
[15:47] it, because that helps YouTube understand that this video is relevant and So, thank you very much to everyone who helped us in any way, and let's continue with the video. This skill is useful when I already know I want a
[16:01] presentation. The idea is for the Cloud to always follow the same design. To do this, I added some templates to the templates folder. So, here, we're in the AI productivity templates folder. And then I'll show you, for example, the
[16:16] presentation template for the Korean class. Oh, so there are several, many pages here. Now in Spanish, I'll keep you watching. Finally, there are also versions in Spanish and English; in fact, I created different templates for each of them
[16:31] . So, it could be PowerPoint templates, PDFs, infographics, in short, a template of whatever you want to create, even a file explaining how you want the visual appearance. And then there are two stages. First, I ask Clud to analyze these
[16:45] templates and identify patterns in each of the three, one for each language. And then I ask him to create a skill based on that analysis. So, let's go. I pasted my prompt asking it to analyze the templates in the folder,
[16:59] identify the patterns, and generate a report explaining how each template works. After about 9 minutes, he finished and let's see the result. Here it is very detailed and talks about all the languages. I'm just popping in
[17:13] quickly, just so you can see. Now that Cloud understands the pattern, we can ask it to create the skill. And I'm going to use the same conversation. Based on this information, create a presentation skill with fixed templates for
[17:28] each of the three languages. And that's when he starts creating. He asked me to install Python. So let's install it again. Here I click on install now and when finished, I can mark it as don, close these tabs and return
[17:43] to the cloud. Skill created. Furthermore, he tested and validated and provided information on what each presentation should include. Now we can test it. I'm going to ask him to create a Spanish presentation, explaining essential vocabulary used in day-to-
[17:58] day IT work. And this was the final result. I'll go through each slide here so we can see how it turned out. And I liked it, you know? I thought it looked very similar to the original. The color scheme turned out really nice, it really
[18:14] stands out. And the result is a presentation that follows the same visual format, but with new content. And this skill is very useful because you can use it for weekly reports, meetings, studying, projects, client presentations, classes—
[18:29] any situation where you need to convey a message through a presentation. And if you don't want presentations, you can create a skill focused solely on infographics, for example. But stay there because we're going to
[18:41] create an agent that's a visual transformer, it's sensational, and it will . It is precisely now that we are going to start creating our agents, and I need to explain the difference between an agent and a skill. Skills are
[18:55] procedures. They explain how to perform a specific task, for example, organizing files, generating reports, creating dashboards, or creating presentations following a template. The agents, on the other hand, are the specialized members of the
[19:10] team. They have a broader role. An agent can think, decide, analyze, and even choose which skills to use. So, agents can even use skills, and more than one at that. The first agent we're going to create is a
[19:25] routine and productivity analyst. This agent will primarily work with Notion, which is a board where I've created tasks to do, tasks in progress, and tasks completed. So, I'll show you here. So, here we have scheduled classes to attend. It has the
[19:41] person's name, the language, and the date and time. Here are some things I need to do, like creating flashcards in English, creating flashcards in Spanish, etc. And making flashcards is intermediate Korean, okay? So this is the board
[19:55] he has access to. His job is to understand my routine, my tasks, my deadlines, and especially what's overdue. This agent is not just for listing items; it's for analyzing routines, and not only analyzing them, but also
[20:10] interpreting them. First, we'll connect Notion to Cloud Code using MCP. This will allow the cloud to read my task board. It will create a connection between these two tools. To do this, you'll type the following into the chat with
[20:24] Cloud Code in VS Code: " Help me connect Notion via MCP," and it will provide you with updated step-by-step instructions on what to do. It's showing up exactly the same way here, where he gave me the instructions. Once
[20:38] that's done, we can create the first agent. For this, we will use barraagents and continue in the terminal. It will take a little while, that's normal. Then, when this screen with the purple text appears , we're going to use only the arrows, the
[20:54] computer's own arrow keys. Clicking won't work, you can only use the arrow keys . And don't be scared off by the interface at first, okay? After a few minutes you'll get used to it. Okay, so I'm going to press the right arrow,
[21:07] then the down arrow, and enter. Press Enter again, and then Enter again. Now, where it says "e" ( white), we're going to add the agent's details. I've already pasted my
[21:19] prompt here; as you can see, it's quite large. It's also in the free material. And when you're finished, you just press enter again at the end and it will start creating the agent based on my description. The more
[21:33] detailed you are, the better. You can even ask the cloud, chat, or another AI for help to create the prompt for your agent. Here we select the tools that he will have access to, and by default they all come checked. To
[21:47] remove one, just use the down arrow and then enter, then use the up arrow again and click until you reach continue or continue. And then you press enter. In this case, I'll keep all the ones that are already there. Then just click continue. Now we can
[22:03] still choose the model using the arrows. And I'm going to select the sonet and press enter. Next, we chose the color, and I'm going to choose pink. And here, enter
[22:15] again. And there you have it, a summary of our agent: name, summary of our agent: name, location, model, description, etc. Once approved, all I have to do is press enter. And our agent has already been created;
[22:29] we can already see his name appearing here. Now press the down arrow twice and enter next to the agent's name. Now go back to run agent and let's test our agent. I'm going to paste my prompt here, and I asked it to analyze
[22:45] my task board in Notion and generate a priority plan. To send, just press enter. And pay attention, because sometimes he might also ask for your permission before continuing, like he did now. And
[22:59] using the arrows, I will allow it. He concluded by providing a summary of the overall situation, the classes scheduled for the coming days, critical bottlenecks, mentioned the trip to Chile, which includes a class scheduled for that date, and the
[23:14] action plan. And most interestingly, he asks if I want him to generate the complete flow for the next class with script, presentation and review material, or if I want a dashboard with a visual overview first. Of all
[23:30] the tasks, I chose to have him generate the dashboard first. And here is our very visual dashboard. I love this, guys. I like things that are very visual and colorful. Finally, with scheduled classes and an explanation of what needs to be done in each one.
[23:44] Pending tasks, bottlenecks, and action plan. And here he used the reporting and dashboard skill that we created earlier. Now, the second agent is even more interesting and, honestly, is my favorite. It doesn't have just
[23:58] one fixed exit. His job is to take text content and determine which visual format makes the most sense. He can choose between slides, PDFs, infographics,
[24:10] dashboards, etc. The rule is simple. If the content is sequential and good for presentation, it will create slides. If it's didactic and explanatory, it will create a PDF. If you have data, numbers, and metrics, it will create a dashboard. If it's
[24:25] comparative, concise, or conceptual, he'll create an infographic. So, this agent not only executes, but also has the power to make decisions. And if you want to get ahead and find out about the latest news from A
[24:39] before everyone else, then I invite you to join our free WhatsApp group. Rest assured, there are no good morning messages or stickers there, just news hand-picked by our team. To
[24:52] enter, simply point your phone's camera at the QR code link in the description and pinned comment. There you can also find our free materials, such as courses, prompts,
[25:04] spreadsheets, as well as coupons and discounts on tools that we recommend. So, if I were you, I'd take a look. Well, to create this agent, we need to integrate it with Nano Banana. First, you'll need to get your API key
[25:18] First, you'll need to get your API key from Google AI Studio. So, here we are in Google AI Studio, okay? Then you'll just come down here, to this little you'll just come down here, to this little key, Get API key. Here it is.
[25:30] Here you can copy your key or even create an API key. Hold on, I'm ahead. Here is an option to create an API key. In the explorer, right-click and select "new file," then
[25:46] select "new file," then type pmcp.json 'll paste this text here, which is also in the free material that's in the
[25:59] description and in the pinned comment, so you can just copy and paste it. And here you will add your API key, which I showed you how to get. And to save, you 'll press Ctrl + S. So now I'm going to put my API key here and
[26:14] save it. So, of course, I can't show that here in the video, right? This key is private; you should also keep it private. Then I'll save, close VS Code, and open it again to include this integration and update it. Okay,
[26:28] the cloud is now open. And now I'm going to go to terminal, new terminal, and type cloud mcp list, as it appears. And now let's confirm if the integration of the nano banana was successful. And it worked, it's showing here how it's connected. So,
[26:44] everything's fine. Now we can create the agent. Let's type barraagents, continue in the terminal, and wait for everything to load. Then, using the arrow keys, select " everything to load. Then, using the arrow keys, select " create new agent" and press enter. Enter. Enter.
[27:00] And now we describe the agent. I'll paste the prompt here and press enter again. Now all you have to do is wait and pay attention to any permission requests he may make. Ready. Now I'm going to press enter in the tools section. The model will be the
[27:16] Sonet and I will choose the color green. And here, enter again. And there you have it, the agent's draft with all the details. All very well? Enter to save. And now we have two agents here, the analyst and the visual transformer. And
[27:33] then we can test the agents bar, continue in the terminal, you know, you have to wait. Now, using the arrow keys, I'll navigate to the visual transformer and press enter. Now I'll write my prompt, and I'll ask him to create an infographic explaining
[27:49] the Korean alphabet. Is it ready? Let's see how it turned out. I've already selected it here. I'm going to zoom in. Ready. I thought it turned out really nice, okay? Very didactic, it turned out very interesting, and even quite cute. I really liked this
[28:03] opinion. Leave your comments below. But now comes the most interesting part. Let's test the entire team with a complex task. The scenario is as follows. I have a messy folder with loose files that you've
[28:18] already seen. I have a task board in Notion with countless tasks, numerous pending items, and upcoming classes for which I have n't prepared the content, neither the I want my productivity team to handle all of this. The
[28:33] prompt could look like this: execute the complete task using the skills and agents already created. I asked him to analyze the messy folder and create a nice, colorful spreadsheet listing all the files, analyze Notion, and generate a
[28:49] productivity report and a dashboard with the main indicators. And finally, I asked him to generate a document with the content for my next class, which is in Notion, along with the necessary materials. So, he has a
[29:04] lot of files to hand in. Well, after about 15 minutes it was ready, and as is standard practice here, we have a summary of what he did, so let's check it out right away. First, the lesson presentation, and I found it well-organized, beautiful,
[29:19] eye-catching, and good at capturing the student's attention . So I'll stay here so you can see her until the end. Now the PDF also turned out nicely, following the same style as the presentation and with exercises for the student to fill out and
[29:35] reinforce the content. Now the spreadsheet about the disorganized files includes the file name, type, category, content summary, and other information. It turned out really pretty too. The report, however, followed the standard format we're used to seeing in this
[29:49] video, with spreadsheets and colors for emphasis. So that also turned out quite interesting. Cloud needed to decide what to do. It's a system. We created a team of A with different roles. We worked on my files,
[30:03] tasks, and routine. And look, if you have n't liked this video yet, now's the time, with me in the comments. Well, Cloud Code has some very interesting commands, including one that saves tokens. And I showed you the
[30:19] best commands to use in this video that's appearing here.




⚡ Saved you 0h 30m reading this? Transcribe any YouTube video for free — no signup needed.