Stop Leaving Thick Fat on Your Brisket
31sMany beginners leave too much fat; this thin-cap tip is controversial but crucial.
▶ Play ClipThis video provides a step-by-step guide to smoking a brisket for beginners, updated for 2023. It covers trimming, seasoning, smoking at two temperature phases, wrapping, resting, and slicing.
Trim a 12–15 lb whole packer brisket: remove the mohawk, thin the fat cap to ¼ inch, cut off the thin tip of the flat, and remove seam fat between point and flat.
Mince or grind trimmed fat, boil with 8 cups water for 2 hours, then refrigerate until a hard fat disc forms. Use this tallow later for wrapping.
Spritz brisket with water, apply a brisket rub (e.g., ¼ cup coarse pepper, ¼ cup kosher salt, 2 tbsp Lowry's). Let sit 30 min or dry brine overnight.
Total cook ~14 hours: first 4 hours at 225–250°F, then ramp to 275–300°F for remaining 8 hours. Use a water pan to block radiant heat and spritz every 30–60 min.
At ~10 hours (internal ~180°F), wrap in butcher paper with beef tallow or clarified butter. Return to smoker for ~2 more hours.
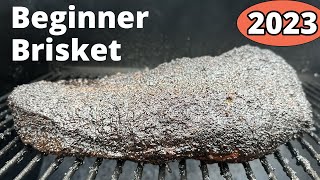
Brisket is done when internal temp is 200–205°F, probe tender (buttery feel), and the brisket feels soft and jiggly when squeezed.
Rest on counter for at least 2 hours until internal temp drops to ~140°F. Slice against the grain, coat slices with tallow to prevent oxidation, and cube the point for burnt ends.
"Title accurately promises an easy beginner brisket recipe; video delivers detailed step-by-step instructions."
What internal temperature should a brisket reach for doneness?
200–205°F, typically 203°F.
14:23
What is the recommended fat cap thickness after trimming?
About ¼ inch.
1:04
How long should a brisket rest on the counter after cooking?
At least 2 hours, until internal temp drops to ~140°F.
15:17
What are the two main muscle groups of a brisket?
The point (fatty side) and the flat (lean side).
1:18
Why is a water pan important when smoking brisket?
It blocks radiant heat, helps maintain lower temperatures, and adds humidity.
10:14
What is the purpose of spritzing the brisket during the cook?
It helps smoke adhere to the surface, creating a darker bark and more smoke flavor.
11:20
At what internal temperature should you wrap the brisket?
Around 180°F.
13:26
What are the three tests to determine brisket doneness?
Temperature test (200–205°F), probe tender (buttery feel), and squeeze test (soft and jiggly).
14:19
How do you render beef tallow from trimmed fat?
Mince or grind fat, boil with 8 cups water for 2 hours, refrigerate until fat solidifies on top, then melt and jar.
4:46
What is the recommended total cook time for a beginner brisket?
About 14 hours: 12 hours smoking plus 2 hours resting.
8:30
Thin fat cap is key
Explains why a ¼-inch fat cap renders better and avoids rubbery fat.
1:0414-hour cook overview
Sets realistic expectations for total time including rest.
8:30Spritzing science
Clarifies that spritzing helps smoke adhesion, not necessarily juiciness.
11:20Three doneness tests
Provides a reliable method to avoid overcooking or undercooking.
14:19Board tallow prevents oxidation
Practical tip to keep sliced brisket looking moist.
16:00[00:00] it's a step-by-step video on how to
[00:02] smoke a brisket for beginners updated
[00:04] with all of my best beginner brisket
[00:06] tips for 2023 so let's get smoking okay
[00:09] it's the night before you're going to
[00:10] smoke your brisket let's call it Friday
[00:12] night so pour yourself a beverage and
[00:14] get ready for step one which is trimming
[00:17] get yourself a 12 to 15 pound whole
[00:20] Packer brisket of the best quality you
[00:22] can afford prime or choice will do just
[00:25] fine the more intramuscular fat the
[00:27] better remove the brisket from the
[00:29] cryovac bag by slicing the bag open any
[00:32] way you'd like use a sharp knife I like
[00:34] to slice into the bag and through the
[00:36] very tip of the flat because we're going
[00:38] to be removing that last few inches of
[00:41] meat anyway to help the brisket cook
[00:42] more evenly then I just pull the brisket
[00:45] out of the cryovac bag I lay it on the
[00:47] cutting board and I begin now you'll
[00:49] notice that one side of the brisket has
[00:51] a lot of fat on it that's what we call
[00:53] the fat cap and it'll have a flap or
[00:55] mohawk on the highest area of the
[00:57] brisket we're going to slice that off on
[00:59] an angle and keep slicing towards the
[01:02] thinner end of the brisket so only a
[01:04] quarter inch of fat remains at the
[01:06] thinner end now starting from the
[01:08] thinner end of the brisket we're going
[01:09] to slice an inch or so strip along the
[01:12] side of the brisket removing most of
[01:13] that large fat deposit that you can see
[01:15] facing the camera we can now clearly see
[01:18] two muscle groups of the brisket which
[01:20] are the point on the left hand side also
[01:22] called the fatty side of the brisket it
[01:24] sits on top of the flat which we see on
[01:27] the right side of the brisket and
[01:28] running underneath the point to the left
[01:30] side it's also called The Lean side of
[01:32] the brisket both muscles are separated
[01:34] by this large seam fat which starts out
[01:37] very thick on the side of the brisket
[01:38] facing the camera and it kind of tapers
[01:40] off and thins out towards the other side
[01:42] we're going to try to carve down as much
[01:44] of that thick seam fat as possible
[01:47] otherwise our brisket slices from the
[01:49] point side of the brisket that you see
[01:50] facing you will have a huge chunk of fat
[01:52] in the middle of them so now we slice
[01:54] down the Mohawk even more on an angle to
[01:57] remove more of that seam fat and give
[01:59] the brisket its round shape now moving
[02:01] on to the tip of the point I'm rounding
[02:03] out any rough edges and slicing down the
[02:05] fat to around a quarter inch thickness
[02:07] then I'm cutting a strip off the other
[02:09] side of the brisket so we can see the
[02:11] meat underneath it moving on to the very
[02:13] top of the fat cap this is where the
[02:14] Precision work kind of comes into play
[02:16] start by slicing it down layer by layer
[02:19] until it's only about a quarter inch
[02:21] thick now you may think it's weird to
[02:22] carve off all of this fat that you paid
[02:24] good money for but a thinner fat cap is
[02:27] a good thing because it's going to
[02:28] render down much more easily and create
[02:30] a thin layer of caramelly gooey bacony
[02:33] fat on each slice if that fat cap is too
[02:37] thick it won't render and you'll get
[02:38] kind of a thick layer of rubbery fat
[02:40] that your guests may actually want to
[02:42] peel off before eating the slice of
[02:44] brisket we definitely don't want that
[02:45] now as you're trimming the fat cap
[02:47] you'll probably cut too deep in some
[02:49] areas and scalp the brisket or expose
[02:52] the meat under the fat cap there may
[02:54] already be several scalps from the
[02:55] butcher that you can't do anything about
[02:57] and you may make some of your own but in
[02:59] general we you want to minimize those
[03:01] scalps because it provides an Avenue and
[03:03] an area for moisture to pool on top of
[03:05] the brisket and mess up the bark on that
[03:08] spot it also results in slices that
[03:10] don't have a continuous layer of
[03:12] rendered fat that being said I've
[03:13] trimmed hundreds of briskets and I still
[03:15] scalp them all the time just go slow
[03:17] make multiple long shallow slices using
[03:20] as much of your knife as possible on
[03:22] each stroke keep that knife sharp and
[03:24] press into the fat as you slice to get
[03:26] an idea of how thick it is in the
[03:28] remaining areas if there's a thick layer
[03:30] that still needs trimming the fat will
[03:32] often be hard when you press into it and
[03:34] if it's a perfect quarter inch thick
[03:36] it'll often be soft and pliable because
[03:38] the meat is right underneath it and
[03:40] often if the fat is super thin you'll be
[03:42] able to actually see a reddish tinge
[03:44] through the fat so that you know it's
[03:46] pretty thin in that area and you want to
[03:47] stop cutting now moving on to the tip of
[03:49] the flat muscle of the brisket we want
[03:51] to slice a few inches off in a crescent
[03:54] moon shape this will shave off the
[03:55] thinnest part of the flat so the brisket
[03:57] Cooks more evenly and it will also
[03:59] prevent the fly flat from curling up and
[04:01] creating an area for moisture to pool
[04:03] and mess up your bark next flip the
[04:05] brisket over and you'll see the other
[04:07] side of the seam fat separating the
[04:08] point and the flat muscles slice that
[04:11] seam fat down as much as possible until
[04:13] it's kind of flush with the meat but
[04:15] don't gouge into it too much now trim
[04:17] off any brown bits on the edges of the
[04:19] brisket and move over to the bottom of
[04:21] the flat where you see a layer of
[04:23] transparent silver skin and fat remove
[04:25] most of that layer being careful to trim
[04:28] off the Silver skin while removing as
[04:30] little meat as possible now you're done
[04:32] trimming and you can Marvel at your
[04:33] beautiful meat sculpture it really is a
[04:35] work of art and you should be proud of
[04:36] yourself now you'll notice that we've
[04:38] trimmed off a lot of fat that again you
[04:40] paid good money for do we just throw it
[04:42] in the garbage no we're going to save
[04:44] that and render it down into beef Tallow
[04:46] so step two is to render down your
[04:48] Tallow the best way I've found to
[04:50] produce the cleanest tasting pure Tallow
[04:52] is to mince up the fat as small as
[04:54] possible or if you have a meat grinder
[04:56] you can grind it in your meat grinder
[04:58] then render it in a pot bought on the
[05:00] stove with eight cups of water added
[05:02] we're going to boil that for at least
[05:04] two hours then we're going to pop it in
[05:06] the fridge until a hard disk of fat
[05:09] solidifies on top of the water will pop
[05:11] that disc out and then melt it down and
[05:13] put it in a jar now we have really pure
[05:15] great tasting beef Tallow we're going to
[05:17] use that later on in our brisket cook to
[05:19] add more juiciness and flavor to our
[05:21] brisket moving on to step three rubbing
[05:23] your brisket I'm spritzing the bottom of
[05:25] the brisket to help the rub stick and
[05:27] then I'm using a shaker bottle to apply
[05:29] the rub to the bottom of the brisket now
[05:31] I'm coating all of the sides and finally
[05:34] I'm flipping the brisket over giving it
[05:36] another Spritz of water and applying the
[05:38] rub to the top I'm using my own blend of
[05:41] brisket rub for this video you can find
[05:42] out where to buy it in the description
[05:44] section below it has a unique blend of
[05:46] pepper sumac different sizes of salt
[05:48] granules and other ingredients to really
[05:50] give your brisket a super dark and
[05:52] amazing flavor but you can also use any
[05:55] brisket rub that you have on hand you
[05:56] can even make your own the one that I
[05:58] like making at home the best is a
[06:00] quarter cup of coarse ground pepper
[06:02] quarter cup of kosher salt and two
[06:04] tablespoons of Lowry's seasoned salt now
[06:07] this brisket is going to sit out for at
[06:09] least 30 minutes before it goes on the
[06:11] smoker to soak up the rub but ideally
[06:12] you would rub it the night before and
[06:14] leave it in the fridge to dry brine
[06:16] overnight that way you just have to wake
[06:18] up in the morning and throw it on the
[06:20] smoker guys before we smoke this brisket
[06:22] I'd like to thank zbiotics for
[06:23] sponsoring this video we all have busy
[06:25] lives these days and can't afford to
[06:27] waste a day stuck on the couch because
[06:29] of a few drinks the night before
[06:30] zebiotics is the answer we've all been
[06:33] looking for zebiotics pre-alcohol
[06:35] probiotic is the world's first
[06:37] genetically engineered probiotic it was
[06:39] invented by PhD scientists to tackle
[06:42] rough mornings after drinking here's how
[06:44] it works when you drink alcohol gets
[06:46] converted into a toxic byproduct in the
[06:49] gut it's this byproduct not dehydration
[06:52] that's to blame for your rough next day
[06:54] zibiotics produces an enzyme to break
[06:56] this byproduct down it's designed to
[06:59] work kind of like your liver but in your
[07:01] gut where you need it the most just
[07:03] remember to drink zbiotics before
[07:04] drinking alcohol drink responsibly and
[07:07] get a good night's sleep to feel your
[07:08] best tomorrow personally whenever I take
[07:10] a zebiotics I just feel more motivated
[07:12] the next day and more ready to tackle
[07:14] the day and that means I know I can have
[07:16] a few drinks and still get everything I
[07:17] need to get done the next day so order
[07:19] zebiotics now for your summertime
[07:21] barbecues weddings and vacations go to
[07:24] zebiotics.com forward slash smoke Trails
[07:26] BBQ or scan the QR code on the screen
[07:29] right now to get 15 off your first order
[07:32] when you use smoke Trails BBQ at
[07:35] checkout you can also sign up for a
[07:37] subscription using my code so you can
[07:39] stay prepared no matter the time or
[07:40] occasion zebiotics is also backed with a
[07:43] 100 money back guarantee so if you're
[07:45] unsatisfied for any reason they'll
[07:47] refund your money no questions asked
[07:49] remember to head to zebiotics.com
[07:51] forward slash smoke trailsbbq and use
[07:54] the code smoketailsbbq at checkout for
[07:57] 15 off also if you want a chance to win
[07:59] a free 12 pack of zebiotics you can sign
[08:02] up in the description section below for
[08:04] a chance to win the contest runs for the
[08:06] next two weeks after the posting date of
[08:08] this video and it's open to residents of
[08:10] the US only so sign up today for your
[08:12] chance to win thank you zebiotics for
[08:14] sponsoring this video okay it's the next
[08:16] day so it's time for step four smoking
[08:18] your brisket so let's talk about time
[08:20] and temperature this is just a quick
[08:22] overview so you know what you're getting
[08:23] into I'll cover this in more detail
[08:25] later in the video but in general a
[08:27] brisket cook will take around 12 hours
[08:30] of active smoking time plus two hours
[08:32] resting so 14 hours total for that first
[08:35] four hours we're going to run a smoker
[08:37] anywhere from 225 to 250 until the
[08:40] brisket starts sweating out moisture and
[08:42] it's better able to protect itself from
[08:44] the high heat which will ramp up to in
[08:47] the second phase of the brisket cook for
[08:49] the next eight hours after that first
[08:51] four hour mark we're going to ramp up
[08:53] temperatures to between 275 to 300 again
[08:56] the brisket is sweating out a lot of
[08:58] moisture it's better able to protect
[09:00] itself from drying out so we're ramping
[09:02] up the temperatures and that increased
[09:04] temperature is also going to help the
[09:05] brisket cook faster power through the
[09:08] stall and it's going to help the brisket
[09:10] fat render on the top of the fat cap so
[09:12] just so you know what you're getting
[09:13] into it's a 14 hour cook that means
[09:16] getting up at around 4 a.m in the
[09:18] morning which is not ideal but I'd
[09:20] highly recommend it if it's your first
[09:22] brisket to experience this traditional
[09:25] way of cooking brisket getting up in the
[09:27] morning smoking the brisket all day
[09:29] resting it slicing it and then serving
[09:31] it fresh that same day that way you'll
[09:33] get a really good idea of what the basic
[09:36] method for cooking a brisket is and you
[09:38] can get into more advanced methods like
[09:40] hot holding or refrigerating and then
[09:43] reheating your brisket or hot and fast
[09:45] cooking on your next brisket cook I have
[09:47] a lot of videos that I'll link in the
[09:49] description section below if you want to
[09:51] look into any more of those Advanced
[09:53] topics but for your first brisket I
[09:55] really recommend just doing it all on
[09:56] the same day now we're still on step
[09:58] four smoking so I'm putting my brisket
[10:00] on the smoker and maintaining
[10:02] temperatures at 250 for the next four
[10:04] hours of the cook on an Offset Smoker
[10:06] like this one here the thicker Point end
[10:09] of the brisket should be facing the
[10:10] Firebox because it's better able to
[10:12] handle the heat and you should have a
[10:14] large water pan next to the Firebox with
[10:16] a few inches of gap between the water
[10:18] pan and the Firebox opening this will
[10:20] allow the indirect convective hot air up
[10:23] and over the brisket as well as some hot
[10:25] air underneath the brisket to cook it
[10:27] more evenly and the water pan will blunt
[10:29] the radiant heat from the Firebox that
[10:31] tends to dry out and burn meat now in
[10:33] the Firebox I have a small grate on the
[10:36] left side with a steel pan full of water
[10:38] directly over the fire this water pan is
[10:41] going to absorb the radiant heat of the
[10:43] fire it's going to help maintain a lower
[10:45] temperature which is especially
[10:46] important in small offsets that tend to
[10:48] run hot and also as the water boils it's
[10:51] going to add humidity to the Cook
[10:52] chamber now if you're cooking on a
[10:54] pellet grill you'll want to place the
[10:55] brisket on the second upper rack with a
[10:58] very large water pan below it again to
[11:01] block that radiant heat and it's the
[11:03] same concept on pretty much any other
[11:04] kind of smoker whether it's a drum
[11:06] smoker Weber Smoky Mountain kamado or
[11:08] Center box smoker get that water pan
[11:11] between the meat and the heat to prevent
[11:12] your brisket from getting dry burnt and
[11:14] overcooked now every 30 minutes to an
[11:17] hour during the first four hours of the
[11:18] cook I'm opening the smoker lid and I'm
[11:20] spritzing any dry areas of the brisket
[11:23] if the bark looks bone dry in certain
[11:25] areas then Spritz it it shouldn't be
[11:27] soaked but we want the meat to look
[11:28] moist and tacky so that smoke clings to
[11:31] it more easily anecdotally a lot of pit
[11:33] Masters say that spritzing increases the
[11:35] juiciness of the brisket I haven't found
[11:37] any experiments or scientific articles
[11:40] or any other empirical evidence
[11:42] including my own experiments to
[11:44] corroborate that but that's what a lot
[11:46] of people say and it really can't hurt
[11:48] the one thing we do know with a hundred
[11:49] percent empirical certainty is that
[11:51] spritzing the meat does help the smoke
[11:53] attach and adhere to the surface better
[11:55] so we get a darker bark and more smoke
[11:57] flavor that is backed up by science and
[11:59] EXP experiments from multiple different
[12:00] sources also at this point I'm foiling
[12:02] off the thinner edge of the flat as well
[12:04] as the protruding part of the point to
[12:06] help it from drying out this just helps
[12:08] those edges from getting dry and it
[12:10] helps the brisket cook more evenly to
[12:11] some extent now at the four hour mark
[12:13] your brisket should look something like
[12:15] this if you're using an offset smoker or
[12:17] charcoal or wood burning smoker possibly
[12:20] less dark and more reddish in Coloring
[12:22] if you're using a pellet grill and it
[12:24] should be sweating out its own moisture
[12:26] now this is a clear sign of evaporative
[12:28] cooling so we now want to ramp up
[12:30] temperatures otherwise the brisket will
[12:33] just stall out and take forever to cook
[12:34] a higher temperature is also necessary
[12:37] to properly render the fat cap so I'm
[12:39] bumping the temperatures up to between
[12:41] 275 to 300 for the remaining eight hours
[12:44] of the cook now the next step is to
[12:46] endure some sort of hardship that will
[12:48] inevitably happen in the middle of your
[12:49] cook in my case there's a thunderstorm
[12:51] happening and my fire is about to die so
[12:54] I'll have to load it all up but you just
[12:56] got to keep going I hope brisket away
[12:59] oh
[13:16] hopefully you overcame your unexpected
[13:18] hardship that inevitably happens and
[13:20] threatens to ruin your brisket cook and
[13:22] then it's time for step six which is
[13:24] wrapping your brisket at around the 10
[13:26] hour mark your brisket should look very
[13:28] dark less moisture pooling on the
[13:29] brisket and it will be probing at around
[13:32] 180 degrees internal so now I'm removing
[13:35] the brisket from the smoker and I'm
[13:36] placing it down on a sheet of butcher
[13:39] paper I'm placing some chunks of beef
[13:41] Tallow that we made earlier in this
[13:42] video on the butcher paper and I'm also
[13:45] adding some clarified butter also called
[13:46] ghee you can also just use regular
[13:48] butter or skip it entirely and use
[13:50] Tallow it's really up to you the
[13:52] important thing is there's liquid fat in
[13:54] the wrap now I'm wrapping up the brisket
[13:56] and then it's going back on the smoker
[13:58] for the remaining two or so hours of the
[14:00] cook step 7 finishing now it's time to
[14:03] finish our brisket and this is probably
[14:04] the hardest part a perfect brisket is
[14:06] tender enough so that you can pull apart
[14:08] the slices with a little bit of
[14:10] resistance and they're nice and juicy if
[14:12] it's overcooked the brisket will be
[14:14] really dry and the slices will just kind
[14:15] of crumble apart in your hands so to get
[14:18] to that perfect doneness we need to
[14:19] perform three tests on the brisket the
[14:21] first test is the temperature test the
[14:23] brisket should probe between 200 and 205
[14:26] in Turtle usually 203 degrees is a good
[14:28] internal temperature to shoot for second
[14:30] the brisket should be probe tender that
[14:32] means when you probe into it there's
[14:35] very little resistance and it feels
[14:36] buttery and tender the probe shouldn't
[14:39] tug when you pull it out a trick to
[14:40] better knowing when it's probe Tender Is
[14:42] to start checking for probe tenderness
[14:44] about an hour after wrapping and then
[14:47] every 30 minutes after that an hour
[14:49] after wrapping it'll probably still be
[14:51] pretty tough and then you can probe into
[14:53] it every 30 minutes after that and
[14:55] eventually you'll feel when the muscle
[14:56] fibers kind of give up and it gets
[14:59] noticeably more tender that is probe
[15:01] tenderness and the final test is to pick
[15:03] up the brisket with cotton gloves under
[15:05] nitrile gloves and poke your fingers up
[15:07] into the underside of the brisket and
[15:08] kind of squeeze the brisket together it
[15:10] should feel very soft and flexible like
[15:12] jello once it meets all those tests then
[15:14] your brisket is done step 8 is resting
[15:17] your brisket after your brisket is done
[15:19] rest it on the counter for at least two
[15:22] hours until it comes down in temperature
[15:23] to around 140 degrees internal the
[15:27] brisket absolutely needs this resting
[15:29] time to redistribute moisture within the
[15:31] brisket reabsorb moisture that's still
[15:33] within the butcher paper and to finish
[15:35] rendering the intramuscular collagen in
[15:37] the brisket if you're still a long ways
[15:39] from dinner let's say you're four or
[15:40] five hours from dinner you can put it in
[15:42] a cooler just make sure that when you do
[15:44] put it in the cooler you've rested it on
[15:46] the counter for at least an hour to
[15:48] bring it down in temperature a little
[15:49] bit maybe to 170 as high as 180 so that
[15:52] the brisket isn't going to overcook from
[15:55] carryover cooking because it could
[15:56] continue to cook at 200 plus degrees for
[15:59] quite a long time and overcook the
[16:00] brisket step nine is slicing unwrap the
[16:03] brisket and pour the juices and Tallow
[16:05] on top of the brisket and All Over The
[16:07] Cutting Board you can and should do this
[16:09] in front of your family and guess
[16:11] because it's very impressive now slice
[16:13] the brisket in Half Stack the two halves
[16:15] and and squeeze them together while
[16:17] showing your family and guests you got
[16:19] to have a little bit of Showmanship you
[16:21] just spent a long time cooking this
[16:22] brisket so it's worth it to show your
[16:25] family all that work now coat the
[16:27] exposed meat with the board Tallow so
[16:29] the meat doesn't oxidize if any slices
[16:31] are exposed directly to the air without
[16:33] being coated in fat they are going to
[16:35] oxidize and appear dry even though they
[16:37] won't be actually dry there will be this
[16:39] Sheen of what looks like dryness on them
[16:42] that's the oxidization and people will
[16:44] think that they look dry so make sure
[16:46] you're constantly coating any slices or
[16:48] exposed meat with fat either from the
[16:50] board or the fat from your hands and
[16:52] that's going to make your brisket look
[16:54] and taste better and more juicy next
[16:56] take the fatty Point side of the brisket
[16:58] and slice off one side of it then Cube
[17:01] up that Barky slice and leave the chunks
[17:03] to the side those are your burnt ends
[17:05] now continue to make quarter inch slices
[17:07] until you reach the other side of the
[17:09] brisket take the last Barky Edge slice
[17:12] and Cube that into more burnt ends now
[17:15] moving on to the thinner flat or lean
[17:17] side of the brisket start by making
[17:19] quarter inch slices all the way along
[17:21] the brisket until you reach the very tip
[17:23] of the brisket depending on how dry the
[17:25] tip is you may decide to just serve that
[17:27] up to your family but more often than
[17:29] not it's better to just take the very
[17:30] tip of the flat and just hide it away
[17:32] use it for tacos or chili at a later
[17:34] date it's always going to be drier than
[17:36] the rest of the brisket you just can't
[17:37] avoid that now after you've nailed this
[17:39] beginner brisket recipe on your first
[17:41] brisket check out my other videos which
[17:44] have more advanced brisket methods my
[17:46] favorite one is the 190 and hold brisket
[17:49] method which involves taking your
[17:50] brisket to around 190 degrees Fahrenheit
[17:52] and then holding it for 18 hours in your
[17:55] oven or another holding device it just
[17:57] creates an amazing flavor experience
[17:59] it's beefy it's juicy it's just amazing
[18:02] I will see you in the next video guys
[18:03] and until then happy smoking
⚡ Saved you time reading this? Transcribe any YouTube video for free — no signup needed.