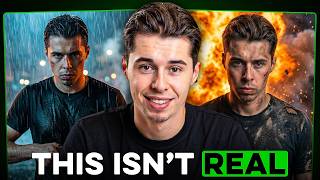

Stop Using Text-to-Video in 2026
44sChallenges a common practice with a bold claim, sparking curiosity and debate.
▶ Play Clip"Delivers on the promise of a realistic AI video workflow, but the title's profanity is unnecessary and the content is somewhat promotional for Higgsfield."
This video presents a practical workflow for creating realistic AI-generated cinematic videos, emphasizing the importance of image-to-video generation over text-to-video. The creator demonstrates a step-by-step process using Higgsfield's tools, including character consistency, style selection, and scene direction, to achieve professional-looking results.
The creator argues that text-to-video is the worst method for realistic AI video generation in 2026, as it often misses essential details. Instead, they recommend image-to-video, where you control the first frame.
The video outlines a predictable workflow to turn any idea into movie footage, covering all steps and explaining how to master each one.
Most people spend 90% of their time testing prompts and regenerating, which is the biggest mistake. The key is to use image-to-video to lock in details like character, lighting, and environment.
To get realistic results, you need to reference great images. The creator uses two AI tools: Soul 2.0 for cinematic images and Nano Banana Pro for edits, both found inside Higgsfield.
Soul 2.0 comes with 22 built-in styles like Y2K, street photography, and Mystic, which simplify creating specific visual effects without complex prompts.
Consistent characters are crucial; small changes like hair color break the illusion. The character feature in Higgsfield allows using the same person in any image or video.
To create a character, upload over 20 photos from different angles. Use Nano Banana Pro to generate the initial image, then use Angles 2.0 to create 12 angle variations, and repeat until you have 20.
After training the character, test styles like street photography and Y2K street. Higgsfield shows the internal prompt used, which can be copied and edited for other styles.
Nano Banana reference allows modifying specific elements (like changing a jacket) while keeping everything else intact, useful for targeted edits without full regeneration.
Cinema Studio is recommended for non-professionals to plan and direct videos shot by shot. It supports up to six scenes per sequence with a total run time, allowing control over characters, emotions, genre, duration, camera movement, and speed ramp.
Setting specific emotions for characters (like hope, anger, sadness) and choosing a genre (comedy, action, horror, intimate) helps the AI handle pacing and emotional tone.
Camera movements (zoom ins, dolly, 360 roll) add cinematic feeling. Speed ramp controls the feeling of time, influencing emotions—slow for sadness, fast for aggression, or rise and drop for dynamic moments.
The workflow produces a seamless sequence with smooth transitions, consistent characters, and pacing aligned with emotion, making the video so realistic that nobody wonders if it's AI.
The video concludes that by using image-to-video generation, consistent characters, and thoughtful scene direction, anyone can create realistic AI videos that look professional and cinematic.
What is the recommended method for creating realistic AI videos?
Image-to-video, not text-to-video.
00:45
What is the biggest mistake people make when creating AI videos?
Spending 90% of time testing prompts and regenerating.
00:30
How many built-in styles does Soul 2.0 have?
22 built-in styles.
01:54
What is the recommended number of photos to upload for character training?
Over 20 photos from different angles.
02:36
What does the Angles 2.0 feature do?
It creates 12 different camera angles from a photo.
03:03
What is the purpose of the Nano Banana reference feature?
To edit specific elements in an image without regenerating the entire image.
04:06
How many scenes can Cinema Studio build in a single sequence?
Up to six scenes.
05:11
What does the speed ramp control?
The feeling of time within each scene, influencing emotions.
06:48
Text-to-video is the worst method
Challenges common practice and sets the foundation for the entire workflow.
00:01The biggest mistake
Identifies a common pitfall that wastes time and reduces quality.
00:30Character consistency is crucial
Explains why consistency is key to realism, a core principle for AI video.
02:21Cinema Studio for non-professionals
Provides an accessible tool for beginners to direct professional-looking videos.
04:32Speed ramp influences emotion
Reveals a subtle but powerful technique for emotional storytelling.
06:48[00:01] a realistic video. In fact, that's probably the worst method in 2026. These days I've got a simple workflow that generates cinematic scenes in minutes.
[00:17] all the steps that go into it and explain how to master each one. So by predictable way to turn any idea into movie footage. First, before we actually get into the practical steps, you need to understand something because this is
[00:30] generations will look realistic or not. You see, most people will spend 90% of generators testing prompts and regenerating over and over again. And it, it's actually the biggest mistake you can make. Whenever you create an AI
[00:45] video, you have two options, text to video or image to video. Text to video prompt [music] and the AI creates an image based on your description, but to figure out the character, the lighting, the environment, and every
[00:58] happens almost every time is that it misses essential details. So that's exactly why even the most experienced AI creators don't use this method. They always go with the second one, image to video. With image to video, you're
[01:11] frame of your video needs to look like before it even starts generating. The model takes that image as a visual reference and builds on top of it. It already locked them in. But not everyone who uses this method gets realistic
[01:25] images and then expect to get a cinematic video from them, but that's to get realistic results, you need to reference great images. So the real them? Well, there are only two AI tools I use for this. The first one is called
[01:40] Soul 2.0 and it's the best model for generating cinematic grade images. The for the edits. You can find both of these inside Higgsfield. So if you want the description. After you log in, go to the image tab and select Soul 2.0. And
[01:54] right away, you'll notice one thing that makes this model completely different. Soul 2.0 comes with 22 built-in styles like Y2K, street photography, Mystic few images I've created with them. So instead of trying to create a specific
[02:09] visual effect using complex prompts, you just select a style and it does all the actually matter if your character looks different from one generation to another. Just imagine spending two hours creating the perfect aesthetic and then
[02:21] character suddenly has a different hair color. These small changes break the illusion and instantly reveal that it's AI. Without a consistent character, inside Higgsfield allows me to use the same person in any image or video I want
[02:36] First, click on the character tab from the top bar and then on create multiple photos from different angles with the character you want to create. And if you want to get the best results possible, I recommend you upload over 20
[02:50] generate our character. For this, head to the image tab, select Nano Banana Pro, and describe exactly what you want. Here's the prompt I'll write. Click The woman looks exactly like I wanted,
[03:03] to the next step. Now we need to create those different angles. For this, go to apps and look for the feature called Angles 2.0. This allows you to get whatever camera angles you need from your photo. You can instantly get 12 of
[03:15] front-facing, side profile, and close-up, or you can also go in and specific. Run this a few times until you get 20 angle variations. The more the AI is trained on your character's identity and holds it consistent. Once
[03:30] you have the images, upload them to the character feature, give her a name, and let it train. Now let's actually test the styles inside Soul 2.0 with our new [snorts] with street photography. Honestly, this already looks cinematic
[03:42] what we get back with Y2K street. And And one of the coolest things with this is that Higgsfield actually shows you the exact internal prompt that it used. So let's actually copy the prompt from
[03:54] the last generation and go back to the image generation. You can also edit the prompt to match your exact preferences. After you paste it in, go ahead and select another style while keeping the same character. Click generate and wait.
[04:06] better than the last one. I feel like this style fits it the best. Now there are two more things I want to change. So for this, I'm going to use Nano Banana reference. Now, I'll paste in this prompt. As you can see, it changed all
[04:19] everything else intact. This is very useful when you want to modify something without regenerating the entire image from zero. Nano Banana is incredibly now that you have a great reference image with a consistent character,
[04:32] you're 80% of the way to a finished video. The only step left is to create become intimidating if you're using complex tools like I see most beginners do. If you're not a professional editor or a filmmaker, the best tool you can
[04:45] use is the Cinema Studio. This has a very intuitive interface which doesn't actually limit the control you have over the production. Cinema Studio lets you plan and direct your video shot by shot before even rendering a single frame.
[04:57] with two characters, a sad man who's knows that's coming unexpectedly. The first thing I do is upload my reference make sure that the video will include all the details that I want. Next,
[05:11] select the multi-shot manual option and then set up the scenes. Cinema Studio lets you build up to six scenes in a single sequence with a total run time of going to create three scenes and for each one, I'll select the exact options
[05:24] I need. First of all, let's click here and add our character. Beside realism, one of the most important things when it comes to creating cinematic scenes is video, take a moment to think about the emotion you want each scene to create.
[05:37] to become a movie director. And inside Cinema Studio, you can actually do this. For each character, you can set a specific emotion like hope, anger, and scene, I want it to be sad. But in the end, the tension finally softens and
[05:52] the characters go from playing AI to feeling like they're actually living further, there's one setting that people often overlook. What I'm talking about is the genre. This tells the AI how to handle the pacing, energy, and the
[06:06] overall emotional tone of the scene. You can choose from comedy, action, horror, with intimate, which will slow the pace down and make the space feel more quiet. But before I show you the biggest secret to conveying the right emotions, let's
[06:19] I'm setting the duration for the first scene to 4 seconds. I want the viewer to really feel the sadness of the man right before the woman arrives. For the second to 5 seconds because there's more happening. And for the last one, I'll
[06:34] select the camera movement, which will give it more of that cinematic feeling. You can choose from multiple options like zoom ins, dolly, and even 360 roll. scenes, this is where you start refining the result using one of the most
[06:48] the one that really shapes how the scene What I am talking about is the speed ramp. This controls the feeling of time within each scene. And depending on what you choose, you can massively influence
[07:00] the emotions the viewer feels. You can make a scene move slower and heavier to >> or you can make it fast and sharp for more aggressive scenes. For the first part of my video, I'll slow it down because I want to emphasize every second
[07:12] of that sadness isolation. For the second part, I keep the pacing smooth and evenly timed, so everything flows naturally. And for the third part, I shape the timing with a rise and drop, so certain moments hit harder and feel
[07:24] more dynamic. Now let's click on generate and watch the result.
[07:40] seamless sequence with smooth transitions, consistent characters, and pacing that aligns with the emotion. And that's how you take a simple idea and turn it into a video so realistic that nobody even wonders if it's AI. If you
[07:52] click the link in the description and sign up to Higgsfield. Thank you for watching and I'll see you in the next one.



⚡ Saved you 0h 08m reading this? Transcribe any YouTube video for free — no signup needed.