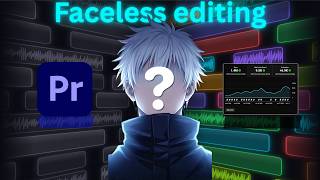

How I Make YouTube Videos: AI Voiceovers & Editing
45sThe creator's raw, honest intro and promise to reveal their entire video-making process hooks viewers immediately.
▶ Play Clip"The title promises a full guide, and while the content delivers on that, it's a bit scattered and self-deprecating, which slightly undermines the 'expert' claim."
The video is a practical, no-nonsense guide to creating YouTube videos, covering the entire production process from AI voiceovers and scriptwriting to editing, sound design, and thumbnail creation. The creator shares his personal workflow and tools, emphasizing efficiency and the use of AI to streamline the process.
The creator immediately dismisses traditional intros and instead presents a clear roadmap for the video, outlining the steps he will cover: voiceovers, editing, sound effects, and thumbnails.
He recommends using Eleven Labs to create a custom voice rather than a pre-made one. He uses AI (like Claude) to generate a detailed voice description, such as 'a 25-year-old guy who found energetic smooth American action'.
He demonstrates using Claude to create a 60fps HTML animation for a video segment. He emphasizes the importance of iterative prompting, where you correct the AI's output until it matches your vision, and notes that the AI learns your style over time.
He shares a method for managing sound effects by creating a separate project file with all his sound effects and transitions. This allows him to easily copy and paste or drag-and-drop them into his main project, saving significant time.
He suggests finding copyright-free music on YouTube and mentions services like Epidemic Sound. He notes that a 10-minute video may require at least 10 different background tracks to match the emotional tone.
He walks through his thumbnail creation process using Canva, which includes using AI to generate backgrounds, sourcing character images from Google, removing backgrounds, and adding text with effects like neon glows. He emphasizes the importance of text and visual elements for click-through.
The video provides a practical, behind-the-scenes look at a content creator's workflow, highlighting the use of AI tools and efficient techniques to produce professional-looking videos. The key takeaway is that with the right tools and a streamlined process, anyone can create high-quality content.
Custom AI Voice
Shows a specific, advanced use of AI to create a unique brand asset, moving beyond simple text generation.
00:29Iterative AI Prompting
Demonstrates the practical workflow of refining AI output through multiple prompts, a key skill for effective AI use.
16:24Sound Effects Workflow
Presents a time-saving, practical hack for a common editing pain point, improving efficiency.
17:48AI-Assisted Thumbnail Design
Combines multiple tools (AI, Canva, Google) to create a compelling thumbnail, highlighting a modern, integrated approach to design.
19:26[00:00] Let's go back seven years, when I started my first YouTube channel. Just stop. Come on. Who cares about this type of intro? Straight up, I'm going to show you how I make my videos. Voiceovers, editing, sound effects, music, movement, colors, loads, action.
[00:14] You know what? Let's just skip the intro. For this video, I'll make a roadmap, and we'll go one by one. First up, voiceovers. I personally use Eleven Lab, but not with some pre-made voice. I actually created my own custom voice, and honestly, I recommend you do the same.
[00:29] And no, this video is not sponsored. You got 200 subscribers, bro, what you talking about? Yeah, you are right, I should just shut the f- Anyway, go to Eleven Labs, click Voices, then Create Voice. You'll see four options. Voice Design, Instant Voice, Professional Voice, Remix.
[00:42] Just go straight to Voice Design. Now here, you have to describe exactly what kind of voice you want. And this is where AI comes in. You can use any AI, chat GPT, Gemini, Claude, whatever.
[00:54] I personally use Claude. Just tell it you want to create a voice in Eleven Labs and give it the detail. Something like, I want a 25-year-old guy who found energetic smooth American action and just chose to do out of speech.
[01:06] Yeah, something like that. Now, Claude will give you the description, copy it, then just paste that script into 11Lab. And before you hit generate, go into settings and change whatever you want in there. I personally like it more loud. The AI voice, of course.
[01:19] Then just hit generate. And, hey everyone, so I just finished up this amazing project. Whoa, hell no. Let's try voice too. Hey everyone. So, I just finished up this amazing project. Damn. Okay, this one is actually fire.
[01:32] Let's try the third one. Hey, everyone. So, I just finished up this amazing project. Ah, the second one, Mom. No question. Alright, click select voice and name it whatever you want. Whatever. Now, you can ignore the label and description.
[01:44] Just save the voice. Um, okay, let's quick fix that. Now, go to voices, click my voices, and there's your glorious, handsome whatever. Alright, it's time for text-to-speech. Go to voice, then click my voices and select it.
[01:58] Now you will see this settings. Let's explain it real quick. Starting with speed, just leave it on 1.00. Yeah, that's it. Stability, the higher you make this, the more consistent your voice will sound on every generation.
[02:13] But it starts sounding more robotic. Just keep it somewhere between 30 and 50. I'm setting mine at 35. Similarity, the higher it is, the clearer your voice will sound. But it has its downside at high levels. So, just don't touch it.
[02:26] And finally, the most important one. Style exaggeration. This one I change almost every single generation. Higher means more emotion. Lower means less. But if you crank it too high, it starts tweaking. Yeah, just like that.
[02:38] All right now, let's generate some random words to test it out. I was there yesterday. Okay, okay, not bad, but I'd regenerate this. I was there yesterday. Yeah, that's better. By the way, these three punctuation marks are your soulmates in 11 Lab.
[02:51] Period ends a sentence cleanly. Exclamation mark adds high energy or emotion. Comma adds a small natural pause. So you should always use them. And one more thing. If you generate a voice and you just don't like it,
[03:05] Eleven Labs gives you two free regenerates before it counts against your credit. Not sponsored, I swear. All right, now let's turn our video script into a voiceover. First, we need an actual script. I personally just open Notepad and start writing something.
[03:20] Okay, I have no idea. Yo, Claude, give me a script. Bro, are you stupid? Just think. Think you f***ed? Alright, bro, chill out. So, basically, you're not just gonna open Claude and say, Yo, bro, give me a script.
[03:32] That's not how this works. You just need to sit down and think. Once you have an idea for your video, just open notes and start writing it down. But, you probably won't have the whole thing figured out in your head. Because you're not the Lawrence's Livermore National Laboratory El Capitan.
[03:47] What? I don't know, bro. You gave me that script. See? Oh, my bad. You can just write it one by one. Like, first 30 seconds, first minute, whatever. Just write something. Anything. Once you have something written, copy it. Go to Claude and tell him,
[03:59] I'm making a YouTube video about blah blah blah, and here's the first part of my script. But do not hit enter yet. Add one more thing. Tell Claude that you're converting the script for Eleven Labs, and you need the punctuation marks for emotion.
[04:12] Now you can hit enter. Well, after that, Claude will give you your script, but enchanted. Just copy the whole thing and paste it into your letter lab. Hit generate and no, it's more painful than that.
[04:24] You're not going to paste the whole script at once and generate it in one go. You need to copy it sentence by sentence. Why? Two reasons. First, your first generation might sound like this. Now, Claude will give you your script, but...
[04:37] Yeah, you get what I'm saying, right? And second, if you generate your entire script at once and you don't like just one sentence out of a hundred words, you have to regenerate the whole thing.
[04:49] Every single word. Again. And trust me, one regeneration is not going to be enough at all. Now it's time for a main part. Editing. I mainly use Adobe Premiere for editing my videos.
[05:01] So if you're on CapCut or DaVinci, you can skip most of the basic stuff coming up. But somewhere in the middle I going to show you something I discovered myself Something outside of Premiere entirely And it will save you a serious amount of editing time So yeah just stick around
[05:16] Alright, let's open our editing software and throw our audio files in. As you can see, there's a lot of empty space in between. We don't need any of that. Just cut it out. But, here's the problem. The transition between words sounds rough.
[05:28] It just doesn't feel right. This works. You just need to sit down and work. You just need to sit down. Yeah, you get what I'm saying, right? Pretty much what you can do here is take the second audio clip and underlap it so it starts just before the first one ends.
[05:42] How this works. You just need to sit down and think. Work. You just need to sit down and think. Yeah, way better already. Let's do the same with the third audio. You just need to sit down and think. Once you have an idea, and as you can hear, this is so shit. Here, instead of overlapping, we actually need a small gap between them.
[05:57] Because this is where the sentence ends. Sit down and think. Once you have an idea for your video, yeah, this feels better. So basically, you need to figure out when it needs overlapping, and when it needs space. Alright, let's talk about zoom-ins and general movements.
[06:11] So everyone knows movement happens by adding two keyframes, and on the second one, moving the frame. This is good, right? No. Well, technically, yes, but it's not smooth at all. Here's what you actually do. Add a transform effect to your clip, turn off this little checkbox here, and set the shutter angle to 180.
[06:28] This is pretty much the motion blur for movement and most OP thing in Premiere. Right click the transform effect and save it as a preset. So every time you add it, the shutter angle is already set to 180 automatically.
[06:43] Now add two keyframes and zoom in. See the difference? Ummm... no. Yeah, you're right. Bad example. Also, I'm on 1.5 quality so it looks terrible. Moving on. Zoom in wherever you want. Right click the first keyframe, go to temporal interpolation, and choose ease out.
[06:59] On the second keyframe, choose ease in. See the difference now? Well, it's actually better. Told ya. But you can make this even smoother, and this is something I do on literally every single zoom in. Click the arrow on the left side of position and scale.
[07:13] You'll see how the movement flows between keyframes, and you can actually control it manually. What I love doing is dragging the right blue line all the way to the left. Just create a fast start and then a smooth chill zoom in.
[07:26] And you can make the second keyframe as long as you want. The movement will still feel the same. Fast at first, relaxed after. This is how you create that continuous flowing movement throughout your video. By the way, one thing to watch out for.
[07:39] If you're changing both scale and position at the same time, make sure the graph lines match each other. If they don't, something like this is going to happen. Now, another tip I love. Set your actual clip scale to 70%.
[07:52] Then add an almost black to dark gray color matte behind it as the background. Why? Because it saves you from this. For a clear-looking window, add a drop shadow effect to your clip.
[08:04] Set the distance to 0 and softness to 200. Then duplicate that effect. It makes the window look way more polished. Save this as a preset, too. Then add an adjustment layer on top of everything.
[08:16] Throw a transform effect on that and do all your movements and zoom in through the adjustment layer instead. Oh, by the way, every preset I use in this video, I'll leave available for free in the description.
[08:28] Now, let me show you how I make this black and white out of screen animation. First, add an adjustment layer on top where you want your screen to go out of frame. Add a transform effect, like always, and set the scale to around 70.
[08:41] Now add an effect called roughen edges. This is what gives you that rounded corner look inside Premiere. Set edge sharpness to 10, fractal influence to 0, and then play with the border value. The higher you go, the more rounded the corners get.
[08:55] Now, we need to make it black and white. Find an effect called Lumetri Color. With this, you can change your screen or any object to basically any color by tweaking the settings. But honestly, I don't really use it for colors myself,
[09:07] because I have this preset from my guy Isaac, and it has a ton of color options, including the black and white I'm using here. And of course, it's completely free. I will leave a link in the description. Drop that black and white onto your adjustment layer, and it's time for the last piece.
[09:23] Drop Shadow. This effect is so OP. We already used it on the window earlier, but let me fully explain what it does. You can use it as an actual shadow or as a deep glow effect, and you can make it literally any color you want.
[09:37] Set distance to zero, pick your color, then add softness based on how big your object is. I'll set mine to 75. Most of the time, I also freeze the clip down to the adjustment layer so the screen doesn't move around like this.
[09:51] And just like that, we made this out of screen animation that I used about 20 times in this video. Now, doing this every single time is a pain. So what you do is hold control and click each effect one by one to select them all,
[10:06] then save the whole thing as a preset. It's one click from now on. Well, it's time for another most important part, text. Click the little text icon and then click anywhere on the screen. Type whatever you want and go to text properties Always make sure you have the text selected so you can actually change the settings Okay let look at fonts first There are a lot of default fonts in Premiere and you have two choices First stick with any default font just like I doing or second
[10:33] go to any font site, find something you like, and use that instead. Now the first thing I always do with text is align it correctly to the center. These buttons help you do that automatically. Just click the second and fourth buttons and it snaps right to the center.
[10:47] About colors, it's completely up to you. I'm not going to explain that. Now, the second necessary thing is adding an effect called VR Glow to your text. This gives it that rich, glowing look. Finally, let's build the text pop-up animation.
[11:01] Add our transform effect to the text and add two keyframes to both position and opacity, one at the start and one after 15 frames. On the first keyframe, move the text slightly downward and set opacity to zero.
[11:13] Add E out on the first keyframe and Ease In on the second, then drag the graph line to the left on both. Save this as a preset so you can apply it to any text in one click from now on. And this is the result.
[11:26] Now, let's build word-by-word animation. This one is honestly a pain, but worth it. First, write the whole sentence as one text layer and cut it at each word you say. Move the text layer up on the timeline at each cut, then crop each one perfectly to only show that specific word.
[11:42] Make all of them the same length as when your character finishes saying the full sentence. Add the pop-up transition to each one, and just like that, you have a word-by-word animation. Quick tip, if you want a deep glow effect on colored text, like red for example,
[11:57] add a drop shadow with low softness and then duplicate it. That gives you really deep reach glow. And finally, it's time for presets and plugins. Let's start with the presets. You know all that stuff we just did? The animations?
[12:09] The glows? All being deframed? Yeah, I ain't doing that every time. You do it once, you save it, and boom. One click, and it's there forever. That's a preset. Now, plugins are a bit different. These are like extra tools that Premiere doesn't come with.
[12:23] Other people made them. Some of them just save you time. And some of them do stuff that Premiere literally can't do on its own. And there are two types of presets and plugins. Free and paid. In this video, I'm going to show you all the free ones that I use.
[12:35] and that most people use too. First, let's start with the Mr. Horse plugin. Go to their site, I'll link it in the description, click this, try for free, and download it. After downloading, open your project and click Window, then Extensions, and here is your Premiere Composer.
[12:50] Now, click this starter pack, and here we have a lot of things. Text boxes, text presets, transitions, social media stuff, shape elements, and even sound effects, and all of this is free. Personally, I use Premiere Composer for two reasons.
[13:04] Light link and digital glitch. This is a transition that you saw in this video maybe 100 times. You just click it and drag it down on the timeline, position it on top of the clips, and you'll have this transition.
[13:16] Same thing for the digital glitch, or any other stuff. The second one will be the Bad FX plugin. This one is the newest, and I can comfortably say it's the best of all the free plugins out there. Same as Mr. Horse, go to their site and download it.
[13:29] Go to Window, Extensions again, and open your Bad FX. Now, the first thing you'll see is text presets. There are so, so, so many text presets. But forget about it. We have these motions, which are interesting.
[13:42] Let me show you an example. Add any motion to the timeline, and in the Properties, click this placeholder arrow and drag anything from your project file. And that's it. You have a fully working, smooth motion, which is so cool. You can change its scale, its animation, opacity, everything.
[13:56] You're fully controlling it, and there are hundreds of motion options. But this is not why this plugin is the best. No, it's the best because it has something that no other free plugin offers. Access. You don't have to use Google or any other sites to download videos and photos into your timeline.
[14:12] You can search anything here. P.S. Images, videos. Let's search editing, for example. As you see, we got hundreds of pictures. Let's say I want light leak videos. Boom! Hundreds of light leak videos. Okay, okay, chill out. I'm glazing it too much. Let's stop here.
[14:26] The third one is the Film Impact Dashboard. And congrats, you don't have to download it. It's automatically inside Premiere. This plugin is created by Premiere and has a lot of different options, same as any other plugin.
[14:39] I'm not going to dive deeper into it because I don't use it at all. And the fourth one, which is a preset that I use it the most, is Isaacverse. This is created by a pretty popular YouTuber named Isaac. You probably know about him. Anyway, go to the Isaacverse site, scroll down, and you'll find the screen Presets.
[14:55] Click this and enter your email. Now you'll get the download link in your email. Click that. And as you see, the first thing here is a tutorial. We already fully explained how to import and use this preset. And then you see the preset itself.
[15:08] Click this purple arrow and it will be downloaded. Now go to Premiere and in the effects section, right click the presets, then import your preset and it will automatically be in your preset section. I'm not going to explain more because Isaac already has a tutorial on his own preset.
[15:22] You just said presets five times, dude. Okay, okay, my bad. And finally the fifth one my preset which I didn create yet So I don know what the logo will be but for you it already created and working well In that preset I put everything that we made in this video and also other ascending parts It will be free of course and the link will be in description Finally it time for that secret
[15:44] I was telling you about before, but somewhere in the middle, I'm going to show you something I discovered myself, something outside of Premiere entirely, and this secret is AI editing. No, This is not some AI flop that you've seen on YouTube all the time.
[15:59] This is something that I randomly discovered, and I used Claude AI to do it. To be honest, I don't know if any other AI does this. So, yeah, just use Claude. Basically, go to your message history where you have the script of your video in Claude.
[16:12] Of course, that's if you used it for the script enhancement. If not, just give it your script. So first, I told it to forget that it knows everything about this editing method, so we can start fresh. Tell Claude this.
[16:24] Create a high-quality 60 frames per second HTML animation for this part, and copy the part of the script that you want animated. Then, ask me any questions, and let's build it together. And tap enter. Now, it's going to ask you questions based on your preferences.
[16:39] The first question was about the background, so I told it to make it solid black. The second was about how the text should come in. Even though I didn't specifically ask for a text animation, I said, yeah, do that. And the third question was the size, so I told it to make it normal, 16 to 9.
[16:55] I tapped enter, and... Yeah, it's only text. Let's fix it real quick. Hey, this is only text. I want you to make it full of icons and all that stuff, not just text, and make those icons glowy.
[17:08] Not too glowy, though. Make it look good and clean. And it made this. You know what? This is not bad, but it's too much text, and the icons are too small. Now, you just correct it until it gives you the result you want. At first, you might have to re-prompt it many times, but the more you do it, the more Claude
[17:23] studies your style and makes it better and better. And finally, this is the final result. Let's download it to see it on full screen.
[17:35] Yeah, this is great. But how do we download it, though? Well, you're not going to download it, because it's not an MP4 file. Just open any screen recording app and record it. Simple as that. Now you can throw this into Premiere, add any zoom-ins or whatever you like,
[17:48] and just like that, you created a professional-looking motion graphic. Finally, our roadmap is back. It's time to move to sound effects. Let's say you got a 15-minute video and you're done editing,
[18:00] and it's time to put the sound effects under it. Well, putting sound effects one by one from folders takes hours, maybe even days. That's why I made a solution for it. But wait, before the solution, the most important thing,
[18:12] How do you even find copyright-free sound effects? Well, you can search it up on YouTube. There's tons of it. Some people even have a link in the description for a whole sound effects pack. There are also sites, for example, Epidemic Sound, where you can get all the music and sound stuff.
[18:28] Basically, there are a lot of different ways to get them, but I'll teach you how to use them as best as possible. Basically, I opened a new project, and over here, I put all the sound effects that I have.
[18:40] On bonus, I added transitions too. Now I can open this project alongside my original project, position it over here on the left side, and just copy paste the sound effects, or drag them down by holding alt, and it makes it so much
[18:54] faster and easier. Let's jump to music now. Not gonna lie, my background music that I'm using are 90% from YouTube. I just searched copyright-free background music and found all of them like that, and this takes so much time really, because one background music is not enough. In one 10-minute
[19:11] project. You might need at least 10 background tracks, but you can keep changing it based on the emotions inside the video. Same goes with sound effects. You'll need to add sound effects almost every second. For an example, this is how my last video's sound effects and background music
[19:26] layers looks like. Yeah, there is a lot of stuff. Okay, okay, let's move on. Finally, the last one, thumbnails. I'm making thumbnails with Canva and a little AI's help too. For example, this background was generated by Claude, and this character is Gojo, if you don't know. I just went to Google
[19:42] and searched 4K Gojo picture, and then I removed the face in Canva using the magic eraser. Then I went to Elements and searched for a question mark, added this to the face, changed the color to white, and added a drop shadow. Now I added Premiere Pro's logo and removed the background. After that,
[19:59] I added a backdrop with the same color as the icon and changed the direction to two and the blur to one. Now, I needed text. All thumbnails need the text, so I added a faceless editing text
[20:11] with cyan color, then added a neon effect and made the intensity one, and positioned the layer to back. Now, I added my analytics picture on the right, you know, for an eye catch effect. Then, I made the question marks smaller, and just like that, I made this video's
[20:26] thumbnail in 20 minutes. Dude, this wasn't a tutorial. You just screen recorded your process. Yeah, sorry, my bad. Well, basically, you're not going to become an expert from this video, but I just shared the basics that I personally use. Of course, if I find something
[20:41] new, I'll share it with you. Don't forget to like the video, though. Bye-bye.
⚡ Saved you 0h 20m reading this? Transcribe any YouTube video for free — no signup needed.