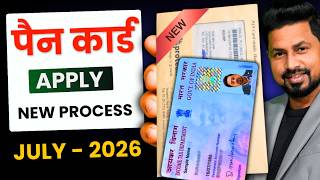

New PAN Card Form Changed!
42sHigh engagement from viewers who need updated steps, with a clear warning about common mistakes.
▶ Play Clip"The title accurately promises a step-by-step guide to applying for a PAN card online, and the video delivers exactly that."
This video provides a step-by-step guide on how to apply for a new PAN card online using the NSDL Protean portal. It covers the entire process from filling the application form to uploading documents, making payment, and completing e-signature via Aadhaar OTP.
The process has changed; the video shows the latest method to apply for a PAN card online. The e-copy will be available in PDF format and the physical card will be delivered by post.
Search for 'NSDL PAN card' and click on the Protean portal. Click on 'New Application' and select 'New PAN Form No. 93 Indian Citizen'.
Enter first name, middle name (if any), and surname. Example: Rajat Kumar Singh – Rajat is first name, Kumar is middle name, Singh is surname. If no middle name, leave blank.
After submitting basic details, a token ID is generated. This is important for logging in later.
Choose the second option: 'PAN Application with Supporting Documents Scan, Upload and E-Sign'. This is the best method.
Enter father's and mother's names. Choose whose name to print on the PAN card (default father's name). Single parent option available.
Select source of income (e.g., salary, business, or no income for students). Enter communication address; office address can be left blank if using Aadhaar eKYC.
Select state, city, and phase. The system auto-fills the AO code based on location. If not found, select default main city.
Aadhaar is accepted for identity and address but not for date of birth. For DOB, use birth certificate, high school marksheet, or voter ID. Upload two different documents.
Photo dimensions: 3.5 x 2.5 cm, max 50 KB. Signature on plain paper, max 50 KB. Use provided tools to resize if needed.
Upload selected documents in PDF format. If document has front and back, merge them into one PDF. Remove password from e-Aadhaar.
Enter first 8 digits of Aadhaar. Review details, then proceed to payment. Government fee is ₹16.90, total ₹107. Pay via credit card, net banking, or UPI.
After payment, authenticate Aadhaar via OTP. Complete e-sign by entering Aadhaar number and OTP. No need to send physical documents.
After e-sign, a PDF slip is generated. ePAN card is sent via email. Physical PVC card is dispatched via India Post. Track application status on the portal.
The video provides a complete, updated guide to applying for a PAN card online, emphasizing the use of Aadhaar eKYC and e-signature for a paperless process. The ePAN is available immediately, while the physical card arrives within a week.
What is the first step to apply for a PAN card online?
Open a browser, search for 'NSDL PAN card', and click on the Protean portal.
00:16
Which form number should be selected for a new PAN card for an Indian citizen?
New PAN Form No. 93 Indian Citizen.
00:41
How should a name like 'Rajat Kumar Singh' be entered in the application?
Rajat as first name, Kumar as middle name, Singh as surname.
01:07
What is the recommended application method for making a PAN card?
The second option: 'PAN Application with Supporting Documents Scan, Upload and E-Sign'.
02:29
What documents are accepted for Proof of Date of Birth?
Birth certificate, high school marksheet, or voter ID card. Aadhaar is not accepted for DOB.
09:27
What are the photo dimensions and size limit for PAN card application?
3.5 x 2.5 cm, max 50 KB.
10:50
How much is the government fee for a PAN card?
₹16.90, making the total payment ₹107.
15:26
What should you do if your document has information on both front and back?
Merge both copies into one PDF before uploading.
13:21
What is the password to open the PDF slip generated after e-sign?
Your date of birth without any symbols.
17:26
How can you track the status of your PAN card application?
Use the 'Track Application Status' option on the portal with your application reference number.
18:17
Choosing the Correct Application Method
Many applicants select the wrong option, causing issues; this tip saves time and prevents rejection.
02:29Aadhaar Not Accepted for Date of Birth
A recent government update; many are unaware, leading to application rejection.
09:27Photo Specifications for PAN Card
Clear guidelines prevent common mistakes like uploading selfies or oversized photos.
10:50Total Fee Breakdown
Transparency about the fee structure helps users budget and avoid scams.
15:26Immediate ePAN Availability
Users can download the ePAN card instantly after e-sign, enabling quick use.
17:26[00:03] changed to a great extent from before. The form number has also been changed. So today I will show you the latest method of how you can apply for your PAN card online. The e-copy will be available online in PDF format
[00:16] and the physical PAN card will be delivered to your home address through the postman. For this, first of all we have to open our browser and here we have to search NSDL PAN card. So a portal named Protein will appear in front of us.
[00:29] You have to be careful. I will provide the link in the video description though. So here all of you have to click on the option of New Application because we want to apply for a new PAN card and after this you will get the option
[00:41] of Application Type where if you are making your new PAN card then you will already see that many forms have been added here in which if you want to apply for a new PAN card then here you have to select the option of New PAN Form No. 93
[00:55] Indian Citizen. You have to enter your name. You have to enter your first name here and if the middle name is in your name then it will come here, the surname or the last name will come here. So let us
[01:07] consider it with an example. For example, if your name is Rajat Kumar Singh, then Rajat becomes your first name. Kumar became your middle name and Singh became your surname. If your name does not have Kumar in it like Rajat Singh is the only one. So what will you do in that case?
[01:19] otherwise you will leave it. You can enter Kumar or Singh in the last name section. Apart from this, if someone's name is single then it is. For example, let's assume someone 's name is Aamir. Isn't it? And apart from that, Khan Singh is not involved in anything else. So
[01:33] what is it like then? Here you will first name and middle name will be left out. So, this is something to keep in mind. People often So, if you do not fill this section , you will not be able to proceed further. Now
[01:49] after this, you have to choose your date of birth by clicking on the option of this calendar. You have to enter the email ID here. You will enter your mobile number here. After this, let us tell you all that we are not a robot and we are submitting the data. Have to give
[02:02] consent. For this you have to tick on it. So as you will see that we have clicked on the submit option, the message of congratulations has appeared here. And along with this a token ID will be generated. So
[02:15] this token ID is very important because it is very important in filling the entire form. In case you ever log in, using the login option. Here we will click on the continue option. So now
[02:29] three options will appear before you all. What method do you want to select for making PAN card ? Many people make the mistake of coming here because they think that this is an easy option. They select this one but after that their
[02:42] problems arise. Look, here you have to select the correct option. The second option is PAN Application with Supporting Documents Scan, Upload and E-Sign. So this option is the best for making PAN card. CSC
[02:55] Center Jan Seva Kendra people use this option. So we will select the second option. After this you have to same name here as it is on your Aadhar card. And after this,
[03:10] your full name has to come in the applicant section. Here you will see your first name, middle name and last name. So this thing has to be matched once and after this, select it here. Registration number this is not for us. We will
[03:24] leave this blank. After this you have to come to the details of parent section. Here, first of all, the father's name has to be entered. So just like you had filled your name, similarly you will enter your father's name here. Apart from this,
[03:38] mother's name will also be asked here. So you have to enter the mother's name here. Here you will be asked whose name do you want to print on the PAN card? So we want to do Father's. Let me tell you one thing, as you might have seen here, there
[03:51] is an option for single parent. Look, if there is someone like this, let's say is divorced. If he does So in that case, if you want, you can print only your mother's name on your PAN card.
[04:07] But by default what remains is the father's name. If there is no such case then you will have to keep the father's name only. After this we will click on the Next option here. So the next page comes where you
[04:21] all are asked about the source of income. So what is your source of income? Like if your income is from salary or from any business. Apart from this, suppose there is income from some other source. But let me tell you one thing that we often make PAN card.
[04:35] They make it in student life. It is made as soon as one turns 18 years old. So at that time many people do not have any source of income. So even in such a situation, your PAN card is made. In that case, you can use the no income option.
[04:47] After this you have to come to the Address of Communication section. Where if we are making our PAN card by doing eKYC through Aadhar, then here we have to select the residence option. After this, we have to enter our home
[05:00] address, house number, name of the building apartment, name of the post office, etc. here. After this, whatever is the name of the tehsil, the district will appear here. Apart from this, country state has to be selected.
[05:13] You will enter the post office pin code of your area here. After this, we do not need to do anything in the office address section because we are making our PAN card by doing eKYC through Aadhaar. So we can leave this section blank
[05:25] because we are giving our residence address as a form of communication. After this, the next section is of telephone number and email ID. Where first of all you have to select your country code. Your mobile number
[05:37] automatically comes here from your registration page. You will see the STD code section. The landline number section will appear. So in today's date no one will have a basic telephone number and it is not so necessary either. You can leave it blank and your PAN card will still be
[05:49] made. After this you have to come to the residential status section. Where we are an Indian citizen and currently we are living in India for the last one year. Meaning, if you have been living there forever, then you have to
[06:03] TIN number or passport details will be asked from all of you. So this is not necessary for you. You haven't got your passport yet. It is not necessary. This is often given as I told you, for NRIs, there is a section inside the form. So we'll
[06:15] leave this blank as well. A section with representative SS is found here. Now what is representative SS here? So, if you are making a PAN card of a minor in that case, there is a need to enter the representative's information. But if
[06:29] your age is above 18 years, then in that case this section is not enabled. You will click on the No option here and proceed further. Here we will click on the Next option. So the next section that comes is of area code, AO code, range code.
[06:44] Now here a question will arise in your mind, brother, what good is this? So see, the Income Tax Department has been divided into different zones by the government. Now if you do not know this here then what you have to do is, you will
[07:01] which Indian Citizen, we are an Indian citizen. We will click on this option and after this we will select our state. We will select the name of the city here. Area name is also asked but do not fill anything in it otherwise
[07:13] many times the information does not come. Here we have to click on the phase option. Now, as we have clicked on the Phase option, you will see that whatever state or city we have selected, the
[07:25] city we have selected, the You can see the code shown inside the description. Apart from this, the names of the locations are shown here. You will see in the Additional Description section
[07:38] where your town may be. Whatever your zone or area is, its name is often visible. Or you can see the pin code of the post office of your area. in whichever section the name of your city or village appears, you will tick in front of it. If you are
[07:52] from a rural area then you have to check the name of the tehsil. If you see the name of the block, then tick next to it. If the name of your village or the name of the nearby location is not visible here, then you can select the default main Lucknow, like if I
[08:05] An option to tick has been given, if you click on it, this information will be automatically filled above. Now you just have to click next. Now like we did next. Now after this the next page comes which is of the document. Look, there has been a lot of change in
[08:19] making PAN card from before till now. Now the documents have also changed. Earlier, if you had an Aadhaar card, your PAN card was made with that only. But now the situation has changed. Now first of all you have to
[08:33] click on the Proof of Identity option to make the PAN card. An identity proof will have to be given here. What can be included in identity proof? So if you have a passport, driving license, voter ID card. Apart from this, you are
[08:45] So whatever document you have, you can give it here. Aadhar is still installed inside it. You can apply it. After this, the next section is Proof of Address. Now what are the documents in the address section? So if
[08:59] which are valid as identity and the same documents are you get to see some documents. So you which document do we want to provide as address? So inside this you will see that if you have a driving
[09:14] license, passport, electricity, water, telephone bill, then multiple options of this type are available. So whatever document it is, you will select it here. After this, you all get the next section of Proof of Date of Birth. So
[09:27] ? So if we click, you will see inside it what was available earlier? There was an option of Aadhaar here that if you wanted, you could add Aadhaar in all three. But what now? Aadhaar will be used for identity and address. But
[09:40] Aadhaar is no longer accepted as the date of birth. Recently you saw that an update came from the government. So which document can be given now ? So if you have your birth certificate, then it can be uploaded here. Apart from this,
[09:52] uploaded here. Apart from this, but if the date of birth is there on it, then it will be mentioned here. Apart from this, if you have your marksheet or high school certificate, you
[10:04] can submit it here. If you have an identity card, that is, if you have a voter ID card, you can submit that also here. So that means there should be two documents from this list. You have to look up one of his names. You can select the name of whatever you find different from Aadhaar.
[10:19] Now after doing this you have to come on the self option as if you are a signatory. The and the designation means that you are filling your own form and what is your current
[10:35] occupation i.e. whether you are a student, a housewife, whatever your current status is, you are a businessman, you can enter it here. After this, the next section is available which is for uploading photo and signature. So now here you have to upload your photo.
[10:50] This same photo will appear on your PAN card. But the photo has a dimension here. As you will see 3.5 * 2.5 cm. That the photo should be there. The size of the photo should not exceed 50 KB. Now
[11:05] if you are doing it from your mobile phone then a question will arise in your mind that friend, this has become a bit technical. How will we do this? So there is no problem. For this we have provided a tool on our portal. Wherever you search skar dna.com,
[11:18] We have provided a section of tools here. Where If the file size of the video you have captured from your phone is large, then it will also be resized here. And
[11:32] in what thing you want to put your photo, it will be converted here accordingly and you will get it. You have to download it and upload the same photo. But let me tell you one thing. Whenever you are giving the photo here because this is a government document. So the photo has to be given like this. No selfies are to be uploaded.
[11:46] I saw some people uploading selfies. You can see in front of you in the photo that you are not wearing sunglasses or cap, that photo has to be pasted here. After this, the next section is found which is of signature. Now you can make
[11:59] your signature with a pen, it can be any blue or black pen. First of all you have to sign it. Take A4 paper which comes with plain photocopy paper, you have to sign on it and after signing,
[12:16] Now after cropping, you have to check whether the size of this file is more than 50 KB. If it is too much then you have to resize it and then come and upload it.
[12:30] you want, you can use that too if you are doing it from your phone. Now in this way we have also uploaded the photo. We have also uploaded the signature. Now you have to upload the document whichever document you are giving to make this PAN card.
[12:42] So if you have selected your Aadhar card above then you have to upload the copy of Aadhar here. Apart from this, if you are giving Voter ID card then the As I told you, there should be two different documents.
[12:55] You will have to give that here. Like Aadhar card will be used for identity and address. But for date of birth, voter ID card, high school mark sheet or birth document you are giving, you have to browse it and upload it here in this manner.
[13:08] document will be uploaded here. But the So if you have captured it from your phone then first of all you have to convert it into PDF. And you have to keep this in mind also. Look like there is an Aadhar card.
[13:21] information is on the front of Aadhaar. Or get a DL. In that too, half the information is on the front and half the information is on its just back side. So if you are giving any such document in which half the information is in front and back then you have to merge both the copies
[13:35] into one and upload that PDF. Look, if you find it confusing then it is not a big deal. We have provided the merge tool on our website. Wherever you go, you will select two photos that you have captured of your document. You will
[13:48] download it here and upload it. Your work will be done. Both will merge into one. Apart from this, for the second document which we have to upload, we line will appear. And here now you have to browse and select that document.
[14:01] If you are giving your marksheet, you will upload the marksheet or it could be your DL document you are giving, you have to select it here. After this you have to click on the upload option. The Come here with red color. It will be mentioned here in PDF format. Now you must
[14:15] uploading a document, if you have uploaded e-Aadhaar, then you can use e-Aadhaar, there is no problem, but you have to remove its password, when you open the PDF or password gets removed, you have to upload it only after removing it, so keep this thing in
[14:30] mind, otherwise it can also lead to rejection. Now we have done this. So we get to see our personal information in front of us. But before moving ahead in the form, do one important thing here.
[14:44] Enter the first eight digits of your Aadhaar card here. Because when we entered the Aadhaar number in the beginning, the option to fill the complete Aadhaar number was not available there. Now it is coming here where you will enter eight digits. You have already entered four digits. After this, you have to match all the information carefully inside this form.
[14:57] If there is any problem, any document you want, you can go back and edit it. You can remove that document, you can delete it. In my case everything
[15:12] seems perfect. We want to submit here. Click on the proceed option. pay the fee for making this PAN card. So here you get the payment gateway to pay the fees which is HDFC and apart from this other
[15:26] you can select any one payment gateway. So you have to select any one from Paytm Build Desk here. As of So you have to select any one from Paytm Build Desk here. As of today, the government fee for making a PAN card is ₹16.90, that is,
[15:39] you have to pay ₹17. You have to accept the terms and conditions and after that click on the proceed payment option. You have to click on the confirm option. So now all of you will get multiple payment options to make payments. If you
[15:52] want, you can make this payment through credit card , net banking or you can use UPI. Now there is a small payment of ₹107. If we want, we can generate QR code here. Like when we go to the merchant's shop,
[16:04] Similarly, we can scan this QR code and make the payment. So we scanned it with our phone.
[16:16] thing to keep in mind is that you have to stay on this page for some time. You neither have to go back nor close this page. So here, after our payment is done, the arrived. Here we have to click on the continue option. Now
[16:31] after the payment is done, the next step is Aadhaar authentication in which you have to allow permission to use Aadhaar. After this, click on the Authenticate option and after this click on the OTP Generation option. So,
[16:45] So, You will enter that OTP here and then submit it. So now the submit it. So now the next step that comes before us is to
[16:57] click on the option of Click Continue to Proceed. You have to click on the option of I Hear By. We have to enter our Aadhaar number and after that click on the Send OTP option. So an OTP will come on our mobile number which is linked to our Aadhar card.
[17:11] You will enter that OTP here and click on the Verify OTP option. So in this way our e- sign will also be completed. Now if you do e-sign then you do not need to send any document to make PAN card.
[17:26] given a PDF file, if you want to then you have to enter a password. The password is nothing but your date of birth. So you have to enter your date of birth without any symbol and
[17:40] after that click OK. So in this way you will see that the PDF slip has been generated and has come in front of us. you will see that the PDF slip has been generated and has come in front of us. As soon as it is generated, you get a notification through message.
[17:52] After which, if you check your email, you will get a digital copy of the PAN card there. From where you can download your PAN card if you want. Apart from this, the PVC card which is generated like your PAN card is also
[18:05] printed along with it and is sent to your home address but the postman brings it, so it may take about a week more time but you get the ePAN card immediately as soon as it is generated, after that you can use that PAN card and
[18:17] if your work is getting stalled anywhere, then you can work through it, an option of track application status has been given on this portal, here you here you
[18:30] select the application type here and after this you will enter the reference number of the PAN application which you got on the slip here and we are not robots, we will click on it and submit, so as you will see that we have just
[18:42] filled the form, our form has been submitted by me. Now whatever process is required to make this PAN card will be started by the government. me show you, after a few days I am now checking that our
[18:56] PAN card has been generated and you will see that sent through India Post. So, this tracking number that you get from India Post, you can go to the India Post website and
[19:12] where the postman has reached. When will he bring it to our home address? I hope you learned something new from this video. If you got any value from the video, if you learned something new, then do like the video and let us know. If you are new to the channel, follow me.
[19:26] new to the channel, follow me. in a new video like this. Goodbye till then. Jai Hind.
⚡ Saved you 0h 19m reading this? Transcribe any YouTube video for free — no signup needed.