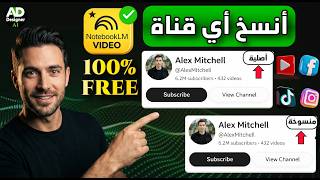

Build a Fully Automated YouTube Channel
45sPromises a revolutionary method to automate content creation, appealing to creators seeking efficiency and growth.
▶ Play Clip"The title promises a system for automated channels, and the video delivers a detailed workflow, though some steps are generic."
This video presents a step-by-step system for building a fully automated YouTube channel using Google Notebook LM. It covers channel analysis, idea generation, script creation, video production, and optimization for monetization.
The video reveals a legal system for creating a professional, automated YouTube channel using Google Notebook LM.
Examples of channels with over 100k subscribers, simple editing, and monetization earning hundreds of dollars monthly.
Using a website to verify monetization status of channels; the content must be original.
Notebook LM is a free tool that summarizes and links topics from uploaded sources like PDFs, websites, YouTube videos.
Using an extension to copy multiple video links at once for analysis.
In Notebook LM, create a project, add video links, and prompt the tool to analyze the channel's specialization, script, title, and style.
Prompt Notebook LM to provide five video ideas for the new channel.
Create a new project for each idea, paste the topic, choose video format (explanatory), language, and style, then generate the video.
The generated video is professional with good voiceover, about five minutes long. Download via the three dots menu.
Use Notebook LM's infographic tool to generate high-quality images for editing.
Prompt Notebook LM for five SEO-friendly titles and a three-word phrase for the thumbnail.
Use Canva to create a thumbnail with the three-word phrase and a character.
Remove logo using mask, extract audio, split scenes, add images/stickers, animations, captions, and sound effects.
By following this system, you can create a professional YouTube channel with automated content that is monetizable and optimized for success.
What is the main tool used to analyze YouTube channels in this system?
Google Notebook LM
02:37
What types of sources can be uploaded to Notebook LM?
PDF files, websites, YouTube videos, audio files, or Google Docs
02:37
How can you copy multiple video links at once?
Use an extension that copies a group of links at once, then press Control and click to select videos.
03:50
What prompt is used to get video ideas from Notebook LM?
'Provide me with five ideas for videos for this channel.'
05:15
What video formats are available in Notebook LM?
Explanatory or informative video
05:59
How do you download a generated video from Notebook LM?
Click on the three dots and choose download.
06:50
What tool is used to create the thumbnail?
Canva
08:55
What editing software is used to remove the logo and add effects?
CapCut
09:23
How do you remove the logo from the video in CapCut?
Copy the video, select it, go to Mask, and place the mask over the logo until it disappears.
09:35
Automated Channel System
Introduces a complete legal system for building a professional YouTube channel using Notebook LM.
00:04Notebook LM Capabilities
Highlights the tool's ability to summarize and link topics from various sources for free.
02:37Video Generation Process
Demonstrates how to generate a complete video from an idea in minutes.
05:44SEO Title Optimization
Emphasizes the importance of SEO-friendly titles and thumbnails for YouTube algorithm promotion.
08:09[00:04] This video might change the way you think about creating content on YouTube. Today, I will reveal to you a smart and legal system for building a professional, fully
[00:17] automated channel using the most powerful tool from Google Notebook LM. It's not just an ordinary tool, but a complete system that helps you analyze any successful channel, understand its strategies, extract its ideas,
[00:32] successful channel, understand its strategies, extract its ideas, build scripts of the same quality, and create complete videos in minutes in a professional manner that complies with monetization policies. I will show you professional manner that complies with monetization policies. I will show you step by step how to choose a successful channel, how to
[00:47] step by step how to choose a successful channel, how to intelligently analyze its content, how to transform data into powerful ideas, and then how to create shareable videos with optimized titles and thumbnails. Please support the video with a like and subscribe to the channel. And always,
[01:04] the video with a like and subscribe to the channel. And always, above all, let us put our trust in God. In
[01:18] God. There are channels that have succeeded thanks to this type of content, like this one, which has more than content, like this one, which has more than 100,000 subscribers with videos explaining ideas, facts, and everyday questions, as well as this one. This channel features videos
[01:36] on psychology and life facts. The videos garner thousands of views with videos garner thousands of views with simple editing and are less than five minutes long. simple editing and are less than five minutes long. This channel also boasts over 100,000 subscribers across
[01:51] This channel also boasts over 100,000 subscribers across 50 videos. All these channels are monetized and earn 50 videos. All these channels are monetized and earn hundreds of dollars monthly. I will now check this channel using a website specializing in determining monetization status. Before that, I'll test my own channel to prove the
[02:07] site's reliability. I'll include the channel link here. Most importantly, check the monetization status. channel link here. Most importantly, check the monetization status.
[02:20] As you can see, the channel is monetized. Now, copy this channel link and verify that it's this channel link and verify that it's monetized. This content is eligible for monetization, provided it's original work. As I'll show you, open Google and type "Notebook LM."
[02:37] I'll show you, open Google and type "Notebook LM." Enter this search. It's a very powerful and Enter this search. It's a very powerful and important tool for creating automated videos. It allows you to upload PDF files, websites, YouTube videos, audio files, or
[02:52] YouTube videos, audio files, or Google Docs. The tool automatically summarizes Google Docs. The tool automatically summarizes and links the topics, making them engaging and unique. It also analyzes any YouTube channel for free. I'll also show you how to copy it. Choose any channel and
[03:06] free. I'll also show you how to copy it. Choose any channel and make it exclusive. To begin, click on "Try It." You can also access the site from your Google account. Click on this box here. I have
[03:18] Google tools; search for Notebook LM [Music]. Scroll down until you find it, then click on the tool. Scroll down until you find it, then click on the tool. You will be taken directly to the site. This is the You will be taken directly to the site. This is the main interface. Then click on "New Project." I can
[03:34] add a single video link or a group of videos. Open this channel to copy these videos. Open this channel to copy these videos. I now have two methods: either copy the link of videos with millions of views or copy all these videos at once.
[03:50] or copy all these videos at once. For speed, use this extension. Its function is to copy a For speed, use this extension. Its function is to copy a group of links at once. Then download it and group of links at once. Then download it and open it from here and click on Settings. Scroll
[04:03] open it from here and click on Settings. Scroll down and add a new section, then modify these down and add a new section, then modify these settings. Here, choose Control and set the color you want, then Action, where you choose "Copy Links from Clipboard," then save. Now go back
[04:17] to the [Music] channel. Press Control and at the same time click the left mouse button, then select each video you want to copy. This way, you can copy as many as you want. I will be satisfied with
[04:31] four. Then go back to the site. Click on "YouTube Web Site," put the links here, and add the on "YouTube Web Site," put the links here, and add the extension. I have the videos here, the sources
[04:43] extension. I have the videos here, the sources here, the chat here, and the tools here. First, here, the chat here, and the tools here. First, write the name here. For better results, write "Copy the Human Psychology channel." Then write this request: "I want to create a similar channel." Review these
[05:01] sources and understand the specialization, script, title, and presentation style. Then generate. Now you have all the important information from the channel. Then continue writing this request to find a suitable name for the
[05:15] request to find a suitable name for the channel. Then choose the suitable name and channel. Then choose the suitable name and continue writing this request: "Provide me with five ideas for videos for this channel." Put your channel name here. Then generate. I now
[05:32] have five fantastic ideas for creating videos that will be successful, God willing. Now open a videos that will be successful, God willing. Now open a new window, create a new project. Click here, then
[05:44] start with the first video. Copy all this information, paste it, and click "Insert." Now the topic is ready. Now go to the tools and choose "Video." Now I have the video format: either an
[05:59] choose "Video." Now I have the video format: either an explanatory or informative video. I choose explanatory. Then the language: I choose English. The tool is also available the language: I choose English. The tool is also available for Arabic. Then choose the video style.
[06:12] for Arabic. Then choose the video style. You can also add the style you want from here. Then generate. Now the video is starting to be created. It will take me Three to five minutes, then continue.
[06:24] will take me Three to five minutes, then continue. Open a new window, then a new project, and copy the Open a new window, then a new project, and copy the idea for the second video in the same way. Paste it and idea for the second video in the same way. Paste it and continue with all the ideas in the same manner. For each idea, you will get a
[06:36] video. The first video is finished. Open it.
[06:50] As you saw, the result is excellent, the video quality and voiceover are professional. The and voiceover are professional. The video duration reached five minutes, which is very good. To download the video, click on these dots, then choose download. Regarding this channel, if
[07:05] then choose download. Regarding this channel, if you open, for example, this video works with images and voiceover only. As you saw, it's a very ordinary video, yet the channel is successful.
[07:20] Most of these videos are done in the same way and garner thousands of views. During editing, I will show you exclusive methods for professional work. Now, I return to the Notebook website for the same video topic. I can
[07:34] use these tools, for example, [Music] Infographic. Click on it Infographic. Click on it and wait until the file is prepared. Then, enter the file. High-quality images can be used in the editing process I will be working with. If you have made it this far,
[07:52] don't forget to like and share the video so everyone can benefit. Now, the most important share the video so everyone can benefit. Now, the most important step is the title and thumbnail. To help the YouTube algorithm promote your videos, you must choose a title. SEO-friendly and also
[08:09] choose a title. SEO-friendly and also compatible with the topic and thumbnail. For a compatible with the topic and thumbnail. For a professional result, return to the website and write this request: "Provide me with five attractive and professional titles for the topic."
[08:23] professional titles for the topic." Excellent! Now, choose, for example, this title and write this request to get a three- word phrase to put in the thumbnail: "Write me a three-word title that I want to use as the title for the thumbnail of this title." I ignore the "
[08:40] the title for the thumbnail of this title." I ignore the " Generate" option. I have this title; it's Generate" option. I have this title; it's attractive and suitable for the thumbnail. Now, open the Canva website, create a template, type " Tom 9 YouTube" in the search bar, then select "Write"
[08:55] Tom 9 YouTube" in the search bar, then select "Write" and enter the text. Adjust it well and choose, for example, and enter the text. Adjust it well and choose, for example, the color yellow under the text. Then go to the the color yellow under the text. Then go to the widget, type "Psychological Stick," then choose the
[09:08] widget, type "Psychological Stick," then choose the appropriate character, adjust it well, and then download it from here. You can also be more creative in creating the thumbnail. Now, the final stage is editing. To make thumbnail. Now, the final stage is editing. To make the work complete, exclusive, and with added value,
[09:23] open the CapCut program and upload the open the CapCut program and upload the entire video. First, update the logo in this way: entire video. First, update the logo in this way: copy the video and select this video, then
[09:35] copy the video and select this video, then go to Mask and select the location above the logo. go to Mask and select the location above the logo. Directly, I go back to the basics and place Directly, I go back to the basics and place the mask directly over the logo until it disappears.
[09:49] the mask directly over the logo until it disappears. Then, I extract the audio for the video. Then, I extract the audio for the video. Click on this icon, then delete, and also extract the audio from the original video. Then, I choose this option to split the video scenes.
[10:05] this option to split the video scenes. Focus on the original video; this is a mask Focus on the original video; this is a mask to cover the logo. The scenes are split, but I have to to cover the logo. The scenes are split, but I have to continue manually until I cut between each scene of the
[10:18] continue manually until I cut between each scene of the entire video. I have now finished cutting all the scenes. entire video. I have now finished cutting all the scenes. Now, to make the video more professional, I have two options: either add suitable PNG images for each
[10:30] sentence of the topic, or add [music] stickers from the Capacitor app to the video so it doesn't get from the Capacitor app to the video so it doesn't get boring. Open the GPT chat, write this boring. Open the GPT chat, write this request: I have this topic, then add the text or
[10:44] request: I have this topic, then add the text or topic and continue writing: I want to create illustrative images as [music] icons and characters in style, fonts, and drawings. I want you to characters in style, fonts, and drawings. I want you to provide me with names in English, arranged
[10:57] provide me with names in English, arranged sentence by sentence, to add in the editing. I got all the names with the order according to each sentence in the topic. Now I can upload sentence in the topic. Now I can upload the images, for example, from Pinterest. Copy this The sentence
[11:13] the images, for example, from Pinterest. Copy this The sentence I'm putting here: I have several images I can upload. I'll I'm putting here: I have several images I can upload. I'll go back to the CapCat program and upload the go back to the CapCat program and upload the images I downloaded. You can also use stickers. I'll
[11:25] images I downloaded. You can also use stickers. I'll remove the background by selecting Auto Background, then adjust the image to fit the frame well. I'll select Animation to move it. For example, I'll choose this movement Animation to move it. For example, I'll choose this movement at the beginning of the image, then this movement at the end.
[11:41] at the beginning of the image, then this movement at the end. Then I'll add a zoom effect, select this scene, add a keyframe, then move it to the end of the image
[12:17] and zoom in. I'll continue all the scenes in the same way until I'm finished. Now I'll add captions for all the scenes and select all of them. Then I'll select the first and second videos, right-click, and choose Compound Clip to combine them all. Then I'll continue by adding sound effects and animating the scenes from Animation. To add the animations, I double-clicked on the video and then added the animations to each scene. When I'm finished, I'll go back here, here, extract the text, and adjust it in its appropriate place.
[12:30] extract the text, and adjust it in its appropriate place.
[13:01] out a todo list does that sense of your ching feel.
[13:21] don't forget to like the video and subscribe to the channel. We'll meet in a new video, God willing. May channel. We'll meet in a new video, God willing. May God grant you success, and peace, mercy, and blessings of God be upon you . [music]
⚡ Saved you 0h 13m reading this? Transcribe any YouTube video for free — no signup needed.