
$500 Car to $3,000 Profit!
44sHigh-profit transformation story that hooks viewers with a massive ROI in a short time.
▶ Play Clip"Delivers on the promise of a weekend flip with detailed steps, but some fluff and sponsor mentions pad the runtime."
This video demonstrates a complete weekend car flipping project, from finding a discounted non-running Toyota Highlander Hybrid to replacing its hybrid battery, detailing the interior and exterior, and selling it for a profit. The host shares his strategies for sourcing deals, diagnosing issues, and performing repairs with common tools, ultimately netting $2,800 in profit.
The host explains the process of buying a car at a discount, fixing it over the weekend with common hand tools, and selling it for a profit. He references previous flips: a 2005 Trailblazer ($500 purchase, $1,000 total, sold for $4,000) and a 2013 Prius ($2,700 purchase, $2,400 parts, kept as daily driver).
The host found a 2009 Toyota Highlander Hybrid with a bad hybrid battery. The dealership quoted $9,000 for a new battery, which is nearly the car's value. He ordered a new upgraded drop-in battery from Electron for $3,940 with a 3-year, 45,000-mile warranty.
AutoTempest is a search aggregator that scans multiple car listing sites (eBay Motors, cars.com, TrueCar, Craigslist) in one click. He recommends using keywords like 'project', 'won't start', 'dead battery', 'needs work' to filter for project cars.
He evaluates a Mercedes SUV listing for $5,500 with a bad fuel pump and window motor, estimating $200 in parts and a potential $8,000 value. For the Highlander, he used CarGurus to check market value (~$9,100 list price), offered $2,500, and negotiated to $2,800.
He tests the 12V battery (100% health), then uses an OBD-II scan tool to check codes. The scan shows P0A80 (hybrid battery malfunction). Freeze frame data reveals block 3 voltage at 16V vs. 18V others, identifying the bad block.
He removes the rear seats, safety plug, and various trim pieces. He emphasizes cleaning the battery cooling vents, which are often clogged and cause heat-related battery failure. The battery is heavy (~180 lbs) and requires two people to remove.
Installation is reverse of removal. He torques bolts to spec (20 ft-lb for chassis, 60 in-lb for brackets and high-voltage wires). He reconnects all wiring harnesses, ensuring connectors click, and installs the safety plug.
After connecting the 12V battery, he tests the car: no check engine lights, engine charges the hybrid battery, and no warning lights. He reassembles the interior, torquing seat bolts to 27 ft-lb.
He replaces the cabin air filter ($10) to fix musty smell. He cleans all plastics with soapy water, a brush, and non-greasy protectant. He uses a steam cleaner for stubborn stains and an extractor vacuum for carpets.
He cleans the engine bay with low-pressure water and protectant. He washes the car, uses a DA polisher with a two-in-one polish/wax, and restores headlights with sanding and clear coat. He also installs a 4K dash camera.
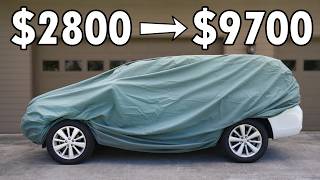
He lists the car for $10,500, negotiates to $9,700, and sells it. Total costs: $2,800 (car) + $3,940 (battery) + $10 (filter) + $50 (cleaning) + $100 (dash cam) = $6,900. Profit: $2,800.
The video demonstrates a profitable weekend car flip, showing that with research, mechanical skills, and detailing, one can turn a broken car into a significant profit. The host emphasizes the importance of patience, using tools like AutoTempest, and thorough cleaning to maximize resale value.
What is the number one killer of hybrid batteries?
Heat, often caused by clogged cooling vents.
15:01
What does the OBD-II code P0A80 indicate?
Hybrid battery malfunction.
09:17
What is the recommended torque for the hybrid battery chassis bolts?
20 ft-lb.
21:29
What is the recommended torque for the high-voltage wire nuts?
60 in-lb.
22:21
What is the recommended torque for the seat bolts?
27 ft-lb.
24:07
Why is it important to clean the hybrid battery cooling vents?
Clogged vents restrict airflow, causing heat buildup that degrades the battery.
15:01
What is the purpose of the safety plug on a hybrid battery?
It cuts the high-voltage circuit, making the battery safe to work on.
13:41
What is the approximate weight of the Highlander hybrid battery?
About 180 lbs.
20:10
What is the benefit of using a two-in-one polish and wax?
It removes light scratches and provides a protective wax layer in one step.
39:21
What is the recommended method for sanding headlights?
Wet sand with 1000 grit then 3000 grit, using back-and-forth motion, not circles.
42:17
What is the total profit from the Highlander flip?
$2,800 (sold for $9,700, total costs $6,900).
48:10
Heat is the #1 killer of hybrid batteries
Emphasizes a critical maintenance tip that can prevent costly battery failure.
15:01AutoTempest as a secret weapon
Reveals a practical tool for efficiently finding project car deals across multiple sites.
04:39Safety plug is critical
Highlights a crucial safety step when working on hybrid batteries.
13:41Profit breakdown
Provides a clear financial summary, showing the viability of weekend car flipping.
48:10[00:01] going to show you how to buy a car at a great price with a steep discount show you how to fix it over the weekend with common hand tools so you could do this yourself. And finally, I'm going to sell it for a healthy profit. And this
[00:15] you. My favorite weekend flip that I've done because it only cost me $500 is this non-running 2005 Trailblazer. I ended up diagnosing the problem to be a bad fuel pump. So, I dropped the fuel tank and it was out with the old melted
[00:29] fuel tank and in with the new. Well, newish because I got a working tank from the tank to make it look brand new. Then, I took our new tank and installed Then, I took our new tank and installed it back into the car and check it out.
[00:45] problem at all. Man, she's running great. No lights on the dash at all. This is exciting. We got ourselves a really nice car here. So, with the car the inside and also correct that paintwork on the outside. And look at
[00:58] risk on this car for 500 bucks since it wasn't running and I fixed it all up using common hand tools for under $500 in parts. So, for $1,000 all in, the car is now worth a little over $4,000. So, the total profit is $3,000. Not bad for
[01:15] a couple days worth of work. And for my most recent flip, I bought this 2013 Prius for dirt cheap because it had a bad hybrid battery. So, I showed you battery from the car, then how to remove the case, remove the old prismatic
[01:28] cells, and package them up to ship them back for a core charge. Then, I showed cylindrical cells, then reinstall the case, torque each bolt to spec, and then reinstall the rebuilt hybrid battery pack into the car. Now, the car ran
[01:41] rattling noise. And luckily, it was just a broken exhaust hanger. So, I showed you guys how to weld this at home and then coat now, the car was running and there was no more rattling. Next, I showed you how
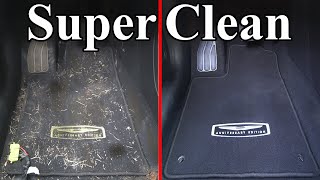
[01:55] and an extractor vacuum starting with the carpets. And this vacuum works sucking it all out. It also works amazing for getting dirt out of the pretty clean, I could tell you they were actually very dirty. Here's all the dirt
[02:10] What a difference from the water we used to clean it. So, I showed you guys how to clean the rest of the car and it went from this to this, this to this, before and after, dirty and clean. And finally, I showed you guys how to clean and
[02:23] shine using a DA buffer. And after buffing off the polish, look at this So, we polished the rest of the car, which not only gave it a deep glossy clear coat scratches like this. Look at that before and after. And finally, I
[02:37] a big difference and cleaning simple make the car look brand new. So, the car cost us $2,700 and with the battery and other parts we put into it, we spent $2,400 totaling $5,100. Now, the car on
[02:52] the low end was worth $8,000, so that gave us a $2,900 profit for a weekend's worth of work. And now, I ended up liking this car so much, I didn't sell her. I kept her and she's been a great reliable daily driver for the last 3
[03:04] years and over 30,000 miles. So, for our next weekend flip, which I will sell next weekend flip, which I will sell this time, I found this 2009 Toyota Highlander Hybrid for a really good price and here's why. If we take a look
[03:16] they were driving along and all of a sudden there was a chime and then they found a bunch of lights popping up on the dash warning them something and then the brake system and check the hybrid system and to pull over immediately
[03:30] they drove to the dealership. The dealership plugged in their scan tool and found the problem that it is a bad hybrid battery and it needed to be replaced. And this cost them $200 to diagnose. So, they got a quote to fix
[03:43] the car and as you could see, it is $9,000 for a new hybrid battery, which is basically how much this car is worth. So, instead, I went online and ordered And I've ordered from Electron in the past. They have a shop in Orange County,
[03:57] fixed at or you could pick your year, make, and model and have the battery more budget-friendly, you could get a rebuild kit with OEM cells for a little over $2,600, which is what I did in the gray Prius over 7 years ago. And I
[04:10] that car is still running great. But for this car, I'm going to go with a brand new upgraded drop-in battery, which has a 3-year, 45,000-mile warranty. That and I'm trying to make this as simple as possible. So, for a little over $3,900,
[04:25] we have a brand new upgraded ready to go hybrid battery that we could put in the car and that sure beats the $9,000 quote they gave the previous owners from we're going to save a lot of money. So, let's get started. Okay, first things
[04:39] good deal and that starts right here on the computer. And this is my secret weapon to finding cars quickly. It's a site called AutoTempest. So, this car for sale websites all in one click like eBay Motors, cars.com, TrueCar, as
[04:53] a one-stop shop. It even helps you search Craigslist in a large area, not don't miss a good deal that might be a little bit further away. And the same could search regions. That way, you're not missing deals that might be just out
[05:07] a cheap project car is to filter your search with keywords. And here's a list could screenshot this real quick. That way, you have them saved. But keywords like project or won't start or dead battery or needs work are all good
[05:21] search terms that find their way into listings for cars that are projects. So, we have a bunch of listings here with cars that might need work. But not every You need to keep an eye out for the ones that stand out. For example, if we
[05:34] scroll back up real quick, there's this Mercedes SUV for $5,500 that caught my description for this listing, they said that the dealer diagnosed that it needs a new fuel pump. So, I looked it up and found an OEM fuel pump for 150 bucks.
[05:47] They also said that the driver window isn't working and I found a window motor for 50 bucks. So, assuming the rest of the car is good, even if we paid full amazing deal because the car is worth at least $8,000 all fixed up. So, deals
[06:00] like this exist, but it takes patience to find. Another good listing I found is the car I ended up buying, the Toyota Highlander Hybrid. So, for this listing, you could see he was asking $4,000 or best offer and there's no accidents.
[06:12] It's a one-owner car. And if we take a look at the description, the owner says hybrid battery and Toyota wants a lot of money to fix it. He has a list of pros take a look at the pictures, the car looks dirty, but is otherwise in decent
[06:26] shape. There's no major damage visible and it has nice new tires. Now, if we which is a really useful tool, and just search our car's year, make, and model, now we have the list price of tons of cars for the last 5 years. And I want to
[06:40] because it's going to be more accurate for us. I also want to filter out the price a bit. Okay, and that looks pretty good. And you could see right here is a similar Highlander Hybrid. It's currently listed for $13,000.
[06:53] And then we have one down here at the bottom listed for $6,000. And our average list price is about $9,100. Remember, this is list price, not sold value, which is 9,200, so we're right in the ballpark. So, if I could get this
[07:07] car for $3,000 or less, we could make a healthy profit. So, I offered the guy 2,500. He countered at 3,500 and after a little back and forth, we both ended up meeting in the middle at 2,800. And now, I'm officially the owner of another
[07:20] broken project car. So, thank you, AutoTempest, for supporting the video and giving us a way to find great deals like this. Now, let's go replace the and products you're going to need. Let's get our safety glasses on. And the first
[07:33] tools, it will make this job so much quicker going to use them. I'm going to use common hand tools so you guys know you could get this job done at home yourself, no problem. We also have a
[07:47] multimeter. We have an OBD-II scan tool. That way, we could check the codes on the computer. And then I have a 12-V battery tester. This is actually very important right now because when I went to pick up this vehicle, it did not
[07:59] which means that our battery could be bad. So, we need to test it out. So, terminal and connect the alligator clips to the battery to power it up. So, now regular flooded battery. We use cold cranking amps. This battery has 550 cold
[08:14] cranking amps. Beautiful. And you could see it says we have 100% battery life, because a new 12-V battery is pricey. profits. But we're good to go here. Okay, now the next thing to do is grab
[08:26] an OBD-II scan tool like this. This plugs into the computer and it will check to make sure that the hybrid battery is actually bad. And also, we problems with this car. And the OBD-II port to plug this into is located under
[08:41] the driver side dash. So, if we take a look, it is right there. So, just plug it into the port, then turn the car to the run position, but don't start it. app and we're ready to scan the computer. So, we're going to do a full
[08:53] system scan, which not only checks the ECU, but it also checks other computers in the car from ABS to airbag to body control modules. This is going to give us a good idea of the health of the car. And now that it's complete, if we look,
[09:05] due to the high voltage system malfunction. And then let's look at the cruise control computer, which also shows a bad hybrid battery. And finally, the hybrid control computer is showing a P0A80
[09:17] battery is bad. And real quick, with the scan tool, we could tap into the So, click on the freeze frame data and this is the data that's recorded when lot of data here, but we want to find the battery block voltages. So, right
[09:31] here, you could see 18 V or so, but there's one outlier at 16 V, which is block three. So, that's the bad battery block, which caused this battery to actually bad, let's replace it. So, let's unplug the scan tool. Then, we
[09:45] all the way to give us more room in the back seat area. Now, let's disconnect battery. That way, we don't drain the battery since the doors are going to be trying to make this as easy as possible for anybody who has to do this, so I
[09:59] description where you can download it for free, and it covers the entire process step-by-step on removing the old battery and installing the new one. make it as easy as possible. So, the hybrid battery is located underneath the
[10:13] fold the carpet up, unbolt the battery, disconnect a couple of wiring harnesses, remove the old battery, install the new one. It is that simple, so let's get do is remove the four bolts that's holding the front of the seats in. So,
[10:27] and then remove both seat bolts. These are 14 mm, and that's one, keep things organized, I'm putting the bolts with the plastic covers. Now, seat, remove the plastic covers, and then the two 14 mm bolts. Good. Then,
[10:44] side, as well as the driver side, and you're also going to want to fold it down. And that exposes the four plastic seat rail covers. There's one here, there, there, and there, and they need to be removed. And to remove these, just
[10:58] give it a quick pull upwards to pop it out. yank. You can see these are very durable clips, thick plastic with metal pieces, so they are not going to break. Now, as I remove parts, I'm going to place it on
[11:11] not going to move. It's a good place to store pieces. I know that piece is going to go there. I know that piece is going to go there. It just helps keep things organized. So, with those two pieces removed, now let's remove these two.
[11:25] there's six bolts, well, technically seven bolts holding in these rear seats. There's one there, two, three, four, five, six, and then underneath here is a hidden bolt that is holding in this seat belt. So, we have to remove this
[11:38] bolt. So, let's get this out. And just like the front bolts, these are also 14 mm, so break it loose, then loosen it up by hand, and finally, a magnet makes it easy to remove. Now, the inner seat rail is held in with two 14 mm bolts, so
[11:52] way as well. Good. And now comes the most difficult part of this whole job, the folding seat release cable. And this is under tension. So, to release that seat release, but it has to stay pulled out. And if you're working by yourself,
[12:06] that closes when you let go. So, a little trick is to grab one of those seat bolts that you removed, and it fits right here and holds it open for you. pocket pry bar to pop this plastic piece open. Good. And then, we need to line up
[12:20] this little keyway here, so the cable could be removed. So, spin this metal the keyway, then carefully move this wire out. usually does. Now, we can remove the bolt and let this back down,
[12:34] place, and now the seat could be removed. And the best way to do this is to tilt the seat sideways out the door, then rotate it so the rails are facing up and down, and now you can easily pull the seat out of the doorway by yourself.
[12:47] rails against any of the plastic inside the car. Beautiful. So, with that seat removed, now we have access to that extra bolt right there for this bracket, which holds in this seat belt. So, let's remove it. So, break the 14 mm bolt
[13:00] free, and then remove it the rest of the way, and now you can remove the mounting more seat rails to go, so remove the bolt on the outer rail. Good. And then, rail. And then, finally, we have the dreaded
[13:14] seat release cable. So, prop that seat release open with the seat bolt. Now, open up the plastic with a pocket pry bar. Good. And now, we need to line up the disc with the keyway, and carefully remove the cable. Beautiful. That went
[13:26] way too easy. So, now we can remove the bolt from the seat release, and the seat damage the plastics or the door. Okay, and just like that, both seats are out. So, with our seats removed, now we have access to our battery. Check this out.
[13:41] You can see it right there. Now, before you touch the battery, it's very, very, very, very important that we remove the safety plug. When you remove the safety plug, it cuts the voltage to the battery and makes it safe to work on. So, do not
[13:55] skip this step. It's very important. And to remove it, just pull open the orange safety handle and pull it straight out. Beautiful. And with our safety plug battery. So, next, what we're going to do is we're going to pull up this carpet
[14:08] pull up the carpet, we need to remove a couple pieces of plastic trim. And just with that removed, now let's head over to the passenger side and remove this Now, all that's left are these three plastic vents that need to come out. And
[14:23] screws under here, so use a pocket pry bar to pop these tabs down, and then remove both of these with a 10 mm socket. That's one, and that's the other. Now, the vent comes right out. Now, we can repeat the
[14:36] process for the other two vents, unscrew the two screws, and the vent comes right out. And finally, for our last vent, you guessed it, unscrew both screws and vents removed, if you own a hybrid, listen up. I'm about to save you a ton
[14:49] of money. Make sure you find your vents and clean them out. Look at all this stuck in the vent here. You can barely see my hand through this, and it is all clogged up. That is horrible. There is
[15:01] efficiently. And the number one killer to hybrid batteries is heat. So, it's this to cool the battery. And also, something I've noticed, every single hybrid battery that I've ever replaced has had a clogged up vent. So, there's
[15:15] battery quicker over time. So, clean your vents. is to use a hose like this. And that's much better. Look at that difference. vents, being sure to get all that debris out of there. That way, they could
[15:29] actually let air flow through efficiently. And let's do our last one. vents are nice and clean, and the air can actually flow through them. And lift this carpet up and over, we probably want to clean this up. Now, I
[15:43] probably the first time this carpet's ever been cleaned under these seats not only is this going to look cleaner, musty smell in here. So, take your time and vacuum up the carpet while the seats
[15:56] And that's much better. So, with the carpet clean, let's lift it up and fold we need to remove, and to get them out, they lift straight up. And now, the up and fold it over, and there's the battery. Now, let's remove this rubber
[16:11] black plastic vent tubes, which divert air to the battery. Next, we need to remove this, but first, unplug the wire here. So, just depress the tab and pull it straight out. And now, this plastic piece pops out, which gives us access to
[16:24] first, we need to remove this safety panel clip. And this isn't a normal use the safety plug and get the end here and twist it inside, so it pops up. Now, hold the panel on, and these are 10 mm, so unscrew both of these, and now the
[16:40] access to the two high voltage wires we need to disconnect. Now, the car is off, the 12-V battery is disconnected, the safety plug is removed, and there are make sure that those don't have any power. But, to be extra safe, I will
[16:54] show you how to verify there is no voltage using a multimeter set to DC one lead to one post and the other lead to the other post, and you can see the multimeter says 0 V, so it's safe to work on. So, use a 10 mm socket with an
[17:07] extension to remove both of these nuts, and a stick magnet works great down real quick, where these wires go matters. So, you can see there's a white red piece of tape, which goes here. If we remove this, you can see there's red
[17:20] paint there, and if we remove this one, you can see there's white paint there. when you reinstall it, don't forget that. Now, we want to tuck these wires case out, they don't get caught. So, with our high voltage wires
[17:33] disconnected, all we need to do now is remove a vent tube right there, disconnect a couple of wires, and then unbolt this from the car, and it'll come the passenger side and removing the vent tube.
[17:46] battery won't have one of these vent tubes, because it's no longer needed. So, now let's go remove the wiring harness. And don't worry about keeping these connectors are different, and you can't mix them up. Good. Then, pop out
[17:58] the wire holder, and there's also a wire holder here, a holder here, and a holder here in the middle, that need to pop out. And then, the wire could be removed from here. So, with the
[18:12] holder that needs to be removed, and finally, we could come over to the driver side of the battery and remove the last two wire connectors. then there's one last wire holder back
[18:24] disconnected, what I like to do is I like to grab the wiring harness, and I just like to put it on top of the back seat in the corner here. That way, it's out of the way for when we remove our battery. Now, the only thing holding the
[18:36] battery in are six bolts in the rear and five bolts in the front. So, let's start removing these bolts. So, these bolts use a 12 mm socket, and that's one, to the middle and remove these two bolts.
[18:50] And that's three, and four. And the last two bolts are So, that's five, and that's six. Perfect. So, with all case, now let's remove the five bolts from the front of the case. So, the two
[19:04] hidden behind these brackets. It's hard to see. You could kind of see it right there, and a little bit right there. So, to get to them, we're going to remove this big bracket piece, which is held in by those two bolts. And these bolts are
[19:16] and now the bracket could come out, giving us access to the two bolts that these are 12 mm, just like the rear bolts, so remove both of them, and then needs to be removed. And finally, on the passenger side, we have to remove the
[19:31] bolts. And then, when that comes out, that gives us access to the last two chassis. Perfect. Now, the battery is completely loose. All right. So, with our checklist complete, that means we are ready to remove the hybrid battery.
[19:44] Now, this is a pretty heavy battery at 160 lb, so I recommend using two people is we're going to turn the battery on its side, and then pull it out through this doorway here, being careful not to damage the door or the door sill. And
[19:56] a moving blanket down here because as you pull this out, it's pretty heavy, it's a perfect place to rest this. So, let's go and remove this battery. 1 2 3. Now, this battery is very heavy at around 180 lb, which is twice as heavy
[20:10] as the normal Prius battery. So, be careful, and I highly recommend having a you get the old battery out of the car, you're going to want to place it on the pallet the new battery came on, then strap it down so you could return it for
[20:22] shipping and come to you to pick it up, which makes this easy. So, it's out with the old and in with the new, and this upgraded battery pack is ready to go as is, so let's get it installed. And I found that the easiest way to get the
[20:35] new battery in is to rest it on the door sill, and then you can move it the rest careful not to trip. Then you can lay it down into place, and just make sure you Perfect. And finally, we can remove the mover's blanket. All right, so our
[20:49] upgraded hybrid battery is in. Installation is opposite of removal, have a checklist. We're going to work our way up the checklist, and it's also good that we kept our fasteners nice and organized, so this will be quick and
[21:02] is install the front bolts that hold the battery to the chassis. Actually, real doesn't line up with the hole in the case? We need to move the battery just a little bit. You just shift it just enough like that so it lines up. So,
[21:16] with all the holes lined up at the front of the battery, we also have the holes lined up at the back of the battery. We're good to go here. So, now we can torque down all five of these battery to chassis bolts to 20 ft-lb.
[21:29] brackets, so get that in place and torque each of these bolts to 60 in-lb. other vent bracket as well. Now, with the front bolts tightened battery, and there are six bolts here that we need to torque to spec, which
[21:43] again is 20 ft-lb. Beautiful. And now the battery is bolted to the chassis. So, now let's go grab our wiring harness, and then spread it supposed to go, and let's start over
[21:55] connectors. And there's two connectors here and one wire holder back here. And connecting these wire connectors, it makes a solid click because if any of you're going to get a check engine light. So, make sure you connect all six
[22:09] connectors nice and tight. Beautiful. So, with the wiring harness connected, now let's go connect our high voltage wires. So, untuck them out of here, damaged by the battery when we removed it and installed it. And remember, red
[22:21] goes to red and white goes to white. So, get each wire on the correct stud, finger tight, and these get torqued to 60 in-lb. Good. Now, get the cover plate on, and these two bolts also get torqued to 60 in-lb. Then our safety panel clip
[22:36] middle to lock it in. So, with the high voltage cover installed, now let's pushes right in. And don't forget to connect the wire and the wire holder as Next, we want to install the black vent plastics, and they all fit into place
[22:50] like so. Then get the rubber cover in place, and then the carpet could get trim so it looks good. And don't forget to install the three panel clips that move to the front of the battery pack and install the vents, starting with the
[23:03] middle vent. So, tighten the two bolts down, then snap the covers closed. Same the bolts, and snap the covers closed. Now, with all our vents in, let's go add our safety plug and test out the battery
[23:16] something or something's not working right. We want to know now rather than when everything's back and installed. So, push the plug in all the way, and then turn the latch so it locks in. Good. Now, connect the negative terminal
[23:28] it's snug. Don't over-tighten this. Okay, moment of truth. Let's test her out and see what we got. All right, so our dash doesn't have any check engine lights. If we come over here, you can see our engine is charging
[23:41] up our new hybrid battery, and finally, there are no warning lights on here. So, we are good to go. Now, let's finish getting the last bits of the interior sill trim. Then we want to carefully get
[23:53] can connect the seat fold down cable, which carefully fits into this keyway. Good, and then push the plastic cap back together like that. And don't forget to Okay, now slide the seat cable onto the metal bracket, then torque the seat
[24:07] bolts on the inner seat rail to 27 ft-lb, and get that plastic cover back on. Then we can torque the seat bolt on the outer seat rail to 27 ft-lb, and get our seat rail covers installed, now let's go install the seat belt. So, get
[24:21] seat belt through this loop on the side of the seat, and torque that bolt to 27 ft-lb. Now, we can get the passenger side seat in, and carefully get this seat fold down cable into the keyway. Perfect. Now,
[24:34] to the seat rail. Good. Now, torque the seat bolts to 27 ft-lb, get the plastic seat cover in place, remove the seat bolt from the latch, and use that bolt on the outer seat rail and torque it to spec. Good.
[24:48] in place. And we are almost done. So, the back of the seats are bolted down. seats and finish bolting them down. So, get both bolts in, torque them to 27 on. Good. And same for the passenger side.
[25:03] Get the bolts in, torque them to spec, and get the plastic covers back on. All right, so with the rear seats bolted in, we have officially replaced the hybrid battery. Our checklist is complete, and I am so excited because now we get to go
[25:17] for a test drive. All right, check it out. So, we have no dash lights, the battery's charging up, we have almost 30 mi a gallon on the dash, and the AC is ice cold. This car is driving great. I really like this car a lot. And don't
[25:31] worry, I will sell it this time. I will say when I turned the AC on, it did we get back, I'll show you how to fix that with a new cabin air filter. And it is a mess. The glass is a mess, the dash is all dusty, everything's all dirty.
[25:44] that. So, let's head back now and clean this car so we can sell it. All right, that's in perfect running condition with no problems. The hybrid battery is fixed. The last thing to do before we sell it is clean the car. Never sell a
[25:59] car that is dirty, you're leaving money on the table. If the wheels are dirty, paint work's dirty, the interior's dirty, all those things will decrease the value of the car. It's so easy to
[26:11] clean a car, which will increase the value and make it quicker and easier to clean is the interior. I'm going to show you my tips and tricks, but I really in there. This thing costs 15 bucks. It's so easy to replace, and I think
[26:25] show you how to do it. Now, for most cars, the cabin air filter could be found on the passenger side behind the glove box. So, just open the glove box you can see it won't go any lower than this, so grab the sides and bend them
[26:38] it all the way down. Now, we can access the cabin filter back here. So, pop this box, and notice how right there it says up. Make sure you remember that. And now we can remove the old air filter by sliding it straight out.
[26:53] So, it's out with the old dirty filter, and look at this. No wonder it smelled musty in here. And in with the brand new one. What a difference. So, let's get this installed. So, the new filter goes right in, and make sure you keep that
[27:05] the cover for the filter box, making sure it clicks in, then close the other cover and make sure that clicks in as well, and finally, just close your glove normally, and don't forget to put all that stuff back into your glove box.
[27:18] With that done, now let's go clean the interior because it definitely needs it. I mean, look at how dirty this is. Look at all the dust on the dash. Look at all the dust and the dirt over here. Even the screen is all messy, the center
[27:31] in here. I don't even want to touch that. Inside the buttons, inside the cup holders, over here where there's dials. Basically, anywhere you're going to turn, they're all grimy and disgusting. Who wants to buy a car with somebody
[27:45] else's dirt and grime? And to clean this up, all you need is some soapy water and a brush. And what you're going to want to do is spray the soapy water directly the surface you're trying to clean, making sure you don't miss any spots.
[27:58] the surface completely, and this towel's absorbing all the dirty soapy water and With that dry, then get another microfiber towel and spray it with some non-greasy interior protectant, and this works great on plastics, vinyl, and
[28:12] protectant into the dash, and already you can see how amazing this looks. The completely, and it's non-greasy. It actually adds a UV protection layer and So, now you know the process to clean all the plastics in the car. Just brush
[28:26] in the soapy water, then you soak up all that dirty water with a clean towel, and protectant to make it look brand new. And check out that before and after. And I've been wanting to clean the shifter the second I bought this car because
[28:41] it's so dirty. And again, it's the same process. And look at that. Here's a before and after. Dirty buttons, clean buttons. Dirty cup holder, clean cup time cleaning deep cup holders like this. So, real quick, just use a brush
[28:55] until all that gunk down there is loose. cup holders. Swirl that brush around, and get all that dirt loose, and then you can take your microfiber towel and absorb all that dirt up and out of the
[29:07] this down with the protectant, and this came out amazing. Here's a before and after. So, now you can apply this method of cleaning to the rest of the interior attention to detail is key to make your plastics look brand new. I even like to
[29:21] brush works great at getting all the dirt out of the textured surface. But the pedals. Protectant makes it slippery, and that wouldn't be good, think you get the idea. Look at this interior. It came out incredible. The
[29:37] door panels look brand new, the dash looks amazing, the center stack here, screens, all the buttons and dials are prindle. Look at all this. The cup holders, they all came out looking brand new. And it is just a really nice place
[29:51] to be in this car. Steering wheel, I mean, you get the idea. Just pay into all the nooks and crannies with that brush, and it's going to make a things left to do. We have to get the carpets done and the seats cleaned. And
[30:04] the seats look decent, but wait till you see this. Now, I'm going to use tape so I'm not going to work this in too much just so you can see how much even a difference. Now, let's wipe this down with a dry towel. And even though the
[30:16] seats looked pretty clean before, look at that difference. Pretty much all mean, you do sit on them every time you drive. Okay, so now let's even this out amazing how much lighter of a color these seats actually are when they
[30:30] protectant so the seats could stay clean and the pleather could stay hydrated. looking amazing. You guys don't need to see every single seat getting clean, but I do want to show you this right here because there is a stain that is not
[30:43] how to get that out. So, my trick with stains is using a steam cleaner. The interior stains, whether it's seats or the carpet. It just helps make it a lot easier to remove them. And this stain is a pretty tough one, so I'm using a stiff
[30:57] stain. So, check that out. It's still there, but this is way better. Now, I'm and very carefully use a plastic razor blade. This is a last-ditch effort to wasn't aggressive enough. And I'm really not pressing hard at all. I'm just using
[31:12] the edge to try to lift the stain as it gets blasted by the steam. So, just take and eventually that stain's going to come out. Beautiful. And check that out. Here's a before and after. All right, so that looks way better. You can still
[31:25] kind of see a faded area there. Don't worry, over time that'll blend in just from use. But no matter what, that's way better than what it was. So, with all our seats nice and clean, with all our plastics nice and clean, that leaves us
[31:38] away when you open the door, and that's these dirty carpets. So, to clean the mat. And it looks like we have a dried lizard under here. Then you're going to loose dirt out of the fibers. And don't worry about the stains right now, that's
[31:53] Next, you want to get some soapy water and a brush, and you're going to spray stains, spray a little bit extra there, that way it'll help clean it a little bit better. So, cover the entire carpet with your cleaner, then use a brush and
[32:05] work that cleaner into the fibers of the carpet. And as you're brushing, you as you work them. Good. So, once you're done brushing the entire carpet, get an that dirty soapy water. You're going to overlap each pass by about 50%, that way
[32:20] the carpet's dry. Now, with the carpet clean and dry, now we're going to want to do the same thing for the rest of the carpet in the car. Vacuum the carpet, spray it down with soapy water, brush that soapy water in,
[32:34] and finally use an extractor vacuum to clean all that dirty water out. And just And once that carpet's dry, the last thing to do is put the clean floor mat And just like that, we are done cleaning the interior, and it came out
[32:47] incredible. Look at how clean this looks. It looks almost brand new. What a potential buyers come in to test drive the car, they could sit in the car and be grimy. They won't be afraid to touch buttons cuz everything is all clean,
[33:03] including back here. Look at how good this looks here. No stains, no odors, that musty smell is gone. And then finally, we have the trunk, which it's nice and clean. So, the interior is clean. Now, we have to move on to the
[33:17] exterior, and we have to clean up this paintwork. It is really dirty. It's hard to see on a white car, but trust me, this is all faded, and I'm going to teach you how to polish it up to give it a nice gloss and make it look brand new.
[33:29] which are faded, and they have yellowing, and they just are not clear. clear again and make it last. And then we also have our engine bay, which we need to match the rest of the car, that brand new look. So, let's finish this
[33:43] simple. Do not be afraid to do this. I have two rules I follow. One, never use a pressure washer. Yes, the engine bay is designed to get wet. Cars drive through water and rain all the time, but these connectors are not designed to get
[33:57] high-pressure water shot into them. It might not damage anything right away, issues. It's not worth it. You don't need to do it. Instead, just use a shower setting on the hose, which is low pressure. And then the other rule I have
[34:10] is never use any type of silicone oil, grease, anything that will attract dust. is the same stuff I used on the interior. It works great. And on the dries so that there's no oily or greasy
[34:24] first step is to grab soapy water and a detailing brush, and you want to spray soapy water. Make sure you get everything completely saturated, and agitate all the surfaces, that way the dirt and grime get loosened up and
[34:38] make sure you use your brush on the entire engine bay. The more surfaces going to come out. Then grab your hose with the low-pressure shower setting and rinse off the dirty soapy water. No high pressure is needed. Next, I'm using one
[34:52] off the water from the surface. You could also use an electric leaf blower, hard to reach. And if you don't have something like this, don't worry. You next step, which is to grab a large absorbent towel and dry the engine bay.
[35:06] protectant we're using is a water-based won't be a problem at all. Next, you want to grab the protectant and spray down the entire engine bay so it covers everything. Then use your brush to work
[35:18] and the rubber surfaces in the engine bay. Right now, you don't need the surfaces. Just make sure you brush it all into every crevice. You really want soak into the plastic and the rubber. And then any excess later on, we're
[35:32] microfiber towel and wipe up any of the remaining product. This is when it have a nice clean, new-looking surface. And just look at how amazing this is coming out. All right, so for 15 minutes' worth of work, look at how
[35:46] amazing this came out. Check out this transformation. And the best part is give it a day or two to dry, and the plastic is going to be super slick and it the next time you need to clean your engine bay. So, with that, we are
[35:59] completely done here. So now, let's get this paintwork clean because this paint can tell. Look at all this embedded dirt. And it doesn't have a glossy shine to it, which we will bring back. Plus,
[36:11] glass, we'll get the wheels done. This car is going to look like a million let's finish this up. So, the first thing to do is rinse down the car. I'm using a 25° nozzle on the pressure washer, and I'm staying about 2 ft away
[36:23] it by accident. And the goal here is to remove as much loose surface dirt as we paint when we wipe it down with a wash mitt. Now that the whole car is rinsed favorite glass cleaner. And my trick to get the glass super clean is to use a
[36:37] fresh plastic razor. So, keep the blade at a really steep angle to the glass and pressure. And it's important that you have a lot of glass cleaner to keep that can do this with a stainless steel
[36:49] razor correctly, you're going to scratch the glass. With a plastic razor, you it completely wrong, which is why I'm comfortable showing you guys this. Plus, a towel. With that done, let's rinse it off.
[37:06] the rest of the glass. And with all the glass done, next we need to do the Just use your favorite wheel and tire cleaner and spray down the whole wheel. Next, I'm using a stiff bristle brush to brush the whole sidewall of the tire.
[37:20] tires because it removes the UV and anti-ozonate that protects the tire from going to add our own protectant once we're done cleaning. Next, you're going the wheel itself. You want to get into every nook and cranny on that wheel,
[37:33] around the lug nuts, and around the valve stem. And we're just loosening up wheel, that way it could rinse right off. Now, clean the wheel and tire down since dirt flows downwards due to gravity. And once we're done with this
[37:47] one, you have three more to go. Beautiful. Nice and clean. Okay, next spray down the entire car so we could do a hand wash. And for this hand wash, we which has all these fingers that trap the dirt deep inside of it instead of
[38:02] scratch the paint. Now, when you're wiping down the paint, make sure you go circular motion, because if you do lightly scratch the paint, straight scratches are a lot harder to see and a lot easier to remove compared to swirls.
[38:15] rinse off all that dirty soapy water. And just like with the wheels, you want to start at the top and rinse downwards. That way all that dirty water flows quick tip, right after you're done cleaning, carefully spray that wash mitt
[38:28] all the dirt out of the microfiber fingers. You want to do this right away mitt, and this will make sure that your wash mitt stays clean and doesn't you're cleaning. Next, grab your extra absorbent drying towel and dry the
[38:42] too hard. That the towel do all the work. And just make sure that you're not glass and the trim as well, because you don't want any water marks on these, which is a pain to remove. Now, I like to clean spots that nobody thinks about,
[38:55] detailing spray and then agitate the dirt with a soft bristle brush, getting finally, wipe away all the dirt with the microfiber towel. And attention to detail like this is what makes all the difference. And another spot people
[39:08] don't clean is under the rear hatch. So again, use detailing spray and then get wipe the dirt away. So, clean around the entire rear hatch. And this attention to detail is going to set this car apart. All right, so this is looking great, but
[39:21] paint. And to do that, I'm using a two-in-one, so polish and wax all in one. It'll help remove little scratches, and it'll provide a protective layer of wax. And I'm going to be using the small DA polisher to get the job done. Okay,
[39:35] foam pad and then dab it onto the paintwork to spread it out. Then you You so you don't sling polish everywhere. Good, with all the polish spread out, now we can speed it up and work our polish into the paint. And it's
[39:48] moving, that way you don't overheat the paint. And as you go back and forth, you want to overlap your passes about 50%, that way you don't miss any spots. Also, the polisher do all the work. Just keep it flat and smooth.
[40:02] with a clean microfiber towel, making sure that you don't leave behind any you're going to want to repeat this process one body panel at a time, and I love the transformation. And check this out, keep an eye on the reflection in
[40:15] coming out from a simple polish. And a quick tip, if you have polish on your it's not going to remove the polish from the embossed letters and in the crevices. So, just use some detailing spray and then get a soft bristle brush
[40:28] to detail is the name of the game. Look at how good this came out. It might not difference. And with the car polished and waxed, look at how amazing this came out. For a quick two-in-one polish with wax in it, the gloss is absolutely
[40:44] This came out way better than I ever expected. Now, the paint wasn't horrible to start with, but still, this has a nice deep gloss and it really pops. But, the only thing is, these tires are not matching the rest of the car. So, we're
[40:57] we've been using on the interior and on the engine bay, and not only will it it's going to look really good as well. So, with some cardboard on the ground so we don't stain the driveway, spray protectant into the brush, and then just
[41:09] tire. And using a brush allows you to get into all the texture and letters on everywhere and look even. Now, do all the other tires, and holy smokes, look at how amazing this car came out. It looks absolutely
[41:25] incredible. The last thing to do to finish this up so we could put it up for sale is to restore these foggy headlights because they're yellowed, they're faded, and they don't look good. So, all you need to do is grab your
[41:37] doesn't matter the brand, just make sure it has a clear coat in it so it lasts are great cuz it comes with everything you need. Well, everything except the going to tape around the edge of the headlight so the paint doesn't get
[41:51] scratched. And a little tip, if you pop the hood, now you don't need to tape tape the paint work where it meets the headlight. And I try to slide the tape in the gap between the headlight and the body panel like that. Huh. And this is
[42:03] not sticking because this car is polished and waxed. Okay, well, do the headlight, and then we can start sanding. Now, we have two sandpapers. We 3,000 grit. The 1,000 grit is more aggressive, the 3,000 grit is finer and
[42:17] start with a 1,000 grit. And they give you a nice Velcro pad to put the sanding disc on, make sure it's centered just like that. Looks good, and now we can sand this. So, grab your soapy water and spray down the sandpaper. Also, spray
[42:30] want to wet sand. And you're going to want to sand in a back and forth motion, not circles. So, go back and forth with a medium to heavy pressure, that way we surface layer. And if you're wondering, the soap and the water helps give you a
[42:43] smoother finish and prevents the sandpaper from clogging up. Okay, so now the dirty water, and check out all the yellow we removed. That's exactly what the 1,000 grit sandpaper, and now we're using 3,000 grit, which will give us a
[42:57] smooth finish. So, spray the lens down with some soapy water, and spray the sandpaper as well. And again, sand in a back and forth motion, not in circles, light pressure. You don't want to press as hard cuz you don't want that
[43:10] sandpaper digging in, we want a smooth finish. Also, make sure you don't just down as well. Okay, so let's wipe this clean and check it out. This is looking really good, and we're not even done yet. Okay, so now we can remove the tape
[43:23] trick before you put the clear coat on, use some alcohol on a towel and wipe the exactly what it's going to look like when that clear coat goes on. That way in this case, we're good to go. And don't worry, the lens is going to fade
[43:37] back once that alcohol evaporates, so that's completely fine. Now, we want to going to start from the top using a medium pressure and wipe horizontally across the lens. You want to overlap each wipe by about 50%, that way you get
[43:49] self-leveling clear coat, so it goes on pretty decent, but it'll smooth out as it dries. Beautiful, and check it out, that came out absolutely incredible. Here's a before and after. Now, we just
[44:01] we're doing that, let's do the other headlight. And this one's even worse. headlights looking amazing, let's do one last thing to hopefully make this car easier to sell. And that is to install a dash camera.
[44:15] This small 4K dash camera was on sale for $100, and there's so many situations camera, especially with all the bad drivers out there. And this is really quick and easy to install. It was inexpensive enough, and I'm hoping this
[44:28] it a little bit easier to sell a car because a lot of people want dash have seen me do this before. We want to hide the camera behind the rearview can remove the protective backing from the double-sided tape, and then push it
[44:42] let's also take off that protective screen cover. Next, we want to install into the cigarette lighter. Then we want to pop out the plastic trim can fish the wires behind and out of sight. So, peel this back, then we're
[44:57] is the same exact process as before when we replaced the cabin air filter. Now, we can fish the wires back behind all this, that way you can't see them. So, pull the wires all the way through, just like that. And if this was my car, I'd
[45:09] around here for the wire to fit in, but I don't want to do anything permanent remove this. So, just push this trim back in place nice and tight, and that wire and run it to the side where the door is, over here, and pull that all
[45:23] glove box back in. And now with the wire off to the side, so it's out of sight. Then we can put that weatherstripping back in, so not it covers it up. Next, we want to run the wire along the bottom of the
[45:37] not crossing over any airbags. And use the included tool to tuck the wires into A-pillar trim. Now, we're going to run the wire up the A-pillar and tuck it in panel back in so it clicks in. And then finally, run the wire along the
[45:52] your way to the dash camera. And then at the dash camera, we can plug it in and clean up any excess wire so it looks good. Now, we can test it out by turning the car on, and this Vantrue dash cam should power on in a couple seconds.
[46:05] need to set up your language, time, and date, and you're all done. And this is the cigarette lighter, the power adapter tucks right into this little cubby right USB port on the adapter, which most people use nowadays, so it's probably
[46:18] time anyway. And now we are officially done cleaning and fixing this car. One weekend and we completely restored this older car. Now, she runs and drives great. Clean exterior, clean headlights, clean engine bay, clean interior. She's
[46:33] super clean. Wheels and tires, and she runs great. Brand new upgraded hybrid battery. The next owner is going to love this thing. I'm curious to see how much money we make. So, now it's time to list her. So, I listed the car for $10,500,
[46:47] profit, but you have to figure buyers are going to negotiate. Now, for the ad, included the stuff you'd want to know. I said the car is fully loaded, has a brand new upgraded hybrid battery with a 3-year, 45,000-mile warranty. The car
[47:01] out, and it has newer brakes and tires, and a 4K Vantrue dash camera. So, with the listing published, now we just wait and see.
[47:13] The first person lowballed the heck out of me, and I was not interested in selling it for $7,000. So, second guy offered me $8,000. I said let's do 10, we met in the middle at 9,700, and now she is officially sold. So, I'm on the
[47:29] going to film this part because I don't want to make the buyer uncomfortable. sure you meet in a public place with plenty of people around when you sell a plenty of people around when you sell a car online.
[47:44] new owners have a really nice car, it's going to last them a long time, and we made a healthy profit. Let me break it down for you. So, we bought the car for $2,800, the brand new battery is $3,940,
[47:57] the cabin air filter was $10, and let's just say cleaning supplies and stuff were an extra 50 bucks. Plus, we had the dash camera on sale at 100 bucks. So, we're all in at $6,900, and we sold the car for $9,700.
[48:10] So, at the end of the day, we made $2,800 in profit for a weekend's worth what I'm going to be doing with my profit, I already spent $2,100 on my first ever legit barn find, and I can't wait to show you guys the future video
[48:24] on how to restore the barn find. It's going to be amazing. So, with that, I remember to give it a thumbs up and consider hitting that subscribe button. used in this video are linked in the description so you can easily find them.
[48:37] really excited about that. It's going to be a lot of fun.
⚡ Saved you 0h 48m reading this? Transcribe any YouTube video for free — no signup needed.