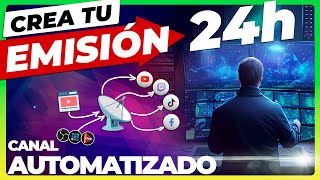

Create a 24-Hour Automated Broadcast for Free
45sThe promise of a free, fully automated 24-hour multi-platform broadcast is highly appealing to creators seeking passive income.
▶ Play Clip"The title accurately promises a guide to creating an automated 24-hour YouTube channel with Swift Stream, and the video delivers exactly that."
This video provides a step-by-step guide on how to set up a fully automated 24-hour multi-platform broadcast using Swift Stream, a free alternative to StreamYard. The presenter, Gina Romero, demonstrates how to schedule pre-recorded videos and stream live from software like OBS to multiple platforms simultaneously.
Swift Stream allows multi-streaming to over 40 platforms, scheduling videos up to 90 days in advance, and looping videos for continuous broadcast.
Swift Stream offers a free plan and a 90-day free trial of the professional version upon registration.
The authentication email may land in spam, so users should check their spam folder after registering.
Users can add platforms like YouTube, Twitch, and Facebook by authorizing accounts or using custom RTMP addresses.
Videos can be uploaded to Swift Stream's cloud, with details like resolution, size, and duration displayed.
A calendar view allows scheduling broadcasts up to 90 days in advance, with options for loop mode and specific end times.
Select a video, choose channels, set schedule or loop mode, and confirm to create a live event.
Use the real-time streaming option in Swift Stream to get an RTMP URL and stream key, then configure OBS to stream to Swift Stream, which then multi-streams to selected platforms.
While streaming, additional platforms can be activated in Swift Stream, and a unified chat allows monitoring messages from all platforms.
Almost unlimited bandwidth, 50 GB storage, and the ability to schedule long-term automated broadcasts, freeing up the computer for other tasks.
No direct Facebook authorization (requires RTMP), and file upload limit of 5 GB, which may require splitting long videos.
Swift Stream is a powerful free tool for creating automated 24-hour channels on platforms like YouTube, with easy scheduling and multi-streaming capabilities. Despite minor limitations like the 5 GB file size cap, it offers a robust solution for passive content broadcasting.
How many platforms can Swift Stream multi-stream to simultaneously?
Over 40 platforms.
00:33
What is the maximum file size for uploading videos to Swift Stream?
5 GB.
15:53
How long is the free trial for the professional version of Swift Stream?
90 days.
04:00
What issue might occur during registration on Swift Stream?
The authentication email may land in the spam folder.
02:11
How can you add a platform not listed in Swift Stream?
By using a custom RTMP address and stream key.
02:39
What is the maximum schedule duration in Swift Stream?
90 days.
00:51
What does the loop mode do in Swift Stream?
It repeats the video continuously until a specified end time.
07:42
What information is needed to configure OBS to stream through Swift Stream?
An RTMP URL and a stream key provided by Swift Stream.
09:33
What is a limitation of Swift Stream regarding Facebook?
There is no direct Facebook authorization; it must be added via custom RTMP.
15:37
What is the storage capacity for files in Swift Stream?
50 GB.
14:45
Multi-streaming to 40+ platforms
This is the core feature that enables automated broadcasting across multiple platforms simultaneously.
00:33Free plan and 90-day trial
The availability of a free plan and extended trial makes the tool accessible for testing and long-term use.
01:5390-day scheduling calendar
Long-term scheduling allows for fully automated channels with minimal manual intervention.
05:44Live streaming via OBS with multi-platform output
This technique enables users to leverage OBS's features while broadcasting to multiple platforms without additional software.
09:035 GB file upload limit
This limitation may require users to split long videos or reduce quality, impacting workflow.
15:53[00:00] Imagine that you want to make a 24-hour multi-platform broadcast YouTube Facebook Twitch the platform that is fully automated Either with pre-recorded videos or making your streams with your favorite broadcast software either obsv mix Whatever
[00:17] you want, that's why in this video I bring you a step by step on how to broadcast in a fully automated way using Swift Stream and also for free I am Gina Romero I am an audiovisual technician we start we are already in front of our computer and we are going to see the tool
[00:33] that we are going to use and we are going to quickly review the main features The tool we are going to use is called Swift Stream and if we go a little further down this will allow us to do multi streaming at the same time to more than 40 platforms Well we can also schedule
[00:51] our videos we have a 90 day template and we can schedule when each of our videos is going to appear and we can also leave it in So every day we could broadcast in Loop mode a
[01:04] video for example of music like those that are there for four hours broadcasting music, well we could do it and program 90 days which for channels automated, as I tell you, it is perfect, we can also broadcast in rtmp, we can store videos in a super simple way and these videos, as I tell you,
[01:23] are going to be broadcast and you are going to schedule them on the day you want, but even if also at some point on a predetermined day you want to do a streaming from obs or vmix or any streaming platform
[01:35] such as create, well, you can also do it and well, we have some more features here, we have already seen this and we have the price table here, as we see, we have a totally free plan, which is super well and the maximum plan costs 79 dollars and
[01:53] has some expanded functions But you will see that if you register Now you have days of totally free trial with the professional version that you will see now I would like to tell you that when you register the email the authentication message has reached spam So
[02:11] maybe that could happen to you too so be on the lookout and when you hit it and you have to receive this authentication email you already know it so check because Maybe it has reached spam so well
[02:23] nothing just with that We are going to enter the platform now we have entered the platform and the first thing you are going to find is going to be this you find this to be able to configure any of how you see all the platforms that you have available you have a lot
[02:39] between them The main ones are YouTube, Twitch and Well, there are several. And if you don't find one, you can simply customize it and you can simply put the name you want here and you would have to
[02:52] put the rtmp address to which you want to launch and put the String, just confirm and that would be it. Simply If you want to access any of the ones that are already predetermined here,
[03:05] you simply have to click enter your data to authorize and it would simply ask you for access and you can have it synchronized with your account if we come. Here we see that we have this channel option that appeared
[03:20] a moment ago and here we see the channels that we have customized, in this case I have a Twitch I have a YouTube directly from the option this here where you give permission to the account
[03:34] that you want and we also have the custom rtmp channels where I have created this and we see that this has a small icon where right now It is live and before I forget
[03:46] something very important If you look here in upgrade you will see that there are different options and I am with the trial version and I am using the professional version completely free for
[04:00] 90 days So that is very interesting to have that option and then we already have the different payment plans but I have the professional version for 90 days completely free of charge. Let's continue and let's go over the following options once we have our channels
[04:16] configured the following we see that we have a dashboard here we are going to see this later but we see that we have the live shows that are on the air During this moment at this moment I have a
[04:28] live show on the air also the live shows that are going to come that are scheduled I I have several here live and the live ones that we have carried out here I have some tests for example of an hour 20
[04:41] of 43 minutes that I will leave you in the links in case you want to review what I have actually broadcast we have already seen practically the entire dashboard but to create a live We would have
[04:53] to create from here but first what we are going to do is review the videos option so that you can see how to prepare the videos and start making the broadcast. What we are going to do is come to the
[05:05] videos and here we have our videos. that I have loaded are these, it tells us the resolution and the size that the duration occupies. And if I wanted to Add a new video, you can imagine that
[05:19] I simply have to click here and I can load any of them. What I am going to do is, for example, load this video here and you see that it is already loaded now the next thing we are going to see is
[05:31] How can we organize all our broadcasts because it is really simple you will see we simply have to come to this option that it says here is that we simply see our
[05:44] mission calendar that we can schedule what is super good, we could organize our entire calendar up to 90 days and we can organize it And we have here clearly when we are going to broadcast each video
[05:57] So it is super good I think it is fantastic for channels like these that broadcast live music You create your 3-hour video, you leave it in Loop and you can have it there for a long time
[06:09] and the next day you create Another and then one day you start programming to create all the videos but then for 90 days Well, you leave them prepared and it seems to me a perfect option for this type of
[06:21] channels, the truth is. Now let's see how we can create our broadcast, it's quite simple, you could come here in videos and start using videos. But what I'm going to do is go back to the dashboard and come
[06:34] here to create a streaming I give it and what it can do are two options, first we are going to see the pre-recorded videos and then we will see how to launch a streaming from our
[06:46] favorite streaming software now we are going to record videos we simply click here as you see I have all the videos I can here use then because I could simply put any of them,
[06:59] I'm going to set this timer with music, I click next and here now it's as simple as or Add a new channel But if I already have them prepared, I'm simply going to give it what I want to broadcast on
[07:13] Twitch and what I want to broadcast on this YouTube and I simply put here test 24 hours and what I simply do is click next now I can simply tell it that I want to launch it now
[07:28] or I can schedule it so here I could simply put the date that I would like Let's go to set it on the 23rd Simply if I wanted it to be finished once the video is over and that's it and if
[07:42] I wanted to make a broadcast in Loop then I would have to set this Loop mode here obviously we have to hit it when we want the video to end we come here We configure it, I tell it to
[07:55] last until 2 o'clock and that's it. We can tell you what our time system is and we click next and we see that we have this configured. If we want to configure something else, we want to add
[08:09] another Facebook, we would simply have to click on the check and what we can To do is to return and this is going to be the video that we are going to launch, we simply return, we check that it is on our calendar
[08:22] and on the 23rd we have the 24-hour test. So, as you can see, programming is super simple And we can leave a schedule to create the automated channel In a super super simple way,
[08:34] we could also broadcast, schedule the same day at the same time, another video on another platform or a lot of things. You see that this offers a lot of options. Now we have seen that it is very simple [ __ ]
[08:46] a pre-recorded video that we have in Suite Stream to schedule it and create our live broadcast now what we are going to do we are going to imagine that we would also like to do our streaming and we would like to do it multiplatform with obs which for example does not allow that option and we need to use restri
[09:03] but since this option is free Well, it seems better to me. So we are going to explain how we can do it. What we would have to do is come here to create broadcast as we have seen before and click on
[09:16] this real-time streaming button. What we have to do is come here and click on it. here this simply asks us to give it a name, we are going to give it vmixeros and we are going to give it a description and we can select any of the channels that I have here, for example I am going to
[09:33] give it this one and I am going to give it next and what It gives us an rtmp and it gives us a Stream key. We have to use this in our encoder. Now I am going to show you with a diagram what is happening
[09:47] in create obs or vmix. What we would need would be a Stream key and one here. which is what it offers us at this moment and we would need authentication,
[10:01] which in this case will be the user and the Swift Stream user. What we are going to do is connect this encoder to Swift Stream and it will do the cross-platform up to 40 platforms in rtmp
[10:14] Although here I have put the main ones and what we are doing with the videos is we upload the videos to the Suite Stream cloud platform and what we do is Well, let's say we settle this step
[10:27] and go directly here that in general ranges now what we are going to do to explain is how to do it we simply have to copy we have to come to our coding software we come here to the
[10:39] gear in create in obs because it is very similar Although in create really how we can Add several destinations it would not be totally necessary we would have to Add an objective and simply
[10:51] put our rtmpp server now as you can imagine we copy our rtmpp we simply paste here and what we have to put here remember we have to put username and our
[11:04] password and we would simply have to put this and what I am going to do is change the name System I give it Ok and now Now we simply have to click streaming we start our streaming
[11:19] and depending on the speed and all this we click OK And if we go to Swift Stream and click next we see that the signal is already reaching us and we see that we have activated this but be careful here
[11:32] It is very important that we are not yet sending to the channels we want, what we would have to do now is click on A Life Now, we click on the like Now it takes a little time obviously we see
[11:46] that it is trying to connect we see that it is already live and well YouTube It always takes a little while depending on the latency of our connection and so it may take a little more or less for what we are going to see. Actually, if we are broadcasting, we come here to the broadcast, we come to our YouTube
[12:03] studio and if you have achieved YouTube, what you have to do To do is to come to the calendar, we come to the calendar and we see that here we have a live, we simply click on the live, we tell them that it
[12:15] is not created for children and now in a few moments, here we have the connection, we are going to see what we have, our live, now we have it on YouTube. What we are going to do is Add some more platform
[12:27] to make that multi Stream in a simple way what we have to do is go to Swift Stream return to Swift Stream I am going to Activate Facebook and I am going to try to also activate Twitch now we see
[12:39] that we are launching the three platforms if we wanted to modify our rtmb we also have it here and we see that we have the chat option in this case we can choose several options that
[12:51] we have here for example if I wanted to in the YouTube chat for example I could put a test here I will send it I send another message and I am going to send another message to Twitch and we are going to see if
[13:08] we are really broadcasting on various platforms. We come to Facebook and we see that we are obviously broadcasting on this platform and if we come to Twitch we should be broadcasting. We see
[13:21] that we have the live stream here. Let's see now. and we also see that we have it is important that we have the concentrated chat that we have sent and as you can see it is super interesting you can
[13:33] integrate the chat from various platforms and be able to concentrate it on this platform to do the live and once you are finishing your live you would simply have to hit At the end of the streaming we confirm and we simply see that if we come to daysboard and in our
[13:51] history we have different tests here and we see how we have seen before on the different channels that we have broadcast and now before entering into the characteristics that I like the most. you like
[14:03] and the ones you least like as well because I would simply like to remind you that if you are liking it The video costs you nothing and you can give it a like. You can also leave a comment in case you have any questions. And that helps any other colleagues also resolve any questions.
[14:19] And of course you can join our vmixeros Telegram channel where you can find more information about the videos extra information maybe even some discount so well
[14:31] well now what we are going to continue and we are going to continue with the main features that Swift Stream has the good things that I have found and the things Well that maybe I should improve in terms of the best features that I have found I have found that you have
[14:45] almost unlimited bandwidth that is super good having 50 gigabytes is also very good for uploading files and something that was very very good as we have already mentioned is that you can schedule a super long schedule of different days and you can have a fully automated channel for
[15:00] any platform YouTube Facebook Twitch or whatever and then that is very good because you can already have the computer turned off or concentrate the computer on other work such as making a render,
[15:12] editing videos or anything else and your computer Well, let's say that it is not working but you are working. So, well, it is a way of creating passive work that is not
[15:24] bad at all and now as for the features that I did not like, well, first you would have to take into account that when you do the registration the email you receive spam I think that is important to take into account It is also important to comment that there is no Facebook option directly,
[15:37] you can add it with your rtmp but it is more interesting to directly authorize the platform to Facebook in this case so that work directly with Swift Stream That would be good But well at the moment there is no option and also something that would improve is
[15:53] that when uploading the file size it reaches up to 5 gigabytes if you make a long file that lasts more than 5 gigabytes then Well, you're going to have to divide it or you're going to have to program it or
[16:06] you're going to have to lower the quality, so the truth is that I didn't like that. And it would be nice if they could increase the size of the files a little. So far I've told you what. Which seems to me to be one of the best options if you want to broadcast 24 hours fully automated and without
[16:22] getting too complicated with the possibility of launching your own videos or broadcasting from your favorite streaming software, be it obsv10 create whatever it is on my part. All that remains is to tell you
[16:34] you can leave a comment, which helps me a lot, and of course you can join the vmixeros Telegram Channel where we expand a little on the information. I hope the video You liked it,
[16:49] you found it interesting and, above all, you can apply it in your future productions. I am Gine Romero. I am also an audiovisual technician. Eugenio. See you in future videos.
⚡ Saved you 0h 16m reading this? Transcribe any YouTube video for free — no signup needed.