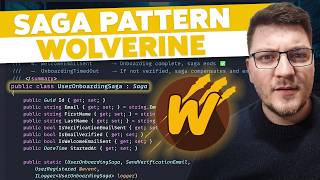

Saga Pattern in .NET with Wolverine
45sQuick, visual introduction to a complex pattern that developers want to learn.
▶ Play Clip"Delivers exactly what the title promises: a clear, step-by-step implementation of the saga pattern with Wolverine."
This video demonstrates how to implement the saga pattern using the Wolverine library in .NET, focusing on a user onboarding workflow that includes sending verification and welcome emails, with a timeout mechanism. The presenter walks through the code step-by-step, covering saga state management, message handling, and persistence.
The saga pattern is a long-lived workflow that orchestrates multiple steps. Wolverine has native support for sagas, which can be represented as a state machine.
The example saga starts with a 'user registered' event, then sends a verification email, and after verification, sends a welcome email. A timeout message limits the saga's lifetime.
The saga is a central class that stores state and handles messages, publishing the next message in the sequence. It implements the 'Saga' base class from Wolverine.
The base class tracks if the saga is completed (for state cleanup) and includes a version number for optimistic concurrency to handle race conditions.
The saga state includes an ID property for identification, user details (email, first name, last name), and flags for verification and welcome email status.
A saga is started by defining a 'start' method that returns the initial state, triggered by a specific event (e.g., 'user registered').
Wolverine supports timeout messages that are delayed for a specified period (e.g., 5 minutes), allowing the saga to handle timeouts and perform compensating actions.
Wolverine's cascading messages feature allows returning multiple message types from a handler, which are automatically published.
A 'verify user email' command updates the saga state (e.g., sets 'is email verified' to true) and triggers the next step.
The saga is marked as completed using 'mark completed', which persists the final state and marks it for deletion.
Wolverine allows a 'not found' method to handle messages that can't be matched to an existing saga instance (e.g., after timeout or completion).
Wolverine supports various persistence options, including PostgreSQL (via WolverineFX.Postgresql), Marten, and EF Core. The tutorial uses PostgreSQL.
The saga is tested using Postman and breakpoints, showing the flow from user registration to email verification and welcome email, with state persisted in the database.
The saga pattern is a powerful way to orchestrate long-lived workflows, and Wolverine provides a solid, easy-to-use framework for implementing it. The tutorial demonstrates a complete example with state management, timeouts, and persistence.
What is the saga pattern?
A long-lived workflow that orchestrates multiple steps, often represented as a state machine.
00:01
How do you identify a saga in Wolverine?
By implementing the Saga base class and defining an ID property.
02:18
What is the purpose of the version number in a saga?
It supports optimistic concurrency to handle race conditions.
02:32
What is the convention for starting a saga?
Define a 'start' method that returns the initial state.
04:13
What is a timeout message in Wolverine?
A message that is delayed for a specified period, allowing the saga to handle timeouts.
05:23
How do you complete a saga?
By calling 'mark completed' on the saga instance.
09:26
What happens when a message cannot be matched to an existing saga?
Wolverine throws an exception, but you can implement a 'not found' method to handle it.
10:33
What persistence options does Wolverine support?
PostgreSQL, Marten, and EF Core.
11:15
Saga pattern with Wolverine
Introduces the core concept of the saga pattern and how Wolverine supports it.
00:01Saga base class features
Explains the built-in features of the Saga class, including concurrency control.
02:18Timeout messages
Shows a unique feature of Wolverine for handling timeouts in workflows.
05:23Not found method
Provides a way to handle messages that don't match an existing saga, a common edge case.
10:33Persistence options
Lists the available persistence options, which is crucial for production use.
11:15[00:01] you can implement the saga pattern using the Wolverine library. A saga represents a long-lived workflow where you need to orchestrate a couple of steps that Wolverine has native support for the saga pattern, so let me show you how you
[00:16] can use it. A popular way of how you could represent a saga is using a state machine, so here's what we're going to build. When we have a user registering to our system, we're going to publish a user registered event. And this is going
[00:30] to start our saga, which needs to keep track of the user onboarding. This will consist of two independent steps. First, we're going to send them a verification email, and if the user successfully verifies, then we are going to send them
[00:44] going to complete the user onboarding. Now, there is also this interesting component here where we are only going to allow the user to successfully onboard for a given period of time. And this will be enabled by Wolverine's
[00:57] timeout message, which I'm going to show you when we dive into the code. And here's another example of the same saga just as a sequence diagram where you can have. So, we've got our API instance, we've got the saga itself, and just the
[01:12] auxiliary service, which is responsible for sending the emails. Now, the saga is implementation, and it will be responsible for managing all of the messages and all of the state transitions that need to happen during
[01:25] the onboarding process. Now, enough about theory, let's go into the code and let me show you how we can build this. Here's the base setup that we have where we are configuring Wolverine to use RabbitMQ as a message broker. And as far
[01:38] as the functionality goes in our API, we've got one use case implemented with the register user handler, and this publishes a user registered event. And this is what's also going to trigger our saga. I'm going to implement this saga
[01:51] as another dedicated feature that I will call onboarding. And how a saga works with Wolverine, and also other popular messaging libraries, is you have a central class that stores the state for the saga if you need state, and it also
[02:04] states by handling messages and publishing the next message in the sequence. Now, let's call this the user onboarding saga. And how do we identify a saga? Well, it's actually very simple. You just implement the saga base class
[02:18] from Wolverine. Now, if you take a peek into the implementation here, first, this tracks if the saga was completed or not. And this is used to figure out if you should clear the state for the saga from the database. to add the
[02:32] persistence component a bit later, and the second thing that a saga offers is the version number, which is used to support optimistic concurrency. So, if you've got concurrent messages that both hit the saga instance, only one of those
[02:44] will be handled because you're going to get the version mismatch in a handler that loses the race condition. This is triggered by the saga concurrency exception. In case of a race condition, you're going to see a saga concurrency
[02:56] exception being thrown. Now, back to our user onboarding saga. I'll drop in a comment here explaining what it is that we want to build. This is the same thing that I talked about in the two diagrams previously. So, we've got our user
[03:09] registered event, which is going to start our saga, and it's also going to going to need a handler for that, which publishes a verification email sent. The user has to manually verify their email, and if that succeeds, we're going to
[03:22] send them a welcome email. In a separate track, there's going to be our timeout component. I'll explain how this works as we go, but let's first talk about the state for our saga. One core piece of information that we're going to need is
[03:34] a way to identify the saga. And Wolverine has a few conventions for how this works. One of the simplest ones is just having the ID property that lets you uniquely identify this saga instance. Now, I'm also going to drop in
[03:46] we want to track the user's email, their first name and last name for some personalization. Another option is having the user ID here, and then using that to fetch this info at runtime. Then we're going to track if the verification
[03:59] email was sent, if the email was verified, and if we sent the welcome we're going to track when the saga started. Now, as with many things in the Wolverine framework, how you start a saga is also defined by convention. You
[04:13] have to define a method on your saga instance, and this should return the initial state for your saga. And the name for this method is start. And here, you just define which event is going to trigger the saga
[04:26] itself, and this will be the user registered event. Let's also inject a logger instance because this supports dependency injection. And remember that we need to new up a new user onboarding saga. We're going to set the user ID,
[04:40] and then we can pick up the email, the first name, and the last name from the user registered event. And once I return the saga from this method, we're going to officially start our workflow. We can also add a log statement at the top to
[04:55] note that we've started the user onboarding. And now we've got an option to publish additional messages from this step. Now, I'm going to create a class here that I will call messages. And this is just going to be a container for all
[05:08] publish. With one of the first ones being a send verification email command, where I'm going to specify the user ID and the email. Now, another thing which I hinted at in the intro is a special message type that Wolverine has called a
[05:23] timeout message. And what this allows you to do is to publish a message which gets delayed for a given period of time, in this case, 5 minutes. And we can handle this from our saga, and when we receive an onboarding timed out message,
[05:36] we can stop the workflow as we have determined that a reasonable amount of further work. This would also be a good place to implement compensating actions if that is something that we need to do in our saga implementation. So, how are
[05:49] Well, if I go back to my user onboarding saga, I can update the return type of my method to return more than one message type. And I can also append the send
[06:01] verification email and also the onboarding timed out message. In our return statement, we also need to provide these values in the tuple. So, we're going to send the send verification email message, and we have
[06:14] to provide our saga identifier and also the user's email. Let me also create a new onboarding timed out message, and we're going to use the same identifier. So, what we're utilizing here is Wolverine's cascading
[06:27] messages feature that lets you return multiple message types from a message, publishing those for you so that you don't so that you don't have to do it manually. So, let's first handle the verification email command. As this is
[06:40] going to be pretty basic, I will just drop in the implementation here, but we message type that we will publish after we send this verification email. And if we take a look at the send verification email handler, and remember Wolverine
[06:53] uses a convention here where you define a handle method, specify your message type, and then Wolverine is able to connect those. So, when you publish the send verification email message, this handler gets invoked. So, here I'm just
[07:05] and once this succeeds, we're going to publish a new verification email sent message. Now, this is intended for our saga where we implement our next step. again by following the Wolverine convention of defining handle methods.
[07:22] type, and implement any logic you need inside. This is different from the start method that should be unique, which you should only have one of as there's only one way to start a saga. Now, Wolverine also has some options here. I'm going to
[07:36] saga feature in the description so that you can explore it further. So, we've the verification email sent, but our next step depends on the user's action. And we need to expose some way for the user to take this action. So, naturally,
[07:51] we need another message. Now, this message is going to be verify user email, and this is a command that I can send through an API endpoint. So, it could look something like this. How this is normally implemented is you specify
[08:04] some unique code in the verification email that you sent to the user's inbox, and once they click that, it triggers an endpoint like this where you can then proceed to verify the user's email. I did make a video on how to implement the
[08:18] I'm going to also drop that in the description of this video if you want to learn more. And what's going to happen here is we're just going to send the verify user email message. Now, this is intended for our saga. So, we define
[08:31] another handle method here, we specify the message type, and here I'm going to update the saga state. So, I can just set is email verified to true, and once this completes, Wolverine takes care of persisting any changes in our database.
[08:45] And this is pretty cool. We can also return our next message, which is going to be a send welcome email command. And in our messages, I have the respective send welcome email and welcome email sent messages. The only thing that's
[08:58] missing is the handler for this message, which I'm going to just drop in, and it interesting, we're just simulating that we are sending an email. In the end, we return a welcome email sent, and Wolverine takes care of publishing this.
[09:11] handle this in our saga. And obviously, this is just another handle method. So, it could look something like handle, we say welcome email sent. This is our event. We're also going to need a logger for the user onboarding saga. And then
[09:26] in the method body, I'm going to add a log statement. Next, I can set the property that determines if the welcome email was sent to true, and lastly, I can complete the saga by calling mark completed. This is going to persist our
[09:40] final state in the database, but also mark the saga as completed and safe for And one last thing we're missing is our message. So, I'm going to add it here.
[09:53] type is the onboarding timeout, and this is a special message type in Wolverine that's used for limiting how long you want a saga to live for. Of course, you can also omit this and just have your saga live forever until it's marked as
[10:06] completed. And what you can do here is, for example, check if the email was already verified. And in this case, you want to ignore the timeout because it Otherwise, you've got an option here. You can do some compensating actions
[10:19] like deleting the user or maybe send them a reminder email to restart the workflow. And lastly, you can also mark the saga as completed from the timeout from the database. Another interesting convention that Wolverine has is when
[10:33] you receive a message that cannot be matched to an existing saga instance. For example, it was completed and deleted from the database or timed out database. And what you can do is implement a not found method on your
[10:46] saga, specify your message type, and then determine what happens inside of Wolverine will throw an exception when publish a message intended for a saga and the framework can't match it to an existing saga instance. So, this is what
[11:01] our saga looks like. It has a couple of steps and it implements the sequence I showed you earlier. Now, one thing we're going to need is persistence for our saga, and Wolverine you've got a bunch of options. I'm going to use what
[11:15] I call a lightweight storage, which we can use for storing the saga and also message state. So, I'll look for Wolverine FX Postgres and I'm going to my system, but I want to know that Wolverine also offers other options. For
[11:31] example, Marten, you can also use EF Core, and I believe SQL Server is a storage package installed. Now, to enable it, we go to our Use Wolverine setup and we say options, persist messages with Postgres, and we provide a
[11:47] connection string. I'll have to add a using statement here. And since I've got provided by Aspire at runtime, this should work without a problem. So, let's start the application and test out our saga. I'll send this post request from
[12:01] Postman, and I've added breakpoints to the entire flow in the backend so that we can follow everything step-by-step. If I hit send here, we're going to hit the breakpoint in our endpoint that triggers the user registration flow.
[12:14] next breakpoint in the register user handler. Now, this publishes a user continue, and you can see that we immediately hit the breakpoint in the user onboarding saga. So, here we're going to create our saga instance, and
[12:27] then we're going to return it and also trigger the subsequent steps by publishing the send verification email message and the onboarding timed out message. Now, remember that this message will only be published in 5 minutes,
[12:40] up the timeout message. So, I'll press continue, and we hit our next breakpoint in the send verification email handler. This will trigger the verification email sent message, which goes back to our saga. Now, this may take a moment or
[12:54] breakpoint in our saga. So, I'll press continue here, and for the time being, this completes our flow. So, now it's up to the user to trigger the verify email endpoint, which we can do by sending another post request, but I want to show
[13:09] you something in the meantime. If I open this inside of DBeaver, you can see my interesting is there is a Wolverine schema inside now. Now, this contains a couple of Wolverine-specific tables, which deal with outgoing and incoming
[13:23] messages. For example, this contains our timeout message, and if we take too long with this explanation, we might actually hit the timeout breakpoint. Now, what I wanted to show you is the user onboarding saga table. This contains the
[13:35] state of our saga, which you can see is just a JSON document here. So, our saga state gets serialized as a simple JSON object. Now, there's the version, which is used for optimistic concurrency. And if I go back to Postman and trigger our
[13:47] next step by simply sending a verify email message that contains the user's ID, we trigger our breakpoint here, and we publish a verify user email command. So, this now again lands in our saga, where we update the saga state. Notice
[14:01] that is email verified was false before this step. And also, you can see here that the welcome email has not yet been sent. Now, I'm going to trigger this. This will trigger the send welcome email handler, which publishes another message
[14:14] that gets routed back to our saga, where we finally update our state, and we also mark the saga as completed. Now, I will press continue here, and this completes our saga flow. And if I go back to the database and I click refresh here, you
[14:28] will see that the state for the current saga instance has now been deleted. And these are, I believe, all of the building blocks that you would need to build a complete saga workflow with Wolverine. Of course, you can add more
[14:40] bells and whistles. For example, all of our handlers support dependency complex logic there where we need to fetch data from multiple sources, maybe call out to some external services. You can add compensating actions here if at
[14:53] any point you figure that you can't complete the saga. But for the most part, the framework support for sagas is pretty solid. And what's also important is it's pretty simple to get the hang of it, even though the saga pattern itself
[15:05] isn't really a trivial thing to implement. If you want to grab the source code for this video, it's going to be available for free from the pinned comment right below. If you enjoyed this video about the saga pattern, I ask of
[15:18] you that you gently tap the like button under this video. Thanks a lot for watching, and until next time, stay awesome.

⚡ Saved you 0h 15m reading this? Transcribe any YouTube video for free — no signup needed.