
Apple Users Can Finally Use Facecam While Streaming FREE!
43sAddresses a long-awaited feature exclusive to Apple users that mobile streamers will instantly want to share.
▶ Play Clip"Delivers exactly what it promises — a practical, 1080p60 walkthrough of iPad game streaming with facecam, minus only a tutorial-style structure."
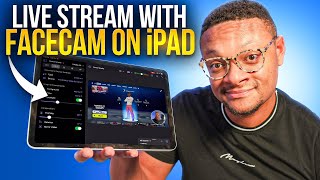
This video demonstrates how to use the free Camo Studio app for iPad to livestream gameplay with a facecam, including capture card setup, audio configuration, and going live to platforms like YouTube, Twitch, and Trovo. The presenter walks through creating scenes, connecting a console via an Elgato capture card, solving audio limitations with a mixer or phone, and adding Streamlabs overlays. It closes with a test stream and quality assessment at 1080p60.
Camo Studio is a free app for Apple devices that lets iPad users capture gameplay and facecam simultaneously — a capability previously limited to Android.
Search 'Camo Studio' on the App Store (purple icon) and download; the app is currently compatible only with iPads running iPadOS 17 or later.
Camo Studio has four primary sections: left side for device/source settings, top middle for record/live controls and audio levels, and a scenes area for managing different stream configurations.
In All Scenes, tap the plus button to add a new scene (e.g., 'game scene') and then modify its sources.
Change the base video source type from camera to External Video Source to use a capture card; select the Elgato 4K X capture card for console gameplay.
Choose 'Apps on this iPad' to broadcast the iPad's own display into Camo Studio, allowing facecam overlay while playing mobile games.
Keep the camera source and use features like background removal, portrait mode, filters, Spotlight brightness, framing/zoom, rotation, and mirror.
The app supports only one USB audio input at a time; for external capture card users, connect all audio devices through an audio interface or mixer (e.g., Fine Gaming Mixer) as a single USB input.
Install Camo Camera on a phone, pair via QR code, then select the phone as an audio source. You must stay inside the Camo Camera app while streaming.
Move and resize the facecam, adjust opacity, corner radius, border color/width, hide sources by long-press, and add text, image, shape, or web layers (e.g., Streamlabs alert/chat URLs).
Duplicate the game scene, change base source to front camera, and hide the secondary source to create a camera-only scene.
Tap the YouTube icon (or connect Twitch/Trovo/custom stream key), create a broadcast with title/description, set quality to 1080p60, and press Start.
Add chat panel, reply to messages, balance audio with game audio below mic volume, use the drawing feature, and switch to fullscreen mode.
Tap the live indicator and press Stop; Camo Studio closes the YouTube stream without needing to go to Control Center.
Camo Studio turns an iPad into a surprisingly capable streaming console — with 1080p60 quality, facecam, overlays, and chat — provided you plan your audio setup around the single-USB-input limitation.
What does Camo Studio let iPad users do that was previously Android-only?
It lets you livestream gameplay and capture your facecam using the iPad camera or an external capture card.
00:16
Which iPadOS version is required for Camo Studio?
iPadOS 17 or later.
00:44
What are the two ways to capture gameplay in Camo Studio?
Use an external video source (capture card) or select 'Apps on this iPad' to capture the iPad's display.
02:46
How do you wire a console to an iPad for streaming?
Console HDMI goes into the capture card, HDMI out goes to TV/monitor, and USB-C connects the capture card to the iPad.
02:59
What is the main audio limitation in Camo Studio?
It can only support one USB audio input source at a time.
05:44
Name two workarounds for the single USB audio input limitation.
Connect an audio interface/mixer as a single USB input, or use a phone with the Camo Camera app as a separate audio source.
05:59
How do you pair a phone as an audio source with Camo Studio?
Install Camo Camera, select 'pair a device' in Camo Studio, scan the QR code with the phone's Wi-Fi option, then wait for the active connection and select the phone as an audio source.
07:14
What can you add as a web layer in Camo Studio?
URLs from Streamlabs for alerts or chat overlays.
09:34
Which platforms can you stream to directly from Camo Studio?
YouTube, Twitch, Trovo, or custom stream key.
10:41
What quality did the creator choose for the test stream and why?
1080p60, preferring more frames over 4K30.
13:41
Why might facecam commentary audio be out of sync?
Because the phone's microphone input is a separate device from the facecam source; using the same device for both facecam and commentary keeps them in sync.
14:53
Camo Studio fills Android-only gap
iPad users can now stream facecam gameplay for free, opening mobile streaming to a much larger audience.
00:16Simple capture-card wiring to iPad
Shows that any capture card with USB-C output can feed console footage into the iPad, turning it into a portable streaming hub.
02:59Single USB audio input constraint
This is the video's most practical warning — without a mixer or phone workaround, multi-device audio is impossible.
05:44Streamlabs overlays as web layers
Demonstrates how to integrate existing streaming alerts/chat into a mobile setup using a plain URL.
09:341080p60 mobile stream looks solid
Proves a free iPad app can deliver quality comparable to desktop streaming setups.
13:41[00:01] for a mobile streaming application that has been viable to not only capture our gameplay picture but also our face cam using the camera on our Apple devices this capability has only ever been available for Android users but that is
[00:16] not the case anymore guys Apple users I have something special to show you guys today and it's 100% free to use and it's called camo
[00:30] the Apple App Store and you're going to want to search up camo studio and when you do that you're going to see the application with that purple icon right there select that and then go ahead and download it as an FYI this application
[00:44] is currently only compatible with iPads running iPad OS 17 or later now before I show you guys the ins and out of this amazing application I want to give a quick shout out to our sponsor Nexus Clips this is an AI powered video
[00:58] editing tool that repurposes your YouTube or twitch live streams into short form engaging content it can automatically detect edit and add subtitles to your most highlight worthy moments you can then easily download
[01:11] your Clips to be uploaded to YouTube or Tik Tok at the single click of a button trying to save all of that time that you're spending editing down your long live streams then give Nexus Clips a try the link will be in the description
[01:24] below all right so up in front of me now we have the camo Studio application when you guys first open this up you should see something that looks similar to this where things are within this app I would break this out into four primary
[01:38] sections the section on the left is going to be all of your device and Source settings if we look at the Middle top area this is where you can start your recordings or set your live stream destinations as well as monting the
[01:50] audio levels for your stream you can also access your General application settings here as well as the help area the rightish middle area is where you're then below that you're going to see something called all scenes and this is
[02:04] where you can add modify and update your scenes for your stream so with that guys next is how you can set this up for a gaming live stream and I think you guys are going to be quite impressed at the features available to us to do this
[02:17] to our all scen section we're going to swipe up there and then select the plus button and then we're going to create a new scene we're just going to call this game scene submit and that's going to create a brand new scene so if we scroll
[02:31] see that that scene has been created here we're going to just select into that looking at the left side under primary source settings we're going to want to adjust the type of source that is being used for our base video so
[02:46] instead of it being the camera if we select that drop down we can actually go with an external video source which means you can plug in a capture card into the iPad if it has that USBC connecting Port all you would need to to
[02:59] do is set up your capture card with your console like you would normally so your console would be the HDMI input into the capture card and then the HDMI out would go to your TV or your monitor then the USBC connection would run from your
[03:13] capture card to your iPad so if I go ahead and select external video Source you're going to see that I can now select the device dropdown and choose my Elgato 4kx capture card and when I do that you
[03:27] can see my gameplay pop up the audio if you look at the top of this app is actually coming through as well and this is just one of the options you have for capturing your gameplay of course you can capture the game playay directly on
[03:41] your iPad for mobile gaming so in this case we would go back up to the type Source option select that drop down and then choose apps on this iPad and this will start a broadcast through the recording functionality of the iPad it
[03:56] will not push you live but it essentially will bring in the feed of your display into this app so that you can then move around your face cam to like and this picture and picture overlay will remain over your iPad
[04:11] screen while you're live and playing your mobile app games since I want to play my games on my PS5 I'm going to stick with the setup that I have here next I'm going to go over to Source number two by going over to the tab with
[04:24] the camera icon that says two on it and we're going to keep the camera the same camera so the type in device I'm just going to keep those the same there are some cool image enhancement features that you could add if you would like
[04:37] such as the background so right now I have mine selected to normal but we can remove that background if we like turn on portrait mode you can add a filter to change the look of your camera I'm going to keep that set to none but I actually
[04:49] kind of like the next feature here which is Spotlight because if you're in a poor lighting situation you can turn this on to make your face much more bright than what it would be without I just turned from a dark skinned man to a
[05:03] lightskinned man next down here we have our framing composition so in case we want to be more zoomed in or more zoomed out I kind of like it you know a little bit zoomed in here so my face is a little bit tight in the frame so I can
[05:15] have your rotation and Mirror video options in case your camera output's a little bit funny next up let's head over to our audio and microphone Tab and this is one of my issues with this app
[05:29] actually what you see here is that only one audio device is selected and that's my Elgato 4kx because I want to make sure that audio is coming through now if you're using the application recording feature and you're not using external
[05:44] fine to have your microphone and game audio recorded the issue comes when you're trying to record audio from another device Al together since the app can only support One USB audio input source at a time so a workaround for
[05:59] this issue if you're using an external capture cart like in my case number one you guys can use an audio interface or mixer to connect all of your audio devices to your iPad as a single USB input source what you guys see me using
[06:13] here is the fine gaming mixer I have my microphone Plugged In which is this road xrr microphone I have it plugged in right here and I can control that audio using this dial now the game audio is also coming into this mixer by this link
[06:30] Pro cable so whatever mixer you have has to have a line in Port so that way you can pull the audio from your controller into the mixer directly and I can control it via this dial right here now the mixer itself is connected to this
[06:46] iPad by using this Dongo have here I'm using the one from mochen so I'm not only connecting just the mixer but also the capture card input as well and some power supply now I realized for those of you who are newer to live streaming this
[07:02] configuration to put together so for option number two you're going to want to take your mobile phone it can be an Android device or an iPhone doesn't matter you're going to want to download the camo camera app once you have that
[07:14] installed head back over to camera number two next to device select that drop down and you're going to want to pair a device here a QR code is going to pop up you're going to want to go into the camo camera app scan scan that QR
[07:30] Code by selecting the Wi-Fi option wait for your phone to connect with the camo studio app and after about 30 seconds or so you should have it connected in an active status and you're going to want to head over back to the microphone
[07:44] option the audio section here you should see your phone listed as an audio source so instead of it saying none select that drop down and then choose one of the options I'm just going to go ahead and select the camera option and then my
[07:57] audio will be coming through as as you can see I'm talking into the microphone but at the same time if we just go and play an emote you can see that audio is coming in as well now the extra caveat here is that you're going to need to
[08:09] stay within the camo camera app on your phone so you can't leave it and head over to a social media site or whatever while you're streaming because your your reset this next let's head over to our layers section and this is where we can
[08:23] see all of our different sources as well as the background and have additional settings to actually play with here so for the example let's actually use the secondary video source which is my face cam here if you have that selected I can
[08:36] actually move my face cam wherever I want on my screen even shrink it down a little bit if I want be itsy bitsy small or be freaking huge if I want to as well but you know we'll keep ourselves at a very nice uh quality size there from
[08:52] here I'm actually going to click into that secondary source there on the left and I can actually change the opacity of myself I can adjust my corner radius so maybe I want my face cam to be more square instead of circular can also
[09:07] change the color of my border so I'll try to make it the theme of my YouTube channel here and we can also adjust the Border width to be thicker or skinnier and now let's say we want to hide the source all together but not delete it
[09:21] well we can just click and hold this source and that'll pop up an option to hide it also within this section you can add new layers such as text an image shape and even a web address so that means if you want to bring in your
[09:34] alerts or your chat overlays from streamlabs you can do that all you would need to do is head over to the streamlabs dashboard go and get your alerts or chat overlay link come back in the C Studio select the web layer option
[09:47] and then add your URL in and submit it I'm going to go ahead and add one more Scene to my setup here and this is going to be for just chatting submit and we're it's actually going to take the whatever the last scene I was working on and
[10:02] essentially duplicate it but for this one I'm going to go over to my base scene instead of it being the external capture card we're going to go with camera and then we're going to select my front facing camera here and then for
[10:15] completely turn this one off so I'm going to go over to my layers go to the secondary source hold that down and we're just going to hide that so that we don't see that and now I have just chatting set up all righty so at this
[10:28] chatting set up all righty so at this point we are in pretty good shape to go live to do that we're going to want to go over to the top middle section select my YouTube icon I already have my account connected but what you're
[10:41] probably going to see when I press this plus button are these options here so you can connect your YouTube twitch trobo or you can use a custom option where you can put in your own streamed key I'm good with my YouTube being set
[10:54] key I'm good with my YouTube being set up I can select a broadcast do new title description I'll just put in test stream broadcast time is going to be now public of course and the one thing I'll say here that we need is an option to
[11:09] upload a thumbnail so possibly another feature that could be added to this app but otherwise we're in good shape we ready to go we can just select done it's going to create our broadcast now we can just go ahead and select start and we
[11:22] will push our stream live to YouTube we can even record next to where I'm already live for YouTube I can select that drop down and we'll be able to live at the same time now one thing I wanted to note that you actually want to do
[11:36] before you go live is where it says 1080p60 right now for me that drop down I'm going to select that make sure you have this set to where you want I prefer recording and streaming at 1080p60 using this application so if you want to
[11:49] record in that quality or any other here just make sure you set it now while we're live there's a couple cool things that we can do one of those is seeing our chat while we're gaming at at the same time so if we go to this section
[12:01] here on the far right hand side tab we can select the plus button and then add our chat to the mix here now we can select it in that drop down and you'll see all of the chats coming through if I want to I can even reply to those chats
[12:13] while I'm live at the same time by just signing in to the chat window here it also doesn't hurt while you're live to give it a listen see how your audio is sounding and balance it out accordingly typically you'll want your game audio to
[12:25] be a little bit less than your microphone audio so that way you're always be heard over any loud noises or gunshot sounds in your games for those of you with a little bit of a creative mind you guys can have some fun with the
[12:37] drawing feature so if you look at the middle area where you see that pen pencil icon next to camo studio is going to bring up a set of objects you can use for drawing so I can just take any one of these and I can either take my finger
[12:50] or a pen and I can just start drawing all over this thing if I don't want to have my creation up on the screen anymore I can just go ahead and select side at the top something else we can do is that if we go all the way to the top
[13:03] left corner of the app if we don't want to see all of our settings and chat we can just select that and that'll put us in more of a full screen mode I'm actually going to get out of the pencil drawing mode as well and that will allow
[13:17] us to see everything in a greater visibility on our stream but I think at this point it's finally time to have some fun so let's do a little bit of a test stream and see how our quality is looking all right doesn't look like
[13:29] anybody came in here so we're chilling we can get a couple weapons but anyways what do you guys think of the quality you're watching this in 1080p60 I you're watching this in 1080p60 I decided to go with more frames
[13:41] decided to go with more frames over you know having a 4K 30 so this is over you know having a 4K 30 so this is 1080p60 upscale to 4K is it good is it bad I think from what I'm seeing here it looks very solid especially for a mobile
[13:54] app that can pull in a capture card signal with a face cam and I got the audio going for both the capture card source and our microphone through the this is extremely impressive and it's only going to get better you know I
[14:08] can't imagine what it's going to be in the future so there's a lot to look the future so there's a lot to look forward
[14:20] to what oh my goodness he
[14:40] go oh D it dud it come here how dare you dare you man okay if you guys are paying close attention to the recording you might have noticed that the FaceCam commentary audio was not perfectly in sync with the video and this is because
[14:53] I'm using the phone's microphone input if I had been using the camera from the have been in sync as I'd be using the same device for both the face cam and the commentary audio all righty guys I'm back in camo studio and I'm finished
[15:07] with my live stream and if I want to stop it all I got to do is head over to the top where I have that little live thing going on YouTube right now touch that and I can just simply press the stop button and that will end my live
[15:20] YouTube you don't have to go to the control center and end it manually or anything like that camo takes care of that for you very nice Easy Clean finish so please let me know in the comment section below what your thoughts are
[15:34] with the quality as well as your experience using this application once you guys came to enjoy the video of course give it a thumbs up subscribe if you're new around here and I will catch you guys in the next one peace
⚡ Saved you 0h 15m reading this? Transcribe any YouTube video for free — no signup needed.