Create Free 3D VTuber Avatar on iPhone
41sShows viewers they can make a professional-looking VTuber without spending money.
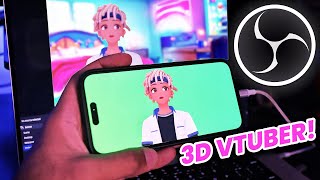
▶ Play ClipThis video provides a step-by-step guide to creating a custom 3D VTuber avatar using the Hype app on an iPhone and integrating it into streaming software like OBS Studio, all for free. It covers two methods: using a direct OBS plugin and screen mirroring, and offers tips for customization and setup.
The video promises to show how to create a free, high-quality 3D VTuber avatar for use in OBS Studio for live streaming and recording.
Needs a Windows or Mac computer with streaming software, an iPhone X or later with Face ID, and a phone stand for stabilization.
Download Hype from the App Store, sign in with Google, Twitter, Apple ID, or phone number, and confirm age (13+).
Access the avatar editor, create a new character, choose gender, skin tone, and customize wardrobe (skin, faces, hair, clothes).
After customization, review items and buy them using coins earned in the app.
Users can import their own VRM files into Hype for further customization.
Enable OBS plugin in Hype, download Hype's free OBS plugin, extract and move folders to OBS installation directory. Plug iPhone via USB, install iTunes if needed, restart OBS, add 'Hype Source' as a source, and adjust with shift key to unsquish. For Mac, use video capture device source.
Use two fingers to resize/reposition avatar, pivot facing direction, crop sides with Alt/Option key, and add chroma key filter for transparent background.
Free method: download Let's View on phone and computer, scan QR code to connect, enable broadcast. In Hype, turn off OBS plugin, set chroma key to green, set landscape orientation. In OBS, add window capture of Let's View, crop with Alt key, and add chroma key filter.
Use Bing's AI chat in creative mode to generate background images, download, and add them to OBS behind the avatar.
Encourages creativity with backgrounds, overlaying avatar on gameplay, adding microphone, and enjoying vtubing.
With the Hype app and either the OBS plugin or screen mirroring, anyone with an iPhone and a computer can create a free 3D VTuber avatar and stream it on platforms like Twitch or YouTube. The video emphasizes that the process is free and accessible, encouraging viewers to experiment with backgrounds and overlays.
"The title honestly describes the video's content—it delivers a complete free method to create and stream a 3D VTuber avatar using an iPhone and OBS."
What are the basic requirements for creating a 3D VTuber using this method?
A Windows or Mac computer with streaming software (e.g., OBS Studio), an iPhone X or later with Face ID, and a phone stand.
[0:14]
What is the name of the app used to create and customize the VRM avatar?
Hype
[1:01]
How can you import your own custom VRM files into the Hype app?
Go to Edit Avatar, then to the list of full avatars, select the 'Imports' tab, and import your own .vrm file.
[2:30]
What are the two methods to get the avatar into a streaming app like OBS?
Method 1: OBS plugin (works only with OBS Studio). Method 2: Screen mirroring (works with any streaming app).
[2:51]
What should you set the chroma key color to in Hype?
Green
[4:09]
Which free screen mirroring app is recommended in the video?
Let's View
[5:48]
How do you crop the avatar in OBS to remove unwanted edges?
Hold the Alt key (Windows) or Option key (Mac) and drag the edges of the source.
[5:00]
What tool is suggested for generating custom background images?
Bing AI chat in creative mode.
[7:33]
Free 3D VTuber creation
The video promises a free, high-quality 3D VTuber avatar creation method, making it accessible to a wide audience.
[0:00]Hype app as central tool
Hype is the free app that enables avatar creation and customization, a key technology enabler.
[1:01]Custom VRM file import
Users can import their own VRM files, allowing advanced customization beyond the app's preset options.
[2:30]Screen mirroring alternative
The screen mirroring method works with any streaming software, providing flexibility for users who don't use OBS Studio.
[5:18]AI-generated backgrounds
Using Bing AI chat for background creation adds a creative, free element to enhance streaming setups.
[7:33][00:00] ever wanted to create your own custom
[00:02] high quality 3D V tuber avatar for free
[00:05] that can be pulled into applications
[00:07] such as OBS studio for live streaming
[00:09] and recording you came to the right
[00:11] video
[00:11] [Music]
[00:14] before I show you guys how this is done
[00:16] there's a few things that you're gonna
[00:18] need first is a Windows or Mac computer
[00:20] with your preferred streaming or
[00:22] recording software installed on it so
[00:24] that could be OBS Studio streamlabs
[00:26] desktop or even prism live studio next
[00:29] you're gonna need an iPhone with the
[00:32] face detection or face ID features on it
[00:34] so that's going to be an iPhone 10 or
[00:37] later older iPhones or Android devices
[00:39] currently won't work with this method
[00:41] third to make it easier for your face to
[00:43] be detected I highly recommend picking
[00:45] up a phone stand so that you have a
[00:47] designated stabilized place to put your
[00:49] phone you can get one of these for like
[00:51] 10 bucks on Amazon but if this doesn't
[00:53] work for you just find any heavy
[00:54] weighted object like a paperweight or a
[00:57] rock any object to put your phone up
[00:59] will work with that out the way you're
[01:01] going to want to head over to the Apple
[01:02] App Store and search up the hyper app go
[01:05] ahead and download that and once it's
[01:07] finished installing launch it and then
[01:09] you can sign in with your Google account
[01:10] Twitter you can use your Apple sign-in a
[01:12] phone number I like to go with the
[01:15] Google option myself you'll need to
[01:16] confirm that you're over the age of 13.
[01:19] after that you can put in your display
[01:20] name and then you'll be into the app
[01:22] what you guys are going to want to do
[01:24] first is head over to the far right hand
[01:25] side and select that Tab and then you'll
[01:28] be able to select the edit Avatar option
[01:30] this is just going to bring you into
[01:32] editing the default Avatar that is
[01:34] already within hyper but we want to
[01:36] create our own custom one from scratch
[01:38] so to do that you're going to want to
[01:40] select the icon with the arrow pointing
[01:42] to the Avatar figure and this is going
[01:44] to take you to where you can access all
[01:46] of your avatars you guys probably don't
[01:48] have any right now so what you guys are
[01:50] going to do is select the new option and
[01:52] this is where you can select whether or
[01:54] not you want a boy or girl icon you can
[01:56] even set the skin tone from dark to
[01:59] light once you've set that you can
[02:00] select show wardrobe and you can go
[02:02] through the many different tabs that are
[02:04] available from skin faces hair irises
[02:07] eyebrows there's even clothes in this
[02:08] app that you can customize for your
[02:10] character which is absolutely wild once
[02:12] you've picked out all the items that you
[02:13] want for your character go head to the
[02:15] right hand side and select buy you're
[02:17] gonna see all of your checkout items
[02:19] listed as well as the amount of coins
[02:21] that you have to spend to get all those
[02:23] items if you're happy with everything
[02:24] and you have the proper amount of coins
[02:26] of course you can go ahead and select
[02:28] purchase by the way if you want to take
[02:30] your avatar customization a step further
[02:32] you can import your own vrm files so
[02:35] back in the edit Avatar section and then
[02:37] going back to your list of full avatars
[02:40] you're gonna see a tab for imports if
[02:42] you select that this is where you can
[02:43] import your own new vrm file alright now
[02:47] for the fun part of getting this Avatar
[02:49] into a streaming application such as OBS
[02:51] Studio I have two different methods to
[02:53] show to you guys but before I do that if
[02:55] you guys are enjoying the video and you
[02:56] want to see more content like this make
[02:58] sure you hit the video with a big thumbs
[02:59] up it helps me out tremendously okay so
[03:01] for method one with the hyper app on the
[03:04] Avatar tab around the middle of the
[03:06] screen you should see an icon that says
[03:08] OBS select that and then you should see
[03:11] a full screen image of your avatar from
[03:13] there you're going to want to select the
[03:15] big red setup OBS button for the first
[03:17] section that says OBS plugin if you're
[03:19] on a Mac computer you're going to want
[03:21] to keep this turned off if you're on a
[03:23] Windows computer you're going to want to
[03:25] turn this on and you're going to need to
[03:27] download Hyper's free OBS plugin from
[03:30] their website now with plugins they will
[03:32] only work for OBS studio so you won't be
[03:34] able to use the other streaming apps in
[03:36] this case with this particular method
[03:38] it's also important to keep in mind
[03:39] depending on when you're watching this
[03:41] video that you're gonna need to be on
[03:43] the correct version of OBS that the
[03:46] hyper plug-in supports if that all
[03:48] checks out go ahead and download this
[03:50] plugin by clicking this link here
[03:51] extract the files then move those two
[03:54] folders that you just extracted to the
[03:56] OBS studio folder located within the
[03:59] program files folder on your C drive
[04:01] doing this will not overwrite your
[04:03] existing folders it will just add new
[04:05] files for this plugin back in the hyper
[04:07] app make the chroma key green rotate the
[04:10] studio orientation to be landscape for a
[04:12] better resolution and then select save
[04:15] now you can plug your iPhone into your
[04:16] computer via the USB cable and if you
[04:19] don't already have iTunes go ahead and
[04:21] download that so you can trust your
[04:23] iPhone with your Windows computer next
[04:25] make sure you restart OBS and now when
[04:28] you go to add a new source on Windows
[04:29] you should see the hypersource that can
[04:31] be added to your scene in landscape mode
[04:33] your image is probably going to be
[04:35] squished so after you apply the source
[04:37] you can stretch it out by holding the
[04:38] shift key and dragging out the sides for
[04:41] Mac users all you need to do is add your
[04:43] iPhone as a video capture device Source
[04:45] from there go ahead and select save and
[04:47] then you can reposition your avatar with
[04:50] your two fingers or even use one finger
[04:52] to Pivot the direction that your avatar
[04:55] is facing set the full sizing and
[04:57] framing of the Avatar as you wish you
[04:59] can trim in the sides by selecting the
[05:01] ALT key on Windows or the option key on
[05:03] Mac and then within your streaming
[05:05] software you're going to want to select
[05:06] the Avatar Source select the filter
[05:08] option and then within here you're going
[05:10] to want to add a chroma key filter and
[05:13] from here your avatars are have a
[05:15] completely transparent background the
[05:16] second method I have to show to you guys
[05:18] is the screen mirroring method and this
[05:20] will work across any streaming
[05:22] application that you have now in order
[05:24] to screen mirror on your Windows or Mac
[05:26] computer you're gonna need some software
[05:28] to be able to accomplish this the best
[05:30] screen mirroring software is typically
[05:32] not free you have air server which hyper
[05:35] actually recommends it's twenty dollars
[05:37] one time fee or you can check out the
[05:40] application called do one which is one
[05:41] of my favorites and it's ten dollars a
[05:43] year but if you guys are on the track of
[05:46] not wanting to pay any money which I
[05:48] totally get you guys can check out the
[05:49] application called let's view it's 100
[05:52] free and you'll need to download it on
[05:54] your phone and also your computer go
[05:57] over to the QR code connection option on
[05:59] the computer and then on your phone if
[06:01] you look to the far right hand side
[06:03] you're gonna see that scanning icon if
[06:05] you choose that this is how you can scan
[06:08] the QR code the only other thing I need
[06:09] to do is Select start broadcast and
[06:12] you'll see within about a second or two
[06:15] your phone screen pop up on your
[06:17] computer now we can go back to the hyper
[06:20] application make sure that we set up OBS
[06:22] this time around we're keeping the OBS
[06:23] plugin option turned off chroma key
[06:25] we're still going to want to set that to
[06:27] Green if we scroll down a little bit
[06:28] more orientation we're going to want to
[06:31] rotate that to get the best quality
[06:33] possible and once you have that set go
[06:35] ahead and select save and then again use
[06:37] your two fingers to zoom in and control
[06:39] how close you are to your avatar and
[06:42] then you can use your pointer finger to
[06:44] adjust the positioning and once you have
[06:46] it into a good spot put it on your
[06:48] paperweight Rock phone mount and now we
[06:50] can pull back up OBS we're going to
[06:53] select the plus button and add a new
[06:54] window capture Source you can name this
[06:57] V tuber if you want and then for the
[06:58] window just make sure that you have the
[07:00] let's view application selected we don't
[07:02] need to capture the cursor and this is
[07:04] looking pretty good we're going to
[07:06] select ok I'm going to right click this
[07:08] real quick and fit it to screen and now
[07:10] to remove the parts where the watermark
[07:11] is or the top of the let's view app
[07:13] we're going to select the ALT key and
[07:15] then we're just gonna crop this on in at
[07:18] the sides and same with the top now all
[07:21] we need to do is select the vtuber
[07:23] source go to filters select the plus
[07:25] button and now we're going to add the
[07:27] chroma key filter and it's transparent
[07:29] close that out and look at that we are
[07:32] looking fresh and ready to V2 if you're
[07:36] wondering where I got the backgrounds
[07:37] from that I put my vtuber in front of I
[07:39] put together the prompt of what I was
[07:41] looking for within the image and then I
[07:43] just use Bing's AI chat features within
[07:45] the creative mode to generate what I
[07:47] wanted from there I could download the
[07:48] image and throw it into OBS now of
[07:51] course you can get even more creative
[07:52] with this by having different types of
[07:54] images or adding your vtuber avatar over
[07:56] top of your gameplay have fun with it
[07:58] make sure you include your microphone
[08:00] and have fun v-tubing
⚡ Saved you time reading this? Transcribe any YouTube video for free — no signup needed.