
Stop Making AI Videos the Hard Way
45sDirectly addresses a common pain point and promises a solution, hooking viewers who struggle with AI video creation.
▶ Play Clip"Delivers on the promise of a workflow, but the title oversells 'best' without comparing alternatives."
This video presents a streamlined workflow for creating AI-generated videos from a single storyboard using the Higgsfield platform. The creator demonstrates how to maintain character consistency across multiple shots by using a character sheet and a storyboard prompt builder, and shows how to adapt the process for different visual styles.
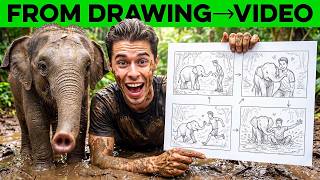
Generating every shot individually and piecing them together is slow and painful. The video introduces a workflow to create AI videos from a single storyboard.
A character sheet is essential to keep the same person in every panel. It prevents shots from shifting halfway through. Use a collage of photos from different angles for better AI lock-on.
Use GPT Image 2 with High Fidelity, 2K resolution, and 16:9 aspect ratio. Upload a collage of yourself and include a style line (e.g., 'rubber hose') to lock in the visual style.
A storyboard sheet with 15 numbered panels (one per second) plans the entire video in one image. Each panel includes shot type, action, and timecode, providing all details for the video model.
Upload a storyboard prompt builder to Claude skills, then describe the scene in one line. Claude generates a detailed storyboard prompt, saving time compared to manual description.
Copy the prompt into GPT Image 2, add the character sheet as reference, and set quality to 4K for cleaner animation. The model handles multiple detailed images in one output.
If elements shift (e.g., toppings count), use the reference icon to edit the storyboard directly, instructing to keep specific elements identical without regenerating the whole board.
In the video workspace, select CDEMS 2.0, upload storyboard and character sheet as references, set duration to 15 seconds, 1080p, 16:9, and enable audio for natural sound. Keep the prompt simple as the storyboard contains all shots.
The animation matches the storyboard, with consistent character appearance and smooth motion. CDEMS uses panels as guidance, not frame-for-frame copy, making the process fast.
The same workflow works for any style by changing the style line in the character sheet. Example: photorealistic blacksmith look by switching style to 'photorealistic'.
Another example: cel-shaded 80s anime surfer. The style line is changed to 'cel-shaded 80s anime', and the same process yields a unique video with retro film look.
Three different videos created from a single storyboard using the same workflow. Higgsfield allows all steps in one platform, and the link is in the description.
The workflow enables efficient, consistent AI video creation from a single storyboard, adaptable to any visual style. By using a character sheet and storyboard prompt builder, creators can produce professional-looking videos quickly.
What is the purpose of a character sheet in AI video creation?
To keep the same person in every panel and prevent shots from shifting halfway through.
00:27
What settings are recommended for generating a character sheet with GPT Image 2?
High Fidelity, 2K resolution, and 16:9 aspect ratio.
00:41
How many panels are in the storyboard and what does each panel include?
15 panels, each with a shot type, one-line action, and timecode.
01:34
What tool is used to generate the storyboard prompt from a one-line description?
Claude with the storyboard prompt builder.
02:16
Why is 4K quality recommended for the storyboard generation?
Because a cleaner storyboard leads to better animation later.
02:45
How can you fix inconsistencies in the storyboard without regenerating the whole board?
Use the reference icon to edit the storyboard directly, instructing to keep specific elements identical.
03:13
What video model is recommended for animating the storyboard?
CDEMS 2.0.
03:39
What is the key to adapting the workflow for different visual styles?
Changing the style line in the character sheet (e.g., from 'rubber hose' to 'photorealistic').
05:18
Character Sheet Prevents Inconsistency
Emphasizes a step most people skip, which is the root cause of shifting character appearance.
00:27Storyboard as Single Source of Truth
Plans the entire video in one image, reducing prompt complexity and improving accuracy.
01:34AI-Assisted Prompt Generation
Using Claude to build a detailed storyboard prompt saves significant time.
02:16Simple Prompt with Storyboard
The storyboard contains all details, so the video prompt can be minimal, simplifying the process.
03:39Style Line as Key Differentiator
A single line change in the character sheet transforms the entire video style, demonstrating flexibility.
05:18[00:00] If you've ever tried making a full AI video by generating every shot and trying to piece them together, you know how slow and painful that can be. That's why I figured out the best workflow to create AI videos from just one single storyboard.
[00:12] And in this video, I'll teach you that exact process from start to finish, and you'll be able to use it for any style of video you want to create. Everything I'm about to make happens inside one platform called Higgs Field. If you want to follow along and have a finished video by the end, I've left a link in the description below.
[00:27] Once you're in, you'll notice everything is organized at the navigation bar at the top. Now before I plan out any scenes, the first thing I need is a character sheet, because that's what keeps me looking like the exact same person in every panel and in the final video.
[00:41] This is the part most people skip, and it's exactly why their shots start shifting halfway through. So I'll head over to Image, set the model to GPT Image 2, and put the quality on High Fidelity, 2K, and the aspect ratio to 16x9.
[00:54] Then, instead of giving it one photo of my face, I'll upload a collage of myself from a few different angles so the AI has way more to lock onto and I come out consistent. Now I'll paste in my character prompt, and the line that actually matters here is the last one, the style, which is rubber hose.
[01:09] This locks in your style, and by changing it, you can create multiple different videos, which I'll show you later. Let's generate. The image is split into two panels, a full body shot and a close-up of my face, and it looks exactly like me.
[01:21] The plain background is the useful part though, because once I start animating this, there's nothing extra in the frame for the AI to get confused by. This is the image we'll use to create a full storyboard and it will keep me looking the exact same across the whole project.
[01:34] The storyboard is the whole foundation of the video, because it will plan out everything in one single image before we even start animating. So instead of writing a separate prompt for every single shot, I'll build one storyboard sheet with 15 numbered panels, one for every second of the final video.
[01:49] Each panel has a shot type, a one line action, and a timecode, so it looks just like a real shot board. And that matters, because the video model has every single detail it needs to keep your output accurate without you needing to describe everything in the prompt or leave it up to chance Now the first step to actually create your storyboard is to write your prompt But doing it manually and describing a 15 panel scene would take a very long time That why I open up Claude and upload this storyboard prompt builder into
[02:16] the Claude skills. Then in a new chat, I upload my character sheet and just describe the scene in one line. You can find the storyboard prompt builder in the description below and by just explaining what you have in mind in one sentence, it builds the rest for you. Claude gives me back
[02:30] this huge storyboard prompt that's ready to be used. So, I'll copy that and head back to the image generation workspace with gpt image 2 selected. This model is currently one of the best to handle a prompt like this. We're essentially asking for multiple detailed images in one output,
[02:45] so it's the best model right now to keep up with that. I'll also drop my character sheet in as a reference, so I stay consistent across every panel. I'll push the quality up to 4k instead of batches 2, because the cleaner this storyboard is, the better the animation will be later. Let's generate.
[03:00] I'll go with this one. All 15 panels are in the same style with every shot of the ramen already planned out. The level of detail on this is honestly impressive. Now since we've generated so many elements, some of them might shift a bit. For example, in this one the
[03:13] number of toppings keeps changing from panel to panel. But there's a simple solution. Instead of regenerating the whole board, I'll clear the prompt, remove the reference image, and click the reference icon to edit the storyboard directly. I'll keep it at 4k and a batch
[03:26] of one, then tell it to keep the toppings identical in every panel and change nothing else. And now, the whole video is planned out on one sheet, with every second locked in and it still looks exactly like me. All that's left is to hand the board to the
[03:39] video model and actually animate it. So back in the main page, click on video and that will take you to the video generation workspace. From the model selector, pick CDEMS 2.0 because it's one of the best models right now for animating a whole scene and keeping it consistent.
[03:53] Before it'll let me use my images though, they need to pass a quick eligibility check, so go to Upload Media and Image Generation and check the storyboard and the character sheet. Once they're cleared, I'll set both as my references, the storyboard for the shots
[04:06] and the character sheet so I remain consistent Then I set the duration to 15 seconds the resolution to 1080p and the aspect ratio to 16 by 9 I turn the audio on so the clip comes out with natural sound Now the prompt itself stays really simple because the storyboard already has all the shots in it
[04:23] So I just tell it to animate the whole thing with natural sound only.
[04:39] This looks really good. It came out exactly how the board planned it, every shot is in order and I'm holding that same look the whole way through. The whole animation is really smooth and it looks like a scene made by a real animation studio. And Cdance isn't
[04:53] copying the storyboard frame for frame, it's using the panels as strong guidance, hitting the main beats and keeping this file locked, which is exactly what makes this so fast. If you tried making this normally, you'd need to create multiple videos with this process
[05:06] and consistency would fall apart fast. Now the best part of this whole workflow is that you can adapt it to create any single video you want. And to show you what that looks like, I'll build a second video that's completely different from the first.
[05:18] This time, fully photorealistic and cinematic. And it runs on the exact same workflow, so the only thing I'm really changing is the style. So, I'll start with a new character sheet. I'll upload the same collage as before. But now into prompts.
[05:30] I'll ask to dress me as a blacksmith, and switch that last style line from rubber hose to photorealistic. That single line is what changes the whole look from a cartoon into something that looks completely real. And in the image we get back, you can see that it looks just like a picture of me, but in a completely new outfit.
[05:46] Then it's the same steps as the first video. I'll head back to Claude with the storyboard prompt builder and describe the new scene in one line. Then I'll take the prompt it gives me, generate the storyboard in GPT image 2 with my new character sheet.
[05:59] The storyboard's structure is similar to the one we got before. With every scene planned out, this time there is nothing I want to edit so it's ready to be animated. So back in the video generation workspace, I'll upload it with my character sheet,
[06:11] keep the same settings as before, and write a simple prompt. This looks like a totally different video, but it came out of the same workflow.
[06:32] My face stays the same throughout. The ambient sounds make everything feel natural, and my favorite part is that the physics are realistic. Once you've got this workflow down, you can make literally any style you want, and they never come out looking the same.
[06:46] Let me show you one more, and it's the most unique style yet. This time, I want to make a video with that cel-shaded 1980s anime look. So I'll start with the character sheet, upload that same collage of me, and this time ask for a surfer in a wetsuit with the style line swapped to cel-shaded 80s anime.
[07:02] And in the image we get back, it still looks exactly like me, just turned into an 80s anime character now, with that grainy retro film look to it. Then I'll head back to Claude with the storyboard prompt builder and describe the new scene in one line.
[07:14] I'll take that prompt into GPT-Image 2 with my new character sheet, and the storyboard comes back with all 15 shots of the ways planned out in that same anime style. Just like before, there's nothing I need to fix, so it's ready to animate.
[07:27] So I'll bring it into CDAMS with the same settings and the same simple prompt, and here's the final video.
[07:44] This one came out completely different again. It's got that soft dawn light with the spray flying off the waves as I drop in, and the whole thing honestly looks like a frame from an 80s anime.
[07:57] You can see the similarities with my actual face even though this is fully animated, and even though it includes intense action movements, Seedance 2 executed it perfectly. Normally this would be hard to do for a video model, especially in this style, so that's
[08:09] three completely different videos, each one built from a single storyboard using the exact same workflow, which means you can now take this and make any style of video you want. And with Higgsfield, you can do it all in one single platform. So use the link in the
[08:22] description to sign up to Higgsfield. Thanks for watching, and I'll see you in the next one.


⚡ Saved you 0h 08m reading this? Transcribe any YouTube video for free — no signup needed.