I watched 10 videos so you don't have to
37sRelatable struggle of learning VoiceMeeter hooks viewers who seek easy solutions.
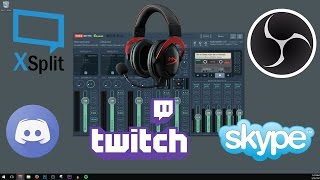
▶ Play ClipThis tutorial provides a step-by-step guide to setting up VoiceMeeter Banana for advanced audio routing in streaming and recording setups. It covers installation, Windows configuration, microphone and headphone selection, and understanding the routing buttons (A1, A2, A3 vs B1, B2). The video also demonstrates how to integrate Discord using Virtual Audio Cable and configure OBS and XSplit to receive the mixed audio stream.
Set Windows default playback device to 'VoiceMeeter Input' to route all system audio into VoiceMeeter.
Use WDM driver for lower latency; switch to MME if crackling occurs.
A1/A2/A3 send audio to physical outputs (headphones, speakers). B1/B2 send audio to virtual outputs (for streaming software).
Enable A1 on VoiceMeeter VAIO input to hear system audio (YouTube, games) in headphones.
Set Discord's output device to 'Cable Input' (Virtual Audio Cable) and select 'Cable Output' under Hardware Input 2 in VoiceMeeter.
In OBS, set Mic/Auxiliary Audio to 'VoiceMeeter Aux Output' to receive the mixed stream.
Double-click any slider to reset it exactly to zero.
"The title accurately describes the tutorial's content and goal, delivering exactly what it promises."
What should you set as the default playback device in Windows for VoiceMeeter Banana?
VoiceMeeter Input
1:29
Which driver type (WDM or MME) offers lower latency in VoiceMeeter Banana?
WDM (Windows Driver Model) has lower latency than MME (Multimedia Extension).
2:14
What should you do if you hear crackling or popping sounds with your microphone in VoiceMeeter?
Switch to the other driver (e.g., from WDM to MME).
2:25
What is the difference between A1/A2/A3 and B1/B2 buttons in VoiceMeeter Banana?
A1, A2, A3 send audio to physical outputs (headphones, speakers). B1, B2 send audio to virtual outputs (for streaming software).
4:19
How do you hear YouTube audio in your headphones using VoiceMeeter?
Enable A1 on the VoiceMeeter VAIO input.
6:05
How do you route Discord audio into VoiceMeeter Banana?
Set Discord's output device to 'Cable Input' (from Virtual Audio Cable).
10:06
In OBS, what audio device should you select as your Mic/Auxiliary Audio to receive the mixed stream from VoiceMeeter?
VoiceMeeter Aux Output.
12:05
How do you reset a volume slider to exactly zero in VoiceMeeter Banana?
Double-click the slider.
15:03
WDM vs MME Driver Choice
Explains the trade-off between latency (WDM) and stability (MME), a key decision for audio setup.
2:14A1/A2/A3 vs B1/B2 Routing
Clarifies the core routing concept: physical outputs vs virtual outputs, essential for understanding VoiceMeeter.
4:19Integrating Discord with Virtual Audio Cable
Shows how to use a virtual cable to route a specific application (Discord) into VoiceMeeter for separate mixing.
8:54Configuring OBS to Receive Mixed Audio
Demonstrates the final step to connect VoiceMeeter to streaming software, completing the setup.
11:37Double-Click to Reset Sliders
A simple but valuable tip for precise volume control, saving time during adjustments.
15:03[00:00] What's up guys?
[00:01] This is going to be an in-depth tutorial on
[00:04] I struggled to learn how to use this program.
[00:07] I had to watch about ten different YouTube
[00:10] The things I know now, if they would have
[00:14] have made this entire process much easier.
[00:17] By the time we're done with this, you'll be
[00:21] how you want.
[00:23] From XSplit to OBS Studio, to Discord or Skype.
[00:26] To getting certain audio to your Twitch stream
[00:29] You're going to be able to do all of it and
[00:37] Remember that you can pause between each of
[00:39] I'm going to try and make them short and sweet.
[00:42] Step 1, download and install VoiceMeeter Banana.
[00:47] Step 2, download and install Virtual Audio
[00:51] There's a link in the description as well,
[00:55] Step 3, before we can make changes to VoiceMeeter
[01:00] Windows is properly set.
[01:02] It's playback device must be set for VoiceMeeter
[01:07] Find your speaker icon in the bottom menu.
[01:12] Right click it, click on audio devices, and
[01:18] to see playback, recording, sounds, and communications.
[01:22] Select playback.
[01:23] You'll notice that my current headset is set
[01:29] Scroll down and change this to VoiceMeeter
[01:33] Click on it and click set default.
[01:36] You'll notice it gets the green check mark.
[01:38] Hit okay, you can now close that down.
[01:42] Step 4, the first thing that we want to do
[01:47] Under hardware input 1, click on select input
[01:52] This is going to bring up a list of pieces
[01:56] You'll notice that there are repeats.
[01:59] WDM, KS, and MME all represent the same devices.
[02:03] They are just different drivers that you can
[02:08] In our case, because it's guaranteed to work,
[02:14] This difference between the two of them is
[02:19] levels than the other.
[02:21] You'll experience less lag with WDM than you
[02:25] However, if you notice any crackling or any
[02:31] driver and that usually fixes the problem.
[02:35] We're going to select in our case WDM because it is a better and more fast option for our microphone.
[02:42] You're microphone will appear as a different
[02:44] I'm using a Focusrite amplifier with a microphone
[02:49] We're going to select Focusrite USB.
[02:51] However, you're microphone is going to be
[02:55] If it's a USB microphone it's likely to show
[02:59] If it's hooked to an amplifier or sound card
[03:03] to show up as the name of that device.
[03:05] I'm assuming that you know which one of these
[03:09] Click on the one that does, start with WDM
[03:13] If WDM is not available, choose MME.
[03:16] Step 5, we now need to tell VoiceMeeter Banana
[03:23] to it.
[03:24] We are going to select our first hardware
[03:27] Under A1, locate the device that you use to
[03:32] In our case, it's a headset.
[03:35] Use the driver that matches the previous driver
[03:39] In our case we used WDM for our microphone,
[03:45] our headset, earphone Hyper X 7.1.
[03:49] In your case it could be desktop speakers.
[03:52] It could be a headset, or it could be some
[03:56] Whichever one you are selecting is going to
[04:02] for Windows.
[04:05] Step 6, now that we have our microphone and
[04:12] record, we now need understand a little bit
[04:16] these inputs and what they do.
[04:19] You'll notice at the top we have A1, A2, and
[04:23] You'll see an A1, and A2, and an A3 in each
[04:29] For right now we're going to turn everything
[04:33] When I show you what each one does you'll
[04:37] Currently, if we were to try and watch anything
[04:44] video by PewDiePie, I can't hear anything
[04:49] And you watching at home, wherever you have
[04:55] this video currently with all of these buttons
[04:59] So, how do we get our headphones hooked to
[05:04] Well, which one of these inputs is YouTube
[05:09] It's coming through this one right here.
[05:12] Notice that we have VoiceMeeter VAIO and VoiceMeeter
[05:16] If you remember back when we set our playback
[05:25] input.
[05:26] We also have the other option to set it for
[05:28] So, as A1 and A2 and A3 correspond to A1,
[05:37] B2.
[05:39] So you'll notice that this, because it's set
[05:45] responsible for catching all of the audio
[05:49] That would include a YouTube video, the audio
[05:55] sounds.
[05:57] Anything that can play through Windows, which
[06:05] All we have to do to get our sound hooked
[06:11] is currently capturing YouTube, to send the
[06:16] You might have guessed it, all we have to
[06:23] If I didn't have a YouTube video on and I
[06:30] true.
[06:31] I would turn A1 on and it would go to my headphones.
[06:33] I do have a secondary set of speakers and
[06:39] to demonstrate this to you to give you an
[06:43] I'm going to click A2 and I'm going to select
[06:48] I have my headphones in A1 and my desktop
[06:53] So now if I was to send the Windows audio
[07:00] send it to my speakers by clicking A2.
[07:05] Now if I go back to YouTube and play that
[07:10] coming through my headphones as well as coming
[07:18] If I turn off A1, it is now only coming through
[07:24] hear that being picked up through my microphone.
[07:28] Notice that if I turn A2 back off, the video
[07:34] audio from Windows, the video on YouTube is
[07:41] This works for all of these inputs.
[07:44] For instance, hardware input 1 can be sent
[07:51] In our case, we are going to send hardware
[07:59] That way it can be mixed with the audio from
[08:04] else you have, and sent as one audio stream
[08:11] XSplit.
[08:13] So here we go.
[08:14] I'm going to send it over B1.
[08:16] I'm also going to send it over to B2.
[08:20] Remember, this is B1 and this is B2.
[08:25] They are identical.
[08:26] They are copies of each other.
[08:28] The reason that there's two is to give us
[08:31] B1 can be used to manage our headphones and
[08:38] And B2 can be connected to OBS or XSplit and
[08:48] recording, or more importantly, out to your
[08:54] Step 7, now we just need to add Discord to
[09:01] directly to your headphones or to your stream,
[09:07] that your setup is complete.
[09:09] This is where we are going to use the virtual
[09:14] We're going to setup Discord under hardware
[09:19] Hit select input device and select cable output.
[09:25] Notice that we're choosing the cable output
[09:30] output option under WDM.
[09:33] Next, open up Skype or Discord or whatever
[09:40] The setup for each of these is going to be
[09:44] Now navigate to the section of Discord with
[09:49] Find the section that says voice, and look
[09:56] Set your input device to the same device that
[10:01] In our case it's the Focusrite USB amplifier.
[10:06] Now we set the output device to match hardware
[10:11] VoiceMeeter Banana is looking for this new
[10:17] It's going to think that Discord is an actual
[10:21] In reality it's just a piece of software but
[10:26] Setting output device to cable input allows
[10:34] into VoiceMeeter, where it then can be mixed
[10:39] XSplit or OBS for your live streams or recordings,
[10:48] Now we just need to tell VoiceMeeter Banana
[10:53] In this case I'd like to have it in my headphones,
[10:58] That will be how I'll show you to set it up
[11:02] What we're going to do is come to hardware
[11:08] A1 is our headphones.
[11:10] Anything that's said in Discord is going to
[11:16] for us to hear, but our stream will be unable
[11:20] If you wanted the stream to hear it, what
[11:27] this audio and send it over to B2, which is
[11:33] to, and then the entire thing will be mixed
[11:37] Step 8, lastly I'm going to open up OBS and
[11:44] to connect these two together.
[11:46] The same will be similar for XSplit (coming
[11:49] Go to the settings button inside of OBS.
[11:53] Open up the audio section.
[11:55] You'll notice we have five audio inputs.
[11:58] Disable all of them.
[12:00] Because the audio is coming through on a single
[12:05] will set the primary microphone device to
[12:14] And not VoiceMeeter VAIO by mistake.
[12:17] Hit apply and then hit OK.
[12:20] Now you'll notice in OBS that as we're talking
[12:27] all the way over to VoiceMeeter Aux, mixing
[12:34] then being sent out all the way to OBS where
[12:40] When you change the volume level here you're
[12:45] microphone in OBS, you're changing the volume
[12:49] When it comes time to adjust how loud each
[12:55] meters.
[12:56] I would suggest to have your microphone always
[13:02] at max level.
[13:03] Set your Discord appropriately, you'll have
[13:08] and game audio.
[13:10] Keep in mind, inside of the game you are able
[13:15] can always do it there.
[13:16] You can change the volume of the sounds effects.
[13:20] Do some local recordings, see how everything
[13:26] have it how you like it.
[13:27] Maybe even have some friends come into your
[13:31] that mixed in as well, or see how loud that
[13:35] Get everything setup, and then once it's setup
[13:39] bit more tweaking from there, and that's is
[13:44] When it comes to getting this to work with
[13:50] Open up XSplit.
[13:51] Open the audio settings button.
[13:54] Set system sounds to none, that way it isn't
[14:00] Set your microphone to the same exact thing,
[14:05] Hit apply, hit OK.
[14:07] Now we have an identical setup.
[14:10] To go over it one last time before we end
[14:15] guys understand this a little bit more, whatever
[14:19] be listening to physically where you are at.
[14:23] Speakers headphones.
[14:24] Our microphone is set here.
[14:26] Our microphone can be sent to our headphones
[14:32] inputs, B1 and B2.
[14:34] Our Discord can be sent to our headphones,
[14:40] stream, turned on and off right here.
[14:43] This can be adjusted for volume without actually
[14:49] just inside of our headphones.
[14:52] These volume controls allow you to independently
[14:57] you are sending out.
[14:59] Lastly, if you ever mess with one of these
[15:03] zero, double clicking it will get it precisely
[15:08] Play around with this a little bit more.
[15:10] The possibilities to add other things to this
[15:14] You're able to add in compression and a noise
[15:20] You're even able to change how your microphone
[15:25] effects, and again double click here to get
[15:32] Hopefully this made this a little bit easier
[15:34] This turned out be kind of a long video, but
[15:38] start to finish you'll have a pretty good
[15:42] When it comes time to add in new things, such
[15:48] time figuring it out.
[15:50] Thanks for watching.
[15:51] If you like the video leave a thumbs up and
[15:56] Thanks and I'll catch you next time.
⚡ Saved you time reading this? Transcribe any YouTube video for free — no signup needed.