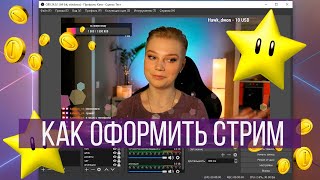

OBS Setup from Scratch: What You'll Learn
42sDirectly addresses beginner streamers' pain points with a clear promise of covering donations, chat, and notifications.
▶ Play Clip"Title accurately promises a complete OBS setup guide, and the video delivers exactly that."
This tutorial guides beginner streamers through setting up OBS Studio from scratch, covering camera configuration, chat integration, donation alerts, goal tracking, media sharing, and visual enhancements to create a professional streaming layout.
Katya Belovskaya introduces the tutorial, promising to cover how to set up OBS for streaming, including donations, chat display, subscription alerts, and more.
Add a new scene, set base and output resolution to 1920x1080, add a Video Capture Device, crop and rotate the image using Transform > Edit Transform, and lock the source.
Go to streamlabs.com, register, select Chat Box widget, customize appearance (e.g., Twitch style, show badges, animated emotes), copy the URL, add a Browser source in OBS, and paste the link.
Use donationalerts.com, register via Twitch or YouTube, go to Alert Widgets, create a new variation for donations (e.g., 5000+), customize image and sound, copy embed URL, add Browser source in OBS.
On donationalerts.com, go to Donation Goals, set a goal (e.g., 7500 rubles), copy embed URL, add Browser source in OBS. Optionally use the new v2 beta for colored flags or jar display.
On donationalerts.com, go to Media Requests, set minimum amount, volume, like percentage, and view count. Copy embed URL, add Browser source in OBS, and test.
Add custom animations (e.g., Media source with loop) and images (e.g., colored bar) to decorate the stream. Layer them appropriately (under donation alerts, over camera).
On donationalerts.com, go to In-Stream Stats, add a new widget for top donations (e.g., most expensive messages, running line style, top 5). Copy embed URL, add Browser source in OBS, crop as needed.
By following these steps, beginner streamers can set up a fully functional OBS layout with chat, donations, goals, media requests, and visual flair, enhancing viewer engagement and stream professionalism.
What is the recommended base and output resolution for OBS?
1920x1080
01:01
How do you crop a camera source in OBS?
Right-click the source, select Transform > Edit Transform, then adjust the crop values.
01:30
Which website is used for chat overlay widgets?
Streamlabs (streamlabs.com)
02:52
How do you add a chat overlay to OBS?
Copy the embed URL from Streamlabs Chat Box widget, then add a Browser source in OBS and paste the URL.
04:57
What is the purpose of the 'Group 1' setting in Donationalerts alerts?
Alerts must be added to Group 1; otherwise, paid subscriber alerts may not work.
06:54
How do you create a donation alert for amounts over 5000?
Create a new variation with condition 'Sum greater than or equal to 5000' and add it to Group 1.
07:31
What is the default alert duration in Donationalerts?
9 seconds
07:48
How do you add a donation goal widget to OBS?
On Donationalerts, create a goal, copy the embed URL, add a Browser source in OBS, and paste the URL.
09:41
What settings can be configured for Media Requests on Donationalerts?
Minimum amount, volume, minimum like percentage, and minimum view count.
12:03
How do you add a custom animation to OBS?
Add a Media source, select a local file, set it to loop, and adjust its position in the source list.
14:05
What widget type is used to display top donations?
In-Stream Stats widget on Donationalerts, configured as 'Most expensive messages' with running line display.
16:10
Complete OBS Setup for Beginners
Provides a comprehensive, step-by-step guide covering all essential elements for a new streamer.
Chat Overlay via Streamlabs
Demonstrates a free and customizable way to display chat on stream, a key feature for viewer interaction.
02:52Donation Alerts Integration
Shows how to set up donation alerts with custom variations, essential for monetization and engagement.
06:23Visual Enhancements with Custom Graphics
Illustrates how to add animations and images to personalize the stream, making it stand out.
13:25Top Donations Widget
Introduces a dynamic widget to display top donors, encouraging competition and donations.
16:10[00:02] today we will be registering for a B&C from scratch. I will tell you how to connect donations, how to withdraw donations to a stream, how to show a chat on the screen, how you conduct a donation collection, how to receive notifications about subscriptions and everything else a
[00:19] beginner streamer needs. I have already recorded a video on how to start streaming and what is needed for this. How I came from this image and this sound. This is approximately what
[00:31] my original picture looked like, not approximately, but exactly like this not approximately, but exactly like this image. I also installed a video light in the back and stretched wrapping paper over it. In general, the link will be here and there.
[00:44] Let's start first with connecting the camera. To begin, let's open UBEES. I specifically created a completely new, empty profile here and then add a scene.
[01:00] empty profile here and then add a scene. In the video settings, you can specify the basic resolution and output resolution. My default is 1920 x 1080. default is 1920 x 1080. Okay, next we need to display the camera. I
[01:14] press the plus sign by pressing the capture button on the variable in the camera and select the remote shooting window for my camera. Here it is. The window is ok, but there's a
[01:30] lot of unnecessary stuff underneath the program, so we right-click, click transform, change display, and start cutting off unnecessary parts at the top and display, and start cutting off unnecessary parts at the top and bottom.
[01:50] 's say it's 150, so I won't cut anything off at the bottom. I'll so I won't cut anything off at the bottom. I'll stretch the image now, so for now I'll click close, and I'll start stretching my images until it
[02:05] and I'll start stretching my images until it looks adequate. You can see that I have a square here, it's from my camera, so I removed it, and I always select it before streams. You see, my image is
[02:18] slightly tilted because my camera is at an angle, and I can't place it straight, so I right-click transform and change display there, and here I can rotate the image
[02:33] rotate the image as I need. After I rotated it, parts appeared that need to be slightly stretched or cropped. Now we click the lock so that our images don't change in any way. Call and
[02:49] without our knowledge. Next, we will set up a chat with you. Go to the set up a chat with you. Go to the stream website abs dot com, register. Sedan, I'm just for lags news, we find this button here, all widgets
[03:06] and click on the chat window, click on the chat window, so now everything will load. Here, by default, you are already presented with different chat designs, but if you want your own
[03:20] design, I make my own built-in design, then you can make your own. Here you can see how your chat will look. You can change it so that there are boxes like these, you can put something more
[03:36] pixelated, old school, but they remind me more of Minecraft, you can put chunks, well, in general, play around here. I'll leave Twitch, so I put Twitch and I'll leave it to show moderator badges, these are the
[03:51] things next to the nickname, show subscriber badges, show in general, everything, everything, everything, I have to show and turn on animated I have to show and turn on animated emoticons, it's better TT or Frankenfess, you can
[04:06] also put it, it won't be superfluous. Next, you can change the background color, I have it set to you can change the background color, I have it set to black, text color white, in principle, you can leave it as is and customize the settings for yourself. The main thing
[04:19] and customize the settings for yourself. The main thing now is to put the chat on the stream, you can set it to always show a message or so that they For example, they disappeared every five seconds, that is, a message appears, you see, and after five seconds it will appear, and then
[04:35] see, and after five seconds it will appear, and then it disappears. I have a check mark, it always shows the message. Now we need to copy this link. Click copy. The link is copied. Now we go to the b.s.
[04:51] Now we go to the b.s. Hello, let's go to PSV, our scene in our sources, we add a browser to the browser, enter the chat, call it whatever you want, this is just for our convenience, and here in the chat we
[05:07] our convenience, and here in the chat we paste the link to our chat, click okay, now chateau is not visible because no one writes anything to me. Now I will write in the chat, I am on the phone,
[05:21] will write in the chat, I am on the phone, open the chat and I can write, let's see how it looks, everything, the chat works great, hello, I am writing from the phone, okay, here it is, hello, the chat is working,
[05:37] you can change its size, you can change the font size, you can change the size of the window itself, to do this,
[06:08] make a black background behind, you can make a white background, you can put it on some white background, you can put it on some picture, as you want, and customize it. I configured it so that it is on a transparent background with white letters.
[06:21] Now we will connect donations and notifications. To do this, open the website " shin alerts". com, let's register here. I'll just log in. You can log in through Twitch and YouTube. If you register through [
[06:36] install], you can still log in through YouTube. I registered through YouTube and now I choose Twitch and it logs in without problems. We need to go
[06:48] here. I visited notification widgets. Here, by default, we already have several notifications. I configured some myself. Some were already by default. Be careful. Add the notification to group 1 because if you add
[07:05] group 1 because if you add another group 2, the notification for paid subscribers won't work. I had this happen. I don't know what to do with it. It turns out I needed group 1. Let's create a new variation. The
[07:18] create a new variation. The default variation. The name of the variation default variation. The name of the variation will be given to you for 5,000. Okay, we add it to the group. One status is enabled. The type of premises is paid
[07:32] messages. The variation conditions are the amount is greater than or equal variation conditions are the amount is greater than or equal to this. This means that you will receive this notification to this. This means that you will receive this notification if you deposit 5,000
[07:45] more. We can set it up with you. My notification duration is My notification duration is nine seconds. I don't touch the view. I put the first square where you have the gif, and below the signature, then the
[07:59] default image is this zombie, I'll leave it. The sound is also the default leave it. The sound is also the default text, you can also customize it, let's say we
[08:11] text, you can also customize it, let's say we save everything. You see, new variations have appeared. You can change it there as you want, for example, change it there as you want, for example, variations from 10 rubles to 100 rubles.
[08:25] I have an image of this moment of a coin, and in the sounds, I have my own custom sound. Let's call this. So, how do I embed this whole thing in the stream? See the link to show the
[08:39] embed link. We click here. The embed link is shown to us, we copy it, go to the crop section, click the plus sign again. Browser,
[08:51] crop section, click the plus sign again. Browser, here we will have a given, you can name the notifications, for example, and here we paste our link, which we just copied, click OK, and now we have a donation window. This is what it looks like.
[09:07] have a donation window. This is what it looks like. Let's make a test notification. how much you donated, and the message. which they attached, let's do a test, your
[09:23] which they attached, let's do a test, your notification, yes, yes, everything works great, too, click, you can lower it, you can make it smaller, you can make it bigger, whatever you want, click the lock,
[09:38] move on to the next one, everything is the same on the website before nationally RTS, we select fundraising, website before nationally RTS, we select fundraising, here we can set a goal and add a new one, for example, a title for a
[09:52] new one, for example, a title for a new branch, ok, our goal is to collect, the branch new branch, ok, our goal is to collect, the branch costs 7000, if we take this Czech one home, we start collecting from 0, well, let's say, let's put it there, let's
[10:06] put it here, so it's nicely visible there, there from 1000 rubles, let's say we already have thousands of rubles, we need seven and a half, you can set the date when the collection ends, I won't put it, I click save, we then
[10:21] see again, show the embed link, we click on this link, click copy, go to our cropping, add a browser here we will have a goal, the goal here we paste our link, click ok
[10:39] here we paste our link, click ok and we have a goal for a new branch, transform, we can change the display and, for example, crop from the top, let 's say, let's have three sings, that's a lot, 200 Let's
[10:54] crop the top and crop the bottom 200 so that it's not just a big square, you can change it as you want. I have this in the upper left corner, everything is on a new thread, now we've pinned it to
[11:13] ours on the elevator, I made new displays, click on fundraising v2 beta, and here they made these colored flags, we can choose any, we
[11:26] flags, we can choose any, we can even choose in the form of a can, so we click save changes, open the embed link, click copy, go to cropping,
[11:39] go to our target, right-click properties, and in the properties, we need to change this link to a new one. That's it. To change the size, you need to
[11:51] it. To change the size, you need to unlock the lock, click and we're already changing the size, you can move it so that it's here, we pin everything, let's move on. Now go to the media placement tab, this is when people can
[12:06] send you videos from YouTube for money. Here you can set the minimum amount, you can set the volume, the minimum percentage of likes, for example, if you only saw 10 percent likes and 90 percent dislikes, then
[12:22] this video will not reach you, and the minimum number of views is like this. Click save, click show embed link, copy this link, embed link, copy this link, go to cropping, hello, go
[12:34] to cropping, click the plus sign, add browser, write media and browser, write media and paste our media here, okay, I
[12:46] usually put this square somewhere like a dacha and then after our flag with dacha and then after our flag with goals, so let's do a test goals, so let's do a test placement,
[13:03] you can put it wherever it's convenient for you, that is, you can put it here, or here, you convenient for you, that is, you can put it here, or here, you can stretch it to half the screen as you want, I usually have it here,
[13:22] figured it out now let's do some decorations I'll talk to you through this window so that everything is immediately visible so that my stream is more lamp-like and stands out from the others I also decorate it with
[13:39] stands out from the others I also decorate it with pictures on the image itself, that is, in addition to the color scheme settings, you have a lot of that and everything else, you can also add something interesting on top of this video
[13:53] I click the plus sign, click the media source here I write animation animation I made this animation in advance by choosing
[14:08] local ones I put it on repeat, so I have a file here, click ok, and I have a file here, click ok, and
[14:20] these things appear on top of my video, over the image, and I need to move the animation to the very bottom, but above the camera, above the image camera, so that the animation is an area and com so that it animation is an area and com so that it is under this donation plate.
[14:33] If we move it under the camera, it will not be visible because the image from the camera is on top of us, we put it on the camera, but under everything else, here you can change everything, you can enlarge it, you can reduce it, you can mirror it, so as it is
[14:47] convenient for you, so you can customize it yourself, you can do everything customize it yourself, you can do everything manually, it’s not that hard to believe and not that difficult, it’s all done through tomorrow, the effect is through Premiere, so you
[15:00] can also download something ready-made in Dubré, so we leave it, so I also put an image here, the image will have a
[15:12] stripe, I drew such a stripe in Photoshop, and at the bottom it is pink and on the side it is black, click ok and
[15:24] you need to lower it a little, you see, that is, you can raise the intensity, so we also put the stripe on the animation so that it is under the iPod To make the stripe appear, I can lower it a little from the bottom like this. You see, here on
[15:42] the side, here on the side, there's a black stripe so the chat is better visible. But in principle, this black half can be removed a little and then the image can be stretched. In general, you can customize it as you like. I'm fixing all this by
[15:57] fixing this image. I ended up with this image. Let me Let me show you how to display top donations on the stream. We open this "shin alerts," click inside the "avaya statistics" stream, and here
[16:13] I have top donations. Let me add it again. Add a new widget. The name add it again. Add a new widget. The name will be the widget description. The background color is not necessary. You don't have to set the data display. Here you need to select
[16:26] what data you display. Here you can create any widget for yourself. We will the largest sender messages or the most
[16:38] expensive messages. Let me make the most expensive messages for repair. The time interval for all time. The display mode is a slider, a running line, a list. I will select a running line. The number of elements, well, let's set 5 top 5,
[16:56] let it be the widget speed. Adjust it too. Look at Adjust it too. Look at the alignment at the top. I put the text. The text can be customized. This is the text. Preview, let me set the color to white,
[17:11] save, click show, here it is, show the embed link, copy the link, go to BIOS, click
[17:23] link, go to BIOS, click browser, this will be our top option, ok, paste our link here, and here we have a slider running, you can make it smaller, like this, remember, you can right-click
[17:38] you can right-click transform and cut off the bottom, and 200, and even here, probably all 400 pixels, that's a bit too much, I'll much, I'll cut off 300 pixels so that our widget
[17:52] is a little smaller, actually, that's all, we've actually, that's all, we've set everything up, so use it. If you found it useful, if you liked this video, please like it,
[18:06] subscribe to me, I'll be posting more videos, write in the comments what you'd like me to show you, I'll definitely show you, I'm
[18:18] very pleased that I can tell you something, show you what I use and make it all convenient, in general, okay, thank you very much for watching this video to the end, with you again, Svetlovskaya, bye-bye [
[18:33] to the end, with you again, Svetlovskaya, bye-bye [
⚡ Saved you 0h 18m reading this? Transcribe any YouTube video for free — no signup needed.