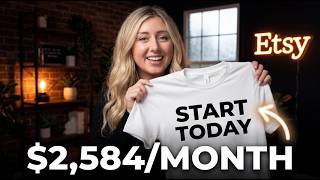

Start a T-Shirt Business with $30
45sThe opening hook promises a low-cost, no-inventory business model, which is highly appealing to aspiring entrepreneurs.
▶ Play Clip"Title accurately promises a low-cost, no-inventory t-shirt business tutorial, and the video delivers exactly that."
This video provides a step-by-step tutorial on starting an online t-shirt business using Printify and Etsy with no inventory and minimal startup costs. The creator demonstrates how to design a t-shirt, set up a listing, and publish it on Etsy, emphasizing the use of Printify for print-on-demand fulfillment.
You can start an online t-shirt business with no inventory and only $30-$50 to start, using print-on-demand.
Etsy is recommended as the best beginner platform for selling t-shirts.
A free module of the Printify and Demand Academy is available, covering how to set up an Etsy shop and Printify account.
Bella and Canvas 3001 is the number one selling t-shirt due to its unisex design and buttery soft feel. Comfort Colors 1717 is also a top performer.
Comfort Colors has a vintage feel with double stitching, while Bella and Canvas is softer. Comfort Colors is currently more popular.
Sweatshirts and hoodies offer higher profit margins than t-shirts, as t-shirts often compete with handmade sellers at lower prices.
Printify Premium reduces production costs; for Comfort Colors 1717, the price drops from $12.41 to $10.72.
Printify integrates multiple print providers (warehouses) that may have different materials and machines, but quality is consistent.
The creator manually selects providers like Swift POD and Monster Digital for consistency, but recommends Printify Choice for beginners.
Start by creating an artboard with exact dimensions for the print area. Use vectorization to edit colors of graphics.
Minimalist and newspaper-style fonts are trending. The example design is a 'mama EST 2026' butterfly design for maternity.
Designs should be over 200 DPI, ideally 300 DPI for high-quality print. SVG format is recommended.
Center the design from armpit to armpit to ensure it looks good when worn.
Mock-ups are product photos where you overlay your design. Purchase mock-ups for realistic presentation.
Printify auto-generates titles and tags; add keywords like pregnancy, maternity, mom, Mother's Day.
Use personalization to allow customers to input custom text (e.g., year) without stopping automatic production.
Aim for 30-40% profit margin. If offering free shipping, use 40% margin; otherwise 30%.
Set automatic renewal for two cycles (8 months). If no sale, let it expire manually to avoid extra fees.
By following this tutorial, you can create and publish a t-shirt listing on Etsy in one session. The creator challenges viewers to start their shop and create one listing to begin a new income stream.
What is the recommended beginner platform for selling t-shirts?
Etsy
00:13
What is the number one selling t-shirt mentioned in the video?
Bella and Canvas 3001
02:10
What is the main difference between Comfort Colors 1717 and Bella and Canvas 3001?
Comfort Colors has a vintage feel with double stitching; Bella and Canvas is softer.
03:44
How much does Printify Premium reduce the cost of Comfort Colors 1717?
From $12.41 to $10.72
05:26
What is Printify Choice?
A feature that automatically selects multiple print providers to fulfill orders quickly.
06:52
What DPI is recommended for high-quality print designs?
300 DPI
12:12
What is a mock-up image?
A product photo where you overlay your design to show how it will look.
15:30
What profit margin does the creator recommend if offering free shipping?
40%
20:27
How long is one renewal cycle on Etsy?
4 months
22:09
What is the creator's rule of thumb for how many renewal cycles to let a listing run?
Two renewal cycles (8 months)
22:09
Low-Cost Business Model
Highlights the accessibility of starting a t-shirt business with minimal investment.
Top Selling T-Shirt
Identifies the most popular t-shirt brand among Etsy sellers.
02:10Higher Profit Margins
Advises focusing on sweatshirts and hoodies for better profitability.
04:12Manual Provider Selection
Explains the trade-off between consistency and speed in print providers.
07:24Listing Renewal Strategy
Provides a practical rule for managing Etsy listings to avoid wasted fees.
22:09[00:00] What if I told you that you could start a online t-shirt business today without any inventory and only spending I would say about 30 to 50 dollars to start.
[00:13] Let's say that you decide on a platform. That's going to be number one step in this process to start this type of business model. So for me, my simple answer to a lot of people who have no experience in maybe selling online, I
[00:27] would recommend Etsy. I think it's the best beginner platform. If at this stage of the video, you're kind of just like, okay, I think I want to start Etsy and Printify and is there a tutorial on how to start? The answer is yes. I actually
[00:41] have a free module of my course, the Printify and Demand Academy. You do not need to pay for the course. You get the free first module for free, which is how to set up a Etsy and Printify and Demand business. I go over step-by-step how to
[00:56] set up your first Etsy shop and also how to set up a Printify account, how to publish a listing, and the essentials that I think every new Etsy and Printify and seller should know. So, we're going to get into how to create a t-shirt
[01:10] together and how to publish it to your Etsy shop. This is going to be that full A to Z walk-through tutorial. I'm going to show you literally everything and if you are on the fence about creating a listing or starting your Etsy business
[01:26] today, maybe watch this video in full and then decide to start. get that free part of my course down below and start your first Etsy listing with me today. So, let's get into creating a t-shirt listing together. For the start of this
[01:41] video, if you're new to the world of Printify and Demand and Printify, welcome because it is so amazing the catalog. There are over 1,000 product types and variants. So, one thing to note about Printify and one of the
[01:57] reasons why I've stuck with them for so long is because their catalog is always expanding. And if you are looking to try out Printify, check out the links down below because I do have a discount to help if you're just signing up. Now,
[02:10] when it comes to Printify today, we're going to be looking over their t-shirts together and what I want to note is that the number one selling t-shirt when I began my Etsy business was the Bella and Canvas 3001. Why is this t-shirt so
[02:29] renowned? Why is it such a winner to so many sellers on Etsy? One other reasons why is because one, it's unisex. Two, it has a buttery soft feel and it's just
[02:43] such a nice material. So, I've also sold hundreds of the Comfort Colors 1717 t-shirt. Now, one of my biggest sellers I will say has been the Gildan 18000
[02:56] crew neck sweatshirt, essentially my six-figure product. I'm recommending t-shirts that I sold in my time on Etsy and not just maybe like things I'd recommend randomly to anyone on this channel. To note, the Comfort Colors
[03:11] 1717 has been a top performer of mine in the past few years. Bella and Canvas five years ago was very popular, sold a lot. I know a lot of sellers who sold the Gildan 5000. I personally like Gildan 5000 if I'm selling more sports
[03:28] and team and event t-shirts. If I'm not doing that and I'm selling maybe more casual wear, I like Bella and Canvas 3001 or Comfort Colors 1717. So, what's the difference between Comfort Colors 1717 and Bella and Canvas 3001? So,
[03:44] Comfort Colors is more of a garment dyed t-shirt. It has that vintage feel and it has a double stitching around the collar. And this has been super popular in the past few years on Etsy and that's why in this video, I'm actually going to
[03:59] be doing a tutorial on the Comfort Colors rather than Bella and Canvas because it does have more popularity right now. On this channel, you'll notice I do recommend a lot of products outside of t-shirts. I typically
[04:12] recommend sweatshirts, hoodies, and higher profit margin items. One of the reasons why is just because typically when we are selling on Etsy, we are competing with handmade sellers and handmade sellers you'll notice sell
[04:27] their t-shirts for around $10 to $15. And if we look on Printify and most Printify and Demand companies, not just Printify, the cost of production fees
[04:40] to account for which is that your cost of production fees plus shipping is going to be about $10 to $15 for one t-shirt. If you're doing embroidery,
[04:54] that adds on typically I would say $2 to $5-ish dependent on what type of embroidery you're doing. You can really increase your production fees, which is essentially the cost of goods and the costs and expenses per product that you
[05:12] sell to a customer, right? Do I recommend a subscription service right away? I will say that if you don't have Printify Premium, it is going to cost more. So, you can save. I do also have a coupon code down below for your first
[05:26] order and a discount on that. But when it comes to direct-to-garment printing, as we can see if we were to do the Comfort Colors 1717, the price is 1241 without Printify Premium. With Printify Premium, the cost
[05:42] goes down to 1072. Now, if you choose manually on Printify, you can actually look at the Printify and Demand providers individually. So, what are Printify and Demand providers for anyone who is new with Printify? So, Printify
[05:56] and Demand providers are the warehouses and individual companies that are integrated within Printify. So, if you think about Printify, it's almost like
[06:08] the school system of print-on-demand companies underneath it, if this makes sense. So, you have like all of the teachers down below and they're printing in their own classrooms. And essentially every warehouse is that classroom and
[06:25] they all have different materials. So, they all have different maybe products that they offer, different printing machines. And a lot of the printing machines are similar. They're going to have similar thread colors, dimensions,
[06:38] ink colors, but they're not all the exact same. Now, I know for some people that might raise alarm of, okay, is the quality consistent then? Yes, it is very much consistent. However, if you're swapping print-on-demand providers,
[06:52] that's where it can get inconsistent, which Printify Choice, that's essentially the multiple print-on-demand providers. And what Printify Choice does customer and the highest quality so that you get the highest reviews in your
[07:09] business, right? There are pros and cons to this. So, pros is your customer gets item as quick as humanly possible. The con is again, you're going to get more inconsistent quality. So, what I have done, I manually select my
[07:24] print-on-demand providers. I have used Swift POD since the beginning of my shop, Monster Digital, Diamondhead T, Marco Fine Arts, Drive Fulfillment. I've used so many of them and they're all really great companies. If this is too
[07:38] much, if this too overwhelming, all I'm going to recommend is trying and starting with Printify Choice, which I'm going to do in this video today because that's going to be a little bit better for anyone who might feel overwhelmed.
[07:51] So, let's get into designing. So, when I'm starting a design, I start with creating a artboards. When I go to my Kittl homepage, I click on new project and it will populate with choosing a artboard size. This is our setup for our
[08:07] pixels for width versus height. So, I'm going to create from here and then this artboard is when we download and upload to Printify, it's going to be exact dimensions. So, we technically don't have to edit anything or adjust sizing
[08:22] unless it looks funky, which sometimes you'll see in these videos I do adjust sizing when I upload here because the print area and dimensions are very
[08:34] large. I'm going to just start with a butterfly cuz I think it's really fun and it's really cute. I'd say like around the summer. There are hundreds to thousands of graphics on Kittl. That's another pro of using Kittl and a design
[08:51] software that has all-in-one with its features and its tools. And a one really cool feature of Kittl, so with this butterfly, it does not allow me to change the colors of it. And what I can do is I can vectorize this butterfly.
[09:07] I'm going to do one color because I want to edit the colors of this graphic. So, if you ever find a graphic on Kittl that you can't edit the colors of, if you click vectorize one color, if it is one color, if it has two colors, you can do
[09:21] two colors. Sometimes you may have to play around with the um amount of colors dependent on the type of design. This won't look as pretty for every graphic, but for this one, I since it only has one color, I can vectorize it here. And
[09:37] then as you guys can see, I can like change the color to really any color we want now, which is really, really fun. So, I'm going to do like a turquoise color. I feel like turquoise has been a little bit more in recently, but um you
[09:52] know what? I take it back. I'm going to do a white because I have mostly darker colored items. So, I'm going to show how to create a white design over a black t-shirt. And typically, what I do is I start with my artboard color being a
[10:06] black, and then I start with my design being a white. So, I'm going to center this on the board. As you can see, to center the blue lines are going to cross. For this design, typically, if I'm adding like a phrase or wording,
[10:21] we're going to move this butterfly a little bit. I'm going to start with a text, and I'm just going to make this very simple and basic. So, I'm going to put mama. We are in a state of design trends being more minimalist. So, that's
[10:36] just something to like note going forward if you are selling on Etsy. And also to note, it we are seeing like a newspaper style. So, I'm going to look for a newspaper-like font today. And honestly, I will say fonts are where I
[10:55] stick in for far too long, and I don't I don't know if anyone else can relate to this. Let me know in our comment section, but I literally struggle for so long on fonts. So, today, I'm going to exercise self-control,
[11:10] and I'm going to do just a very simple design of mama EST 2026. I want to go into the realm of pregnancy reveal or maternity. And for
[11:27] that, I'm going to focus on making a design that's very simple, but it's still going to be Okay, this is something simple but unique. So, we're kind of hitting minimalism, but also kind of that cottagecore aesthetic feel
[11:41] again. So, what I'm doing here is I'm just aligning everything. I'm going to make this a lot larger because this is going to go directly on our t-shirt, and then we're going to publish this on Etsy. So, I am pretty
[11:56] happy with this. What I'm going to do here is I'm going to remove background. I'm going to optimize quality. So, typically on Printify for a design, you want your design over 200 DPI, and closer to 300 DPI for highest quality of
[12:12] print when you're doing a direct-to-garment or sublimation print or design, let's say. What I like to do is SVG. For Kittl, it says 72 DPI as example. What I will say is since we already have the dimensions exact for
[12:28] our design going onto Printify, I copied this exact print area size. You do not need to change this to 300. If you do, it will be a very large file. For this, typically, this is to increase our quality if we don't have the correct
[12:43] design dimensions. We do have correct design dimensions, so you don't need to worry about that. If you are concerned when you're following this video, just wanted to overexplain that. Again, overexplanation
[12:56] um for the purpose of just any further education for anyone who's new to all of this. So, when it comes to our design on t-shirt, I am going to select the pepper color because that has been a top performer personally for me. And I'm
[13:12] going to go ahead with this color. What I will say is I like to when I have a large and tall design like this, where mama's at the top, EST 2026 is at the
[13:25] bottom, I typically want to move that design to the top line of the box here because it's filling in so much space vertically. Typically, I like to have
[13:38] the middle of my design from armpit to armpit, basically on the t-shirt. One of the reasons why is I find this goes on the t-shirt nicer when a customer wears it. It prevents the top line of the design being too far down, and for
[13:53] women, too far down kind of looks kind of funny if you if you think about it a second more. And also, it [clears throat] just looks nicer and more uniform to have that top line to the top of that. So, this is essentially
[14:07] how I would create this design. Now, one thing I will note is looking at this design and kind of just auditing my design, I don't like the EST 2026. I feel like it looks very basic, and I'm going to change it to maybe a duo font.
[14:24] So, I'm going to look at script fonts with Kittl. And one thing I'm going to do here is I'm actually going to change the font. I have it currently on uppercase, so I'm going to change it to lowercase cuz it kind of looks funny.
[14:37] What I'm going to look for is just a font that I think will look good with this type of design.
[14:49] So, what I'm going to do, I actually really like this EST 2026. I'm going to do that. I'm going to do this. I feel like this kind of looks nice. I'm going
[15:01] to make this all kind of closer together just to fit that like feeling. Um and yeah, I like this. So, I'm going to download this, and I'm going to show you all something that's very magical. With mock-up images, one thing to note
[15:17] is typically when you are creating your designs, you will recommendation is to purchase a few because then you can go and overlay it
[15:30] and have really high-quality beautiful mock-ups. What a mock-up is for anyone who might be like, "I'm so lost. I have no idea what you're talking about, Heather." So, what a mock-up is, if I were to edit this, so a mock-up image is
[15:45] essentially where you overlay your design on a product photo. So, this example of Let's say this box here is my design. So, a mock-up image, it looks
[15:57] blank like this. It's a photo taken, and then you overlay your design. And the way that you create this is by clicking print area front. And then, what you can do is you can expand it to fit and look realistic to your design. So, right now
[16:15] it's at full transparency, so I'm going to take the opacity down a little bit here. And essentially, after I rotate a little bit because designs are never going to be exactly straight and perfect on a model mock-up unless, you know, it
[16:30] was set up that way. It typically isn't going to be that. As you can see, I have espresso as one of my colors. I'm actually going to select that here. What I recommend is selecting the colors also that you have on this. If I took off
[16:46] global fulfillment for this, I could do espresso. So, you can take off global fulfillment if you would like as well. I'm going to save this here. And then, once I save this and I publish this to my Etsy shop, I can actually pull those
[17:01] mock-ups right away from what I just showed you all. Now, you can do this all in also Kittl. So, there are mock-ups on Kittl that you can use as well, but I typically still recommend purchasing a photo mock-up, and then you can take
[17:16] that photo mock-up to Kittl, which I've shown in a past video that I'm going to link and also show how to create a Simply Listed template. So, you can do either, but this is just my current process, and this is actually what I do
[17:31] still to this day because I hate making mock-up images, and if anyone else has that problem, and that's what's keeping you from creating more listings on Etsy as a new business owner and seller, so just showing you my processes now, so
[17:46] later on, it's much faster for you as a seller on Etsy. And just as experienced seller, that's my best recommendation. So, Printify has a titles and tags now. Honestly, they are so good that I haven't been changing much. I I cannot
[18:01] description done for us. Mama butterfly EST 2026 t-shirt. So, for keywords for this design, I do want pregnancy, I want maternity, I want mom, mama, motherhood,
[18:16] Mother's Day because those are all tags that can get a customer to us. So, I do see Mother's Day already in here. Pregnancy, mom, mama. I am going to put maternity, and I'll put pregnant. We're kind of in the boho area, but it is
[18:32] still streetwear, so I'm going to put streetwear. Um you can fill out sustainability. I'm going to put birthday because it can be for a mom's birthday, perhaps. I know that kind of seems a little bit outside of the
[18:44] adjacent things, but I think that could be something. Um I'm going to remove rust brown, and I'm actually going to put comfort colors 1717 because a lot of customers actually look for comfort colors specifically. Underneath holiday,
[18:58] I will select Mother's Day. And then, I know we have a butterfly, but phrase and saying kind of It is a phrase and saying, so I'm just going to put that. So, one thing to note is Printify has personalization hub, so you can make
[19:12] this a personalization listing. For this example today, I'm kind of making this more simplified for any new Etsy seller. I do have other videos on personalization hub, but when you click personalization, this is going to stop a
[19:27] listing from being automatically produced or printed, packed, and shipped for your customer. So, I do recommend this in this example, and I would put "Please indicate the year you'd like for EST." And then, I will just have that as
[19:47] my year to put as the personalization box, just in case someone wants 2027 or maybe this is later on years that your listing is doing well. 2 years down the line it might be 2028, right? So, I'm going to assign a new shipping profile.
[20:02] I'm going to click economy and then for our pricing, pricing I typically want around over 30% profit margin. I personally like 40% profit margin, so
[20:14] margin or I do profit by the number, so you can add it all. So, what I did is I actually select it all, add it price, add it profit margin, and then I did
[20:27] 40%. You may notice that the price is 2622 and that might seem high. However, one thing I want to note is I usually have a sale running and if you offer free shipping, I would recommend having 40%
[20:42] profit margin. Now, if you aren't offering free shipping, I would lower it to 30%. So, what I'm going to do is I'm going to hide and store for this listing because I'm going to push through my mock-ups and then I'll publish on Etsy.
[20:56] So, I'm going to publish everything as what I have here, everything check marked down below, and only show variants that are in stock on Simply Listed. As you can see, the shirt that I just published from Printify is showing
[21:11] up. So, this is my template on Simply Listed and the mock-ups I purchased on Watermelon Mocks and essentially I'm going to create mock-up by just clicking that little paperclip. It does take a moment for Simply Listed to populate all
[21:25] of my designs overlaid on mock-up images, but in just a few moments here it should come up and then I can publish to my shop. So, as you can see, oh my gosh, I love when it does this. This is so beautiful. On the listing on my Etsy
[21:40] shop in the giraffe area, that's where it's going to populate from Printify and from Simply Listed with the new mock-ups. I am going to only adjust one thing from our back end, which is the mock-up image. I'm actually going to
[21:54] zoom in quite a bit because I want that design in my customer's face when they're on scrolls. What I'm going to recommend to everyone is to do automatic renewal. I typically have a rule of thumb of two renewal cycles before I
[22:09] expire a listing if it doesn't sell within those two renewal cycles. What a renewal cycle is is 4 months you're paying that 20 cents for that listing to stay on the Etsy platform and be shown to the user base on Etsy and the
[22:24] customer base on Etsy. If you don't have automatic renewal, at the end of the 4 months, that listing expires. So, I like to do automatic for, again, two renewal cycles. There is not a way to get notified that something's going to be
[22:38] expiring soon. I'll send myself an email reminder in 8 months. I know this sounds really weird, but just to tell myself like, "Hey, I made a batch of listings in maybe let's say April of 2026 and now I want to check on those listings 8
[22:54] months later. All you should know at this stage is set it to automatic. Two cycles is what I recommend, so that's about 8 months on Etsy. If it doesn't sell, let it manually expire because you already paid the 20 cents. So, I don't
[23:07] recommend just deactivating in full. I do recommend waiting and letting them self-deactivate by the manual renewal setting. So, I'm going to publish this listing and then we're going to look at it in full on Etsy. So, this is the
[23:21] final Etsy listing and this is essentially how you can do a listing in full in literally one session with me. And let's say you watched this and you haven't started an Etsy shop yet, I want to challenge you at the end of this
[23:35] video to create one listing, start your shop today if you really want to try this and create a new income stream for yourself. This is literally A to Z what I do on a daily basis in my own Etsy business. If you haven't already, don't
[23:51] forget to subscribe and watch this video next because it's going to help you in getting some more sales in your new Etsy shop and in the listing you may have created alongside me during this video. I'll see you guys in the next video
[24:06] here. Bye. >> [music] >> Hey.
⚡ Saved you 0h 24m reading this? Transcribe any YouTube video for free — no signup needed.
