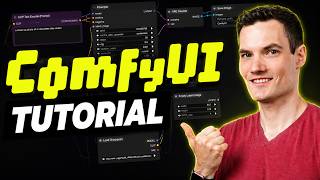

What is ComfyUI?
45sClear, concise intro to a trending AI tool, perfect for hooking viewers interested in AI content creation.
▶ Play Clip"Delivers a solid, step-by-step tutorial that matches the title's promise, though it could be slightly more concise."
This video is a beginner-friendly tutorial on ComfyUI, a free and open-source tool for creating AI-generated content using a visual node-based interface. The host, Kevin, guides viewers through installing ComfyUI, setting up an image model, generating a first AI image, and understanding how workflows and nodes function to enable custom projects.
ComfyUI is a popular free, open-source tool for generating images, videos, and more on your own computer using a visual node-based interface.
Download the desktop version from the official website (link in description). It's free, runs locally, and gives full access to models and workflows. The cloud version is an option for those without powerful hardware, but it costs money.
After installation, launch ComfyUI, select 'local' for local execution, agree to terms, name the installation (e.g., 'ComfyUI'), and continue with default settings.
The main screen shows categories for images, videos, audio, 3D models, and large language models. Start with the 'text to image' template.
ComfyUI indicates missing required models. Click 'show missing models' to see what's needed, then 'download all' to install them.
Use the mouse wheel to zoom, middle mouse button to pan, and the mini-map in the bottom right to navigate larger workflows.
The workflow is divided into sections: loading the model, entering a positive prompt, entering a negative prompt, configuring image size, and sampling settings.
Sampling settings are where the image is generated. Beginners should leave defaults, but the 'seed' is important: changing it generates different variations of the same prompt.
Click 'Run' to generate the image, which is automatically saved. Access all generated assets via the 'Assets' button or press 'A'.
Change the prompt to create different images (e.g., a double chocolate chip cookie) and adjust image size (e.g., width to 768) for different aspect ratios.
Workflows are built from nodes, each performing a specific task. Data flows between nodes via connections, and you can extend workflows by adding new nodes.
Right-click to add a node, select 'image upscaling', set the scale factor (e.g., 2X), and connect it between the decode and save nodes to enhance the image.
Right-click on the workflow tab to save it with a custom name. Workflows can be shared, and the community provides many templates to start from.
ComfyUI includes templates for text-to-image, image-to-video, image editing, image-to-3D, and text-to-song. Explore these to learn and customize.
ComfyUI empowers users to create AI content by connecting nodes in workflows. With the basics covered, viewers are encouraged to experiment with templates and build their own workflows.
What is ComfyUI?
A free, open-source tool for creating AI-generated content using a visual node-based interface.
What are the two versions of ComfyUI mentioned?
Desktop (free, runs locally) and Cloud (costs money, good for less powerful computers).
00:29
How do you navigate the ComfyUI canvas?
Use the mouse wheel to zoom, middle mouse button to pan, and the mini-map in the bottom right for larger workflows.
02:39
What is the purpose of the negative prompt?
It tells the model what to avoid in the generated image.
03:11
What does the seed setting do?
Changing the seed generates different variations of the same image while using the same prompt.
03:55
How do you view all generated images?
Click the 'Assets' button on the left or press the 'A' key.
04:11
What is a node in ComfyUI?
A node performs a specific task, and workflows are built by connecting nodes together.
05:40
How do you add a node to a workflow?
Right-click on the canvas, select 'Add Node', and choose from the menu of hundreds of nodes.
06:14
How do you save a workflow?
Right-click on the workflow tab, select 'Save', enter a file name, and confirm.
07:42
What are some starter templates available in ComfyUI?
Text-to-image, image-to-video, image editing, image-to-3D, and text-to-song.
08:23
ComfyUI as a versatile tool
Establishes ComfyUI's broad capabilities beyond just image generation, setting the stage for the tutorial.
Seed for variations
Explains a key parameter that allows users to generate different results from the same prompt, a fundamental concept in AI generation.
03:40Node-based workflow concept
Highlights the core architectural principle of ComfyUI, enabling flexibility and customization.
05:40Extending workflows with nodes
Demonstrates how easily workflows can be enhanced, showing the power of the node system.
06:14Starter templates for exploration
Encourages users to leverage community templates, accelerating learning and creativity.
08:23[00:00] In this video, I’ll show you how to use ComfyUI step by step. ComfyUI is one of the most popular free and open-source tools for creating AI-generated content on your own computer. People
[00:12] use it to generate images, create videos, enhance photos, and build powerful AI workflows using a visual node-based interface. In this tutorial, we'll start from the very beginning. We'll install ComfyUI, set up an image model, generate our first AI image, and then learn how workflows and nodes
[00:29] work so you can start building your own projects. I'm Kevin, and let's dive in. To get started, head to the following website. You'll find a link right here at the bottom of the screen. Here on the homepage, you'll notice that ComfyUI offers both a desktop version and cloud version. For this
[00:46] tutorial, we'll use the desktop version since it's free to use, runs directly on your own computer, and gives you full access to your models and workflows. The cloud version can be a good option if you don't have a powerful computer, or maybe you'd rather not manage the hardware yourself,
[01:01] although there is a cost associated with it. Let's click on download and then download again. Once the installer finishes downloading, run through the install process. After installation completes,
[01:13] launch ComfyUI, and you'll see the following screen. For this tutorial, we'll select local, so everything runs directly on your own computer. Down below, I'll agree to the terms, and then let's click on continue. Next, let's give this installation a name. I'll set mine
[01:27] to ComfyUI. For most people, you can leave the remaining settings as is, and then down below, let's click on continue. Once ComfyUI launches, you'll land on the main getting started screen. Now, right away, you can see that ComfyUI supports much more than just the image generation. Over
[01:42] here on the left-hand side, you'll find categories for images. Here we have videos, audio, 3D models, large language models, and more. To help you get up and running quickly, let's go back to the
[01:56] getting started section, and let's start with text to image. I'll click here. ComfyUI now loads a complete image generation workflow. Now, notice in the top right-hand corner that ComfyUI is telling us that we're missing a required model. Think of ComfyUI as the application that allows us to build
[02:13] and run AI workflows. The model itself is what actually creates the image. To see what we need, let's click on show missing models. Right here, ComfyUI shows us the exact model required by this
[02:26] workflow. To install the model, right over here, let's click on download all. Right up on top, we can now check on the download progress. Now that the model has finished downloading, let's generate our first image. Let's take a quick look at the workflow. You can zoom in
[02:39] and out using your mouse wheel, and you can press the middle mouse button to pan around the canvas. You can also use the mini map in the bottom right-hand corner to quickly navigate around larger workflows. Now, notice that this workflow is divided into several different sections. Right
[02:56] over here, we start by loading the model that we just downloaded. Next, we enter a prompt, and this describes the image that we'd like to create. Now, I want to generate an image of a chocolate chip cookie, so right over here, I'll enter in the following prompt. Now,
[03:11] below that we have the negative prompt. This tells the model what we'd like to avoid in the generated image. So, over here, I'll enter in my text. If you want to follow along, you'll find these same exact prompts in the description of this video. Next, we can configure
[03:25] the image size. Here we could set the width, we could also set the height, and also the number of images we'd like to generate. Now I'll leave the default settings in place since they work well with this model. Next, let's go up and we'll look at the sampling section. This is where ComfyUI
[03:40] generates the image. You'll notice several different settings here. Now, as a beginner, I recommend leaving these at their default values. Now there is one setting worth knowing, and that's the seed. You'll find that right here at the top of the list. Changing the seed allows
[03:55] you to generate different variations of the same image all while using the same prompt. For now, let's leave all of these settings as is. Then, in the top right-hand corner, let's now click on Run. And there we have our first AI generated image. It also automatically saved the image to your
[04:11] computer. Now, you might be wondering how do you view all of your generated images or assets? Over on the left-hand side, we have this button for assets. When I hover over, you'll also notice that there is an associated shortcut key. You can press the letter A. When I click on that, here I can see
[04:26] all the different images that I've generated. If I right click, over here, I could save it elsewhere on my computer or down below, I could also delete the asset if I'd like. Right above, I'll close this view. Now that we've successfully generated an image, let's take a closer look at
[04:40] how this workflow works and how we could modify it to produce a different result. Now, right now we're generating just a chocolate chip cookie. Let's see what happens when we make a few changes. So right over here, we have the prompt field, and let's update this text to instead create,
[04:55] let's say, a double chocolate chip cookie with a melted chocolate center. That sounds so good. Now, if we scroll down just a little bit, here we have the image size. And previously, we went with a 512 pixel by 512 pixel image, and that produced a square image. But let's actually
[05:11] try a different aspect ratio. So right over here, let's change the width to, let's say 768. I'll enter in that value. And then right up on top, let's try running this. I'll click here.
[05:24] And there we have a double chocolate chip cookie, and now it's also a wider image. Now that we've generated a few different images, let's take a closer look at how this workflow is organized. One of the things that makes ComfyUI unique is that the workflows are built using nodes.
[05:40] Each node performs a specific task. Here's an example. We have our first node, and that loads the checkpoint or the model that we downloaded. And together, all of these different nodes create the workflow that generates this final image. Now, as you look across this canvas, notice how all of
[05:58] these different nodes are connected together with all of these different lines. Data flows from one node to the next until we eventually arrive at the finished image. Now, the nice thing about this approach is that we're not limited to the workflow exactly as it exists today. We could
[06:14] easily extend it by adding new nodes. I'll zoom in right here on this last stage. To add a node, the option to add a node. I'll click on that, and that opens up a menu with hundreds of different
[06:30] nodes that you can use to customize your workflow. Now, I'd like to add an image upscaling node. So here within the image at the very top of the list, we have the option for upscaling. And right here, we can upscale the image by. I'll click on that. Right over here, it's now added a new upscaling
[06:45] node. And let's try upscaling the image, let's say by 2X. Here I'll enter 2 and click on OK. However, right now, this node is not connected to the overall workflow. So over here, let's take the
[06:57] output of the decoding node, and here I'll feed it into the upscaling step. And over here, I'll take the output of the upscale step, and let's feed that into the save image step. That way, we'll upscale the image before we end up saving it. Now, let's run the workflow again. In the top
[07:12] right, I'll click on run. And right there, you can see that we've now enhanced the image simply by adding a single node to the workflow. Right down below, you'll now see the new dimensions of this image. We've effectively upscaled it by 2. This is the core idea behind ComfyUI. By
[07:27] combining and connecting different nodes, you can build workflows that generate images, edit photos, create videos, process audio, and much more. Now that we've customized this workflow, let's save it so we can use it again later. Right up on top, you'll see all of your different workflows.
[07:42] I'll right click on this one, and right here, we see the option to save. I'll click on this. Right here, we can enter in a file name. I'll call mine the upscale image generator, and down below, let's click on confirm. To get back to workflow, over on the left-hand side, click on workflows,
[07:56] and there you can see the workflow that we just saved. You can also share workflows with other people, which is one of the reasons ComfyUI has such a large and active community. Instead of building everything from scratch, you can start from an existing workflow and modify to fit your
[08:11] exact needs. Here, I'll close out of workflows. Before we wrap up, let's take one more look at One of the things I like about ComfyUI is that you have a large collection of starter
[08:23] templates to get you up and running quickly. Now, in addition to text to image, which we just used, here you'll find other fun ones, like image to video. Here, you have image editing. Here we have image to video again, image to 3D. You even have text to song, so lots of different options
[08:38] and fun things that you can play with. Now, I recommend clicking in, downloading the models, and then exploring how they're built. Every workflow here is made up of nodes, and you could use these templates as a starting point and then customize them to fit your own needs. And that's how to use
[08:53] ComfyUI. Now that you understand the basics, go ahead and experiment with the built-in templates and start building workflows of your own. If you'd like to learn more about AI tools and how to get the most out of them, consider subscribing. Thanks for watching, and I'll see you in the next video.




⚡ Saved you 0h 09m reading this? Transcribe any YouTube video for free — no signup needed.