
Free AI Upscaling to 4K?
45sPromises a free solution to a costly problem, sparking curiosity.
▶ Play Clip"Title accurately promises a free AI upscaler tutorial; video delivers exactly that."
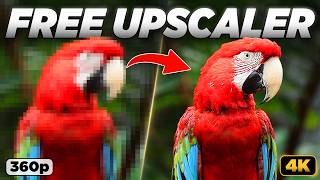
This tutorial demonstrates how to use SeedVR 2.5, a free AI model, to upscale low-resolution videos to 1080p or 4K within ComfyUI. It covers installation, model selection, settings, and compares results with paid tools like Topaz Video.
The video presents a free method using SeedVR 2.5 to upscale low-res videos to 1080p or 4K.
Hardware impacts speed; GPUs with 8GB VRAM can work but results vary. Online cloud options are available for better performance.
Download the SeedVR workflow JSON from GitHub, drag into ComfyUI, and install missing nodes via the manager.
OpenArt.ai centralizes AI models for video, image, and voiceover generation; offers a discount code.
Import low-quality video; choose SeedVR2 model variant: 7B for quality (requires >24GB VRAM), 3B for lower VRAM. Avoid 'sharp' models for natural results.
Default 1080p recommended; 4K may need high VRAM. Batch size should match total frames for temporal consistency.
Click run; first time downloads models. Preview results in the output node.
SeedVR performs well on faces, low-light, and black-and-white footage. Compared to Topaz Video (paid), SeedVR is free but less intuitive.
SeedVR 2.5 is a powerful free alternative for video upscaling, especially when used within ComfyUI, though paid tools like Topaz Video offer more polish and speed.
What is the minimum VRAM recommended to use SeedVR?
8 GB of VRAM.
0:52
Which SeedVR model variant produces better quality but requires more VRAM?
The 7B models.
4:18
What is the default target resolution in the SeedVR workflow?
1080p.
5:46
Why should batch size ideally match the total number of frames?
To achieve better quality and temporal consistency, reducing flickering.
6:21
What is the main advantage of using Topaz Video AI over SeedVR?
Topaz is more intuitive, faster, and produces more natural-looking results.
9:10
What is the cost of Topaz Video AI subscription mentioned?
Starting at $25 per month.
9:28
Model selection trade-off
Explains the quality vs. VRAM trade-off between 7B and 3B models, a key decision point.
4:18Batch size importance
Highlights that matching batch size to frame count improves temporal consistency, a critical detail for quality.
6:21SeedVR quality assessment
Demonstrates SeedVR's ability to preserve soft backgrounds and handle low-light footage, showing its strength.
8:04Comparison with Topaz Video
Provides a balanced comparison between free and paid tools, helping users decide based on needs.
9:10[00:00] In today's video, I'm going to show you
[00:02] a completely free way to use AI for
[00:04] upscaling low-resolution videos, old
[00:07] clips, and movies, turning them into
[00:10] 1080p or even 4K videos with sharp
[00:13] details and high-quality results. Now,
[00:15] it's worth mentioning that there are
[00:17] already plenty of other video upscaling
[00:19] tools [music] out there. However, most
[00:21] of those tools come at a high price or
[00:23] require subscription. So, instead, we're
[00:26] going to use a completely free upscaling
[00:28] model called SeedVR 2.5. I'm going to
[00:31] show you exactly how to use it, test its
[00:33] output quality and upscaling speed, and
[00:35] see how it compares to other paid tools
[00:37] [music] in the market. Before getting
[00:39] started, it's worth mentioning that the
[00:41] hardware you use will directly impact
[00:44] upscaling speed and your ability to
[00:46] tweak certain [music] settings. I will
[00:48] put my own specs on screen for your
[00:50] reference. Keep in mind that you can
[00:52] still use SeedVR on GPUs with as little
[00:55] as 8 GB of VRAM, but results will vary,
[00:58] and I will explain this in more detail
[01:00] later in the process. Now, if you do not
[01:03] meet the minimum hardware requirements,
[01:05] or if you want to use SeedVR at its full
[01:08] potential, you can run it entirely
[01:10] online. There are dedicated websites
[01:12] that let you run ComfyUI in the cloud
[01:15] with access to high-end GPUs at
[01:17] different hourly rates, and I will leave
[01:20] direct links to those websites in the
[01:22] description box. With those options, you
[01:24] can skip all the installation steps, and
[01:26] you can still follow the exact same
[01:27] process as running ComfyUI locally. And
[01:30] if you want to run the workflow on your
[01:32] computer, you will first need to install
[01:34] ComfyUI. If you haven't done that yet,
[01:36] make sure you watch this video first. It
[01:38] will take about 5 minutes, then you can
[01:40] come back and continue this tutorial.
[01:42] Now that you have ComfyUI installed, go
[01:44] to the GitHub page that I linked in the
[01:46] description and download the SeedVR
[01:49] video upscaling workflow. Make sure you
[01:51] get the JSON file, then drag and drop it
[01:54] into ComfyUI to open it. As soon as you
[01:57] open the workflow, you will likely see a
[01:59] pop-up window telling you that you're
[02:01] missing some [music] required nodes. To
[02:02] fix this, open the manager, go to all
[02:05] extensions, and search [music] for this
[02:07] node, then click install. It only takes
[02:10] a couple of seconds, and once it's done,
[02:12] click apply changes. Wait until it says
[02:15] extensions successfully installed, then
[02:18] close the manager, and the workflow
[02:20] should now be ready to go. But before we
[02:22] go through the settings, I want to share
[02:24] something with you. If you are someone
[02:25] who creates AI content, [music]
[02:27] you probably already know how scattered
[02:29] everything can get. Different websites,
[02:31] new model drops, it's all over the
[02:33] internet, and you're just sitting there
[02:34] trying to figure out where to even
[02:36] [music] use it. And that's exactly why I
[02:38] want to tell you about today's sponsor,
[02:40] openart.ai.
[02:42] It brings everything into one place. You
[02:44] get access to powerful video models like
[02:46] One, Kling, LTX, and everything runs
[02:50] online, so your GPU can finally relax.
[02:52] I've been using it a lot over the past
[02:54] couple of years, especially for
[02:56] generating images and [music] thumbnail
[02:58] ideas using models like Flocks or Nano
[03:00] Banana Pro. And using OpenArt, you don't
[03:03] burn through a ton of credits, which is
[03:04] huge when you're just trying things out.
[03:07] You can also use OpenArt to replace
[03:09] characters in videos, generate
[03:11] voiceovers, and creating accurate lip
[03:13] sync. Wow. It's honestly become a solid
[03:16] part of my workflow, and [music] I
[03:17] definitely recommend trying it out. I
[03:20] will leave a link in the description,
[03:21] and make sure you use my code [music]
[03:23] MDMZ20 to get 20% off when you choose
[03:26] any monthly subscription. And now, let's
[03:28] get back to the tutorial. First, let's
[03:31] go to the load video node and click here
[03:34] to import the low-quality video you want
[03:36] to upscale. For this demo, I'm going to
[03:38] use [music] this clip of a parrot. I
[03:40] specifically chose this to see how well
[03:43] SeedVR recovers feather details and
[03:45] whether it keeps the blurred background
[03:47] [music] soft or tries to sharpen it. The
[03:49] resolution of this video is 360p, which
[03:52] is pretty low and pixelated, as you can
[03:55] see, but you can still use the same
[03:57] workflow to upscale even
[03:59] lower-resolution videos. Here, you can
[04:01] choose from a list of model variations.
[04:04] They are all SeedVR2 models, but they
[04:06] come in different sizes, they have
[04:08] different hardware requirements, and
[04:10] they are suited to slightly different
[04:11] use cases. So, yes, your choice here
[04:14] matters, [music] and it will affect
[04:15] generation speed and even quality. But
[04:18] to simplify things, the 7B models
[04:21] generally produce better quality, but
[04:23] they also require more VRAM. I recommend
[04:25] using them only if you have more than 24
[04:28] GB of VRAM. The 3B models, however,
[04:32] should work well on lower VRAM GPUs such
[04:35] as 8 GB or 12 GB. Quality might be
[04:38] affected. In some cases, you will notice
[04:40] a big difference. Other times, the
[04:42] results will be very close to what you
[04:44] get with 7B models. Still, use the 3B
[04:47] models if you have low VRAM or if you
[04:50] want to upscale long videos. You will
[04:52] also notice that some models are labeled
[04:54] sharp. I do not recommend using these,
[04:56] since they tend to produce less
[04:58] natural-looking results. That said, you
[05:01] can use them if you want extra crisp
[05:03] edges and more detail, and they can be a
[05:05] good fit for cartoons or animated
[05:07] videos. Choosing the right model depends
[05:09] on many factors, so I recommend
[05:11] experimenting based on your input and
[05:13] computer specs. If a model is too heavy
[05:15] for your machine, you will get an
[05:17] out-of-memory error when running the
[05:19] workflow. That said, if you want the
[05:21] best results, go with the 7B FP16
[05:24] version. It is the most demanding model
[05:26] of the bunch, but if your machine can
[05:28] handle it, it's the one I recommend.
[05:30] Personally, I found that it hits its
[05:32] limit on my machine when videos exceed
[05:35] 10 seconds. So, for longer videos, I
[05:37] switched to the FP8 version. Now, let's
[05:40] move over to this node. [music] Here,
[05:42] you can choose the target resolution you
[05:44] want to upscale your video to. By
[05:46] default, it is set to 1080p, and I
[05:49] recommend sticking with this resolution
[05:51] for a good balance of quality and
[05:53] upscaling speed. Personally, I did not
[05:55] have any issues upscaling to 1080p using
[05:58] the 7B models. I did try pushing it to
[06:01] 4K, and unfortunately, that did not work
[06:04] on my machine, but it worked just fine
[06:07] with the same video on RunComfy using a
[06:10] GPU with 48 GB of VRAM. There are still
[06:13] a bunch of other settings here that
[06:15] directly affect output quality and speed
[06:17] that you might want to adjust based on
[06:19] your input and needs. For example,
[06:21] [music] the batch size should ideally
[06:24] match the total number of frames in your
[06:26] video. Not only will you achieve better
[06:28] quality, but you will also get better
[06:31] temporal consistency. With a small batch
[06:33] size, you might notice some flickering
[06:36] in the upscaled video. However, a bigger
[06:38] batch size requires more VRAM, so there
[06:41] is a limit to how high you can push it.
[06:43] This is where understanding the settings
[06:45] and experimenting comes in. You can read
[06:47] more about what each of these inputs
[06:49] does by simply hovering over it. For
[06:52] simple upscaling tasks, you do not need
[06:54] to worry too much about the other
[06:56] settings. But let me know if you would
[06:58] like me to make another video where I
[06:59] dive deeper into the settings, and I
[07:01] will also link some useful resources in
[07:04] the description box. Okay, at this
[07:06] stage, we can go ahead and click run to
[07:08] start upscaling the video. Keep in mind
[07:10] that if you're running this for the
[07:12] first time, the workflow will use some
[07:14] time to download the models before it
[07:16] starts processing. [music] And real
[07:18] quick, if you're finding this tutorial
[07:19] useful so far, please support me by
[07:21] liking the video and subscribing to the
[07:23] channel. I make a lot of ComfyUI and AI
[07:26] tutorials that you don't want to miss.
[07:28] Once processing is done, you can preview
[07:30] the upscaled video in this node, and as
[07:32] you can see, SeedVR did an impressive
[07:35] job enhancing our low-quality video and
[07:38] restoring detail. I also like that it
[07:40] retained the softness of the blurred
[07:42] background. Some upscaling models overdo
[07:44] it and try to sharpen out-of-focus
[07:47] background, which would look terrible.
[07:49] You might argue that it looks a little
[07:51] over-sharpened and unnatural, especially
[07:53] around the parrot's eye, as you can see,
[07:56] but let's not forget that the input
[07:57] quality was very low, which makes the
[08:00] upscaling process more challenging than
[08:02] working with a medium-quality video.
[08:04] That being said, I'm confident this is
[08:07] one of the best, if not the best,
[08:09] open-source [music]
[08:10] upscaling model out there. During my
[08:12] tests, it performed really well with
[08:15] human faces. It has preserved the
[08:17] original colors and contrast. I also
[08:19] found it very useful for enhancing
[08:22] low-light footage like this, as well as
[08:24] black and white videos, which is truly
[08:26] impressive. [music]
[08:27] And by the way, if you want to learn how
[08:28] to colorize black and white videos using
[08:31] AI, check this video out. Another great
[08:33] use case of SeedVR is AI-generated
[08:36] videos. You can generate videos at a
[08:38] lower resolution to save time and money,
[08:41] then run them through SeedVR to upscale
[08:43] them for free. Now, I also tried to see
[08:46] how SeedVR performs against the video
[08:49] upscaling giant, Topaz [music] Video.
[08:52] This has always been my favorite
[08:53] upscaling tool, and I use it all the
[08:56] time. It's fast, works really well on
[08:58] all sorts of footage, and gives you
[09:00] access to a bunch of upscaling models,
[09:02] both local and on the cloud. It also has
[09:05] frame interpolation, advanced exporting
[09:07] settings, and much more. Personally, I
[09:10] find Topaz much more intuitive. The UI
[09:13] makes the process easy and simple. You
[09:15] can preview short segments before
[09:17] upscaling, and with the right
[09:18] combination of settings, I'm able to get
[09:20] more natural-looking results. However,
[09:23] when you put the price into perspective,
[09:25] things change. Topaz Video requires a
[09:28] subscription, and prices start at $25 a
[09:31] month. For a tool that's absolutely
[09:34] free, SeedVR stands really strong.
[09:36] Personally, Topaz Video has become a
[09:38] crucial part of my workflow, and I will
[09:40] keep using it, but I also like having
[09:42] the option of using SeedVR inside
[09:45] ComfyUI. And for a free tool, I find it
[09:47] very capable. [music] Let me know what
[09:48] you think in the comments below. Is
[09:50] SeedVR good enough for what you need? I
[09:53] would love to hear your thoughts. Stay
[09:55] creative, and I'll catch you in the next
[09:57] video. Peace.
[09:59] >> [music]
⚡ Saved you 0h 10m reading this? Transcribe any YouTube video for free — no signup needed.