
Email Marketing ROI is INSANE
45sHigh ROI claim ($30-40 per $1 spent) is controversial and attention-grabbing, perfect for hooking viewers.
▶ Play Clip"The title accurately promises a full Omnisend tutorial, and the video delivers exactly that."
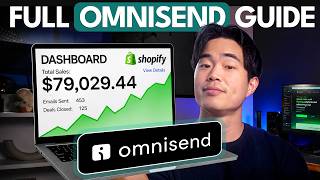
This tutorial provides a comprehensive walkthrough of using Omnisend for email marketing, covering account setup, campaign creation, automation workflows, form building, audience segmentation, and AI integration via Claude. The presenter emphasizes email's high ROI and the value of owning your audience.
Email offers one of the highest ROIs (30-40x) and you own your list, unlike social media followers.
Omnisend is an email and SMS marketing platform ideal for e-commerce, creators, and businesses. It's about 35% cheaper than competitors and offers free migration.
Create an account via the link for a 30% discount. Free plan allows 500 emails/month and 250 contacts. Connect your store or import contacts.
The dashboard shows revenue, orders, audience growth, and live view. Key tabs: Campaigns, Automations, Forms, Audience, Reports.
Add contacts via file upload, paste, or direct import from Mailchimp/Klaviyo. You can also add single contacts with tags.
Choose campaign type (single email, A/B test, SMS, push). Set subject line, sender, preheader, and select from many professional templates. The drag-and-drop editor is intuitive.
Pre-built workflows (welcome, cart abandonment, post-purchase) are the real money maker. Customize triggers, delays, emails, SMS, and A/B tests. Once started, they run on autopilot.
Use templates or AI to create sign-up forms. Customize fields, behavior targeting, and enable the form to grow your list.
Create segments like 'deal hunters' or 'inactive contacts' to target specific groups. Customize logic based on purchase history, dates, etc.
Reports AI allows you to ask questions about performance. Standard reports show sales, campaign, automation, and form metrics.
Set up a custom MCP connector in Claude to retrieve data and create campaigns via chat. Example: 'Create a Black Friday campaign with three emails sent over two days.'
By following this guide, you can set up a full email marketing system in Omnisend, including campaigns, automations, forms, and AI integration, enabling professional email marketing without a large team.
What is the typical ROI for email marketing according to the video?
30 to 40 dollars for every dollar spent, sometimes more.
00:30
How much cheaper is Omnisend compared to other email service providers?
About 35% less for the same features.
02:00
What are the limits of the Omnisend free plan?
500 monthly emails and 250 contacts.
02:45
What types of campaign types does Omnisend support?
Single email, email A/B test, SMS campaign, and push notification campaign.
06:00
How can you add contacts to Omnisend?
Via file upload, paste contact details, or direct import from Mailchimp and Klaviyo.
05:00
What is the purpose of a preheader in an email?
It is the text that appears underneath the subject line in the inbox.
07:00
What is the recommended first automation workflow to set up?
A welcome email workflow, often including a discount to build trust and improve deliverability.
10:00
How can you create a form in Omnisend?
Use a template or the AI form generator, customize fields and behavior targeting, then enable the form.
14:30
What is the URL for the Omnisend MCP connector?
https://mcp.omnisend.com/mcp
20:00
What can you do with the Omnisend-Claude integration?
Retrieve campaign performance data, ask for analysis, and create email campaigns directly via chat.
20:30
Email ROI is 30-40x
Highlights the immense value of email marketing compared to other channels.
00:30Omnisend is 35% cheaper
Key differentiator for cost-conscious businesses.
02:00Automations are the real money maker
Emphasizes the importance of automated workflows for scaling.
09:30AI integration with Claude
Demonstrates cutting-edge use of AI to automate email marketing tasks.
19:30[00:00] My name is Harley, and in this video, I'll be showing you exactly how to use Omnisend to do email marketing. Emails have been such a big part of my own business. It's helped me make a ton of money, and I want to show you guys exactly how to do it yourself. Because the truth is, like emails, it's still one of the best ways to make money in any business. It's basically free, right? You own the audience.
[00:21] And for every dollar you spend, you're making like 30 to 40 dollars, sometimes even more. Omnisend is one of my favorite email tools because it is so easy to use. It's only automations and workflows you guys can immediately start using. And just such a premium platform for a very affordable price. So, if you guys follow along this video, you'll have your account set up, your first email built. And I'll also show you guys how to set
[00:41] up automations, build forms, and a bunch of other really important stuff. And at the end, I'll actually show you guys exactly how to connect Omnisend to Klaviyo, so we can use Klaviyo to basically help with all our emails. And yes, I'll have a link down below to get a free trial of Omnisend, so you guys can try it out. And using that link will also help to support the channel. So, I do want to say thank
[01:02] you so much in advance. Anyways, let's get started. All right, so first, let's talk about what Omnisend is, and why it's my preferred platform for email marketing. Essentially, Omnisend is an email and SMS marketing platform. So, you can build emails, you can send campaigns, and you can set up automations that send the right message at the right time without you manually touching it. So, it's really perfect for e-commerce stores, creators, anyone with a business or an
[01:22] email list. Now, the thing that I keep telling everyone is email is so powerful because you literally own the email list yourself. When you look at social media, you do not own your followers. The algorithm or the platform does. But with emails, right, anything can happen to social media or any of these algorithms, but you are safe because you own your own email list. And it has one of the highest ROIs of any type of marketing
[01:43] activity by far. Yes, emails are a dinosaur, right? It's not super sexy, but the ROI is absolutely crazy, and that's why I think every business owner should definitely do a lot with emails. Basically, the more emails you send, the more money you make. And if you're clicking on this video, right, you're probably interested in Omnisend. And I'll say like the pricing is really, really good. It's about 35% less than other email service providers for the same
[02:03] features. And they also have a free migration for brands who already run emails on a different provider, and that takes about 5 days to do. All right, so now let me show you guys exactly how to set Omnisend up. So, first you need to create your Omnisend account. So, if you guys click on the link down below in the description, it's going to take you to this exact landing page. On this page you also get a
[02:24] 30% discount. Yeah, I encourage you guys to check out some of the features. And if you go to see pricing right here, we can see the different pricing tiers. So, we have the free plan, which you guys can get started with. This allows you to send up to 500 monthly emails and have 250 contacts. But if you already have a list or you're growing fast, right, you can get the standard or the pro plan. The pro
[02:44] plan is the one that has unlimited monthly emails. So, yeah, I recommend getting at least one of these, but to test it out, you know, just start with the free one. So, if you click on sign up now, it's going to take you to this page, and you'll be able to sign up using either Shopify, your Google account, or just with email. Just choose whichever one works for you guys. Now, I'm in a demo account right
[03:05] here, but once you create your account, this is what your dashboard is going to look like. Now, if you're going to be using Omnisend with a store, you're going to need to connect your store to your Omnisend account. It's going to be different depending on if you have a Shopify account or WooCommerce account or whatever. So, I'll have links down below to guides that will show you exactly how to do that. If you don't have an
[03:26] e-commerce store, then you can just directly import your email list, and I'll also have a guide on how to do that as well down below. So, like I said, I have this demo store connected to my account. And under dashboard, you're going to see goals overview and live view. So, I love the overview section of the dashboard because it shows you your revenue, it shows you orders. And by the way, all this might look a little
[03:46] bit different depending on if you have a store connected or not. We also have our audience growth, right? So, email subscribers, SMS subscribers. We can change this from last 30 days to last 7 days, and so on. And you can also look at your live view. Now, over here on the left, you can see we also have campaigns automations forms audience reports, and store settings. So, I'll take you through all these different tabs, but let's check
[04:07] out audience first. So, if we come here to contacts, if you guys have an email list, you'll be able to import that over here. So, if you click on add or update contacts, you can see we can add a single contact, we can import contacts from a file, so for example, a spreadsheet, we can paste contact details, and we can also import contacts directly from Mailchimp and Klaviyo. So, however you have your list, you're going to
[04:27] add contacts using the one that matches that. And so, for example, just to show you guys how to add a single contact, you'll see it's going to have us enter in their email address, their phone, and you can also add existing tags. So, do that first so that you can have your account populated with some contacts. If you don't have any contacts yet, totally okay. I'll show you guys how to actually get contacts using forms and
[04:48] stuff like that. So, now let me show you guys the campaigns tab right here. Here's where we're going to set up our first email campaign. Now, as you can see, I have some demo emails already here, but if we come here to the top and click on create campaign, you'll see we can choose our campaign type. So, there is single email, there's email AB test, so you can send two different versions of a single email, see
[05:08] which one's better. You can also do an SMS campaign, or you can do a push notification campaign. So, let me show you guys how to set up a simple email. So, we'll click on create email. We are going to put in our subject line, so test email Charlie. We'll set our sender name, so I'll just leave this as is. We're going to be using the shared Omnisend domain to send out this email. But, if you have
[05:29] your own custom emails, you'll want to go to domains. Let me just click on that right now and add in your own custom domain. So, as you can see, if we're using a domain to send out emails, we'll select this one. So, yeah, just follow the instructions right here. It's very easy to do. Okay, so going back to our first email, we can populate our preheader. So, this is the text that's going to show underneath the
[05:49] subject line of your email. We can also click on this button. It's going to use Omnisend AI to basically generate this for you. So, feel free to do that. Let's just do this one. Campaign name, internal test one. This is only for internal use, so other people will not see this. Language, we're going to use English. You can also edit UTM tags if you want. And now I'm going to choose email template. So, one of the
[06:10] best things about Omnisend is they have tons and tons of really great-looking templates that are all professionally designed. So, as you can see, I'm filming this video close to 4th of July, so they have a bunch of cool 4th of July templates. But, as you can see, there are so many other different templates that work year-round. So, what I recommend doing is just browse through these templates, see which ones match your brand or your company. It's
[06:31] a great way to just save a lot of time with your emails. You can also come here to your goals, so you can select, say, offer discount. It's going to show you the discount templates. We can also sort by theme or by different type, so feel free to do that. And you can also save templates as well. So, as you can see, some of these have been saved in this demo account. But, for this one, let's
[06:51] go ahead and select something like this Father's Day Gift Guide. Click Use Template. is very easy to use, so pretty much anything you want to change, you're just going to double-click it. For example, I can change the image right here. Any of these images I can change as well. I can also resize them if I want, but I do not recommend doing that. So, we'll click on command Z to undo that. We can change the background
[07:12] by clicking this, change out the buttons. You can also change the canvas width, but I recommend just keeping it as is. Of course, if you want to edit the text, you can easily do that right here. Change out the buttons, too. If you want to delete anything, very easy as well. Just click on the trash can. And if there's a particular element or item that you want to save, for example, let's say this button, we want
[07:32] to reuse it, we can click on this button right here to save the item, and we can reuse it for future emails. You'll also want to make sure that it looks good on mobile, since many people open your email from their phone. And I think this all looks good to me. Of course, you're going to want to customize it for your own offer. But, just for this video, I just want to show you guys, you know,
[07:53] the editor right here, very easy to use. You can play around with the products, the the the header content, and the footer. And what I recommend doing is clicking on this button right here, preview and test. So, you're previewing as your contacts. So, this is what they're going to receive. It shows you the email size right here. You can also send a test email to your own email, which I recommend doing as well. This is the
[08:13] preview on mobile. Okay, looks good. We'll exit out of this. Next, we'll click on save and choose recipients. So, you'll be able to choose which email subscribers you want to send to. We can exclude different segments. We can also send to particular segments as well. I'll show you guys how to create segments later on, but there are some pre-made ones. Let's just do all subscribers now. We'll click on review campaign. Cool. So, there's a campaign booster,
[08:34] which is pretty cool. You can edit your settings. And then for the send, you can send it either right now or you can schedule it for later. So, if we schedule a particular date, we can do that. And then you'll just click on schedule or send campaign. I also encourage you guys to play around with the email AB test. I always like to do this. I like to send it two different versions of the email to
[08:54] see which one wins. So, as you can see, we have version A right here. Then you're going to add a version B. But other than that, it's very similar to the previous one that we just sent. All right. So, now I'm going to tell you guys how to set up automations. And this is the real money maker. So, if you come here to the left, we can click on automation. And what I encourage you guys to
[09:15] do is click on create workflow. And we're going to browse all the pre-built automations that come with Omnisend. This is also one of my favorite parts because they've built all this out for you. They've done the hard work. So, all you basically need to do is click on one of these templates, and then you can customize the workflow. Over here on the left, you can see we can sort by channel, by goal, by type. So, for
[09:36] example, if you want to create a welcome email, we'll come here to the welcome email. And there are a bunch of different ones that we can choose from. Just to show you guys, let's go ahead with this one, which sends three different emails. We'll click on customize workflow. And so, here is the automation workflow builder. It's very easy to use. It's very, very intuitive. So, as you can see, the customers are going to enter the workflow
[09:56] when they subscribe. So, you're going to set your trigger filters. It's going to wait 1 minute, but all of this is customizable. So, for example, if we wanted to wait 2 minutes, we can set that like that. This is going to be our first email. So, it's going to give them a 10% discount. And guys, by the way, all this stuff is really optimized, right? So, if you don't really know too much about what you should
[10:17] be saying for your welcome email, just follow the template. I do believe that by giving some type of initial discount, it builds some trust. It also helps them open the email, which helps with deliverability later on. So, you can edit the subject line, you can edit the preheader. This is the email. So, what we're going to do is edit content. We can edit this email as is. Click on finish editing. It's going to bring us back
[10:37] to the workflow builder. We're going to wait 1 day, but of course, you can customize this, send out another one, wait 4 days, and then send out a final email. So, the great thing is that once someone enters this workflow, they are going to be taken through it automatically. You don't need to do anything, and the best businesses have a bunch of automations like this running. Now, in terms of adding different actions, for example, we can
[10:58] add an SMS by dragging that right here. Right, I'd probably actually create a delay. So, let's do a delay right here. Wait for, let's say, 2 hours. Then, you can set up your text message right here. So, here we can edit and customize our text message, and also put a unique discount code, if you want. You can add an image, if you want. We can also add AB testing, right, by dragging this right here. So, we
[11:18] can split participants 50/50, or let's say, 30/70, if there's one that you think is going to do better. So, 30% will go to this action right here, 70% will go to this action. Let's say we put an email right here, and then let's do an SMS right here. Yeah, you can get super creative with this. If you're starting out, I don't recommend doing too much customization, just go with the templates. But, just know that you can
[11:39] absolutely go crazy with the automations that you build. Once you're done with this, you're going to click on start workflow, and it's going to start. Of course, I didn't enter these, so I'm just going to close. I also want to show you, if you click on create workflow again, you can create these automations completely from scratch and just build it directly with that editor. I don't recommend doing that for most people. I recommend just starting with
[11:59] a template to make your life easier. Plus, these are already built for optimization. But yeah, definitely you want a welcome email. You also want a cart abandonment email if you have an e-commerce store. We can take a look at some of these. You also probably want to have a post purchase workflow. If you want to do special occasion ones, you guys can send those out. All right, for example, if it's someone's birthday, you can send out
[12:20] an email plus an SMS. If you want to build loyalty, right, we can send out campaigns for product reviews. Very, very important. If people don't buy for a long time, you can reactivate them with a workflow. Once you build out a ton of these, you essentially have a full email machine running on autopilot. So, I highly recommend taking a look at some of the automation workflows that you can build and actually doing these yourself. And once
[12:41] you've built them, you can see all the different workflows that you have built. And now, I'm going to show you guys how to build a form. If you want to grow your list, this is very, very important that you have a form on your website. Whether you just have a form on your website or you have some type of freebie that you give that signs them up for this newsletter or gets them on this list, we
[13:01] can build all these within OmniSend. So, yes, you can use AI to create forms. It's pretty cool. But you can also click on create forms up here. So, let me do that for this video. So, just like with automations and email campaigns, there are tons of form templates. So, these are the recommended ones and you can also browse all of the different forms. And so, obviously, everyone you guys watching this is going to require different types
[13:22] of forms on your website or for your business. But let's say we want to go with this one. We can edit with AI or we can just edit with the form builder. Let me show you guys how to use the form builder. So, very simple again, any text you want to change, go ahead and change that. If we want to have their phone number, we can drag that right here. You can change the color, we can
[13:42] add other stuff. But for this 10% off your first order form, recommend just having the email only. So I'm going to delete this one. There's a tons of advanced stuff that we can do relating to behavior. So for example, we can target certain types of people. I'm not going to get too much into this type of stuff, but feel free to play around with them. Once you're done with a form, you're going to click on enable
[14:03] form. So now our form is going live and we can put this form on our website. We can put this form on our emails. You can do whatever you want with this form. Let me show you guys also how to create with AI. So for example, let's do a Mother's Day one. This seems like a pretty solid prompt. I'm going to leave it as is, but of course you guys can customize it. We'll click on generate
[14:23] form. It may have you answer a few questions about what you want, but in this case I didn't need any other information because we had a pretty solid prompt. Okay, so it's done building it and we have a few different variations that we can choose from. So let's go ahead and choose this one. We'll click on edit in form builder just to customize it a bit. Looks okay to me and we will click on enable form.
[14:44] Yeah, so that's how you build a form. Now let me show you guys the audience tab. So under audience, this is where you're going to see all your contacts. You're going to be able to look at different segments you have. You'll see your customer breakdown. We'll be able to import, export, and also tag people. Let me show you guys segments since this is very very important. What you want to do is click on create segment and
[15:04] we'll see some of the most popular segments that OmniSend recommends. So for example, one that's really cool is deal hunters. So these are subscribers who made a purchase during one of your sales. So you may be able to target these people for bigger discounts or just more frequent discounts. We also have inactive contacts, right? We have at risk to churn. So what I recommend doing is just using all of these different segments, getting really creative with
[15:25] how you target people. Don't just send emails to your entire list, right? It's usually a lot better and a lot more effective to send to particular segments. And for any of these segments, what we can do is customize. So we'll click on customize right here. So it's very self-explanatory, but you can see subscribe to any of these, right? We can change this if we want. And then, this is like the logic. So, these are people who
[15:46] have placed an order at least one time between these dates. So, you'll select the dates where a particular code was entered. So, once you fill these out, you'll be able to save and show your contacts. And you'll be able to target these people directly with your emails or your automations. Again, it's very, very important that you guys take segments very seriously. So, now I want to show you guys the reports. So, if we come here to
[16:06] reports, you guys can click on reports AI. We can basically ask the AI any questions. We can have it summarize performance. We can ask what segments should I target right now. You're basically chatting with AI inside of Omnisend. You can also look at your sales reports over here. So, this is your store performance. You can see how individual products are performing as well. You can look at reports for different campaigns as well as for different automations,
[16:27] as well as how your different forms are performing. So, cool place to look at the numbers behind your email marketing. So, now what I'm going to do is show you guys how to connect Omnisend to Claude. This works for both Claude and ChatGPT. I'll have links to instructions down below for you guys to look at as well. But, this is super, super cool because we can basically control Omnisend and control all our emails and have it
[16:47] build us stuff directly within Claude. This just takes a couple of minutes to set up. So, I'm going to show you guys how to do that right now. Depending on when you guys are watching this, there may already be an official Claude connector for Omnisend. But, until then, we're going to set it up as a custom connector. So, this is going to work whenever. And you guys can absolutely connect it this way. So, I'm in my
[17:08] Claude account right here. The first thing I'm going to do is come to customize. Now, we're going to click on connect your apps. So, if you're watching this later on, you'll be able to just search up Omnisend and there should be a connector for you guys. But, for now, I'm going to come to connectors, click on this button right here, add custom connector. I'm going to call it Omnisend. We're going to type in httpsmcp.omnisend/mcp. We're we're
[17:28] to click on add and now we're going to click on this button right here connect. We're going to log into our Omnisend account. We're going to select the correct store and click on authorize access. Cool. So now that that is done. I'm going to go back. Now we can actually control our Omnisend directly within Cloud which is super super cool. So I can do something like this. So how did my recent email campaigns perform? Rate on
[17:49] the scale of 1 to 100. You'll of course select which model you want to use. I recommend using one of the better ones. We'll click on enter. So as you can see it's using the Omnisend connector to retrieve information. We'll click always allow. If you guys want to connect to chat GPT that's also possible and I'll have instructions down below. Okay, so it's pulled all the data and it rates it 79 out of 100. And as
[18:09] you can see it's given me a really good summary and analysis. So super helpful. So you can use Cloud to get a ton of information. You can also ask it stuff like what automations generated the most money in the last year. So yeah, you can get really creative with what you ask it. I do want to note this works both in chat as well as in co-work. So you can use either one. So as you can
[18:30] see we don't have a top earner because none of these were actual emails. This is a demo account. But yeah, it's pretty cool that I can do all this for us. Now it's not just for retrieving information and analysis. It's also to actually perform actions. So for example, I can actually have it create email campaigns directly within Cloud. Let's do something like this. Create a Black Friday campaign with three emails sent over two days. And when
[18:51] you have a conversation with Cloud right it usually asks you if you want to do this or do this. And so essentially you're talking to an email marketing person that can do stuff for you. So I suggest recommend responding and you'll start delegating a lot of stuff to AI. As you can see it is designing and architecting this three email Black Friday sequence. Right since it's AI it's super smart. It's going to know how to do
[19:11] the timing. It's going to know what to put in the emails. Yeah, it's really cool cuz if for example, you're using Cloud co-work you can send this create a Black Friday campaign message on your phone when you're out as long as your computer is open, it can do this task for you. And then when you come back to your office, you'll have the emails ready for you to review. All right, so it is done building those
[19:32] three emails for us. And what it's done is it's put it in our drafts folder on Omnisend. So, I'm going to go back to the Omnisend website. As you can see, it is now right here. So, let me just show you some of these emails that it created for us. Let's click on this one. So, as you can see, I have a solid subject line. Of course, this is a dummy store, so some of this information
[19:52] is not going to be like really accurate. And we'll click on email content, and so this is what it built us, which looks pretty solid, right? It says, "Hey their first name." Or if there's no name, it just says, "Hey there." This is our biggest sale of the year, and it's officially live. Next, we'll click on save and choose recipients. It's chosen different segments on what it thinks I should send to. Definitely double-check this, but that's
[20:13] really cool that it does that. We'll click on review campaign, and we can send now or schedule for later. That's just one of the emails that it built us. Let's check out this one, second one. Let's look at the email content. Cool. So, our second one. And yeah, I think you guys get the point. It's just really cool that you can just have all this done within Claude or ChatGPT. And this is all just using the
[20:33] Omnisend MCP. So, if you've watched till now, now you have your account set up, you have your store and your contacts connected, you've built your first campaign, you've set up some automations, right? You've built a sign-up form or whatever other form, and you've actually connected AI directly to Omnisend. If you've done all this, now you have a full email marketing system that can actually run itself. And so for most of you guys watching this, you won't
[20:54] need a full email team. You can just do it yourself and have really professional emails going out. Yeah, that's pretty much everything that you guys need to know about getting started with Omnisend and using it to build out your email marketing for your business. Again, I'll have my link down below in the description. It's going to get you 30% off any of the paid plans. You'll also be able to get a free trial to Omnisend, so
[21:14] you can test it out. And yeah, hopefully you guys see just how amazing and awesome Omnisend is. Even a beginner like me can send out really awesome emails with tons of automations and workflows and just have really good overall email strategy because of this platform. If you guys got any value from the video, make sure to hit that like button, subscribe, or even share with a friend who should be doing emails. On my channel, I do
[21:35] a ton of other content about entrepreneurship, finance, and tutorials. And yeah, again, thank you so much for your time and I'll see you in the next video. Peace. >> [music]
⚡ Saved you 0h 21m reading this? Transcribe any YouTube video for free — no signup needed.