AI Summary
This video demonstrates a complete AI filmmaking workflow, using an AI clone of the creator to produce a realistic video. The creator walks through a seven-step process from storyboarding and character creation to final editing, highlighting the capabilities of AI tools like Seedance and Artlist. The video emphasizes that while AI generation is powerful, the final edit is crucial for a polished result.
Chapters
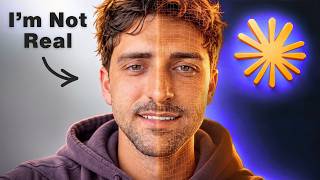
The video opens by revealing that the presenter is an AI clone, not a real person, to showcase the realism of current AI video technology.
The creator notes that AI content has improved dramatically in just a few months, making it nearly impossible to tell the difference between AI and real footage.
The creator used CBS 2.5 to generate the voice, delivery, and lip sync for the AI clone, all from a written prompt.
The creator used Claude to structure a single Seedance 2.5 generation prompt that covers the entire 30-second video chronologically, including what happens, when, and to whom.
The Artlist MCP (Model Context Protocol) allowed the creator to generate the video directly inside Artlist, avoiding the need to copy and paste prompts between tools.
The first generation had issues with the 'Inception-style' city fold. The creator fixed this by providing a reference clip of the desired motion, which gave the model the missing information.
If the movement feels off, don't make the prompt longer. Instead, provide a clean reference clip that demonstrates the exact motion you want.
The creator emphasizes that AI generation is just raw material. The final edit, including sound design and music, is what turns it into a finished film.
The creator believes that in a few years, actors might not be needed, as their IP could be licensed for AI-generated movies.
The video concludes that while AI video generation is a powerful tool, the real magic happens in the edit. The creator encourages viewers to subscribe for more tutorials on creating viral AI videos.
Mentioned in this Video
Tutorial Checklist
💡 Key Takeaways
The AI Clone Reveal
This is a powerful demonstration of how realistic AI-generated video has become, immediately grabbing the viewer's attention.
The Power of Reference Clips
This is a key technique for controlling motion in AI video, a common problem that many creators face.
09:40The Importance of the Edit
This highlights that AI generation is just the first step, and the final edit is what makes the video professional.
10:10Full Transcript
[00:00] Okay, this is crazy. Here, come a little closer because we need to talk about AI content. What you're seeing right now is not real. This is my AI clone, and none of this is real.
[00:12] In fact, if I want, I can change where I am, like the movie Inception. I can add other people to the scene. Dude, is that Digital Income Project? And I can even control the camera movement, all with a few clicks.
[00:26] Yeah, so pretty scary right? This technology has come a long way because just a few months ago I was making AI content like this and you guys obviously could tell the difference,
[00:38] but today it's almost impossible to tell. And to prove it to you, this footage that you're watching now is still not real. That is still my AI influencer. And yes, finally I am real, 10 fingers, my name's Clay and I've used AI content to grow millions of followers
[00:53] on Instagram and YouTube and make 7 figures doing so. In fact, this YouTube channel started out as an AI influencer. So today, I'm going to be showing you this secret to making realistic shots like this so you can amplify your content and get similar results. But before we jump in, let me show you
[01:09] why I use Seedance 2.5 on Artlist for this. In case you haven't heard, Seedance 2.5 is ByteDance's newest video model and it is crazy. Basically, you can now generate up to 30 seconds of continuous
[01:21] video in one single pass. Meaning you don't have to stitch together clips anymore. But one of the coolest parts about this is that audio is now co-generated with the visuals. So in that video of me that I showed you, the dialogue, the music, the sounds, all of that came through one video
[01:36] generation. And that takes us to step one, which is coming up with a story idea using Quads. Before you ever open Artlist, you need to decide what your 30 seconds are actually going to be about. We don't just want to write cool cinematic video, we want to write a specific storyline.
[01:50] What happens? Where does it happen? Who's in it? All things that are going to make the audience stop scrolling. Now, I know some of you might want to use ChatGTT, but look, I've tested every major LLM out there, ChatGTT, Gemini, all of them, and Claude is simply the best.
[02:05] So here, I gave Claude one simple idea. A man is standing in a realistic Parisian plaza speaking directly to the audience. He reveals that he is an AI clone, then proves it by changing the world around him, adding new people to the scene, and taking control of the camera.
[02:18] Claude then turned that prompt into a complete 30 second story with dialogue, actions, camera movements, and sound cues. So, here's the story that Claude gave me, and I'm just reading through it, and it
[02:30] looks completely real, and as you can see, it came up with all these lines on its own. But if you want this to actually feel real, then you also need to create a beat map. And in case you haven't heard of the term, it's basically a chronological blueprint for the entire clip.
[02:42] What happens at second one what happens at second seven when the camera pushes in when As moves out It a second by second roadmap for the video generator to follow But as you can probably imagine this takes a lot of time So before we move on to the next step I going to show you
[02:56] something that makes this exponentially faster. If you come here, you can connect Artlist MCT to Quad, which only takes about 30 seconds to set up, and then you can generate the images and the videos directly inside of your Quad Conversation. That way you don't have to copy over prompts and
[03:10] do it one by one. I actually had to look this up and MCP stands for Model Context Protocol. It's basically the way that cloud is able to connect to external tools and use them. I ended up using Artlist MCP throughout this entire project. That way you can follow it all in one
[03:24] tab without having to switch workflows every two seconds. Step two, creating the character sheet. Now this is a step that most people skip and it's the step where most people are going to end up losing their entire video. Because if you don't get Steve Dance locked reference images of your
[03:38] character, it's going to end up casting a new actor in every frame, and I want it to look like me. In case you're new here, this channel actually started as a faceless AI influencer channel. We got over 250,000 subscribers all from an AI avatar, but now I show my face and I want the
[03:53] clone to look as much like me as possible in these videos. To get clips like this, I didn't have to go to a professional photographer or anything like that. I just gave Claude a regular selfie with me, and from that single selfie, I generated a full character sheet using GPT image 2 on our list.
[04:08] And again, the beautiful part is you did this all through Claude MCT. I just described what I needed, and then Claude sent it to Artlist, and then the character sheet came back inside the conversation. This character sheet is very important, and as you can see, row 1 is basically close-ups of my face,
[04:23] row 2 is a front-facing full body shot, and row 3 is a clear view of what my body looks like. Same outfit, same proportions, seen from behind, all the things that the AI needs to come up with consistent characters for these videos.
[04:35] Now here's another hack that's going to save you some credits. You do not need to generate character sheets for the secondary characters. Instead, SeedDance 2.5 is going to auto-generate them based on your text description in the prompt.
[04:47] So you only need a full character sheet for the main character. Moving on to step 3, creating the location sheet. Now we came up with some really cool visuals for this scene, and it's basically the same principle. If you don't lock the environment, then it's going to put you all over the place in these scenes.
[05:02] And in our video, this matters even more, because we used that scene from Inception where the city folds over on itself and we thought it would be cool. So to lock in the location that I wanted, I went back into Cloud and described the environment
[05:14] in detail. A large plaza in Paris, 5 story limestone buildings, all the things that the AI needs to make sure this actually looks the way I want. Then I bring that location sheet over to GPT Image 2 on Artlist using the Cloud MCP, and
[05:27] as you can see it basically the same workflow as the character sheet We create three location reference images every image showing the same plaza the same architecture all the same stuff that we need to make this consistent So now that our location is locked what are the actors actually saying
[05:42] And that takes us to step four, which is writing and recording the dialogue. CPS generates audio in the same path as the visuals. Dialogue, music, sound effects, everything rides with that actual video. So for your dialogue, you basically have two options, and I use both in this video.
[05:58] Option 1 is where you write the dialogue into your prompt and CDAMP 2.5 generates the speech natively. You basically describe who says what, when they say it, and then the model produces voice alongside the visuals. And here's an example of a recent video that went viral on Instagram to show you what I'm talking about.
[06:14] If you don't want to record anything, then this is going to be your fastest pass. It works and it's built into the model. But if you want to make it a little bit better, you have option 2. This is where you record the dialogue yourself and you upload it as audio references.
[06:26] That way the model can match the inflections of your voice and this is what I ended up using for most of the clips that we generated. So to do this I basically took my mic and these are the seven lines that I had to record. But for our secondary characters, like the guy who says, dude is that Digital Income
[06:42] Project? I didn't record that line. I left that entirely to CBS 2.5 to make it happen. You can see that we described that in the line of the prompt and then the model generated the voice, the delivery, and the lip sync automatically. And let's just pause to think about what that means.
[06:56] I was able to combine my own recorded voice with an AI generated video model. And it still just blows my mind to think about the future of AI filmmaking because the possibilities are really endless. In a few years, actors might not even be needed to make movies anymore.
[07:11] Instead, they'll just license their IP and someone can make an entire movie using their character. Okay, so our story is written, our characters are locked, the location is locked, the dialogue is recorded, everything is ready. So that takes us to step 5, which is building the prompt and actually generating this with
[07:26] Seed Games 2.5. This is the part where everything comes together. To make this, I went back into Claude and said take the beatmap, the character description, the location description, the dialogue timing, and write me a single Seed Games 2.5 generation prompt that covers the entire 30
[07:41] seconds chronologically. Claude then structures this prompt as a chronological sequence. What happens, when it happens, to whom it happens, and what the camera actually sees. And because Because I was using the Artlist MCP, I didn't have to copy that all over and paste it into
[07:56] Artlist. Instead it generated all this inside of Artlist for me. Without the MCP, you basically have to write the prompt in, copy it, open Artlist, select cdns 2.5, yuck, you get the point. And a couple more settings that you probably want to put in here.
[08:09] I set mine to 30 seconds because it was a full story, but obviously you can make yours shorter. And then because this is YouTube I selected the aspect ratio as 16 by 9 which is horizontal And then one last thing you should know is there also a feature called smart duration Basically if you don know how long your clip going to be or how long you want it you can put this feature on and it analyze it for you and come up with the right timing
[08:30] All right, so we have our prompts submitted, our references attached, and the duration all set. Now, I would love to tell you that this came back perfect, but that's just not the reality, and I think it's a learning lesson that you're going to want to understand. Step six, what went wrong and how we fixed it.
[08:44] The first result was really close, but this Inception style city fold kept giving me trouble. With only a written prompt, Seed Dance understood the idea, but not the exact movement. In the first version, the building stretched like rubber, and then in this one, they just rearranged
[08:58] themselves completely. Technically, the city moved, it just had not seen Inception. And I realized that the problem was not the quality of the prompt. So instead of adding another paragraph to this prompt, we just gave it motion to follow. I downloaded the original movie scene from YouTube,
[09:13] isolated the exact section where the world moves upward, and then I cut it into a short reference clip. We then uploaded that clip into Seedance alongside our character and location references. And that was the part that gave Seedance the missing information that it needed,
[09:27] which means that adding a reference clip can actually control the motion of the video. The second issue that I faced was the arrival of the two additional characters. They basically didn't always appear at the right moment. I was able to tighten that beat by stating
[09:40] that in the prompt the camera completes its turn first, then both men are already standing opposite of me the presenter. And that's the lesson here. If words explain the look but the movement feels a little bit off, don't make a longer prompt. Instead give the model a clean
[09:54] reference that demonstrates the motion that you actually want. And that one change fixed the entire sequence. But this generation is still just raw material and the edit is what's going to turn this into a finished film. Step 7. Edit, Sound Design, and Export. Most AI tutorials end at the
[10:10] generation and I'm not going to do that because that's not what actually works on social media. So I took this entire clip into a video editor you can use Premiere Pro, CapCut, whatever works for you and I kept it simple. First I turned a few seconds off the ending because we don't want any
[10:24] dead space in our video. Second was sound design. Even though CDN's 2.5 generated audio with visuals this edit is where you can really elevate your footage. To do that I added music and sound effects from Artlist and that's what's really cool about this workflow. The music library,
[10:39] the sound effects, the AI toolkit, all of this lives inside of Artlist which is the same subscription and the same workspace. That way you don't have to bounce around 10 different tools to make something like this. The last thing I did was export in 1080p and I'm going to show you another
[10:52] video where I used this exact same workflow so you can see how great this was. Nobody actually shows you how to make AI videos that look like this. The depth, textures, the little details, but I do.
[11:05] And in my next video, I'm showing you how to create these viral Pixar videos. So subscribe for more.